Page 1714 of 3229
Refer t o: Bat t ery Tray (414-01 Bat tery, Mount ing and Cables ,Removal and Ins tall ati on).
Recharge the A/C sys tem.
Refer t o: Air Condi ti oning (A/C) Sys tem Recovery, Evacuati on andCharging (412-00 Cl imat e Control Sys t em - General Informat ion,General Procedures).
8.
Inst all t he engi ne cover.
Refer t o: Engi ne Cover - I6 3.2L Pet rol (501-05 Int eri or Trim andOrnament ati on, Removal and Ins tal lat ion).
9.
Connect t he batt ery ground cable and ins tall t he cover.
Refer t o: Specificati ons (414-00 Bat tery and Charging Sys tem -General Informat ion, Specificati ons).
10.
Page 1715 of 3229

Publi s hed: 11-May-2011
Climate Control - Air Conditioning (A/C) CompressorTD4 2.2L Diesel
Removal and Inst all ati on
Removal CAUTION: Make s ure that the specified amount of refrigerant oi l is added.
• NOTE: Removal s t eps in t his procedure may cont ain i nst all ati on det ail s.
Di sconnect t he bat t ery ground cable.
Refer t o: Specificati ons (414-00 Bat tery and Charging Sys tem -
General Informat ion, Specificati ons).
1.
Recover t he A/C refrigerant .
Refer t o: Air Condi ti oning (A/C) Sys tem Recovery, Evacuati on and Charging (412-00 Cl imat e Control Sys t em - General Informat ion,
General Procedures).
2. 3.
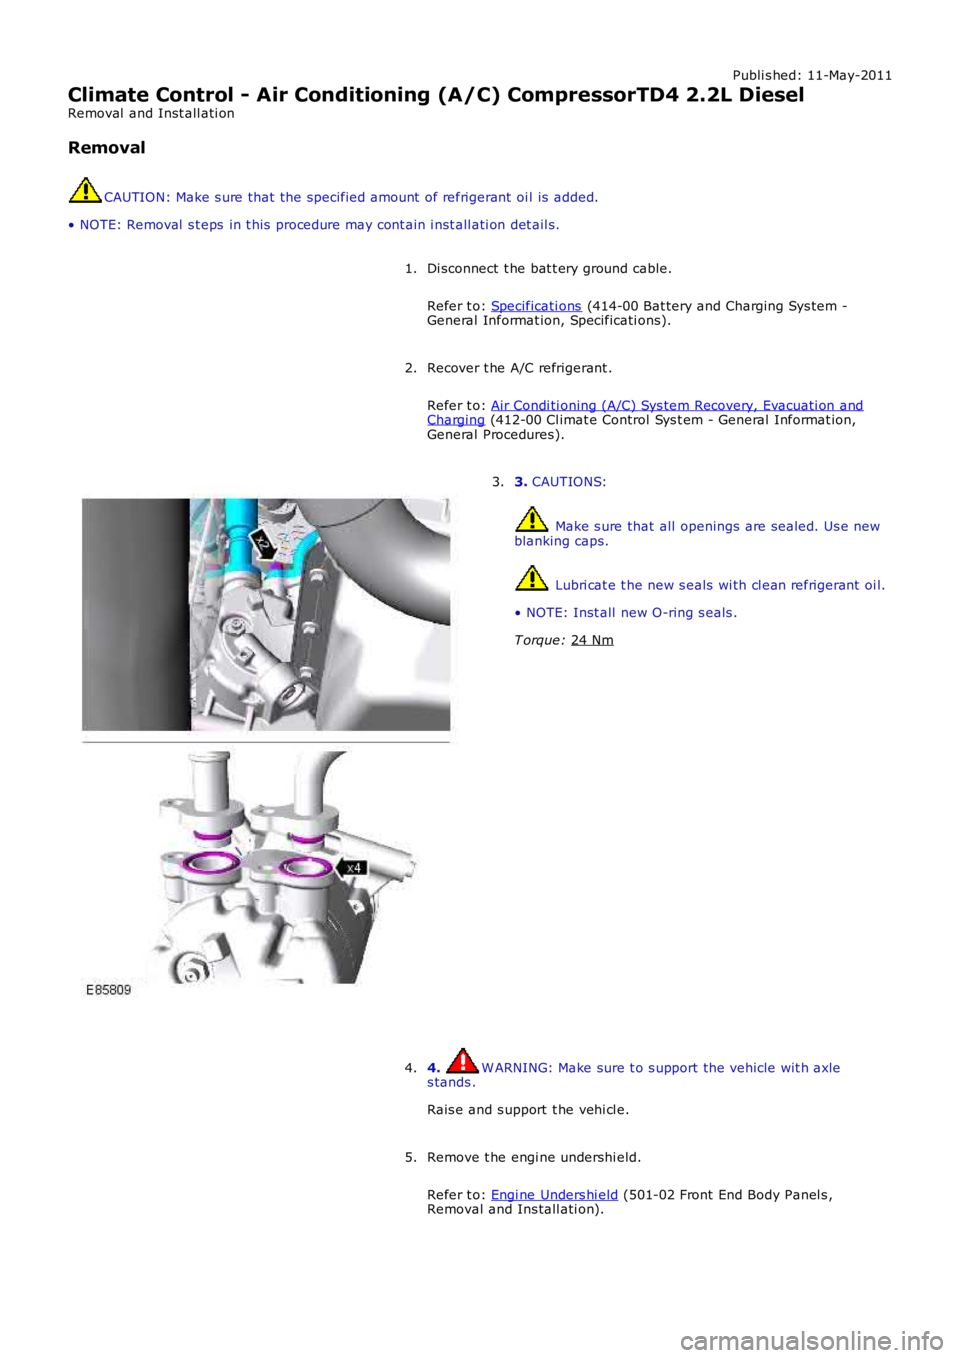
CAUTIONS: Make s ure that all openings are sealed. Us e new
blanking caps. Lubri cat e t he new s eals wi th cl ean refrigerant oi l.
• NOTE: Inst all new O-ring s eals .
T orque: 24 Nm 3.
4. W ARNING: Make sure t o s upport the vehicle wit h axle
s tands .
Rais e and s upport t he vehi cl e.
4.
Remove t he engi ne undershi eld.
Refer t o: Engi ne Unders hi eld (501-02 Front End Body Panel s ,
Removal and Ins tall ati on).
5.
Page 1726 of 3229

Inst all t he glove compartment .
Refer t o: Glove Compart ment (501-12 Ins trument Panel andConsol e, Removal and Ins t al lat ion).
10.
Inst all t he pas s enger s ide ins trument panel end trim panel .11.
Secure t he wiring harnes s s upport bracket .12.
Inst all t he cl imat e control as s embly.13.
Inst all t he audi o unit .14.
Inst all t he cent er speaker.15.
Inst all t he video dis play.
Refer t o: Video Dis play (415-01 Informati on and Entert ainmentSyst em, Removal and Ins tall ati on).
16.
Inst all both ins trument panel s peakers .17.
Inst all both upper t rim panels .18.
Connect t he in-vehi cl e t emperature s ens or electrical connect or.19.
Connect t he keyl es s s t art module elect rical connect or.20.
Inst all t he ins trument cl ust er.
Refer t o: Ins trument Clus ter (413-01 Ins t rument Clus t er, Removaland Inst all at ion).
21.
Inst all t he cl ocks pri ng.
Refer t o: Clocks pri ng (501-20B Supplement al Res t raint Sys tem,Removal and Ins tall ati on).
22.
Inst all t he ins trument panel.
Refer t o: Ins trument Panel - TD4 2.2L Dies el (501-12 Inst rumentPanel and Cons ole, Removal and Inst all at ion).Refer t o: Ins trument Panel - I6 3.2L Pet rol (501-12 Ins t rument Paneland Consol e, Removal and Ins t al lat ion).
23.
Connect t he batt ery ground cable.
Refer t o: Specificati ons (414-00 Bat tery and Charging Sys tem -General Informat ion, Specificati ons).
24.
Return t he s teeri ng col umn t o i ts original posi ti on.25.
Page 1735 of 3229
Publi s hed: 11-May-2011
Climate Control - Ambient Air Quality SensorLHD AWD
Removal and Inst all ati on
Removal
Di sconnect t he bat t ery ground cable.
Refer t o: Specificati ons (414-00 Bat tery and Charging Sys tem -General Informat ion, Specificati ons).
1.
Remove t he CJB.
Refer t o: Cent ral Junct ion Box (CJB) (418-00 Module Communi cat ionsNet work, Removal and Ins t allat ion).
2.
3.
Installation
To i nst all , revers e t he removal procedure.1.
Page 1756 of 3229
Publi s hed: 11-May-2011
Auxiliary Climate Control - Electric Booster Heater
Removal and Inst all ati on
Removal
• NOTE: Removal s t eps in t his procedure may cont ain i nst all ati on det ail s.
Di sconnect t he bat t ery ground cable.
Refer t o: Specificati ons (414-00 Bat tery and Charging Sys tem -General Informat ion, Specificati ons).
1.
Remove t he s el ect or lever.
Refer t o: Sel ect or Lever As sembl y (307-05 Aut omat icTrans mi ss ion/Transaxle Ext ernal Cont rol s , Removal andInst all at ion).Refer t o: Gears hi ft Lever (308-06 Manual Trans mis s ion/Trans axleExternal Controls , Removal and Inst all at ion).
2.
Remove both fl oor consol e ext ensi ons.3.
4.
5.6.
Page 1758 of 3229
Publi s hed: 11-May-2011
Auxiliary Climate Control - Fuel Fired Booster Heater
Removal and Inst all ati on
Removal
• NOTE: Removal s t eps in t his procedure may cont ain i nst all ati on det ail s.
Di sconnect t he bat t ery ground cable.
Refer t o: Specificati ons (414-00 Bat tery and Charging Sys tem -
General Informat ion, Specificati ons).
1.
2. W ARNING: Make sure t o s upport the vehicle wit h axle
s tands .
Rais e and s upport t he vehi cl e.
2.
Drai n t he cool ant .
Refer t o: Cool ing Sys tem Drai ni ng, Fi lli ng and Bleeding (303-03B
Engine Cooli ng - TD4 2.2L Di esel , General Procedures ).
3.
Remove t he RH fender s plas h s hield.
Refer t o: Fender Spl ash Shi eld (501-02 Front End Body Panel s ,
Removal and Ins tall ati on).
4. T orque:
10 Nm 5.
Page 1760 of 3229
Publi s hed: 11-May-2011
Auxiliary Climate Control - Fuel Fired Booster Heater Fuel Pump
Removal and Inst all ati on
Removal
Di sconnect t he bat t ery ground cable.
Refer t o: Specificati ons (414-00 Bat tery and Charging Sys tem -
General Informat ion, Specificati ons).
1.
2. W ARNING: Make sure t o s upport the vehicle wit h axle
s tands .
Rais e and s upport t he vehi cl e.
2. 3. W ARNING: Be prepared t o coll ect es capi ng fuel.
CAUTION: Make s ure that all openings are sealed.
Us e new bl anki ng caps .
3. T orque:
10 Nm 4.
5.
NOTE: Do not dis ass embl e further if t he component
i s removed for acces s onl y.
5.
Installation
Page 1761 of 3229

Publi s hed: 11-May-2011
Auxiliary Climate Control - Fuel Fired Booster Heater Coolant Pump
Removal and Inst all ati on
Removal
Di sconnect t he bat t ery ground cable.
Refer t o: Specificati ons (414-00 Bat tery and Charging Sys tem -General Informat ion, Specificati ons).
1.
2. W ARNING: Make sure t o s upport the vehicle wit h axles tands .
Rais e and s upport t he vehi cl e.
2.
Remove t he s econdary bulkhead cent er panel.
Refer t o: Secondary Bulkhead Cent er Panel - TD4 2.2L Dies el(501-02 Front End Body Panel s, Removal and Ins tal lati on).
3.
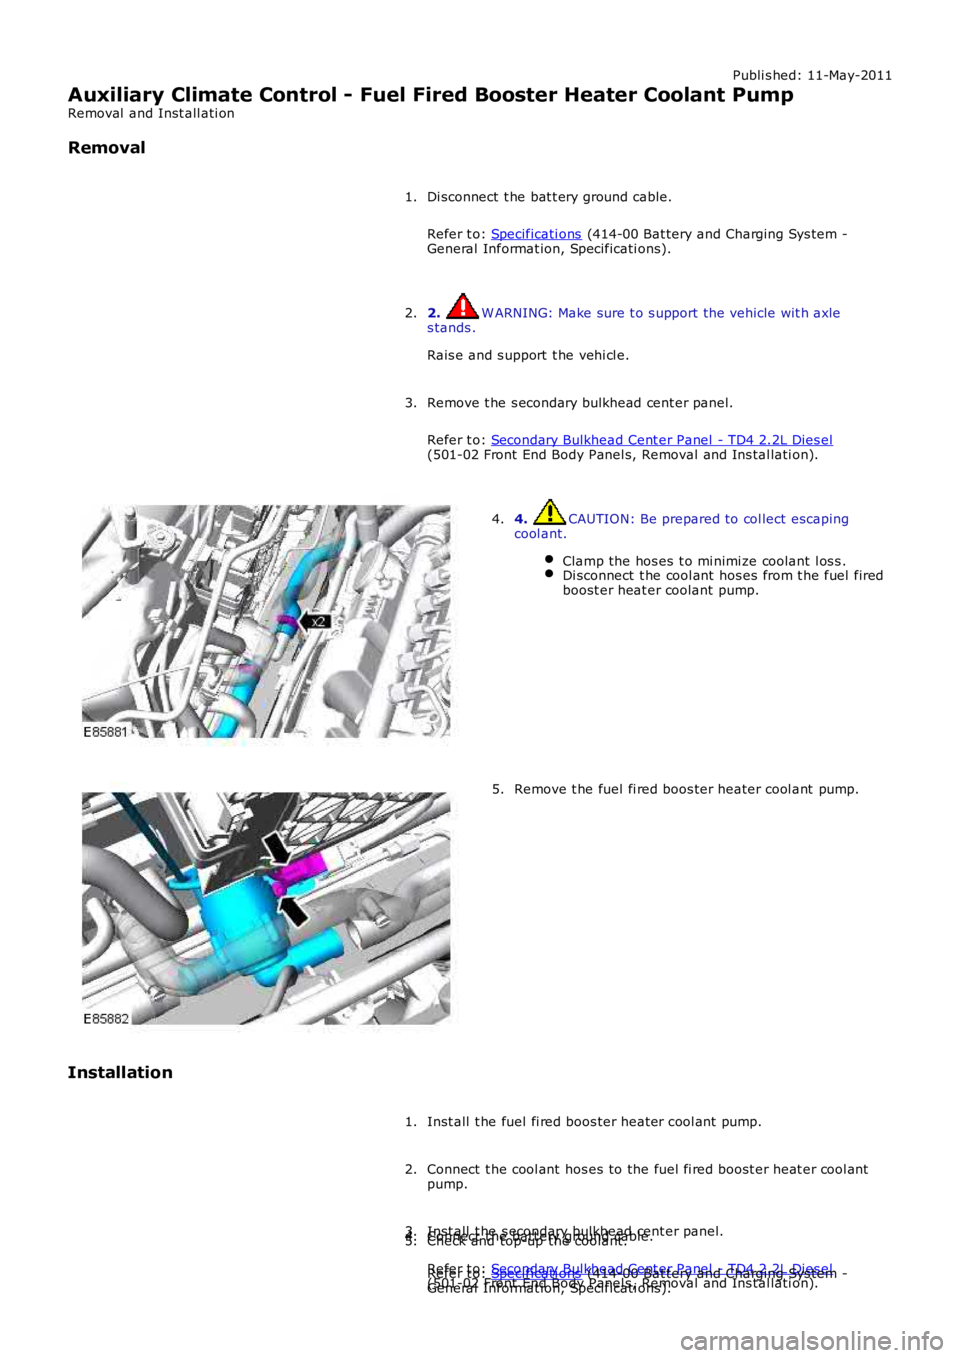
4. CAUTION: Be prepared to col lect escapingcool ant.
Clamp the hos es t o mi nimi ze coolant l os s .Di sconnect t he cool ant hos es from t he fuel firedboost er heat er coolant pump.
4.
Remove t he fuel fi red boos ter heater cool ant pump.5.
Installation
Inst all t he fuel fi red boos ter heater cool ant pump.1.
Connect t he cool ant hos es to the fuel fi red boost er heat er cool antpump.2.
Inst all t he s econdary bulkhead cent er panel.
Refer t o: Secondary Bulkhead Cent er Panel - TD4 2.2L Dies el(501-02 Front End Body Panel s, Removal and Ins tal lati on).
3.Connect t he batt ery ground cable.
Refer t o: Specificati ons (414-00 Bat tery and Charging Sys tem -General Informat ion, Specificati ons).
4.Check and top-up the coolant.5.