Page 161 of 255
Where serious damage has occurred or
large areas need renewal due to neglect, it
means certainly that completely new sections
or panels will need welding in and this is best
left to professionals. If the damage is due to
impact, it will also be necessary to completely
check the alignment of the bodyshell
structure. Due to the principle of construction,
the strength and shape of the whole car can
be affected by damage to one part. In such
instances the services of a Ford agent with
specialist checking jigs are essential. If a body
is left misaligned, it is first of all dangerous as
the car will not handle properly, and secondly
uneven stresses will be imposed on the
steering, engine and transmission, causing
abnormal wear or complete failure. Tyre wear
may also be excessive.
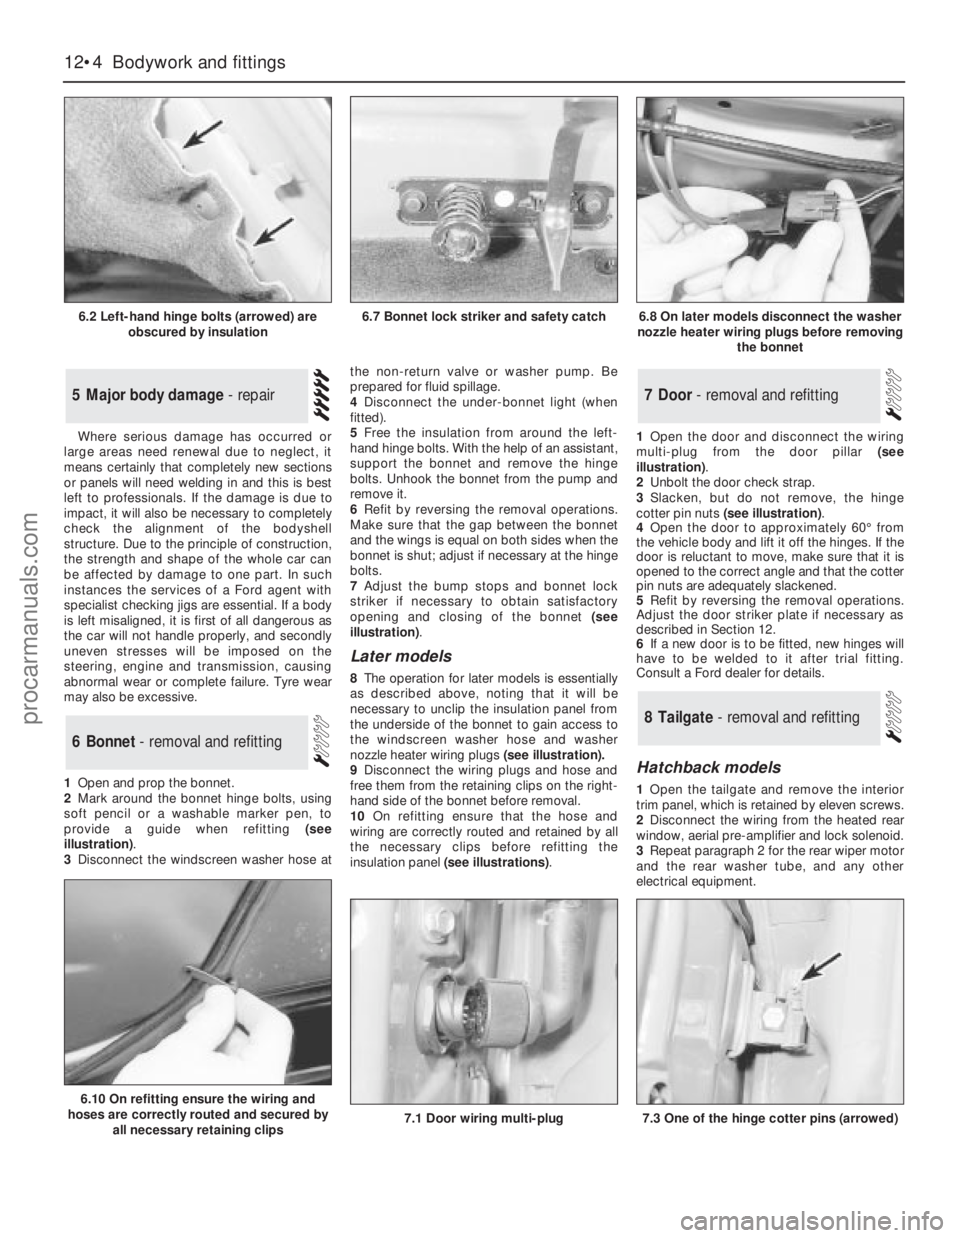
1Open and prop the bonnet.
2Mark around the bonnet hinge bolts, using
soft pencil or a washable marker pen, to
provide a guide when refitting (see
illustration).
3Disconnect the windscreen washer hose atthe non-return valve or washer pump. Be
prepared for fluid spillage.
4Disconnect the under-bonnet light (when
fitted).
5Free the insulation from around the left-
hand hinge bolts. With the help of an assistant,
support the bonnet and remove the hinge
bolts. Unhook the bonnet from the pump and
remove it.
6Refit by reversing the removal operations.
Make sure that the gap between the bonnet
and the wings is equal on both sides when the
bonnet is shut; adjust if necessary at the hinge
bolts.
7Adjust the bump stops and bonnet lock
striker if necessary to obtain satisfactory
opening and closing of the bonnet (see
illustration).
Later models
8The operation for later models is essentially
as described above, noting thatit will be
necessary to unclip the insulation panel from
the underside of the bonnet to gain access to
the windscreen washer hose and washer
nozzle heater wiring plugs (see illustration).
9Disconnect the wiring plugs and hose and
free them from the retaining clips on the right-
hand side of the bonnet before removal.
10On refitting ensure that the hose and
wiring are correctly routed and retained by all
the necessary clips before refitting the
insulation panel (see illustrations).1Open the door and disconnect the wiring
multi-plug from the door pillar (see
illustration).
2Unbolt the door check strap.
3Slacken, but do not remove, the hinge
cotter pin nuts (see illustration).
4Open the door to approximately 60°from
the vehicle body and lift it off the hinges. If the
door is reluctant to move, make sure that it is
opened to the correct angle and that the cotter
pin nuts are adequately slackened.
5Refit by reversing the removal operations.
Adjust the door striker plate if necessary as
described in Section 12.
6If a new door is to be fitted, new hinges will
have to be welded to it after trial fitting.
Consult a Ford dealer for details.
Hatchback models
1Open the tailgate and remove the interior
trim panel, which is retained by eleven screws.
2Disconnect the wiring from the heated rear
window, aerial pre-amplifier and lock solenoid.
3Repeat paragraph 2 for the rear wiper motor
and the rear washer tube, and any other
electrical equipment.
8Tailgate - removal and refitting
7Door - removal and refitting
6Bonnet - removal and refitting
5Major body damage - repair
12•4Bodywork and fittings
6.2 Left-hand hinge bolts (arrowed) are
obscured by insulation
6.10 On refitting ensure the wiring and
hoses are correctly routed and secured by
all necessary retaining clips
7.1 Door wiring multi-plug7.3 One of the hinge cotter pins (arrowed)
6.7 Bonnet lock striker and safety catch6.8 On later models disconnect the washer
nozzle heater wiring plugs before removing
the bonnet
procarmanuals.com
Page 162 of 255
4Have an assistant support the tailgate.
Disconnect the struts from the tailgate.
5Jam the tailgate latch with a piece of wood
or cardboard so that the tailgate cannot shut.
Lower the tailgate.
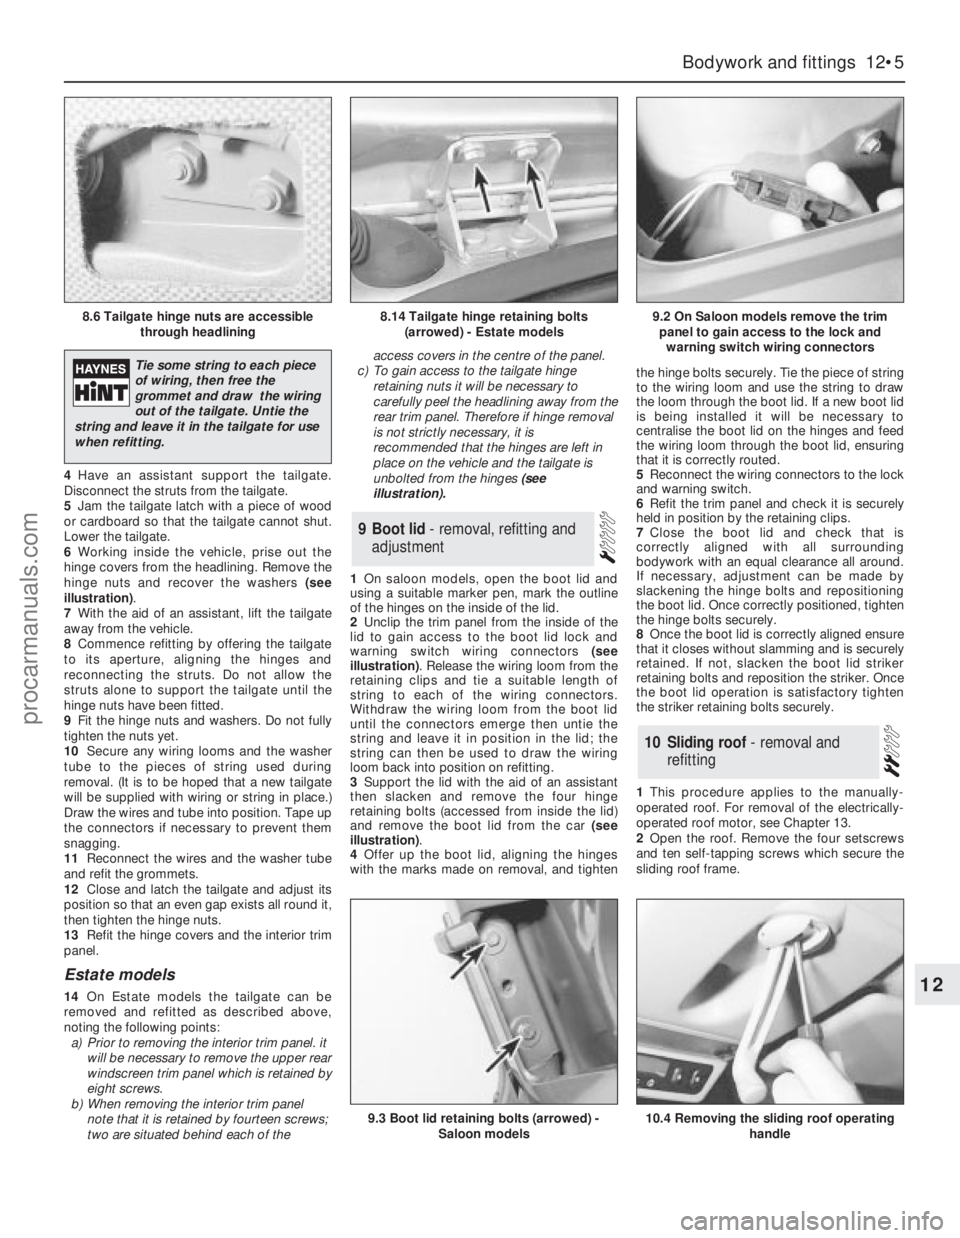
6Working inside the vehicle, prise out the
hinge covers from the headlining. Remove the
hinge nuts and recover the washers (see
illustration).
7With the aid of an assistant, lift the tailgate
away from the vehicle.
8Commence refitting by offering the tailgate
to its aperture, aligning the hinges and
reconnecting the struts. Do not allow the
struts alone to support the tailgate until the
hinge nuts have been fitted.
9Fit the hinge nuts and washers. Do not fully
tighten the nuts yet.
10Secure any wiring looms and the washer
tube to the pieces of string used during
removal. (It is to be hoped that a new tailgate
will be supplied with wiring or string in place.)
Draw the wires and tube into position. Tape up
the connectors if necessary to prevent them
snagging.
11Reconnect the wires and the washer tube
and refit the grommets.
12Close and latch the tailgate and adjust its
position so that an even gap exists all round it,
then tighten the hinge nuts.
13Refit the hinge covers and the interior trim
panel.
Estate models
14On Estate models the tailgate can be
removed and refitted as described above,
noting the following points:
a)Prior to removing the interior trim panel. it
will be necessary to remove the upper rear
windscreen trim panel which is retained by
eight screws.
b)When removing the interior trim panel
note that it is retained by fourteen screws;
two are situated behind each of theaccess covers in the centre of the panel.
c)To gain access to the tailgate hinge
retaining nuts it will be necessary to
carefully peelthe headlining away from the
rear trim panel. Therefore if hinge removal
is not strictly necessary, it is
recommended that the hinges are left in
place on the vehicle and the tailgate is
unbolted from the hinges (see
illustration).
1On saloon models, open the boot lid and
using a suitable marker pen, mark the outline
of the hinges on the inside of the lid.
2Unclip the trim panel from the inside of the
lid to gain access to the boot lid lock and
warning switch wiring connectors (see
illustration). Release the wiring loom from the
retaining clips and tie a suitable length of
string to each of the wiring connectors.
Withdraw the wiring loom from the boot lid
until the connectors emerge then untie the
string and leave it in position in the lid; the
string can then be used to draw the wiring
loom back into position on refitting.
3Support the lid with the aid of an assistant
then slacken and remove the four hinge
retaining bolts (accessed from inside the lid)
and remove the boot lid from the car (see
illustration).
4Offer up the boot lid, aligning the hinges
with the marks made on removal, and tightenthe hinge bolts securely. Tie the piece of string
to the wiring loom and use the string to draw
the loom through the boot lid. If a new boot lid
is being installed it will be necessary to
centralise the boot lid on the hinges and feed
the wiring loom through the boot lid, ensuring
that it is correctly routed.
5Reconnect the wiring connectors to the lock
and warning switch.
6Refit the trim panel and check it is securely
held in position by the retaining clips.
7Close the boot lid and check that is
correctly aligned with all surrounding
bodywork with an equal clearance all around.
If necessary, adjustment can be made by
slackening the hinge bolts and repositioning
the boot lid. Once correctly positioned, tighten
the hinge bolts securely.
8Once the boot lid is correctly aligned ensure
that it closes without slamming and is securely
retained. If not, slacken the boot lid striker
retaining bolts and reposition the striker. Once
the boot lid operation is satisfactory tighten
the striker retaining bolts securely.
1This procedure applies to the manually-
operated roof. For removal of the electrically-
operated roof motor, see Chapter 13.
2Open the roof. Remove the four setscrews
and ten self-tapping screws which secure the
sliding roof frame.
10Sliding roof - removal and
refitting
9Boot lid - removal, refitting and
adjustment
Bodywork and fittings 12•5
12
8.6 Tailgate hinge nuts are accessible
through headlining8.14 Tailgate hinge retaining bolts
(arrowed) - Estate models9.2 On Saloon models remove the trim
panel to gain access to the lock and
warning switch wiring connectors
9.3 Boot lid retaining bolts (arrowed) -
Saloon models10.4 Removing the sliding roof operating
handle
Tie some string to each piece
of wiring, then free the
grommet and draw the wiring
out of the tailgate. Untie the
string and leave it in the tailgate for use
when refitting.
procarmanuals.com
Page 163 of 255
3Apply masking tape to the front and sides of
the roof aperture to protect the paintwork.
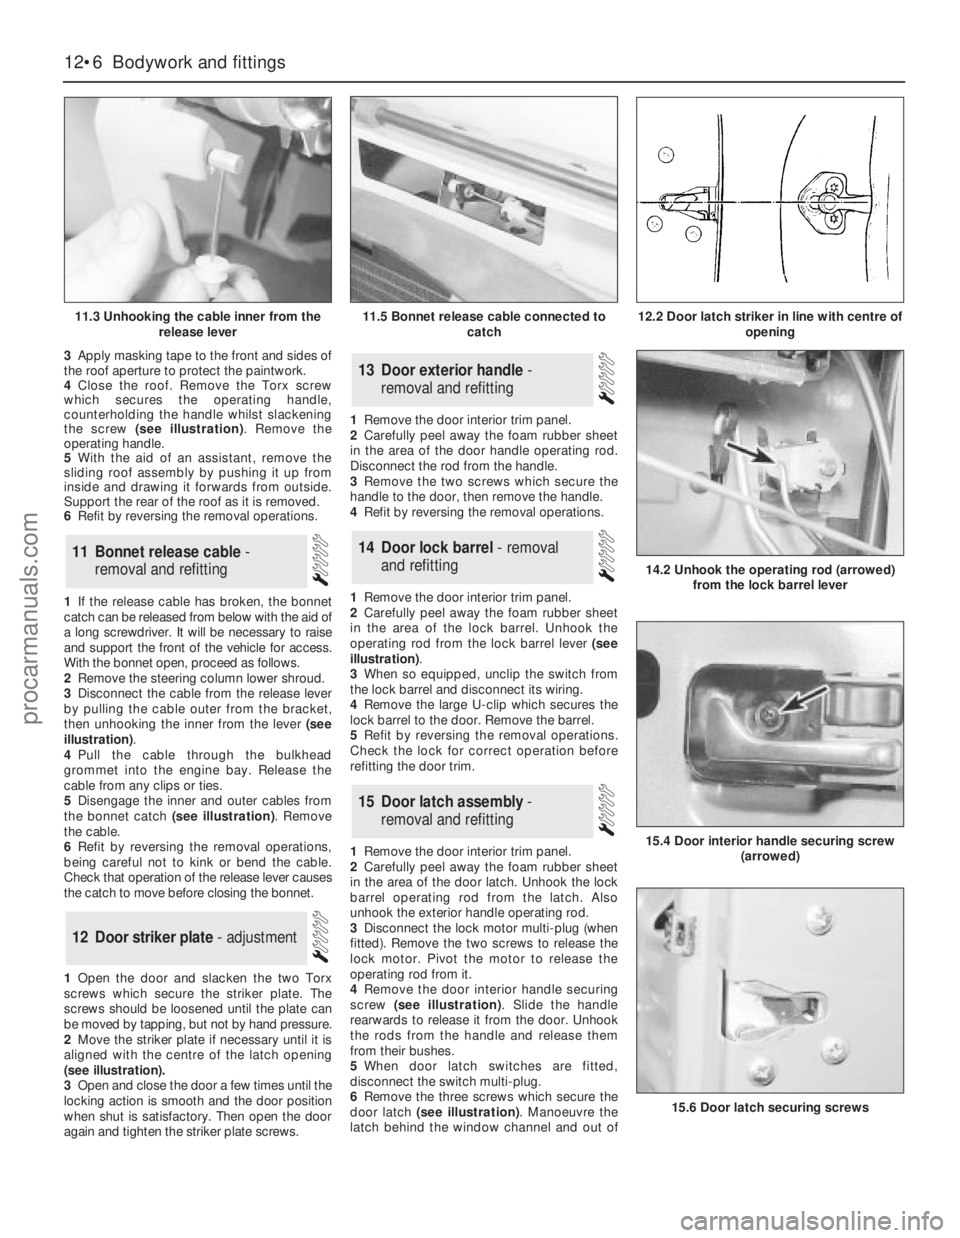
4Close the roof. Remove the Torx screw
which secures the operating handle,
counterholding the handle whilst slackening
the screw (see illustration). Remove the
operating handle.
5With the aid of an assistant, remove the
sliding roof assembly by pushing it up from
inside and drawing it forwards from outside.
Support the rear of the roof as it is removed.
6Refit by reversing the removal operations.
1If the release cable has broken, the bonnet
catch can be released from below with the aid of
a long screwdriver. It will be necessary to raise
and support the front of the vehicle for access.
With the bonnet open, proceed as follows.
2Remove the steering column lower shroud.
3Disconnect the cable from the release lever
by pulling the cable outer from the bracket,
then unhooking the inner from the lever (see
illustration).
4Pull the cable through the bulkhead
grommet into the engine bay. Release the
cable from any clips or ties.
5Disengage the inner and outer cables from
the bonnet catch (see illustration). Remove
the cable.
6Refit by reversing the removal operations,
being careful not to kink or bend the cable.
Check that operation of the release lever causes
the catch to move before closing the bonnet.
1Open the door and slacken the two Torx
screws which secure the striker plate. The
screws should be loosened until the plate can
be moved by tapping, but not by hand pressure.
2Move the striker plate if necessary until it is
aligned with the centre of the latch opening
(see illustration).
3Open and close the door a few times until the
locking action is smooth and the door position
when shut is satisfactory. Then open the door
again and tighten the striker plate screws.1Remove the door interior trim panel.
2Carefully peel away the foam rubber sheet
in the area of the door handle operating rod.
Disconnect the rod from the handle.
3Remove the two screws which secure the
handle to the door, then remove the handle.
4Refit by reversing the removal operations.
1Remove the door interior trim panel.
2Carefully peel away the foam rubber sheet
in the area of the lock barrel. Unhook the
operating rod from the lock barrel lever (see
illustration).
3When so equipped, unclip the switch from
the lock barrel and disconnect its wiring.
4Remove the large U-clip which secures the
lock barrel to the door. Remove the barrel.
5Refit by reversing the removal operations.
Check the lock for correct operation before
refitting the door trim.
1Remove the door interior trim panel.
2Carefully peel away the foam rubber sheet
in the area of the door latch. Unhook the lock
barrel operating rod from the latch. Also
unhook the exterior handle operating rod.
3Disconnect the lock motor multi-plug (when
fitted). Remove the two screws to release the
lock motor. Pivot the motor to release the
operating rod from it.
4Remove the door interior handle securing
screw (see illustration). Slide the handle
rearwards to release it from the door. Unhook
the rods from the handle and release them
from their bushes.
5When door latch switches are fitted,
disconnect the switch multi-plug.
6Remove the three screws which secure the
door latch (see illustration). Manoeuvre the
latch behind the window channel and out of
15Door latch assembly -
removal and refitting
14Door lock barrel - removal
and refitting
13Door exterior handle -
removal and refitting
12Door striker plate - adjustment
11Bonnet release cable -
removal and refitting
12•6Bodywork and fittings
11.3 Unhooking the cable inner from the
release lever
14.2 Unhook the operating rod (arrowed)
from the lock barrel lever
15.4 Door interior handle securing screw
(arrowed)
15.6 Door latch securing screws
11.5 Bonnet release cable connected to
catch12.2 Door latch striker in line with centre of
opening
procarmanuals.com
Page 164 of 255
the door through the large cut-out. Further
displacement or removal of the foamrubber
sheet may be necessary.
7Refit in the reverse order to removal, noting
the following points:
a)Apply a little grease to the interior handle
rods where they pass through the plastic
bushes
b)When securing the interior handle, have
the locking lever in the “unlocked”
position, hold the assembly forwards as
far as itwill go and tighten the securing
screw
c)Check all functions before refitting the trim
panel.
Door weatherstrip
1Open the door and remove the weatherstrip
securing screw from the latch end. In the case
of the rear door, also remove the screw from
the hinge end.
2Carefully lift the latch end of the
weatherstrip and pull it off the door.
3Refit by reversing the removal operations,
using your palm to seat the weatherstrip.
Aperture weatherstrip
4Open the door. Remove the scuff plate
securing screws from the bottom of the door
aperture.
5Pull the old weatherstrip out of the door
aperture.
6Fit the new weatherstrip, starting at the
right-angled corner at the top. Fit the
weatherstrip to the other corners and bends,
leaving the straight sections until last.
7Refit the scuff, plate securing screws.
All models except Estate
1Disconnect the battery negative lead.
2Remove the tailgate interior trim panel,
which is secured by eleven screws.
3Remove the six nuts which secure the
tailgate handle. Remove the handle and
recover the gasket.
4Disconnect the tailgate lock switch multi-
plug. Release the switch locking tab and
remove the switch.
5Disconnect the operating rod from the lock
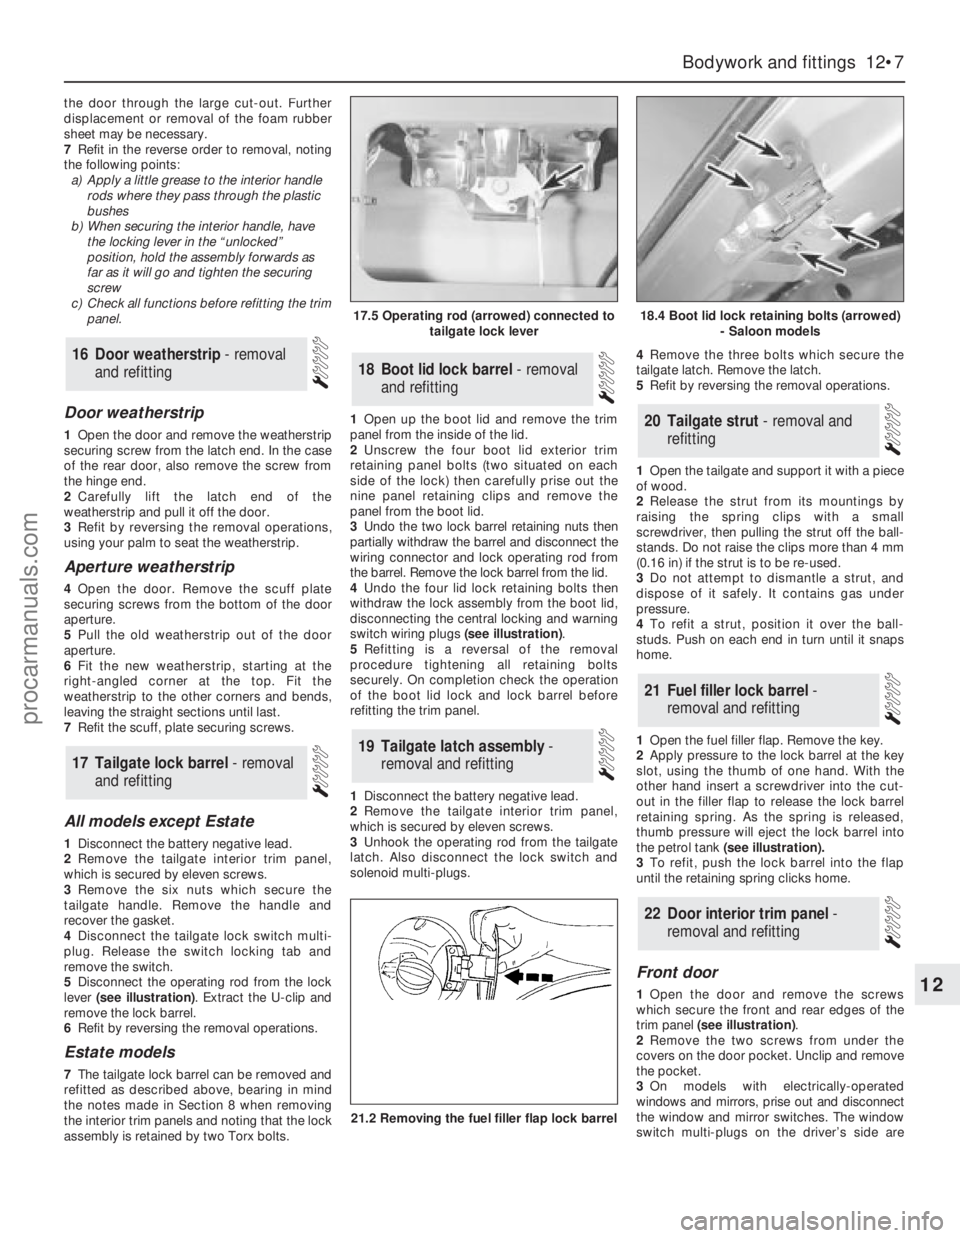
lever (see illustration). Extract the U-clip and
remove the lock barrel.
6Refit by reversing the removal operations.
Estate models
7The tailgate lock barrel can be removed and
refitted as described above, bearing in mind
the notes made in Section 8 when removing
the interior trim panels and noting that the lock
assembly is retained by two Torx bolts.1Open up the boot lid and remove the trim
panel from the inside of the lid.
2Unscrew the four boot lid exterior trim
retaining panel bolts (two situated on each
side of the lock) then carefully prise out the
nine panel retaining clips and remove the
panel from the boot lid.
3Undo the two lock barrel retaining nuts then
partially withdraw the barrel and disconnect the
wiring connector and lock operating rod from
the barrel. Remove the lock barrel from the lid.
4Undo the four lid lock retaining bolts then
withdraw the lock assembly from the boot lid,
disconnecting the central locking and warning
switch wiring plugs (see illustration).
5Refitting is a reversal of the removal
procedure tightening all retaining bolts
securely. On completion check the operation
of the boot lid lock and lock barrel before
refitting the trim panel.
1Disconnect the battery negative lead.
2Remove the tailgate interior trim panel,
which is secured by eleven screws.
3Unhook the operating rod from the tailgate
latch. Also disconnect the lock switch and
solenoid multi-plugs.4Remove the three bolts which secure the
tailgate latch. Remove the latch.
5Refit by reversing the removal operations.
1Open the tailgate and support it with a piece
of wood.
2Release the strut from its mountings by
raising the spring clips with a small
screwdriver, then pulling the strut off the ball-
stands. Do not raise the clips more than 4 mm
(0.16 in) if the strut is to be re-used.
3Do not attempt to dismantle a strut, and
dispose of it safely. It contains gas under
pressure.
4To refit a strut, position it over the ball-
studs. Push on each end in turn until it snaps
home.
1Open the fuel filler flap. Remove the key.
2Apply pressure to the lock barrel at the key
slot, using the thumb of one hand. With the
other hand insert a screwdriver into the cut-
out in the filler flap to release the lock barrel
retaining spring. As the spring is released,
thumb pressure will eject the lock barrel into
the petrol tank (see illustration).
3To refit, push the lock barrel into the flap
until the retaining spring clicks home.
Front door
1Open the door and remove the screws
which secure the front and rear edges of the
trim panel (see illustration).
2Remove the two screws from under the
covers on the door pocket. Unclip and remove
the pocket.
3On models with electrically-operated
windows and mirrors, prise out and disconnect
the window and mirror switches. The window
switch multi-plugs on the driver’s side are
22Door interior trim panel -
removal and refitting
21Fuel filler lock barrel -
removal and refitting
20Tailgate strut - removal and
refitting
19Tailgate latch assembly -
removal and refitting
18Boot lid lock barrel - removal
and refitting
17Tailgate lock barrel - removal
and refitting
16Door weatherstrip - removal
and refitting
Bodywork and fittings 12•7
12
17.5 Operating rod (arrowed) connected to
tailgate lock lever18.4 Boot lid lock retaining bolts (arrowed)
- Saloon models
21.2 Removing the fuel filler flap lock barrel
procarmanuals.com
Page 165 of 255
colour-coded: the blue plug is outermost. On
models with manually-operated windows,
remove the window winder handle, which is
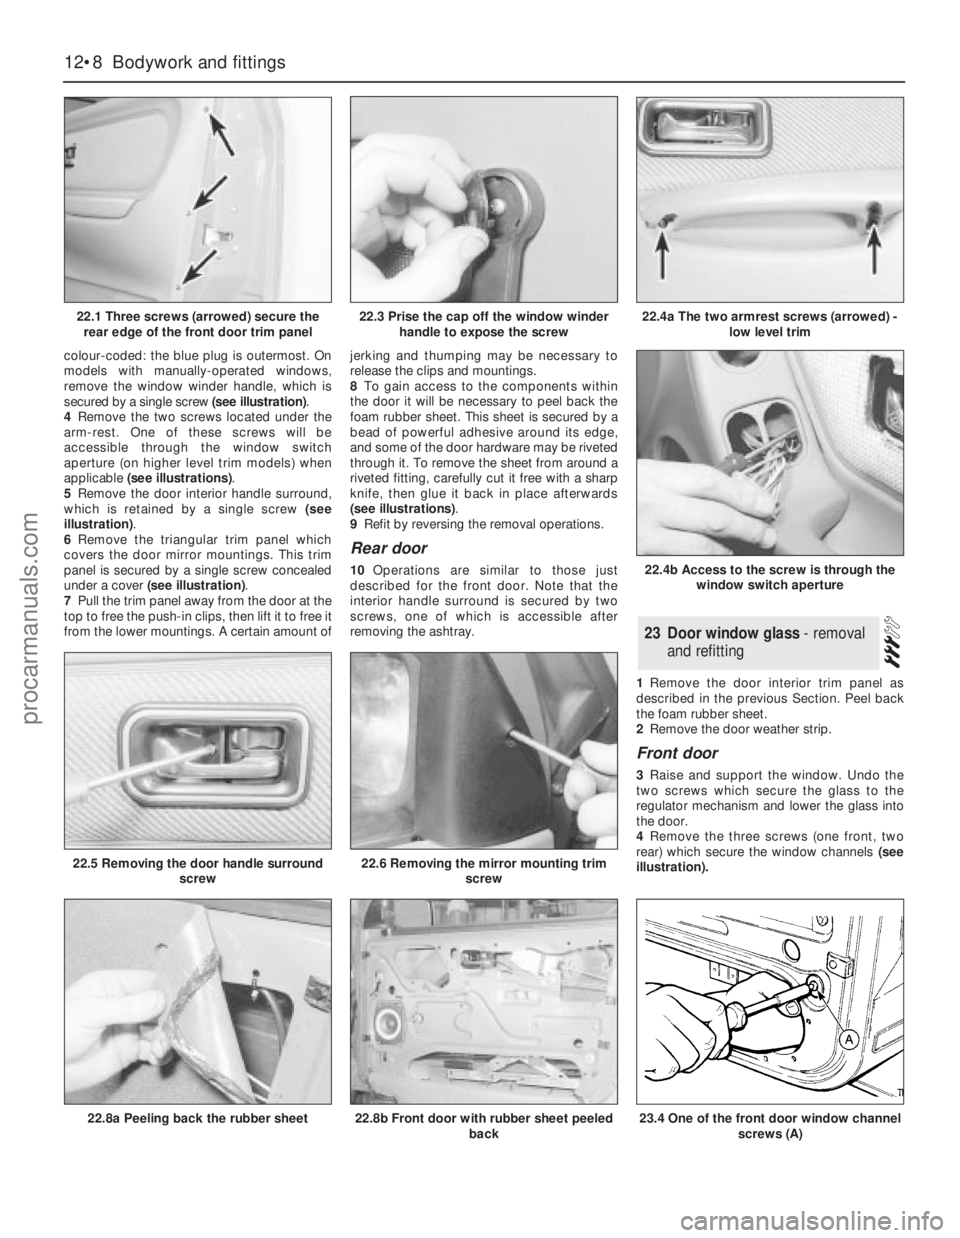
secured by a single screw (see illustration).
4Remove the two screws located under the
arm-rest. One of these screws will be
accessible through the window switch
aperture (on higher level trim models) when
applicable (see illustrations).
5Remove the door interior handle surround,
which is retained by a single screw (see
illustration).
6Remove the triangular trim panel which
covers the door mirror mountings. This trim
panel is secured by a single screw concealed
under a cover (see illustration).
7Pull the trim panel away from the door at the
top to free the push-in clips, then lift it to free it
from the lower mountings. A certain amount ofjerking and thumping may be necessary to
release the clips and mountings.
8To gain access to the components within
the door it will be necessary to peel back the
foam rubber sheet. This sheet is secured by a
bead of powerful adhesive around its edge,
and some of the door hardware may be riveted
through it. To remove the sheet from around a
riveted fitting, carefully cut it free with a sharp
knife, then glue it back in place afterwards
(see illustrations).
9Refit by reversing the removal operations.
Rear door
10Operations are similar to those just
described for the front door. Note that the
interior handle surround is secured by two
screws, one of which is accessible after
removing the ashtray.
1Remove the door interior trim panel as
described in the previous Section. Peel back
the foam rubber sheet.
2Remove the door weather strip.
Front door
3Raise and support the window. Undo the
two screws which secure the glass to the
regulator mechanism and lower the glass into
the door.
4Remove the three screws (one front, two
rear) which secure the window channels (see
illustration).
23Door window glass - removal
and refitting
12•8Bodywork and fittings
22.1 Three screws (arrowed) secure the
rear edge of the front door trim panel
22.6 Removing the mirror mounting trim
screw22.5 Removing the door handle surround
screw
22.8a Peeling back the rubber sheet22.8b Front door with rubber sheet peeled
back
22.4b Access to the screw is through the
window switch aperture
22.3 Prise the cap off the window winder
handle to expose the screw22.4a The two armrest screws (arrowed) -
low level trim
23.4 One of the front door window channel
screws (A)
procarmanuals.com
Page 166 of 255
5Free the glass from the channels. Carefully
remove the glass upwards through the
window aperture.
6Refit by reversing the removal operations.
Note that the channels are adjustable: wind
the window up and down after securing the
channels and adjust them if necessary for
smooth operation. The regulator mechanism
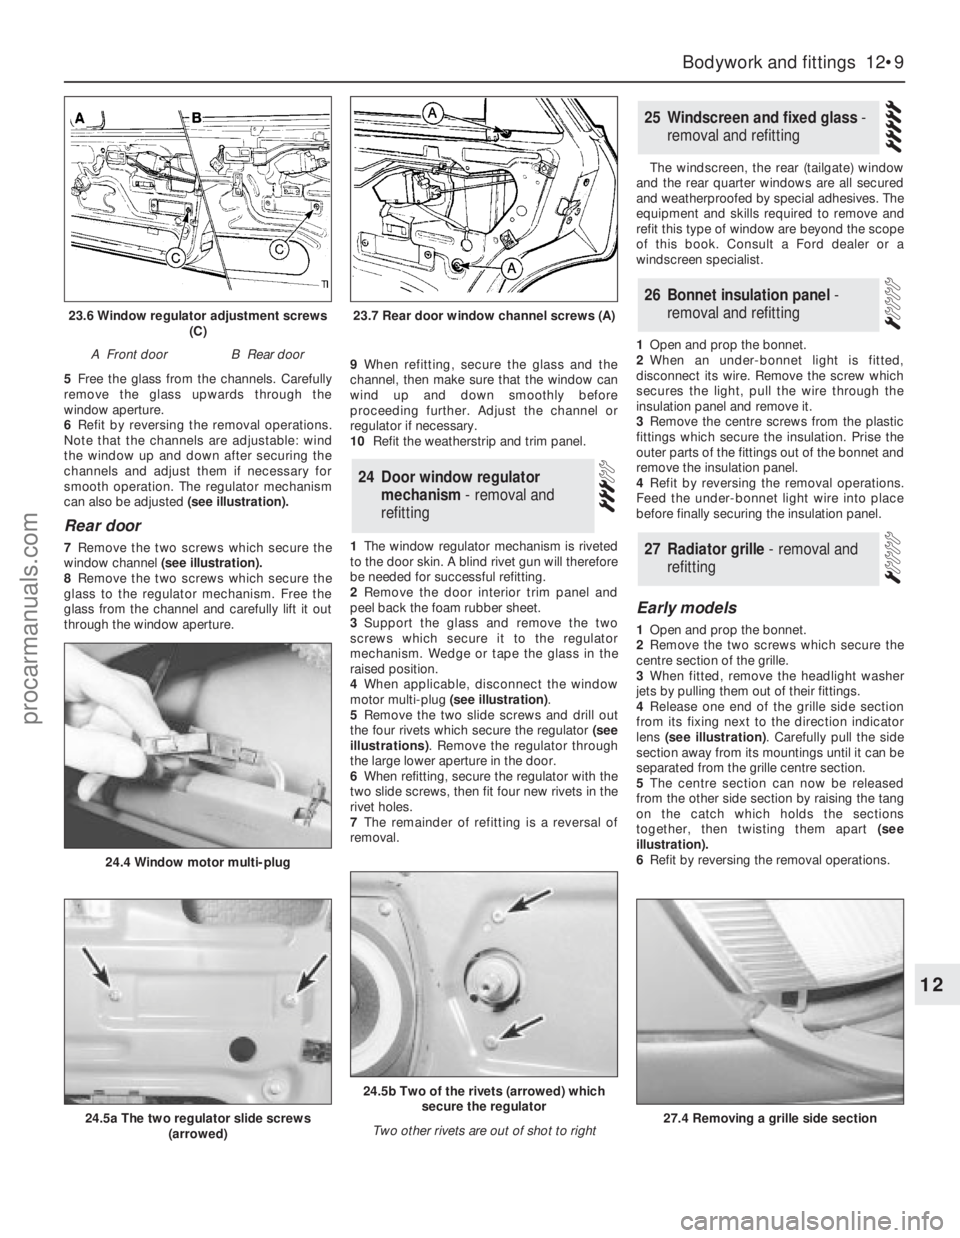
can also be adjusted (see illustration).
Rear door
7Remove the two screws which secure the
window channel (see illustration).
8Remove the two screws which secure the
glass to the regulator mechanism. Free the
glass from the channel and carefully lift it out
through the window aperture.9When refitting, secure the glass and the
channel, then make sure that the window can
wind up and down smoothly before
proceeding further. Adjust the channel or
regulator if necessary.
10Refit the weatherstrip and trim panel.
1The window regulator mechanism is riveted
to the door skin. A blind rivet gun will therefore
be needed for successful refitting.
2Remove the door interior trim panel and
peel back the foam rubber sheet.
3Support the glass and remove the two
screws which secure it to the regulator
mechanism. Wedge or tape the glass in the
raised position.
4When applicable, disconnect the window
motor multi-plug (see illustration).
5Remove the two slide screws and drill out
the four rivets which secure the regulator (see
illustrations). Remove the regulator through
the large lower aperture in the door.
6When refitting, secure the regulator with the
two slide screws, then fit four new rivets in the
rivet holes.
7The remainder of refitting is a reversal of
removal.The windscreen, the rear (tailgate) window
and the rear quarter windows are all secured
and weatherproofed by special adhesives. The
equipment and skills required to remove and
refit this type of window are beyond the scope
of this book. Consult a Ford dealer or a
windscreen specialist.
1Open and prop the bonnet.
2When an under-bonnet light is fitted,
disconnect its wire. Remove the screw which
secures the light, pull the wire through the
insulation panel and remove it.
3Remove the centre screws from the plastic
fittings which secure the insulation. Prise the
outer parts of the fittings out of the bonnet and
remove the insulation panel.
4Refit by reversing the removal operations.
Feed the under-bonnet light wire into place
before finally securing the insulation panel.
Early models
1Open and prop the bonnet.
2Remove the two screws which secure the
centre section of the grille.
3When fitted, remove the headlight washer
jets by pulling them out of their fittings.
4Release one end of the grille side section
from its fixing next to the direction indicator
lens (see illustration). Carefully pull the side
section away from its mountings until it can be
separated from the grille centre section.
5The centre section can now be released
from the other side section by raising the tang
on the catch which holds the sections
together, then twisting them apart (see
illustration).
6Refit by reversing the removal operations.
27Radiator grille - removal and
refitting
26Bonnet insulation panel -
removal and refitting
25Windscreen and fixed glass -
removal and refitting
24Door window regulator
mechanism - removal and
refitting
Bodywork and fittings 12•9
12
23.6 Window regulator adjustment screws
(C)
A Front doorB Rear door
23.7 Rear door window channel screws (A)
24.5a The two regulator slide screws
(arrowed)
24.4 Window motor multi-plug
24.5b Two of the rivets (arrowed) which
secure the regulator
Two other rivets are out of shot to right
27.4 Removing a grille side section
procarmanuals.com
Page 167 of 255
Later models
7The radiator grille of these models can be
removed and refitted as described above,
noting that it will also be necessary to remove
the headlamp wiper arms (where fitted) before
the grille can be removed. To remove a wiper
arm, lift the cover to gain access to the
retaining nut then undo the nut and pull the
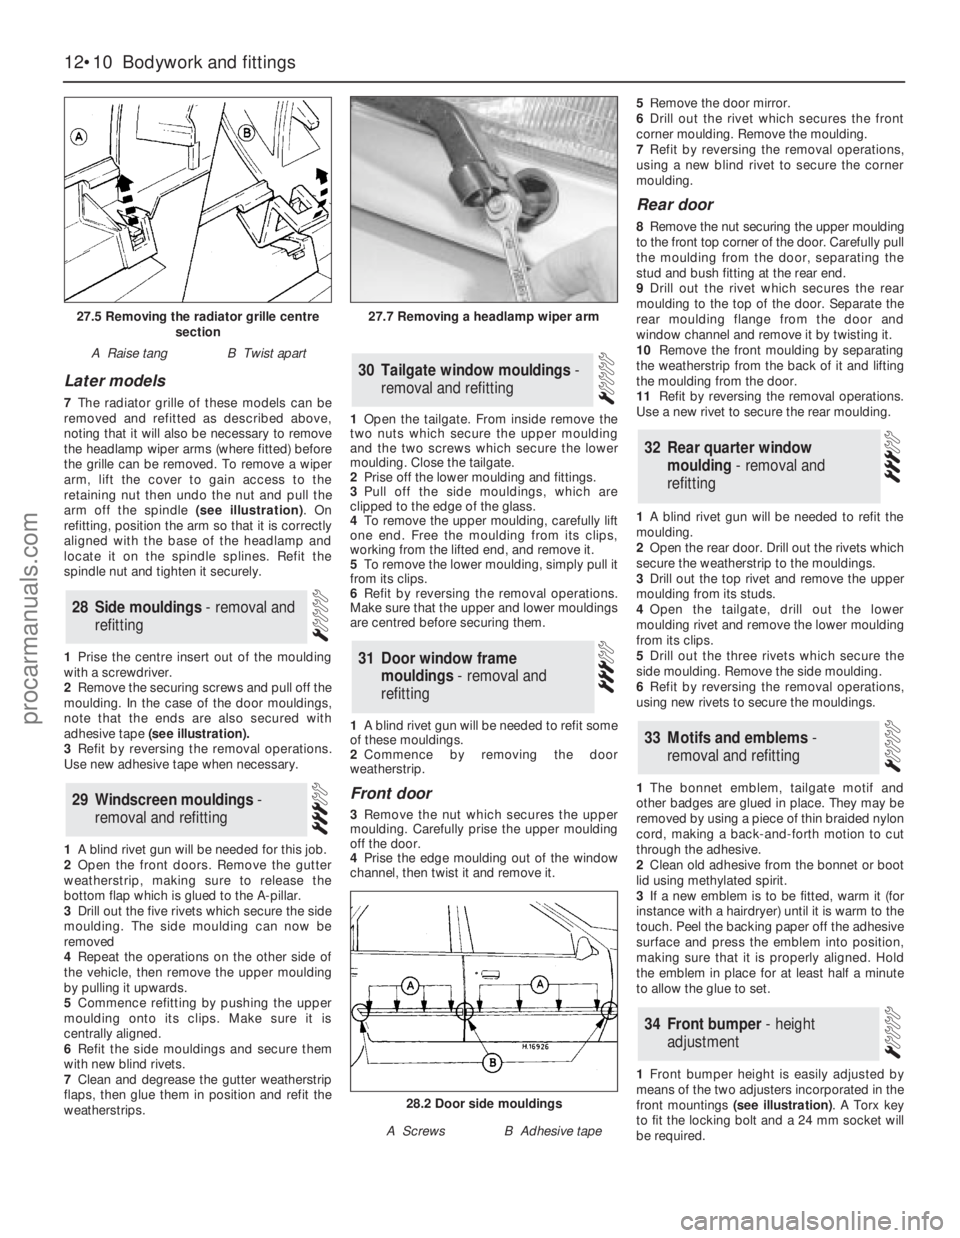
arm off the spindle (see illustration). On
refitting, position the arm so that it is correctly
aligned with the base of the headlamp and
locate it on the spindle splines. Refit the
spindle nut and tighten it securely.
1Prise the centre insert out of the moulding
with a screwdriver.
2Remove the securing screws and pull off the
moulding. In the case of the door mouldings,
note that the ends are also secured with
adhesive tape (see illustration).
3Refit by reversing the removal operations.
Use new adhesive tape when necessary.
1A blind rivet gun will be needed for this job.
2Open the front doors. Remove the gutter
weatherstrip, making sure to release the
bottom flap which is glued to the A-pillar.
3Drill out the five rivets which secure the side
moulding. The side moulding can now be
removed
4Repeat the operations on the other side of
the vehicle, then remove the upper moulding
by pulling it upwards.
5Commence refitting by pushing the upper
moulding onto its clips. Make sure it is
centrally aligned.
6Refit the side mouldings and secure them
with new blind rivets.
7Clean and degrease the gutter weatherstrip
flaps, then glue them in position and refit the
weatherstrips.1Open the tailgate. From inside remove the
two nuts which secure the upper moulding
and the two screws which secure the lower
moulding. Close the tailgate.
2Prise off the lower moulding and fittings.
3Pull off the side mouldings, which are
clipped to the edge of the glass.
4To remove the upper moulding, carefully lift
one end. Free the moulding from its clips,
working from the lifted end, and remove it.
5To remove the lower moulding, simply pull it
from its clips.
6Refit by reversing the removal operations.
Make sure that the upper and lower mouldings
are centred before securing them.
1A blind rivet gun will be needed to refit some
of these mouldings.
2Commence by removing the door
weatherstrip.
Front door
3Remove the nut which secures the upper
moulding. Carefully prise the upper moulding
off the door.
4Prise the edge moulding out of the window
channel, then twist it and remove it. 5Remove the door mirror.
6Drill out the rivet which secures the front
corner moulding. Remove the moulding.
7Refit by reversing the removal operations,
using a new blind rivet to secure the corner
moulding.
Rear door
8Remove the nut securing the upper moulding
to the front top corner of the door. Carefully pull
the moulding from the door, separating the
stud and bush fitting at the rear end.
9Drill out the rivet which secures the rear
moulding to the top of the door. Separate the
rear moulding flange from the door and
window channel and remove it by twisting it.
10Remove the front moulding by separating
the weatherstrip from the back of it and lifting
the moulding from the door.
11Refit by reversing the removal operations.
Use a new rivet to secure the rear moulding.
1A blind rivet gun will be needed to refit the
moulding.
2Open the rear door. Drill out the rivets which
secure the weatherstrip to the mouldings.
3Drill out the top rivet and remove the upper
moulding from its studs.
4Open the tailgate, drill out the lower
moulding rivet and remove the lower moulding
from its clips.
5Drill out the three rivets which secure the
side moulding. Remove the side moulding.
6Refit by reversing the removal operations,
using new rivets to secure the mouldings.
1The bonnet emblem, tailgate motif and
other badges are glued in place. They may be
removed by using a piece of thin braided nylon
cord, making a back-and-forth motion to cut
through the adhesive.
2Clean old adhesive from the bonnet or boot
lid using methylated spirit.
3If a new emblem is to be fitted, warm it (for
instance with a hairdryer) until it is warm to the
touch. Peel the backing paper off the adhesive
surface and press the emblem into position,
making sure that it is properly aligned. Hold
the emblem in place for at least half a minute
to allow the glue to set.
1Front bumper height is easily adjusted by
means of the two adjusters incorporated in the
front mountings (see illustration). A Torx key
to fit the locking bolt and a 24 mm socket will
be required.
34Front bumper - height
adjustment
33Motifs and emblems -
removal and refitting
32Rear quarter window
moulding - removal and
refitting
31Door window frame
mouldings - removal and
refitting
30Tailgate window mouldings -
removal and refitting
29Windscreen mouldings -
removal and refitting
28Side mouldings - removal and
refitting
12•10Bodywork and fittings
27.5 Removing the radiator grille centre
section
A Raise tangB Twist apart
27.7 Removing a headlamp wiper arm
28.2 Door side mouldings
A ScrewsB Adhesive tape
procarmanuals.com
Page 168 of 255
 1
1 2
2 3
3 4
4 5
5 6
6 7
7 8
8 9
9 10
10 11
11 12
12 13
13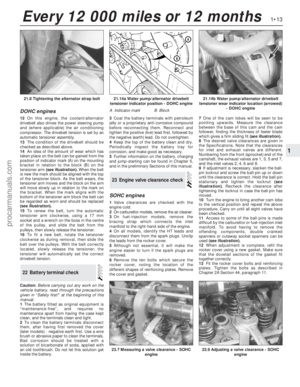 14
14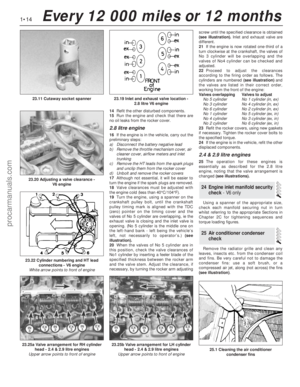 15
15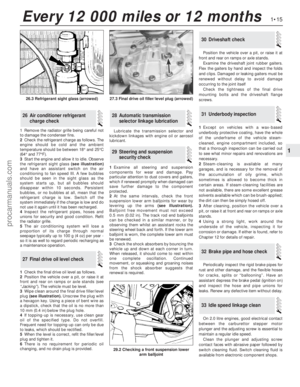 16
16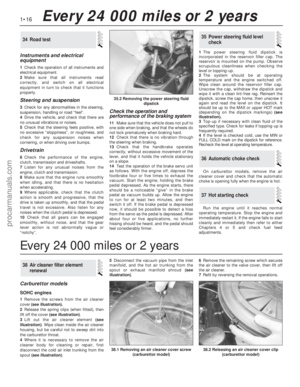 17
17 18
18 19
19 20
20 21
21 22
22 23
23 24
24 25
25 26
26 27
27 28
28 29
29 30
30 31
31 32
32 33
33 34
34 35
35 36
36 37
37 38
38 39
39 40
40 41
41 42
42 43
43 44
44 45
45 46
46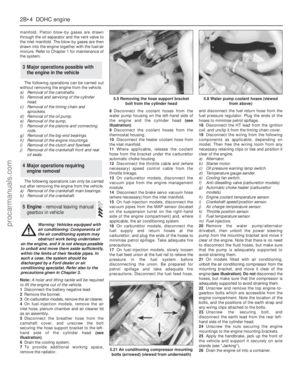 47
47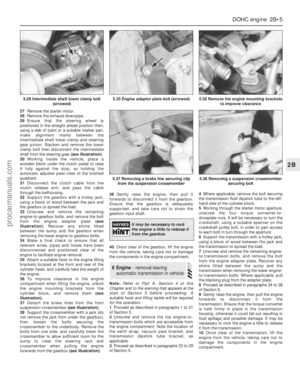 48
48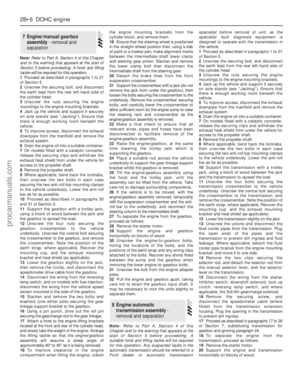 49
49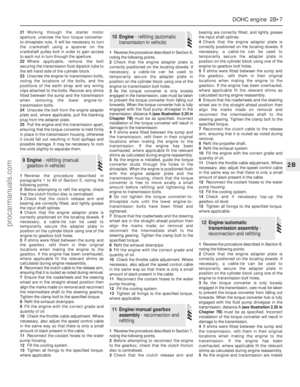 50
50 51
51 52
52 53
53 54
54 55
55 56
56 57
57 58
58 59
59 60
60 61
61 62
62 63
63 64
64 65
65 66
66 67
67 68
68 69
69 70
70 71
71 72
72 73
73 74
74 75
75 76
76 77
77 78
78 79
79 80
80 81
81 82
82 83
83 84
84 85
85 86
86 87
87 88
88 89
89 90
90 91
91 92
92 93
93 94
94 95
95 96
96 97
97 98
98 99
99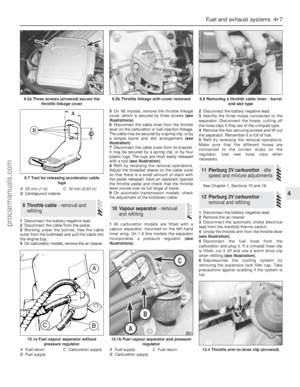 100
100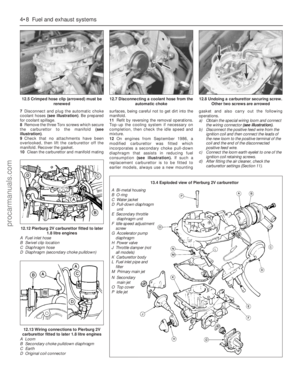 101
101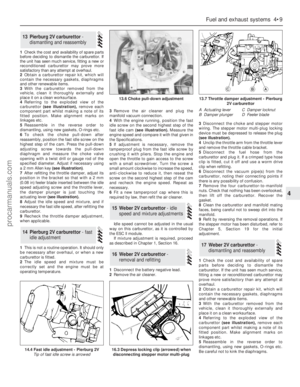 102
102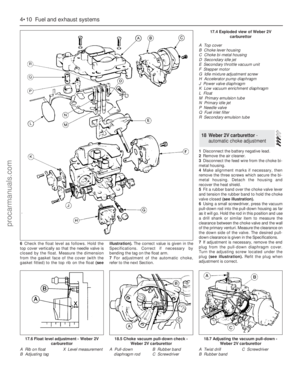 103
103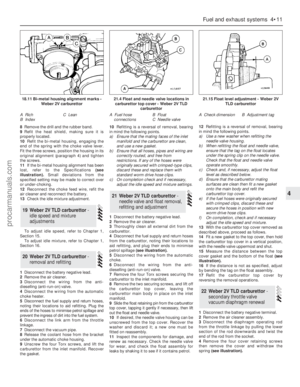 104
104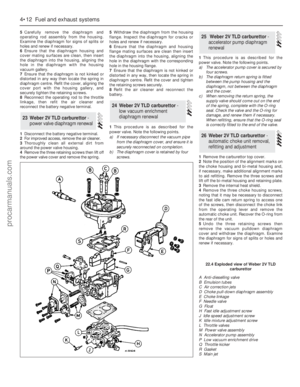 105
105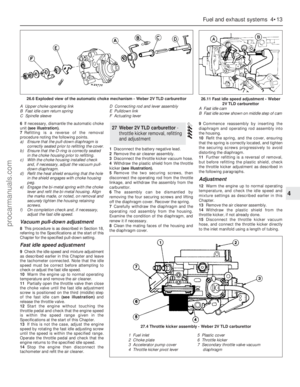 106
106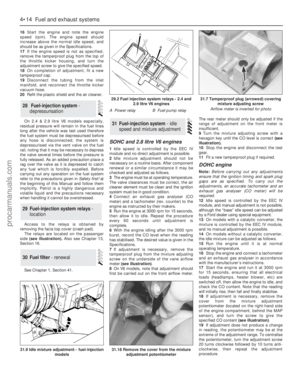 107
107 108
108 109
109 110
110 111
111 112
112 113
113 114
114 115
115 116
116 117
117 118
118 119
119 120
120 121
121 122
122 123
123 124
124 125
125 126
126 127
127 128
128 129
129 130
130 131
131 132
132 133
133 134
134 135
135 136
136 137
137 138
138 139
139 140
140 141
141 142
142 143
143 144
144 145
145 146
146 147
147 148
148 149
149 150
150 151
151 152
152 153
153 154
154 155
155 156
156 157
157 158
158 159
159 160
160 161
161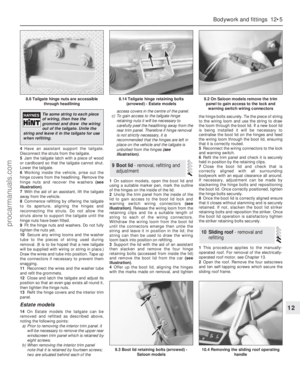 162
162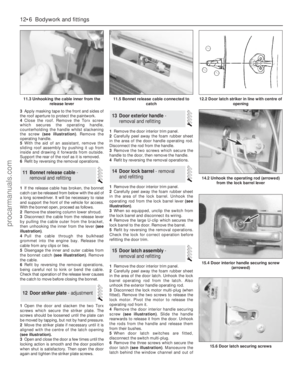 163
163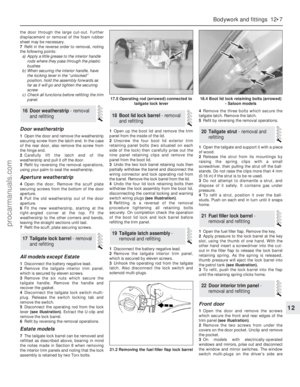 164
164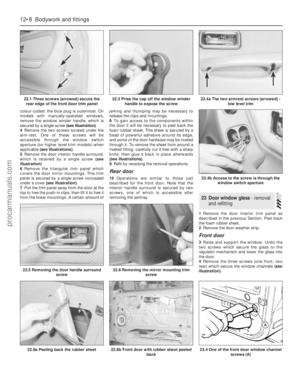 165
165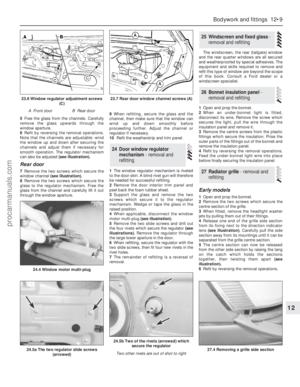 166
166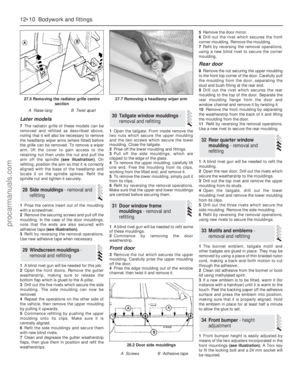 167
167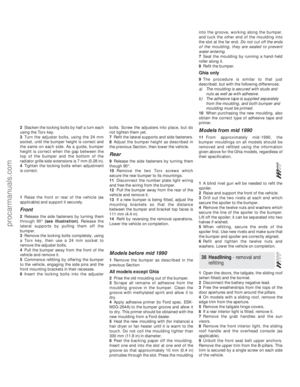 168
168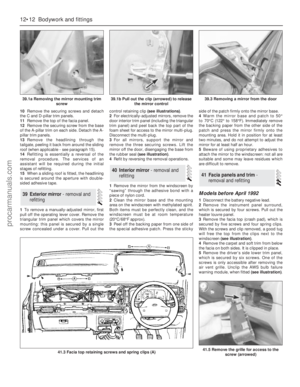 169
169 170
170 171
171 172
172 173
173 174
174 175
175 176
176 177
177 178
178 179
179 180
180 181
181 182
182 183
183 184
184 185
185 186
186 187
187 188
188 189
189 190
190 191
191 192
192 193
193 194
194 195
195 196
196 197
197 198
198 199
199 200
200 201
201 202
202 203
203 204
204 205
205 206
206 207
207 208
208 209
209 210
210 211
211 212
212 213
213 214
214 215
215 216
216 217
217 218
218 219
219 220
220 221
221 222
222 223
223 224
224 225
225 226
226 227
227 228
228 229
229 230
230 231
231 232
232 233
233 234
234 235
235 236
236 237
237 238
238 239
239 240
240 241
241 242
242 243
243 244
244 245
245 246
246 247
247 248
248 249
249 250
250 251
251 252
252 253
253 254
254


