Page 137 of 255
17Refit the washer, spring and spring cover.
Compress the spring and refit the circlip, then
release the spring compressor.
18Lubricate the caliper bore with clean
hydraulic fluid and fit a new piston seal.
19Reassemble the piston components.
Lubricate the contact face of the adjuster nut
with a little brake grease, then fit the adjuster
nut (with new seal), thrust bearing,
thrustwasher, wave washer and the second
thrustwasher. Secure with the circlip.
20Fit a new dust boot. The manufacturers
recommend that it be fitted to the caliper
groove and the piston fitted afterwards; it is
also possible to fit the boot to the piston first
and engage it in the caliper groove afterwards.
Either way it is a fiddly business.
21Refit the piston and screw it into the
caliper, then fit whichever lip of the dust boot
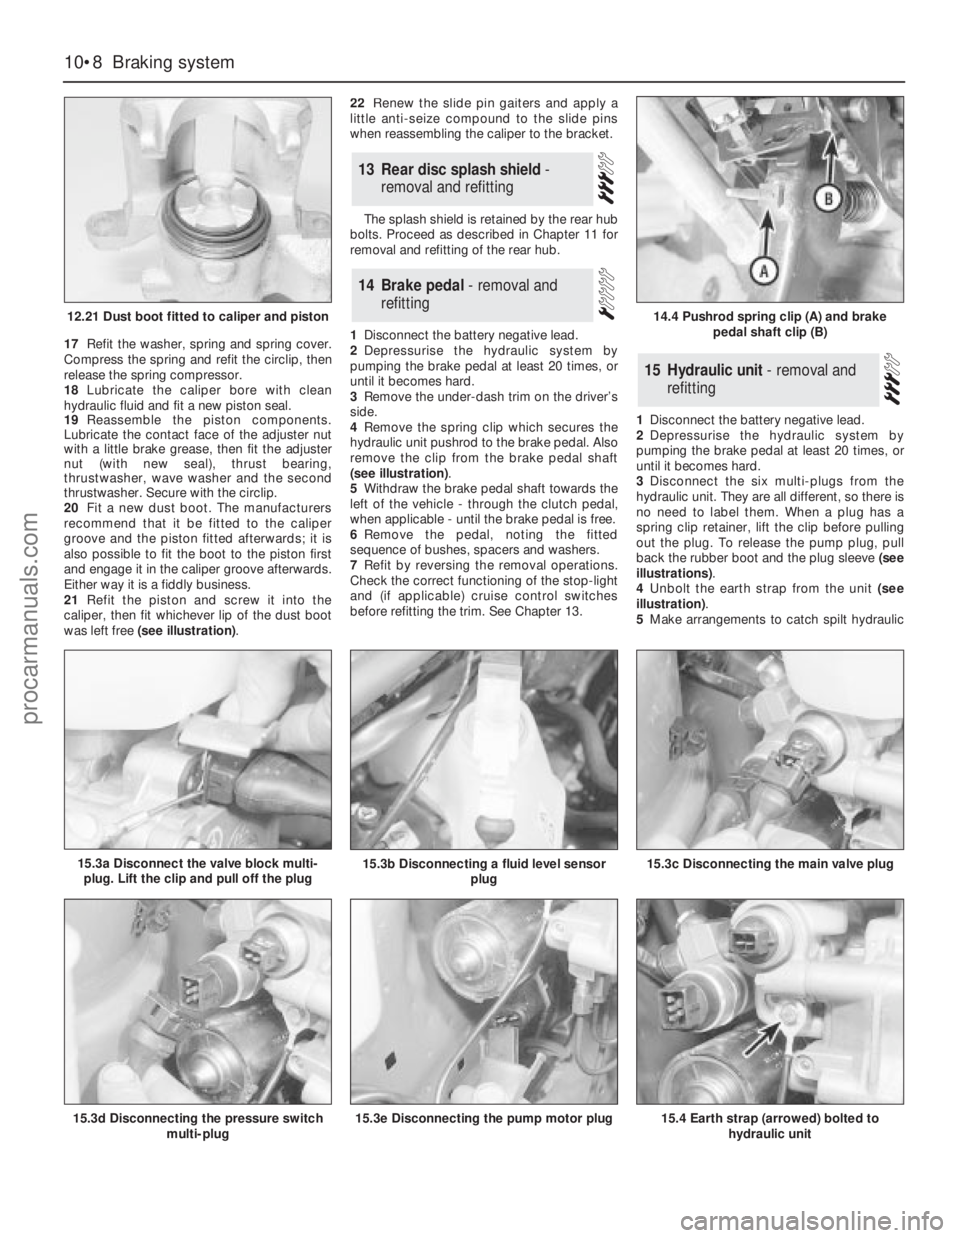
was left free (see illustration).22Renew the slide pin gaiters and apply a
little anti-seize compound to the slide pins
when reassembling the caliper to the bracket.
The splash shield is retained by the rear hub
bolts. Proceed as described in Chapter 11 for
removal and refitting of the rear hub.
1Disconnect the battery negative lead.
2Depressurise the hydraulic system by
pumping the brake pedal at least 20 times, or
until it becomes hard.
3Remove the under-dash trim on the driver’s
side.
4Remove the spring clip which secures the
hydraulic unit pushrod to the brake pedal. Also
remove the clip from the brake pedal shaft
(see illustration).
5Withdraw the brake pedal shaft towards the
left of the vehicle - through the clutch pedal,
when applicable - until the brake pedal is free.
6Remove the pedal, noting the fitted
sequence of bushes, spacers and washers.
7Refit by reversing the removal operations.
Check the correct functioning of the stop-light
and (if applicable) cruise control switches
before refitting the trim. See Chapter 13.1Disconnect the battery negative lead.
2Depressurise the hydraulic system by
pumping the brake pedal at least 20 times, or
until it becomes hard.
3Disconnect the six multi-plugs from the
hydraulic unit. They are all different, so there is
no need to label them. When a plug has a
spring clip retainer, lift the clip before pulling
out the plug. To release the pump plug, pull
back the rubber boot and the plug sleeve (see
illustrations).
4Unbolt the earth strap from the unit (see
illustration).
5Make arrangements to catch spilt hydraulic
15Hydraulic unit - removal and
refitting
14Brake pedal - removal and
refitting
13Rear disc splash shield -
removal and refitting
10•8Braking system
12.21 Dust boot fitted to caliper and piston
15.3d Disconnecting the pressure switch
multi-plug15.3e Disconnecting the pump motor plug15.4 Earth strap (arrowed) bolted to
hydraulic unit
14.4 Pushrod spring clip (A) and brake
pedal shaft clip (B)
15.3a Disconnect the valve block multi-
plug. Lift the clip and pull off the plug15.3b Disconnecting a fluid level sensor
plug15.3c Disconnecting the main valve plug
procarmanuals.com
Page 138 of 255
fluid. Identify the hydraulic pipes and
disconnect them from the base of the unit.
Hint: Plug or cap the open unions to keep
fluid in and dirt out.
6Remove the under-dash trim on the driver’s
side. Disconnect the spring clip which secures
the hydraulic unit pushrod to the brake pedal.
7Have an assistant support the hydraulic
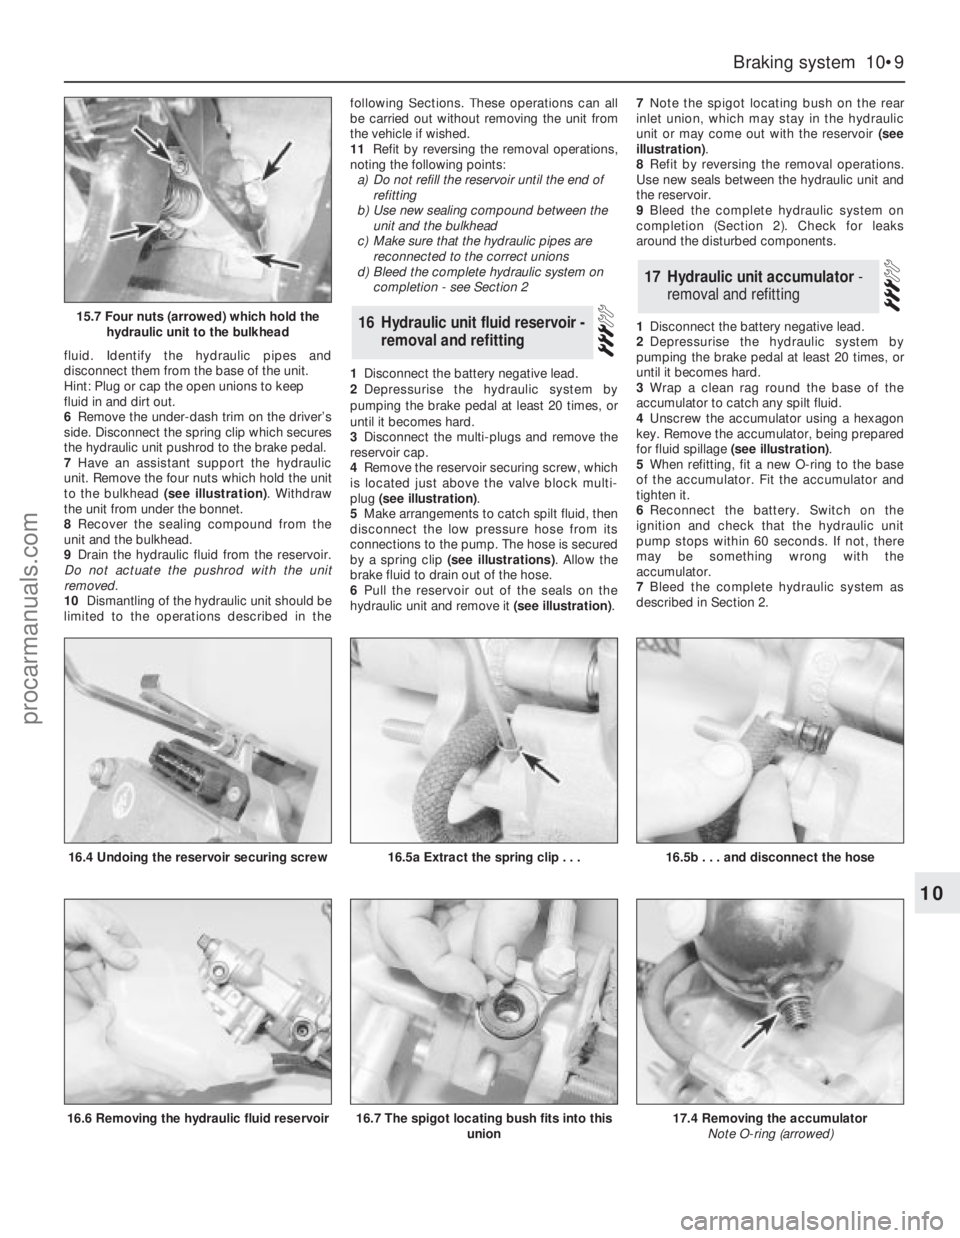
unit. Remove the four nuts which hold the unit
to the bulkhead (see illustration). Withdraw
the unit from under the bonnet.
8Recover the sealing compound from the
unit and the bulkhead.
9Drain the hydraulic fluid from the reservoir.
Do not actuate the pushrod with the unit
removed.
10Dismantling of the hydraulic unit should be
limited to the operations described in thefollowing Sections. These operations can all
be carried out without removing the unit from
the vehicle if wished.
11Refit by reversing the removal operations,
noting the following points:
a)Do not refill the reservoir until the end of
refitting
b)Use new sealing compound between the
unit and the bulkhead
c)Make sure that the hydraulic pipes are
reconnected to the correct unions
d)Bleed the complete hydraulic system on
completion - see Section 2
1Disconnect the battery negative lead.
2Depressurise the hydraulic system by
pumping the brake pedal at least 20 times, or
until it becomes hard.
3Disconnect the multi-plugs and remove the
reservoir cap.
4Remove the reservoir securing screw, which
is located just above the valve block multi-
plug (see illustration).
5Make arrangements to catch spilt fluid, then
disconnect the low pressure hose from its
connections to the pump. The hose is secured
by a spring clip (see illustrations). Allow the
brake fluid to drain out of the hose.
6Pull the reservoir out of the seals on the
hydraulic unit and remove it (see illustration).7Note the spigot locating bush on the rear
inlet union, which may stay in the hydraulic
unit or may come out with the reservoir (see
illustration).
8Refit by reversing the removal operations.
Use new seals between the hydraulic unit and
the reservoir.
9Bleed the complete hydraulic system on
completion (Section 2). Check for leaks
around the disturbed components.
1Disconnect the battery negative lead.
2Depressurise the hydraulic system by
pumping the brake pedal at least 20 times, or
until it becomes hard.
3Wrap a clean rag round the base of the
accumulator to catch any spilt fluid.
4Unscrew the accumulator using a hexagon
key. Remove the accumulator, being prepared
for fluid spillage (see illustration).
5When refitting, fit a new O-ring to the base
of the accumulator. Fit the accumulator and
tighten it.
6Reconnect the battery. Switch on the
ignition and check that the hydraulic unit
pump stops within 60 seconds. If not, there
may be something wrong with the
accumulator.
7Bleed the complete hydraulic system as
described in Section 2.
17Hydraulic unit accumulator -
removal and refitting
16Hydraulic unit fluid reservoir -
removal and refitting
Braking system 10•9
10
15.7 Four nuts (arrowed) which hold the
hydraulic unit to the bulkhead
16.4 Undoing the reservoir securing screw16.5a Extract the spring clip . . .
16.6 Removing the hydraulic fluid reservoir
16.5b . . . and disconnect the hose
16.7 The spigot locating bush fits into this
union17.4 Removing the accumulator
Note O-ring (arrowed)
procarmanuals.com
Page 139 of 255
1Remove the accumulator (Section 17).
2Disconnect the high pressure hose from the
pump. Be prepared for fluid spillage.
3Disconnect the low pressure hose from the
pump. Allow the fluid to drain out of the
reservoir through the hose.
4Disconnect the multi-plugs from the
pressure switch and the pump motor.
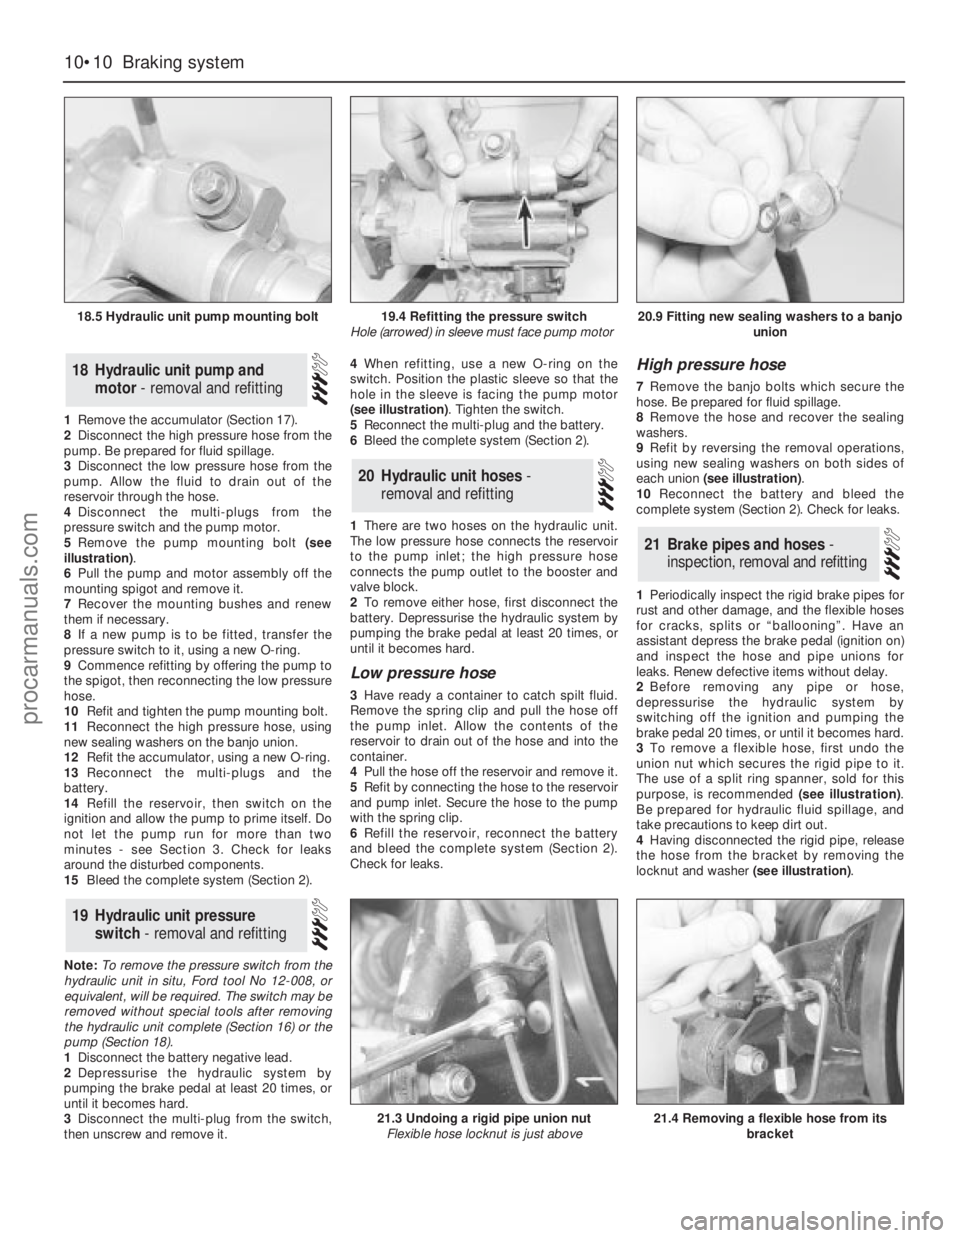
5Remove the pump mounting bolt (see
illustration).
6Pull the pump and motor assembly off the
mounting spigot and remove it.
7Recover the mounting bushes and renew
them if necessary.
8If a new pump is to be fitted, transfer the
pressure switch to it, using a new O-ring.
9Commence refitting by offering the pump to
the spigot, then reconnecting the low pressure
hose.
10Refit and tighten the pump mounting bolt.
11Reconnect the high pressure hose, using
new sealing washers on the banjo union.
12Refit the accumulator, using a new O-ring.
13Reconnect the multi-plugs and the
battery.
14Refill the reservoir, then switch on the
ignition and allow the pump to prime itself. Do
not let the pump run for more than two
minutes - see Section 3. Check for leaks
around the disturbed components.
15Bleed the complete system (Section 2).
Note: To remove the pressure switch from the
hydraulic unit in situ, Ford tool No 12-008, or
equivalent, will be required. The switch may be
removed without special tools after removing
the hydraulic unit complete (Section 16) or the
pump (Section 18).
1Disconnect the battery negative lead.
2Depressurise the hydraulic system by
pumping the brake pedal at least 20 times, or
until it becomes hard.
3Disconnect the multi-plug from the switch,
then unscrew and remove it.4When refitting, use a new O-ring on the
switch. Position the plastic sleeve so that the
hole in the sleeve is facing the pump motor
(see illustration). Tighten the switch.
5Reconnect the multi-plug and the battery.
6Bleed the complete system (Section 2).
1There are two hoses on the hydraulic unit.
The low pressure hose connects the reservoir
to the pump inlet; the high pressure hose
connects the pump outlet to the booster and
valve block.
2To remove either hose, first disconnect the
battery. Depressurise the hydraulic system by
pumping the brake pedal at least 20 times, or
until it becomes hard.
Low pressure hose
3Have ready a container to catch spilt fluid.
Remove the spring clip and pull the hose off
the pump inlet. Allow the contents of the
reservoir to drain out of the hose and into the
container.
4Pull the hose off the reservoir and remove it.
5Refit by connecting the hose to the reservoir
and pump inlet. Secure the hose to the pump
with the spring clip.
6Refill the reservoir, reconnect the battery
and bleed the complete system (Section 2).
Check for leaks.
High pressure hose
7Remove the banjo bolts which secure the
hose. Be prepared for fluid spillage.
8Remove the hose and recover the sealing
washers.
9Refit by reversing the removal operations,
using new sealing washers on both sides of
each union (see illustration).
10Reconnect the battery and bleed the
complete system (Section 2). Check for leaks.
1Periodically inspect the rigid brake pipes for
rust and other damage, and the flexible hoses
for cracks, splits or “ballooning”. Have an
assistant depress the brake pedal (ignition on)
and inspect the hose and pipe unions for
leaks. Renew defective items without delay.
2Before removing any pipe or hose,
depressurise the hydraulic system by
switching off the ignition and pumping the
brake pedal 20 times, or until it becomes hard.
3To remove a flexible hose, first undo the
union nut which secures the rigid pipe to it.
The use of a split ring spanner, sold for this
purpose, is recommended (see illustration).
Be prepared for hydraulic fluid spillage, and
take precautions to keep dirt out.
4Having disconnected the rigid pipe, release
the hose from the bracket by removing the
locknut and washer (see illustration).
21Brake pipes and hoses -
inspection, removal and refitting
20Hydraulic unit hoses -
removal and refitting
19Hydraulic unit pressure
switch - removal and refitting
18Hydraulic unit pump and
motor - removal and refitting
10•10Braking system
18.5 Hydraulic unit pump mounting bolt
21.3 Undoing a rigid pipe union nut
Flexible hose locknut is just above21.4 Removing a flexible hose from its
bracket
19.4 Refitting the pressure switch
Hole (arrowed) in sleeve must face pump motor20.9 Fitting new sealing washers to a banjo
union
procarmanuals.com
Page 140 of 255
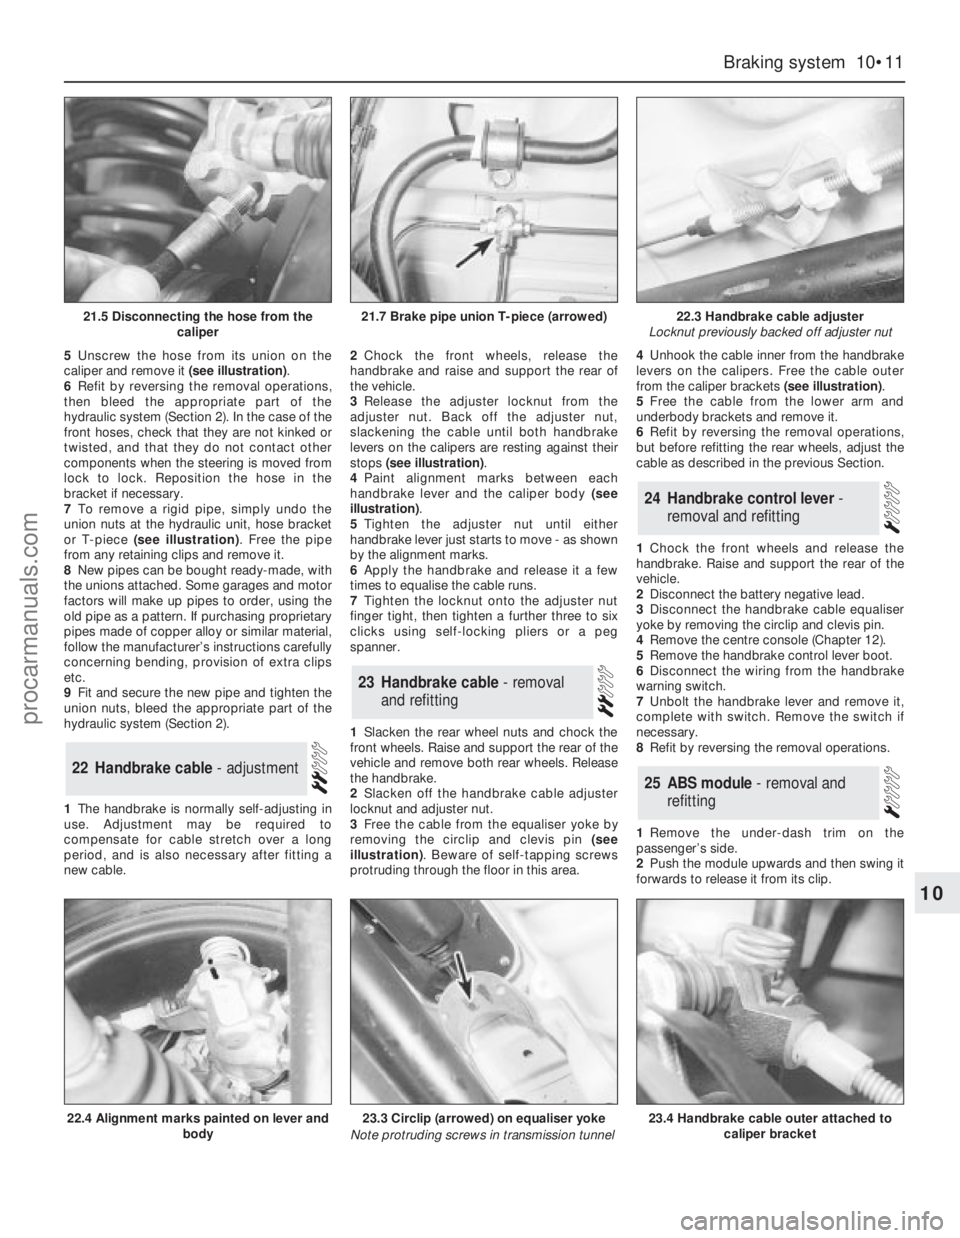
5Unscrew the hose from its union on the
caliper and remove it (see illustration).
6Refit by reversing the removal operations,
then bleed the appropriate part of the
hydraulic system (Section 2). In the case of the
front hoses, check that they are not kinked or
twisted, and that they do not contact other
components when the steering is moved from
lock to lock. Reposition the hose in the
bracket if necessary.
7To remove a rigid pipe, simply undo the
union nuts at the hydraulic unit, hose bracket
or T-piece (see illustration). Free the pipe
from any retaining clips and remove it.
8New pipes can be bought ready-made, with
the unions attached. Some garages and motor
factors will make up pipes to order, using the
old pipe as a pattern. If purchasing proprietary
pipes made of copper alloy or similar material,
follow the manufacturer’s instructions carefully
concerning bending, provision of extra clips
etc.
9Fit and secure the new pipe and tighten the
union nuts, bleed the appropriate part of the
hydraulic system (Section 2).
1The handbrake is normally self-adjusting in
use. Adjustment may be required to
compensate for cable stretch over a long
period, and is also necessary after fitting a
new cable.2Chock the front wheels, release the
handbrake and raise and support the rear of
the vehicle.
3Release the adjuster locknut from the
adjuster nut. Back off the adjuster nut,
slackening the cable until both handbrake
levers on the calipers are resting against their
stops (see illustration).
4Paint alignment marks between each
handbrake lever and the caliper body (see
illustration).
5Tighten the adjuster nut until either
handbrake lever just starts to move - as shown
by the alignment marks.
6Apply the handbrake and release it a few
times to equalise the cable runs.
7Tighten the locknut onto the adjuster nut
finger tight, then tighten a further three to six
clicks using self-locking pliers or a peg
spanner.
1Slacken the rear wheel nuts and chock the
front wheels. Raise and support the rear of the
vehicle and remove both rear wheels. Release
the handbrake.
2Slacken off the handbrake cable adjuster
locknut and adjuster nut.
3Free the cable from the equaliser yoke by
removing the circlip and clevis pin (see
illustration). Beware of self-tapping screws
protruding through the floor in this area.4Unhook the cable inner from the handbrake
levers on the calipers. Free the cable outer
from the caliper brackets (see illustration).
5Free the cable from the lower arm and
underbody brackets and remove it.
6Refit by reversing the removal operations,
but before refitting the rear wheels, adjust the
cable as described in the previous Section.
1Chock the front wheels and release the
handbrake. Raise and support the rear of the
vehicle.
2Disconnect the battery negative lead.
3Disconnect the handbrake cable equaliser
yoke by removing the circlip and clevis pin.
4Remove the centre console (Chapter 12).
5Remove the handbrake control lever boot.
6Disconnect the wiring from the handbrake
warning switch.
7Unbolt the handbrake lever and remove it,
complete with switch. Remove the switch if
necessary.
8Refit by reversing the removal operations.
1Remove the under-dash trim on the
passenger’s side.
2Push the module upwards and then swing it
forwards to release it from its clip.
25ABS module - removal and
refitting
24Handbrake control lever -
removal and refitting
23Handbrake cable - removal
and refitting
22Handbrake cable - adjustment
Braking system 10•11
10
21.5 Disconnecting the hose from the
caliper21.7 Brake pipe union T-piece (arrowed)22.3 Handbrake cable adjuster
Locknut previously backed off adjuster nut
22.4 Alignment marks painted on lever and
body23.3 Circlip (arrowed) on equaliser yoke
Note protruding screws in transmission tunnel23.4 Handbrake cable outer attached to
caliper bracket
procarmanuals.com
Page 141 of 255
3Press the multi-plug locking lever,
disconnect the multi-plug and unhook it from
the module. Remove the module.
4Refit by reversing the removal operations.
Make sure that the multi-plug is properly
engaged before refitting the module.
Front
1Ensure that the handbrake is applied. Raise
and support the front of the vehicle.
2From under the bonnet disconnect the
wheel sensor wiring multi-plug. Unclip the
wiring, working towards the sensor.
3Remove the securing bolt and withdraw the
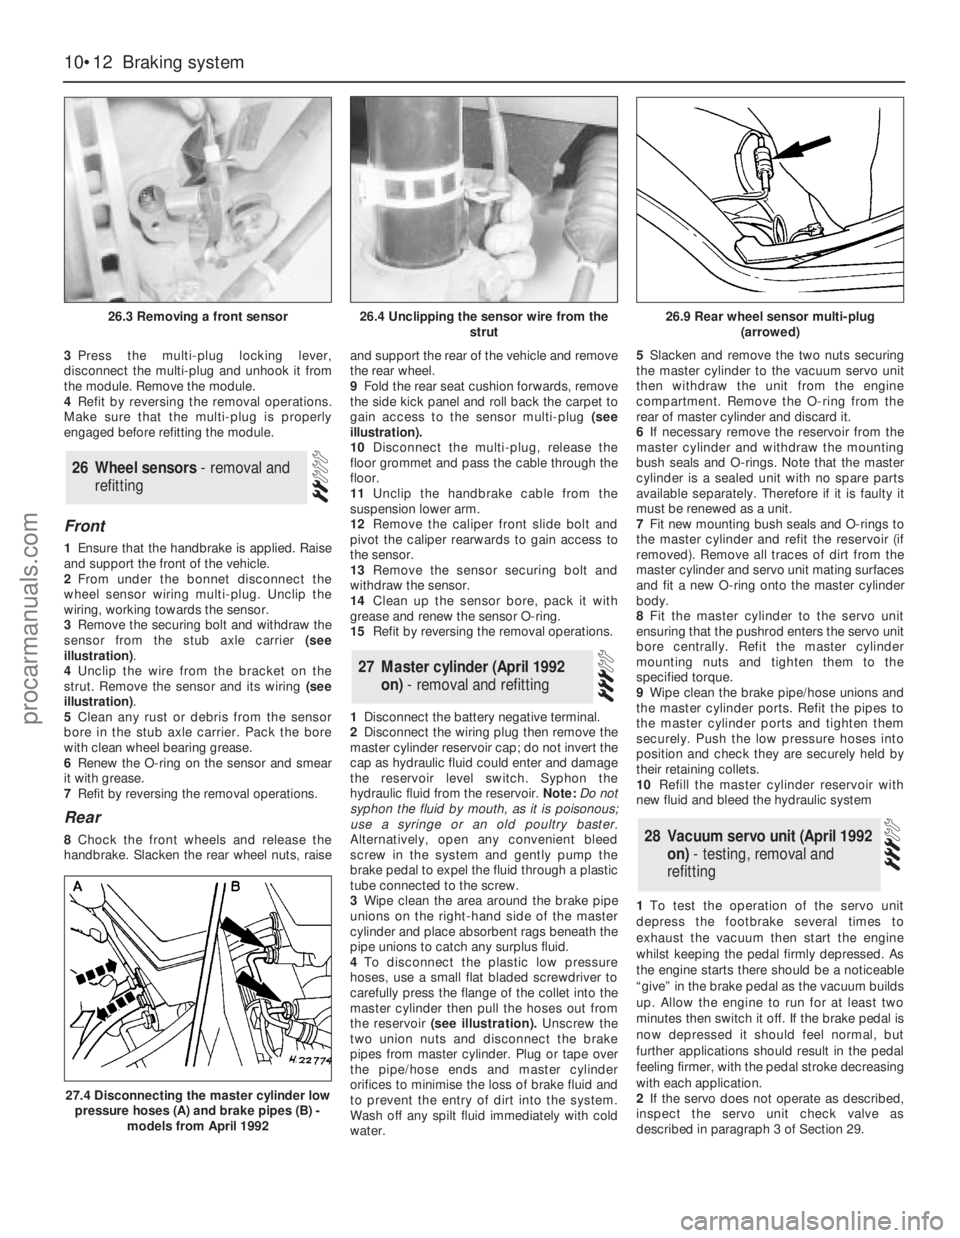
sensor from the stub axle carrier (see
illustration).
4Unclip the wire from the bracket on the
strut. Remove the sensor and its wiring (see
illustration).
5Clean any rust or debris from the sensor
bore in the stub axle carrier. Pack the bore
with clean wheel bearing grease.
6Renew the O-ring on the sensor and smear
it with grease.
7Refit by reversing the removal operations.
Rear
8Chock the front wheels and release the
handbrake. Slacken the rear wheel nuts, raiseand support the rear of the vehicle and remove
the rear wheel.
9Fold the rear seat cushion forwards, remove
the side kick panel and roll back the carpet to
gain access to the sensor multi-plug (see
illustration).
10Disconnect the multi-plug, release the
floor grommet and pass the cable through the
floor.
11Unclip the handbrake cable from the
suspension lower arm.
12Remove the caliper front slide bolt and
pivot the caliper rearwards to gain access to
the sensor.
13Remove the sensor securing bolt and
withdraw the sensor.
14Clean up the sensor bore, pack it with
grease and renew the sensor O-ring.
15Refit by reversing the removal operations.
1Disconnect the battery negative terminal.
2Disconnect the wiring plug then remove the
master cylinder reservoir cap; do not invert the
cap as hydraulic fluid could enter and damage
the reservoir level switch. Syphon the
hydraulic fluid from the reservoir. Note: Do not
syphon the fluid by mouth, as it is poisonous;
use a syringe or an old poultry baster.
Alternatively, open any convenient bleed
screw in the system and gently pump the
brake pedal to expel the fluid through a plastic
tube connected to the screw.
3Wipe clean the area around the brake pipe
unions on the right-hand side of the master
cylinder and place absorbent rags beneath the
pipe unions to catch any surplus fluid.
4To disconnect the plastic low pressure
hoses, use a small flat bladed screwdriver to
carefully press the flange of the collet into the
master cylinder then pull the hoses out from
the reservoir(see illustration).Unscrew the
two union nuts and disconnect the brake
pipes from master cylinder. Plug or tape over
the pipe/hose ends and master cylinder
orifices to minimise the loss of brake fluid and
to prevent the entry of dirt into the system.
Wash off any spilt fluid immediately with cold
water.5Slacken and remove the two nuts securing
the master cylinder to the vacuum servo unit
then withdraw the unit from the engine
compartment. Remove the O-ring from the
rear of master cylinder and discard it.
6If necessary remove the reservoir from the
master cylinder and withdraw the mounting
bush seals and O-rings. Note that the master
cylinder is a sealed unit with no spare parts
available separately. Therefore if it is faulty it
must be renewed as a unit.
7Fit new mounting bush seals and O-rings to
the master cylinder and refit the reservoir (if
removed). Remove all traces of dirt from the
master cylinder and servo unit mating surfaces
and fit a new O-ring onto the master cylinder
body.
8Fit the master cylinder to the servo unit
ensuring that the pushrod enters the servo unit
bore centrally. Refit the master cylinder
mounting nuts and tighten them to the
specified torque.
9Wipe clean the brake pipe/hose unions and
the master cylinder ports. Refit the pipes to
the master cylinder ports and tighten them
securely. Push the low pressure hoses into
position and check they are securely held by
their retaining collets.
10Refill the master cylinder reservoir with
new fluid and bleed the hydraulic system
1To test the operation of the servo unit
depress the footbrake several times to
exhaust the vacuum then start the engine
whilst keeping the pedal firmly depressed. As
the engine starts there should be a noticeable
“give” in the brake pedal as the vacuum builds
up. Allow the engine to run for at least two
minutes then switch it off. If the brake pedal is
now depressed it should feel normal, but
further applications should result in the pedal
feeling firmer, with the pedal stroke decreasing
with each application.
2If the servo does not operate as described,
inspect the servo unit check valve as
describedin paragraph 3 of Section 29.28Vacuum servo unit (April 1992
on) - testing, removal and
refitting
27Master cylinder (April 1992
on) - removal and refitting
26Wheel sensors - removal and
refitting
10•12Braking system
26.3 Removing a front sensor
27.4 Disconnecting the master cylinder low
pressure hoses (A) and brake pipes (B) -
models from April 1992
26.4 Unclipping the sensor wire from the
strut26.9 Rear wheel sensor multi-plug
(arrowed)
procarmanuals.com
Page 142 of 255
3If the servo unit still fails to operate
satisfactorily the fault lies within the unit itself.
Repairs to the unit are not possible.
4Remove the master cylinder (Section 27).
5Disconnect the vacuum hose from the servo
unit taking care not to displace the rubber
sealing grommet. Disconnect the wiring plug
from the Pedal Travel Sensor (PTS) which is
situated on the front of the servo.
6Working from inside the vehicle, remove the
servo pushrod retaining clip from the brake
pedal. If necessary, to improve access to the
brake pedal remove the right-hand lower facia
panel .
7Slacken and remove the four nuts securing
the servo unit to the bulkhead, then return to
the engine compartment and remove the
servo unit from the vehicle. Remove the
gasket from the rear of the unit and discard it.
8Note that the vacuum servo unit is a sealed
assembly with no spare parts available
separately. Therefore if it is faulty it must be
renewed as a unit. Inspect the vacuum servo
vacuum hose sealing grommet for damage or
deterioration and renew if necessary.
9Remove all traces of dirt from the servo unit
and bulkhead mating surfaces and fit a new
gasket onto the rear of the servo.
10Manoeuvre the servo unit into position,
ensuring that the servo unit pushrod is
correctly located with the hole in the pedal.
Refit the servo unit retaining nuts and tighten
them to the specified torque setting. Secure
the pushrod in position with the retaining clip
11Carefully refit the vacuum hose to the servo
unit taking great care not to damage or displace
the sealing grommet. Reconnect the wiring
connector to the Pedal Travel Sensor (PTS).
12Refit the master cylinder as described
above. On completion start the engine and
check the operation of the servo unit.
1Disconnect the vacuum hose from the servo
unit taking care not to displace the rubber
sealing grommet.
2To disconnect the hose from the inlet
manifold, use a small flat-bladed screwdriver
to carefully press the flange of the collet into
the manifold then pull the hose out and
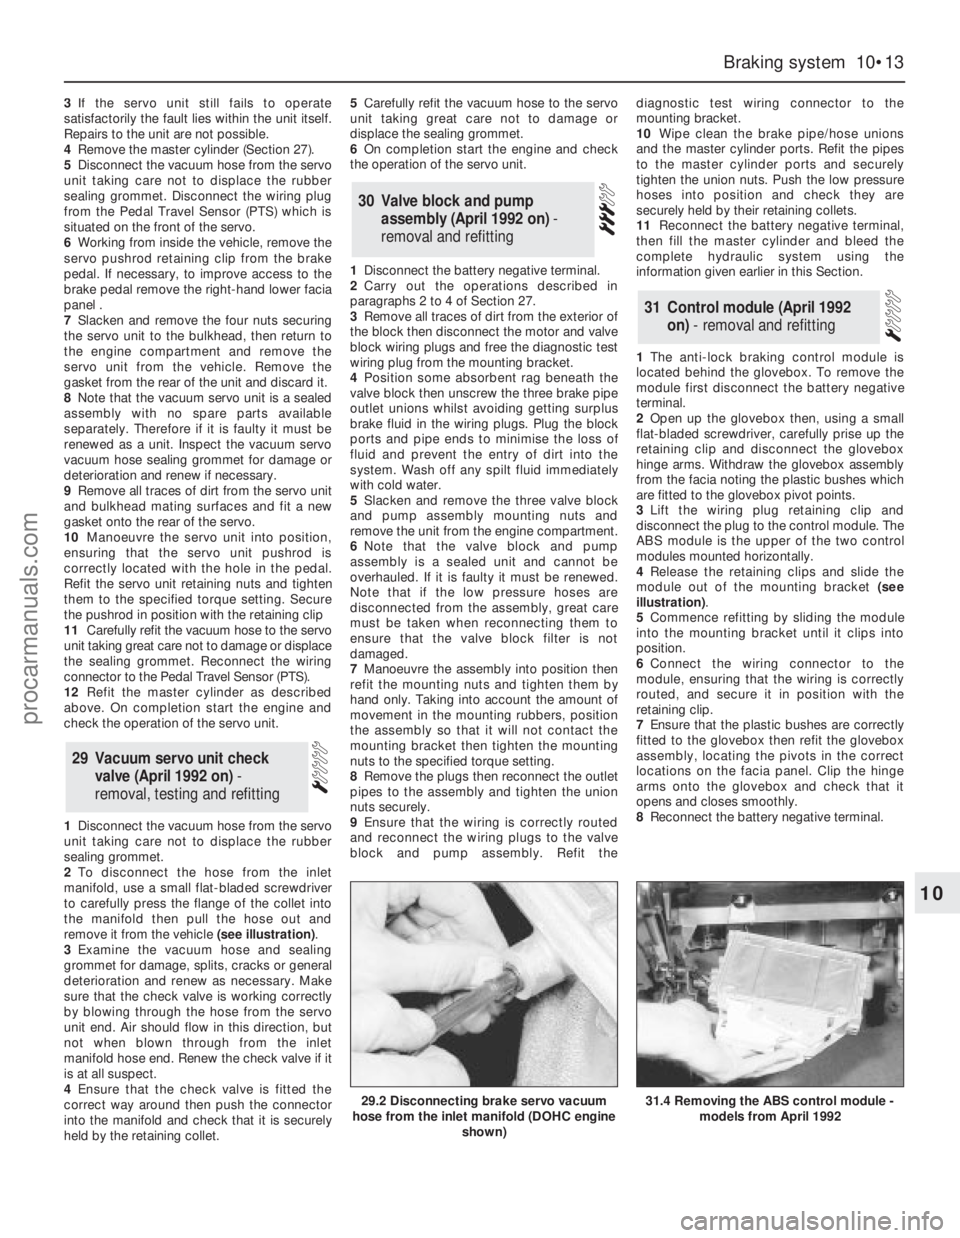
remove it from the vehicle (see illustration).
3Examine the vacuum hose and sealing
grommet for damage, splits, cracks or general
deterioration and renew as necessary. Make
sure that the check valve is working correctly
by blowing through the hose from the servo
unit end. Air should flow in this direction, but
not when blown through from the inlet
manifold hose end. Renew the check valve if it
is at all suspect.
4Ensure that the check valve is fitted the
correct way around then push the connector
into the manifold and check that it is securely
held by the retaining collet.5Carefully refit the vacuum hose to the servo
unit taking great care not to damage or
displace the sealing grommet.
6On completion start the engine and check
the operation of the servo unit.
1Disconnect the battery negative terminal.
2Carry out the operations described in
paragraphs 2 to 4 of Section 27.
3Remove all traces of dirt from the exterior of
the block then disconnect the motor and valve
block wiring plugs and free the diagnostic test
wiring plug from the mounting bracket.
4Position some absorbent rag beneath the
valve block then unscrew the three brake pipe
outlet unions whilst avoiding getting surplus
brake fluid in the wiring plugs. Plug the block
ports and pipe ends to minimise the loss of
fluid and prevent the entry of dirt into the
system. Wash off any spilt fluid immediately
with cold water.
5Slacken and remove the three valve block
and pump assembly mounting nuts and
remove the unit from the engine compartment.
6Note that the valve block and pump
assembly is a sealed unit and cannot be
overhauled. If it is faulty it must be renewed.
Note that if the low pressure hoses are
disconnected from the assembly, great care
must be taken when reconnecting them to
ensure that the valve block filter is not
damaged.
7Manoeuvre the assembly into position then
refit the mounting nuts and tighten them by
hand only. Taking into account the amount of
movement in the mounting rubbers, position
the assembly so that it will not contact the
mounting bracket then tighten the mounting
nuts to the specified torque setting.
8Remove the plugs then reconnect the outlet
pipes to the assembly and tighten the union
nuts securely.
9Ensure that the wiring is correctly routed
and reconnect the wiring plugs to the valve
block and pump assembly. Refit thediagnostic test wiring connector to the
mounting bracket.
10Wipe clean the brake pipe/hose unions
and the master cylinder ports. Refit the pipes
to the master cylinder ports and securely
tighten the union nuts. Push the low pressure
hoses into position and check they are
securely held by their retaining collets.
11Reconnect the battery negative terminal,
then fill the master cylinder and bleed the
complete hydraulic system using the
information given earlier in this Section.
1The anti-lock braking control module is
located behind the glovebox. To remove the
module first disconnect the battery negative
terminal.
2Open up the glovebox then, using a small
flat-bladed screwdriver, carefully prise up the
retaining clip and disconnect the glovebox
hinge arms. Withdraw the glovebox assembly
from the facia noting the plastic bushes which
are fitted to the glovebox pivot points.
3Lift the wiring plug retaining clip and
disconnect the plug to the control module. The
ABS module is the upper of the two control
modules mounted horizontally.
4Release the retaining clips and slide the
module out of the mounting bracket (see
illustration).
5Commence refitting by sliding the module
into the mounting bracket until it clips into
position.
6Connect the wiring connector to the
module, ensuring that the wiring is correctly
routed, and secure it in position with the
retaining clip.
7Ensure that the plastic bushes are correctly
fitted to the glovebox then refit the glovebox
assembly, locating the pivots in the correct
locations on the facia panel. Clip the hinge
arms onto the glovebox and check that it
opens and closes smoothly.
8Reconnect the battery negative terminal.
31Control module (April 1992
on) - removal and refitting
30Valve block and pump
assembly (April 1992 on) -
removal and refitting
29 Vacuum servo unit check
valve (April 1992 on) -
removal, testing and refitting
Braking system 10•13
10
29.2 Disconnecting brake servo vacuum
hose from the inlet manifold (DOHC engine
shown)31.4 Removing the ABS control module -
models from April 1992
procarmanuals.com
Page 143 of 255
1Disconnect the battery negative terminal
then deplete the vacuum in the braking system
servo unit by depressing the footbrake several
times.
2Disconnect the wiring plug from the sensor
which is situated on the front of the vacuum
servo unit.
3Using a small flat-bladed screwdriver, prise
off the retaining circlip, then carefully withdraw
the sensor from the servo unit taking great
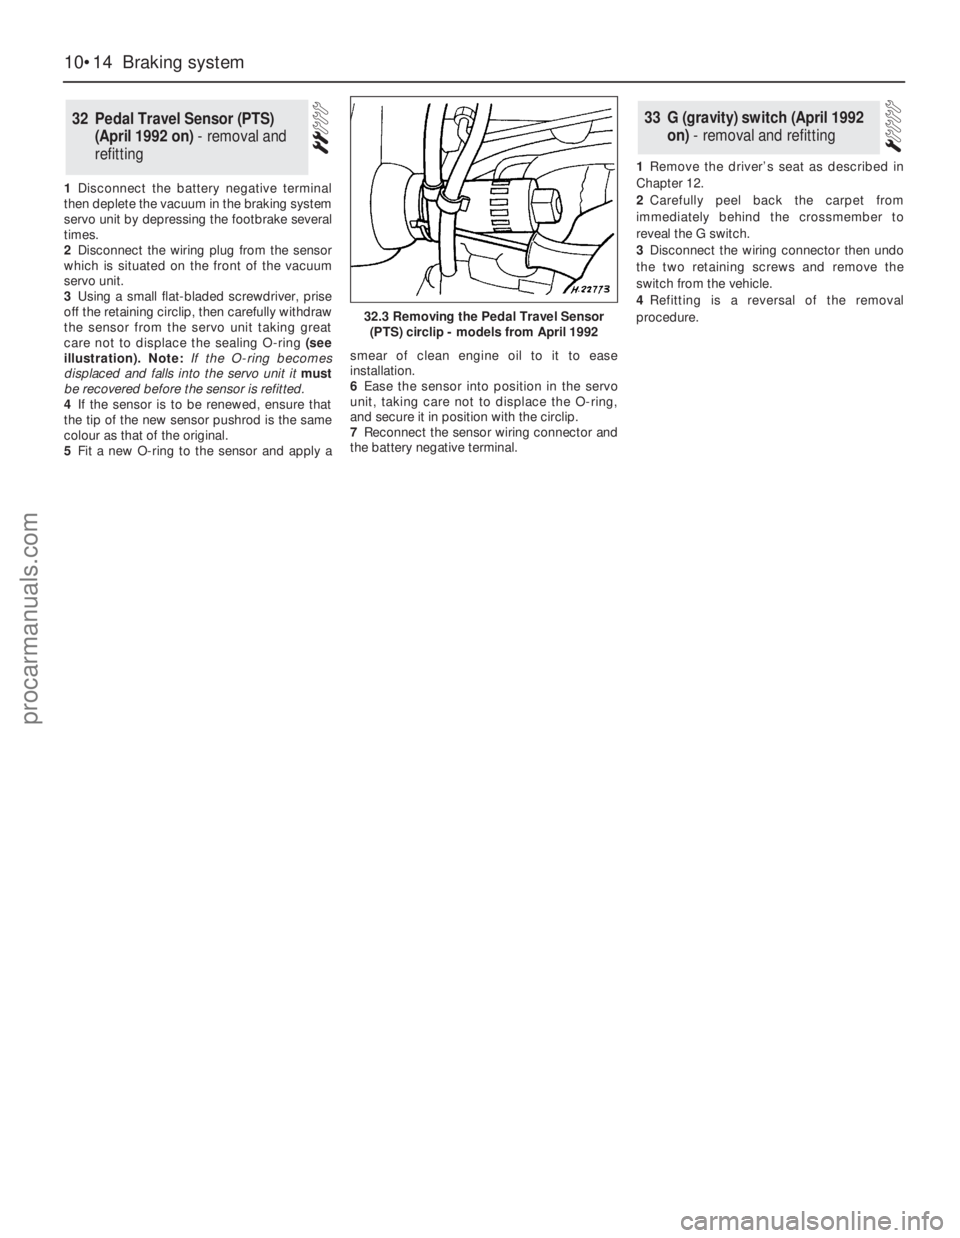
care not to displace the sealing O-ring (see
illustration).Note:If the O-ring becomes
displaced and falls into the servo unit it must
be recovered before the sensor is refitted.
4If the sensor is to be renewed, ensure that
the tip of the new sensor pushrod is the same
colour as that of the original.
5Fit a new O-ring to the sensor and apply asmear of clean engine oil to it to ease
installation.
6Ease the sensor into position in the servo
unit, taking care not to displace the O-ring,
and secure it in position with the circlip.
7Reconnect the sensor wiring connector and
the battery negative terminal.1Remove the driver’s seat as described in
Chapter 12.
2Carefully peel back the carpet from
immediately behind the crossmember to
reveal the G switch.
3Disconnect the wiring connector then undo
the two retaining screws and remove the
switch from the vehicle.
4Refitting is a reversal of the removal
procedure.
33G (gravity) switch (April 1992
on) - removal and refitting32Pedal Travel Sensor (PTS)
(April 1992 on) - removal and
refitting
10•14Braking system
32.3 Removing the Pedal Travel Sensor
(PTS) circlip - models from April 1992
procarmanuals.com
Page 144 of 255
Chapter 11
Steering and suspension
Front anti-roll bar - removal and refitting . . . . . . . . . . . . . . . . . . . . .19
Front anti-roll bar bushes - renewal . . . . . . . . . . . . . . . . . . . . . . . . .20
Front stub axle carrier - removal and refitting . . . . . . . . . . . . . . . . .16
Front suspension crossmember - removal and refitting . . . . . . . . .15
Front suspension lower arm - removal, overhaul and refitting . . . . .18
Front suspension strut - dismantling and reassembly . . . . . . . . . . .22
Front suspension strut - removal and refitting . . . . . . . . . . . . . . . . .21
Front wheel alignment - checking and adjusting . . . . . . . . . . . . . . .14
Front wheel bearings - renewal . . . . . . . . . . . . . . . . . . . . . . . . . . . .17
General information . . . . . . . . . . . . . . . . . . . . . . . . . . . . . . . . . . . . . .1
Power steering fluid - level check and bleeding . . . . . . . . . . . . . . . . .2
Power steering hoses - removal and refitting . . . . . . . . . . . . . . . . . .12
Power steering pump - removal and refitting . . . . . . . . . . . . . . . . . .11
Power steering pump drivebelt - removal, refitting and tensioning .10
Rear anti-roll bar - removal and refitting . . . . . . . . . . . . . . . . . . . . .30
Rear crossmember insulator - removal and refitting . . . . . . . . . . . .28
Rear hub - removal and refitting . . . . . . . . . . . . . . . . . . . . . . . . . . . .24
Rear shock absorber - removal and refitting . . . . . . . . . . . . . . . . . .31Rear spring - removal and refitting . . . . . . . . . . . . . . . . . . . . . . . . . .27
Rear suspension and final drive assembly - removal and refitting . .23
Rear suspension lower arm - removal and refitting . . . . . . . . . . . . .29
Rear wheel bearings - renewal . . . . . . . . . . . . . . . . . . . . . . . . . . . . .25
Ride height control compressor - removal and refitting . . . . . . . . . .33
Ride height control sensor - removal and refitting . . . . . . . . . . . . . .34
Ride height control system - general information . . . . . . . . . . . . . .32
Steering column - removal and refitting . . . . . . . . . . . . . . . . . . . . . . .7
Steering column lock - removal and refitting . . . . . . . . . . . . . . . . . . .8
Steering gear - removal and refitting . . . . . . . . . . . . . . . . . . . . . . . . .3
Steering intermediate shaft and flexible coupling - removal and
refitting . . . . . . . . . . . . . . . . . . . . . . . . . . . . . . . . . . . . . . . . . . . . . .9
Steering rack bellows - renewal in vehicle . . . . . . . . . . . . . . . . . . . . .4
Steering wheel - centralising . . . . . . . . . . . . . . . . . . . . . . . . . . . . . . .6
Steering wheel - removal and refitting . . . . . . . . . . . . . . . . . . . . . . . .5
Track rod end - removal and refitting . . . . . . . . . . . . . . . . . . . . . . . .13
Wheel stud - renewal . . . . . . . . . . . . . . . . . . . . . . . . . . . . . . . . . . . .26
General
Suspension type:
Front . . . . . . . . . . . . . . . . . . . . . . . . . . . . . . . . . . . . . . . . . . . . . . . . . . Independent, MacPherson struts and anti-roll bar
Rear . . . . . . . . . . . . . . . . . . . . . . . . . . . . . . . . . . . . . . . . . . . . . . . . . . . Independent, semi-trailing arms and anti-roll bar; ride height
control optionally available
Steering type . . . . . . . . . . . . . . . . . . . . . . . . . . . . . . . . . . . . . . . . . . . . . . Rack and pinion, power-assisted on some models
Front wheel alignment
Toe:
Setting value . . . . . . . . . . . . . . . . . . . . . . . . . . . . . . . . . . . . . . . . . . . . 2 ± 1 mm (0.08 ± 0.04 in) toe-in
Tolerance in service . . . . . . . . . . . . . . . . . . . . . . . . . . . . . . . . . . . . . . 0.5 mm (0.02 in) toe-out to 4.5 mm (0.18 in) toe-in
Castor :
SOHC and 2.8 litre models:
Standard, without ride height control . . . . . . . . . . . . . . . . . . . . . . . + 1°51’ ± 1°00’
Standard, with ride height control . . . . . . . . . . . . . . . . . . . . . . . . . . + 1°58’ ± 1°00’
Heavy duty . . . . . . . . . . . . . . . . . . . . . . . . . . . . . . . . . . . . . . . . . . . + 1°46’ ± 1°00’
DOHC carburettor and low series fuel-injection models . . . . . . . . . . + 2°27’ ± 1°00’
DOHC high series models . . . . . . . . . . . . . . . . . . . . . . . . . . . . . . . . . . + 2°26’± 1°00’
2.4 litre:
low series models . . . . . . . . . . . . . . . . . . . . . . . . . . . . . . . . . . . . . . + 2°17’ ± 1°00’
high series models . . . . . . . . . . . . . . . . . . . . . . . . . . . . . . . . . . . . . + 2°50’ ± 1°00’
2.9 litre models . . . . . . . . . . . . . . . . . . . . . . . . . . . . . . . . . . . . . . . . . . + 2°22’ ± 1°00’
11•1
Easy,suitable for
novice with little
experienceFairly easy,suitable
for beginner with
some experienceFairly difficult,
suitable for competent
DIY mechanicDifficult,suitable for
experienced DIY
mechanicVery difficult,
suitable for expert
DIY or professional
Degrees of difficulty
Specifications Contents
11
procarmanuals.com
 1
1 2
2 3
3 4
4 5
5 6
6 7
7 8
8 9
9 10
10 11
11 12
12 13
13 14
14 15
15 16
16 17
17 18
18 19
19 20
20 21
21 22
22 23
23 24
24 25
25 26
26 27
27 28
28 29
29 30
30 31
31 32
32 33
33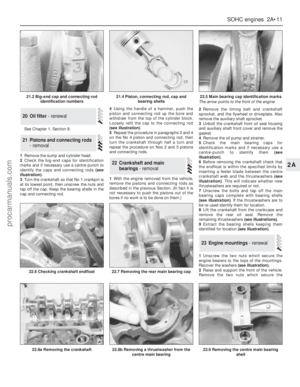 34
34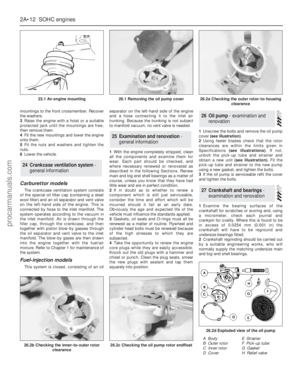 35
35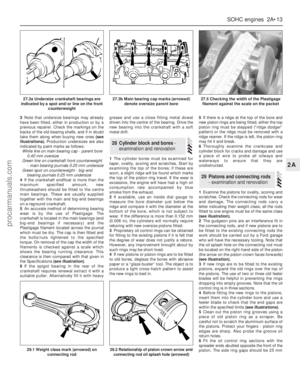 36
36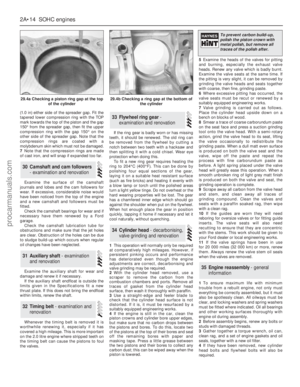 37
37 38
38 39
39 40
40 41
41 42
42 43
43 44
44 45
45 46
46 47
47 48
48 49
49 50
50 51
51 52
52 53
53 54
54 55
55 56
56 57
57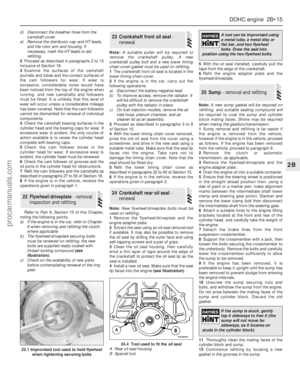 58
58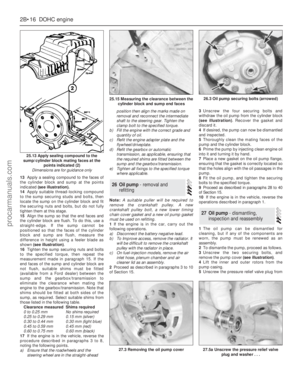 59
59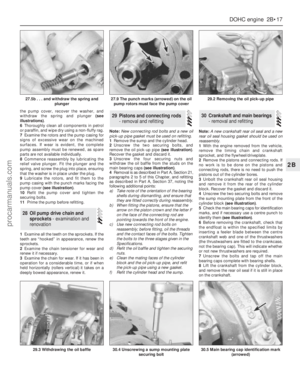 60
60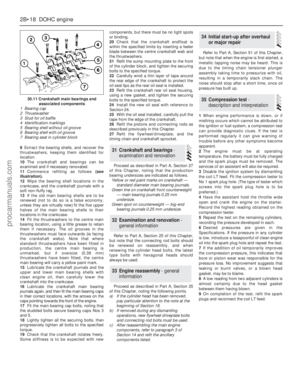 61
61 62
62 63
63 64
64 65
65 66
66 67
67 68
68 69
69 70
70 71
71 72
72 73
73 74
74 75
75 76
76 77
77 78
78 79
79 80
80 81
81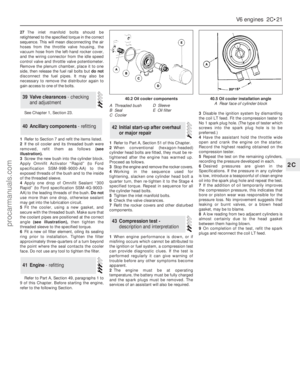 82
82 83
83 84
84 85
85 86
86 87
87 88
88 89
89 90
90 91
91 92
92 93
93 94
94 95
95 96
96 97
97 98
98 99
99 100
100 101
101 102
102 103
103 104
104 105
105 106
106 107
107 108
108 109
109 110
110 111
111 112
112 113
113 114
114 115
115 116
116 117
117 118
118 119
119 120
120 121
121 122
122 123
123 124
124 125
125 126
126 127
127 128
128 129
129 130
130 131
131 132
132 133
133 134
134 135
135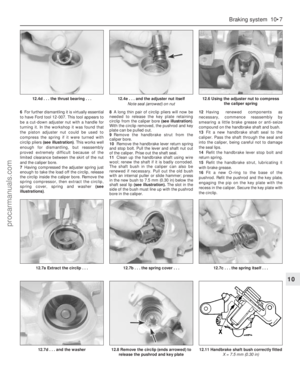 136
136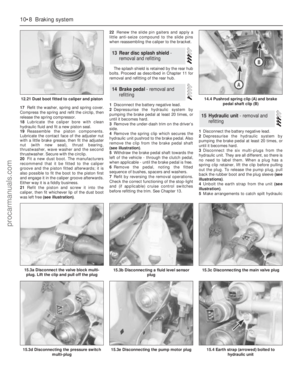 137
137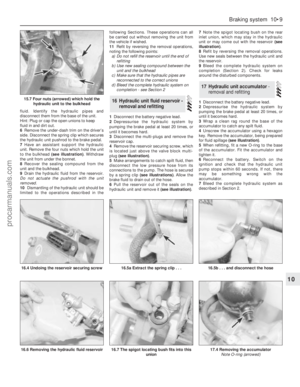 138
138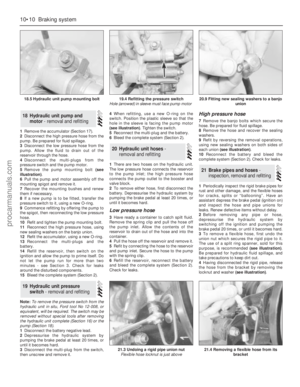 139
139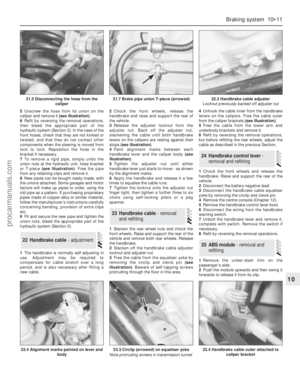 140
140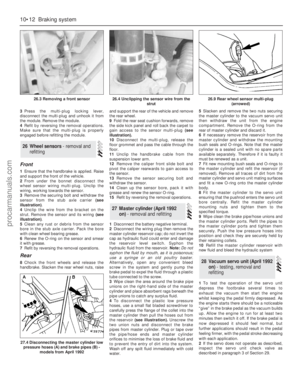 141
141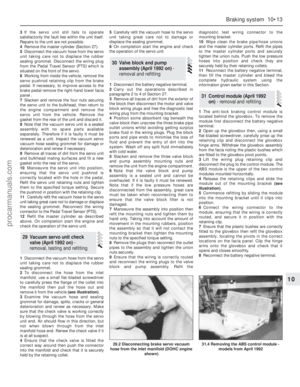 142
142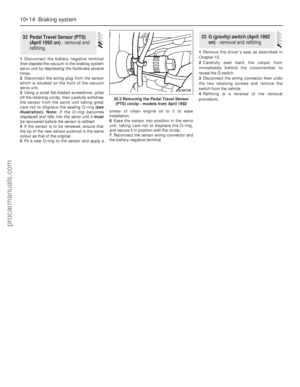 143
143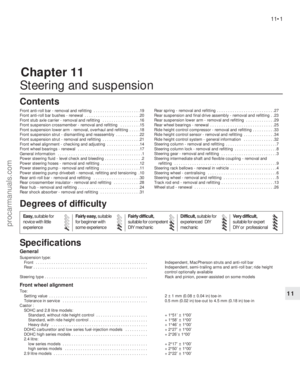 144
144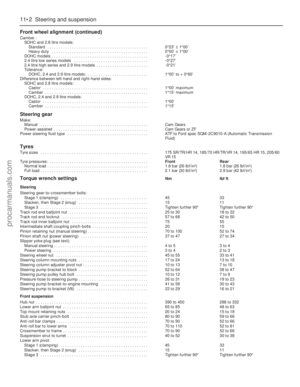 145
145 146
146 147
147 148
148 149
149 150
150 151
151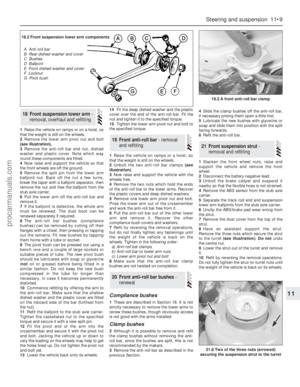 152
152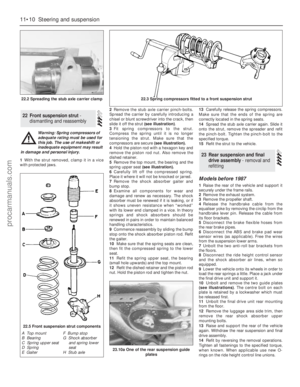 153
153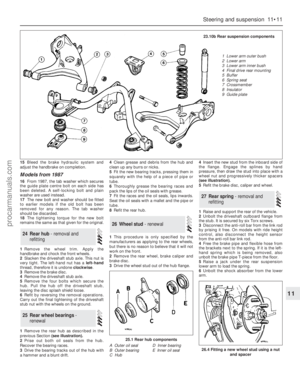 154
154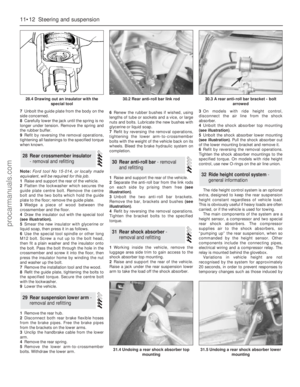 155
155 156
156 157
157 158
158 159
159 160
160 161
161 162
162 163
163 164
164 165
165 166
166 167
167 168
168 169
169 170
170 171
171 172
172 173
173 174
174 175
175 176
176 177
177 178
178 179
179 180
180 181
181 182
182 183
183 184
184 185
185 186
186 187
187 188
188 189
189 190
190 191
191 192
192 193
193 194
194 195
195 196
196 197
197 198
198 199
199 200
200 201
201 202
202 203
203 204
204 205
205 206
206 207
207 208
208 209
209 210
210 211
211 212
212 213
213 214
214 215
215 216
216 217
217 218
218 219
219 220
220 221
221 222
222 223
223 224
224 225
225 226
226 227
227 228
228 229
229 230
230 231
231 232
232 233
233 234
234 235
235 236
236 237
237 238
238 239
239 240
240 241
241 242
242 243
243 244
244 245
245 246
246 247
247 248
248 249
249 250
250 251
251 252
252 253
253 254
254


