Page 185 of 255
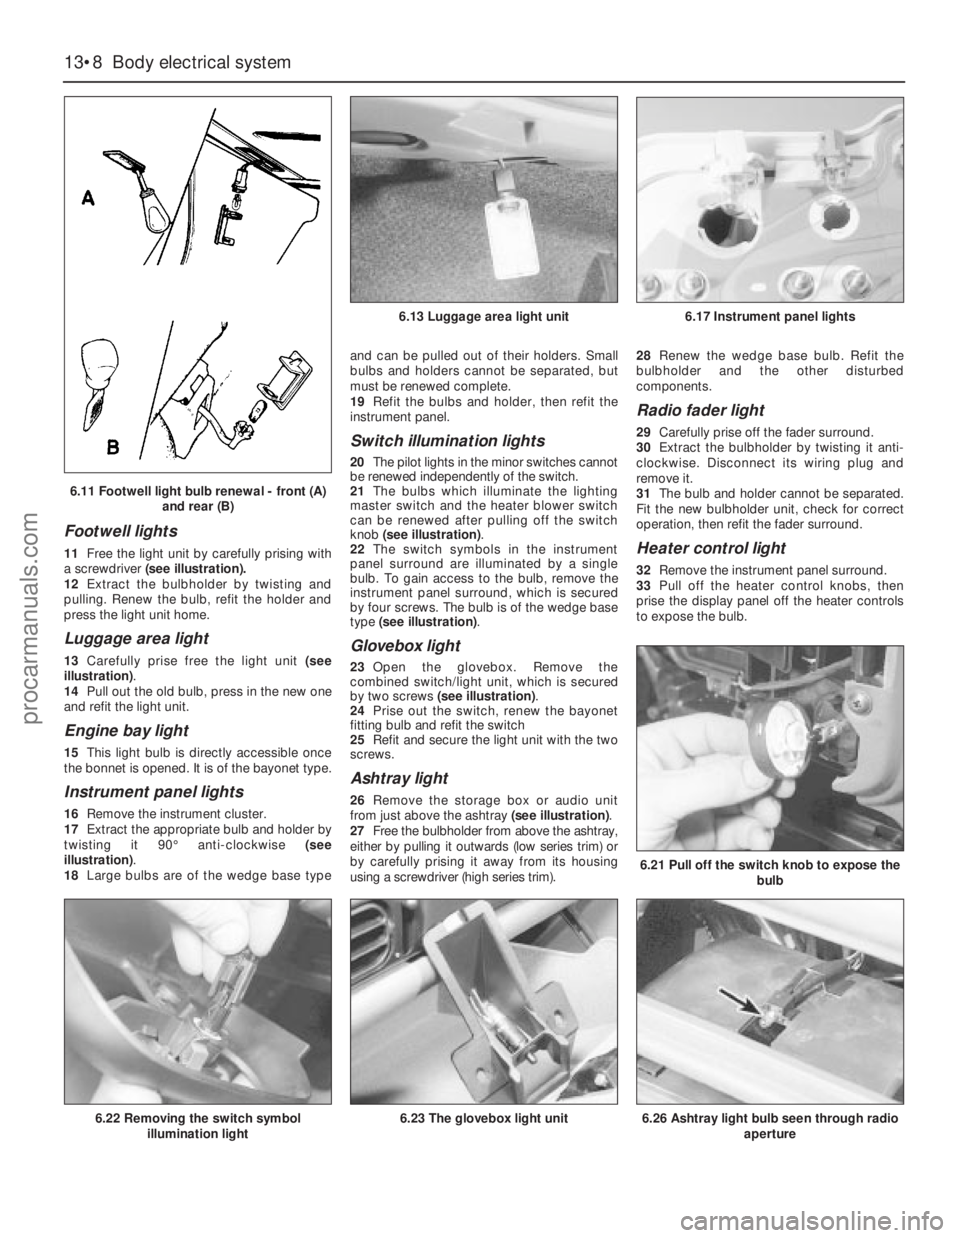
Footwell lights
11Free the light unit by carefully prising with
a screwdriver(see illustration).
12Extract the bulbholder by twisting and
pulling. Renew the bulb, refit the holder and
press the light unit home.
Luggage area light
13Carefully prise free the light unit (see
illustration).
14Pull out the old bulb, press in the new one
and refit the light unit.
Engine bay light
15This light bulb is directly accessible once
the bonnet is opened. It is of the bayonet type.
Instrument panel lights
16Remove the instrument cluster.
17Extract the appropriate bulb and holder by
twisting it 90°anti-clockwise (see
illustration).
18Large bulbs are of the wedge base typeand can be pulled out of their holders. Small
bulbs and holders cannot be separated, but
must be renewed complete.
19Refit the bulbs and holder, then refit the
instrument panel.
Switch illumination lights
20The pilot lights in the minor switches cannot
be renewed independently of the switch.
21The bulbs which illuminate the lighting
master switch and the heater blower switch
can be renewed after pulling off the switch
knob (see illustration).
22The switch symbols in the instrument
panel surround are illuminated by a single
bulb. To gain access to the bulb, remove the
instrument panel surround, which is secured
by four screws. The bulb is of the wedge base
type (see illustration).
Glovebox light
23Open the glovebox. Remove the
combined switch/light unit, which is secured
by two screws (see illustration).
24Prise out the switch, renew the bayonet
fitting bulb and refit the switch
25Refit and secure the light unit with the two
screws.
Ashtray light
26Remove the storage box or audio unit
from just above the ashtray (see illustration).
27Free the bulbholder from above the ashtray,
either by pulling it outwards (low series trim) or
by carefully prising it away from its housing
using a screwdriver (high series trim).28Renew the wedge base bulb. Refit the
bulbholder and the other disturbed
components.
Radio fader light
29Carefully prise off the fader surround.
30Extract the bulbholder by twisting it anti-
clockwise. Disconnect its wiring plug and
remove it.
31The bulb and holder cannot be separated.
Fit the new bulbholder unit, check for correct
operation, then refit the fader surround.
Heater control light
32Remove the instrument panel surround.
33Pull off the heater control knobs, then
prise the display panel off the heater controls
to expose the bulb.
13•8Body electrical system
6.21 Pull off the switch knob to expose the
bulb
6.26 Ashtray light bulb seen through radio
aperture6.22 Removing the switch symbol
illumination light6.23 The glovebox light unit
6.13 Luggage area light unit6.17 Instrument panel lights
6.11 Footwell light bulb renewal - front (A)
and rear (B)
procarmanuals.com
Page 186 of 255
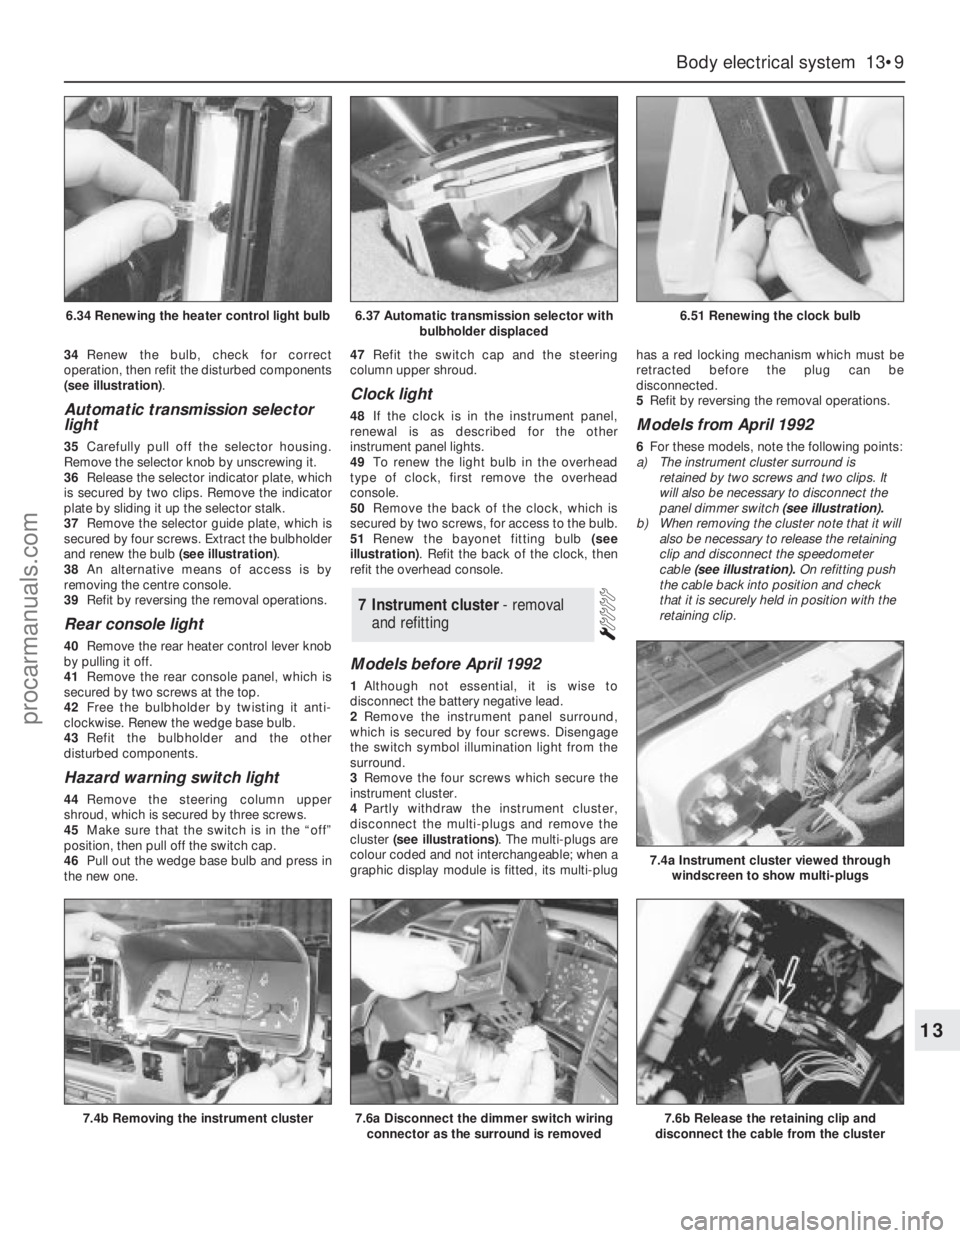
34Renew the bulb, check for correct
operation, then refit the disturbed components
(see illustration).
Automatic transmission selector
light
35Carefully pull off the selector housing.
Remove the selector knob by unscrewing it.
36Release the selector indicator plate, which
is secured by two clips. Remove the indicator
plate by sliding it up the selector stalk.
37Remove the selector guide plate, which is
secured by four screws. Extract the bulbholder
and renew the bulb (see illustration).
38An alternative means of access is by
removing the centre console.
39Refit by reversing the removal operations.
Rear console light
40Remove the rear heater control lever knob
by pulling it off.
41Remove the rear console panel, which is
secured by two screws at the top.
42Free the bulbholder by twisting it anti-
clockwise. Renew the wedge base bulb.
43Refit the bulbholder and the other
disturbed components.
Hazard warning switch light
44Remove the steering column upper
shroud, which is secured by three screws.
45Make sure that the switch is in the “off”
position, then pull off the switch cap.
46Pull out the wedge base bulb and press in
the new one.47Refit the switch cap and the steering
column upper shroud.
Clock light
48If the clock is in the instrument panel,
renewal is as described for the other
instrument panel lights.
49To renew the light bulb in the overhead
type of clock, first remove the overhead
console.
50Remove the back of the clock, which is
secured by two screws, for access to the bulb.
51Renew the bayonet fitting bulb (see
illustration). Refit the back of the clock, then
refit the overhead console.
Models before April 1992
1Although not essential, it is wise to
disconnect the battery negative lead.
2Remove the instrument panel surround,
which is secured by four screws. Disengage
the switch symbol illumination light from the
surround.
3Remove the four screws which secure the
instrument cluster.
4Partly withdraw the instrument cluster,
disconnect the multi-plugs and remove the
cluster (see illustrations). The multi-plugs are
colour coded and not interchangeable; when a
graphic display module is fitted, its multi-plughas a red locking mechanism which must be
retracted before the plug can be
disconnected.
5Refit by reversing the removal operations.
Models from April 1992
6For these models, note the following points:
a)The instrument cluster surround is
retained by two screws and two clips. It
will also be necessary to disconnect the
panel dimmer switch (see illustration).
b)When removing the cluster note that it will
also be necessary to release the retaining
clip and disconnect the speedometer
cable (see illustration).On refitting push
the cable back into position and check
that it is securely held in position with the
retaining clip.
7Instrument cluster - removal
and refitting
Body electrical system 13•9
13
6.37 Automatic transmission selector with
bulbholder displaced6.51 Renewing the clock bulb
7.4b Removing the instrument cluster7.6a Disconnect the dimmer switch wiring
connector as the surround is removed7.6b Release the retaining clip and
disconnect the cable from the cluster
7.4a Instrument cluster viewed through
windscreen to show multi-plugs
6.34 Renewing the heater control light bulb
procarmanuals.com
Page 187 of 255
1With the instrument cluster removed, a
particular gauge or other component can be
renewed by following the appropriate parts of
this Section.
2Remove all the light bulbs and holders from
the rear of the panel by twisting them anti-
clockwise.
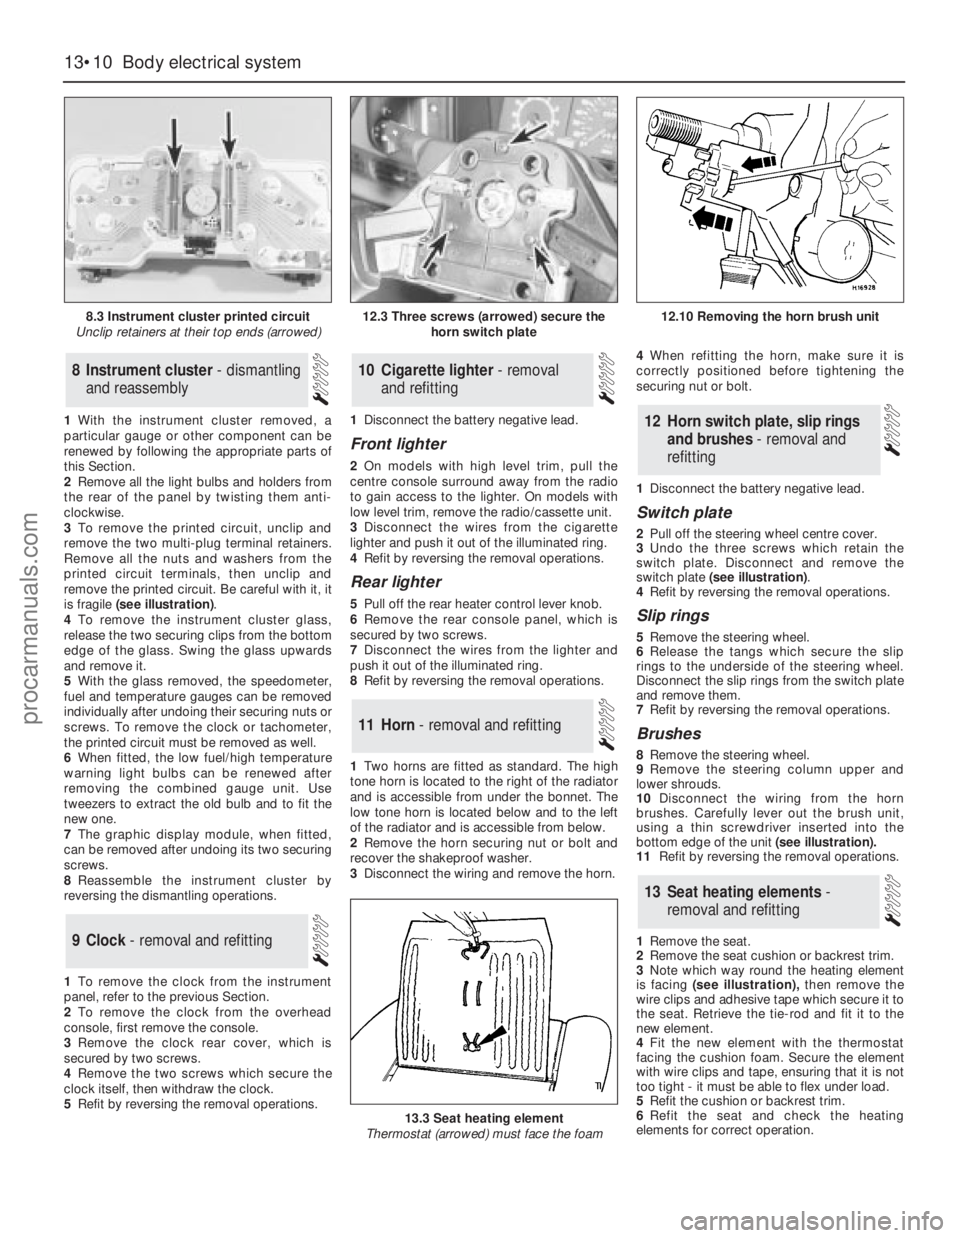
3To remove the printed circuit, unclip and
remove the two multi-plug terminal retainers.
Remove all the nuts and washers from the
printed circuit terminals, then unclip and
remove the printed circuit. Be careful with it, it
is fragile (see illustration).
4To remove the instrument cluster glass,
release the two securing clips from thebottom
edge of the glass. Swing the glass upwards
and remove it.
5With the glass removed, the speedometer,
fuel and temperature gauges can be removed
individually after undoing their securing nuts or
screws. To remove the clock or tachometer,
the printed circuit must be removed as well.
6When fitted, the low fuel/high temperature
warning light bulbs can be renewed after
removing the combined gauge unit. Use
tweezers to extract the old bulb and to fit the
new one.
7The graphic display module, when fitted,
can be removed after undoing its two securing
screws.
8Reassemble the instrument cluster by
reversing the dismantling operations.
1To remove the clock from the instrument
panel, refer to the previous Section.
2To remove the clock from the overhead
console, first remove the console.
3Remove the clock rear cover, which is
secured by two screws.
4Remove the two screws which secure the
clock itself, then withdraw the clock.
5Refit by reversing the removal operations.1Disconnect the battery negative lead.
Front lighter
2On models with high level trim, pull the
centre console surround away from the radio
to gain access to the lighter. On models with
low level trim, remove the radio/cassette unit.
3Disconnect the wires from the cigarette
lighter and push it out of the illuminated ring.
4Refit by reversing the removal operations.
Rear lighter
5Pull off the rear heater control lever knob.
6Remove the rear console panel, which is
secured by two screws.
7Disconnect the wires from the lighter and
push it out of the illuminated ring.
8Refit by reversing the removal operations.
1Two horns are fitted as standard. The high
tone horn is located to the right of the radiator
and is accessible from under the bonnet. The
low tone horn is located below and to the left
of the radiator and is accessible from below.
2Remove the horn securing nut or bolt and
recover the shakeproof washer.
3Disconnect the wiring and remove the horn.4When refitting the horn, make sure it is
correctly positioned before tightening the
securing nut or bolt.
1Disconnect the battery negative lead.
Switch plate
2Pull off the steering wheel centre cover.
3Undo the three screws which retain the
switch plate. Disconnect and remove the
switch plate (see illustration).
4Refit by reversing the removal operations.
Slip rings
5Remove the steering wheel.
6Release the tangs which secure the slip
rings to the underside of the steering wheel.
Disconnect the slip rings from the switch plate
and remove them.
7Refit by reversing the removal operations.
Brushes
8Remove the steering wheel.
9Remove the steering column upper and
lower shrouds.
10Disconnect the wiring from the horn
brushes. Carefully lever out the brush unit,
using a thin screwdriver inserted into the
bottom edge of the unit(see illustration).
11Refit by reversing the removal operations.
1Remove the seat.
2Remove the seat cushion or backrest trim.
3Note which way round the heating element
is facing (see illustration),then remove the
wire clips and adhesive tape which secure it to
the seat. Retrieve the tie-rod and fit it to the
new element.
4Fit the new element with the thermostat
facing the cushion foam. Secure the element
with wire clips and tape, ensuring that it is not
too tight - it must be able to flex under load.
5Refit the cushion or backrest trim.
6Refit the seat and check the heating
elements for correct operation.
13Seat heating elements -
removal and refitting
12Horn switch plate, slip rings
and brushes - removal and
refitting
11Horn - removal and refitting
10Cigarette lighter - removal
and refitting
9Clock - removal and refitting
8Instrument cluster - dismantling
and reassembly
13•10Body electrical system
8.3 Instrument cluster printed circuit
Unclip retainers at their top ends (arrowed)
13.3 Seat heating element
Thermostat (arrowed) must face the foam
12.3 Three screws (arrowed) secure the
horn switch plate12.10 Removing the horn brush unit
procarmanuals.com
Page 188 of 255
1Disconnect the battery negative lead.
2Remove the steering column upper and
lower shrouds.
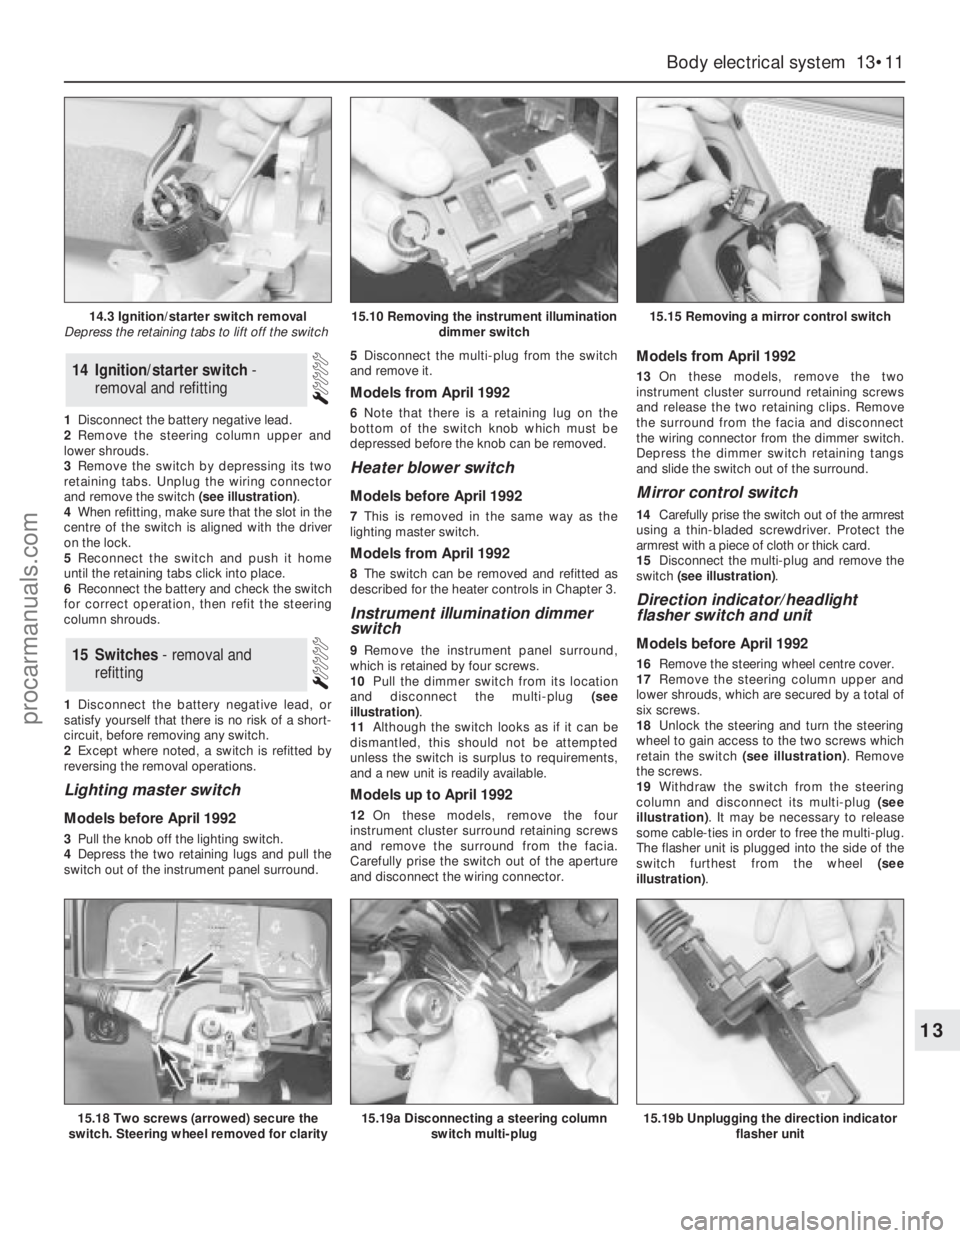
3Remove the switch by depressing its two
retaining tabs. Unplug the wiring connector
and remove the switch (see illustration).
4When refitting, make sure that the slot in the
centre of the switch is aligned with the driver
on the lock.
5Reconnect the switch and push it home
until the retaining tabs click into place.
6Reconnect the battery and check the switch
for correct operation, then refit the steering
column shrouds.
1Disconnect the battery negative lead, or
satisfy yourself that there is no risk of a short-
circuit, before removing any switch.
2Except where noted, a switch is refitted by
reversing the removal operations.
Lighting master switch
Models before April 1992
3Pull the knob off the lighting switch.
4Depress the two retaining lugs and pull the
switch out of the instrument panel surround. 5Disconnect the multi-plug from the switch
and remove it.
Models from April 1992
6Note that there is a retaining lug on the
bottom of the switch knob which must be
depressed before the knob can be removed.
Heater blower switch
Models before April 1992
7This is removed in the same way as the
lighting master switch.
Models from April 1992
8The switch can be removed and refitted as
described for the heater controls in Chapter 3.
Instrument illumination dimmer
switch
9Remove the instrument panel surround,
which is retained by four screws.
10Pull the dimmer switch from its location
and disconnect the multi-plug (see
illustration).
11Although the switch looks as if it can be
dismantled, this should not be attempted
unless the switch is surplus to requirements,
and a new unit is readily available.
Models up to April 1992
12On these models, remove the four
instrument cluster surround retaining screws
and remove the surround from the facia.
Carefully prise the switch out of the aperture
and disconnect the wiring connector.
Models from April 1992
13On these models, remove the two
instrument cluster surround retaining screws
and release the two retaining clips. Remove
the surround from the facia and disconnect
the wiring connector from the dimmer switch.
Depress the dimmer switch retaining tangs
and slide the switch out of the surround.
Mirror control switch
14Carefully prise the switch out of the armrest
using a thin-bladed screwdriver. Protect the
armrest with a piece of cloth or thick card.
15Disconnect the multi-plug and remove the
switch (see illustration).
Direction indicator/headlight
flasher switch and unit
Models before April 1992
16Remove the steering wheel centre cover.
17Remove the steering column upper and
lower shrouds, which are secured by a total of
six screws.
18Unlock the steering and turn the steering
wheel to gain access to the two screws which
retain the switch (see illustration). Remove
the screws.
19Withdraw the switch from the steering
column and disconnect its multi-plug (see
illustration). It may be necessary to release
some cable-ties in order to free the multi-plug.
The flasher unit is plugged into the side of the
switch furthest from the wheel (see
illustration).15Switches - removal and
refitting
14Ignition/starter switch -
removal and refitting
Body electrical system 13•11
13
14.3 Ignition/starter switch removal
Depress the retaining tabs to lift off the switch15.10 Removing the instrument illumination
dimmer switch15.15 Removing a mirror control switch
15.18 Two screws (arrowed) secure the
switch. Steering wheel removed for clarity15.19a Disconnecting a steering column
switch multi-plug15.19b Unplugging the direction indicator
flasher unit
procarmanuals.com
Page 189 of 255
20When refitting, check the switch for
correct operation before refitting the shrouds
and steering wheel centre cover. When fitting
the shrouds, be careful not to trap the switch
rubber gaiter.
Models from April 1992
21Note that if access to the switch retaining
screws cannot be gained with the steering
wheel in position, then the steering wheel
must first be removed.
Windscreen wipe/wash switch
Models before April 1992
22Proceed as described in the previous sub-
section for the direction indicator switch.
Depending on equipment, the wipe/wash
switch may have more than one multi-plug
connected to it.
Models from April 1992
23Note that if access to the switch retaining
screws cannot be gained with the steering
wheel in position, then the steering wheel
must first be removed.
Door pillar switch (for courtesy
light)
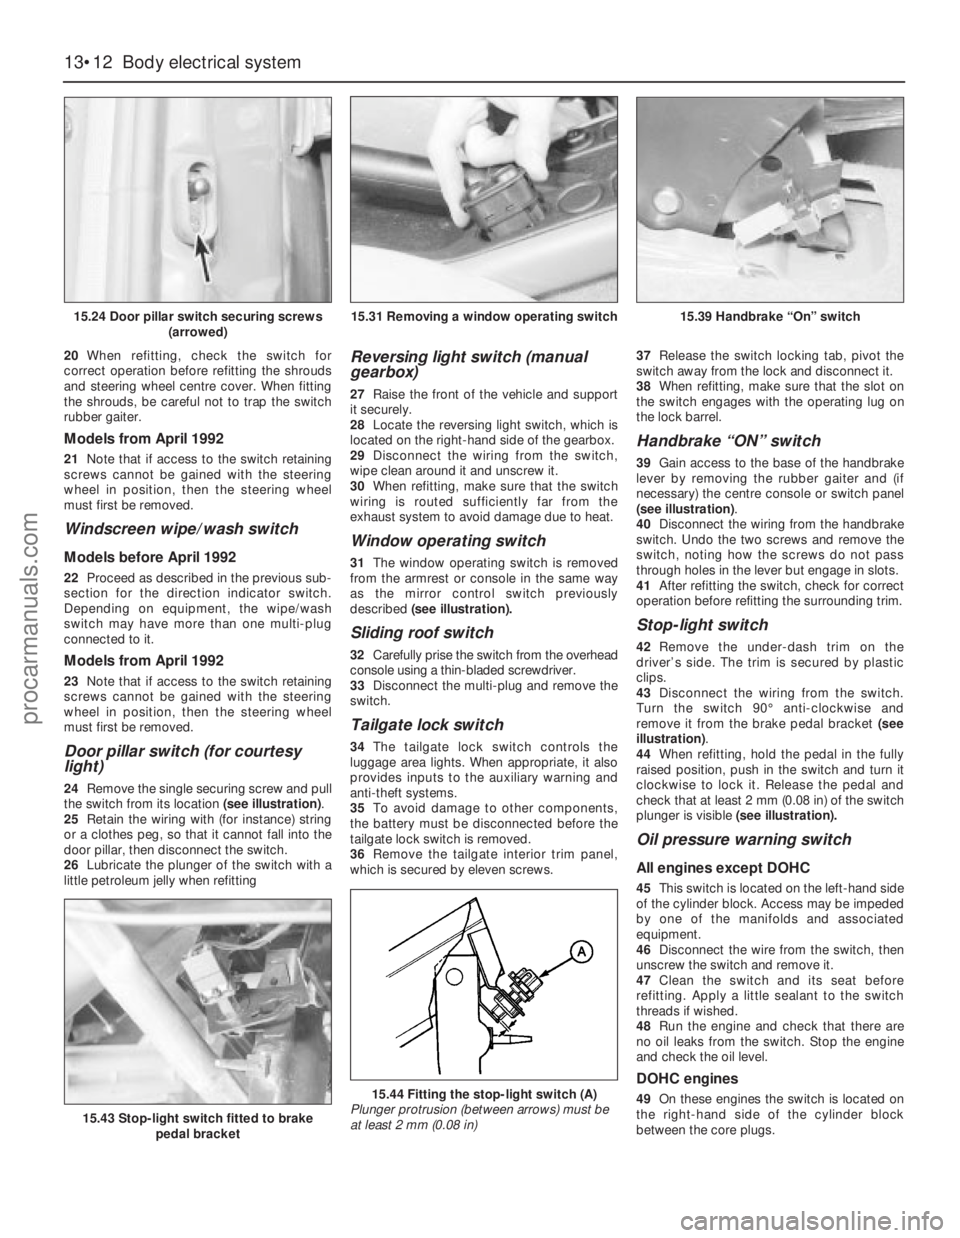
24Remove the single securing screw and pull
the switch from its location (see illustration).
25Retain the wiring with (for instance) string
or a clothes peg, so that it cannot fall into the
door pillar, then disconnect the switch.
26Lubricate the plunger of the switch with a
little petroleum jelly when refitting
Reversing light switch (manual
gearbox)
27Raise the front of the vehicle and support
it securely.
28Locate the reversing light switch, which is
located on the right-hand side of the gearbox.
29Disconnect the wiring from the switch,
wipe clean around it and unscrew it.
30When refitting, make sure that the switch
wiring is routed sufficiently far from the
exhaust system to avoid damage due to heat.
Window operating switch
31The window operating switch is removed
from the armrest or console in the same way
as the mirror control switch previously
described (see illustration).
Sliding roof switch
32Carefully prise the switch from the overhead
console using a thin-bladed screwdriver.
33Disconnect the multi-plug and remove the
switch.
Tailgate lock switch
34The tailgate lock switch controls the
luggage area lights. When appropriate, it also
provides inputs to the auxiliary warning and
anti-theft systems.
35To avoid damage to other components,
the battery must be disconnected before the
tailgate lock switch is removed.
36Remove the tailgate interior trim panel,
which is secured by eleven screws.37Release the switch locking tab, pivot the
switch away from the lock and disconnect it.
38When refitting, make sure that the slot on
the switch engages with the operating lug on
the lock barrel.
Handbrake “ON” switch
39Gain access to the base of the handbrake
lever by removing the rubber gaiter and (if
necessary) the centre console or switch panel
(see illustration).
40Disconnect the wiring from the handbrake
switch. Undo the two screws and remove the
switch, noting how the screws do not pass
through holes in the lever but engage in slots.
41After refitting the switch, check for correct
operation before refitting the surrounding trim.
Stop-light switch
42Remove the under-dash trim on the
driver’s side. The trim is secured by plastic
clips.
43Disconnect the wiring from the switch.
Turn the switch 90°anti-clockwise and
remove it from the brake pedal bracket (see
illustration).
44When refitting, hold the pedal in the fully
raised position, push in the switch and turn it
clockwise to lock it. Release the pedal and
check that at least 2 mm (0.08 in) of the switch
plunger is visible (see illustration).
Oil pressure warning switch
All engines except DOHC
45This switch is located on the left-hand side
of the cylinder block. Access may be impeded
by one of the manifolds and associated
equipment.
46Disconnect the wire from the switch, then
unscrew the switch and remove it.
47Clean the switch and its seat before
refitting. Apply a little sealant to the switch
threads if wished.
48Run the engine and check that there are
no oil leaks from the switch. Stop the engine
and check the oil level.
DOHC engines
49On these engines the switch is located on
the right-hand side of the cylinder block
between the core plugs.
13•12Body electrical system
15.24 Door pillar switch securing screws
(arrowed)
15.43 Stop-light switch fitted to brake
pedal bracket
15.44 Fitting the stop-light switch (A)
Plunger protrusion (between arrows) must be
at least 2 mm (0.08 in)
15.31 Removing a window operating switch15.39 Handbrake “On” switch
procarmanuals.com
Page 190 of 255
Heated rear window switch
Models before April 1992
50Remove the instrument panel surround,
which is secured by four screws.
51Carefully prise the switch from its location,
disconnect the multi-plug and remove it.
Models from April 1992
52Using a small flat-bladed screwdriver,
carefully prise the switch out of the centre
facia vent panel and disconnect the wiring
connector.
53On refitting, reconnect the wiring
connector and push the switch in until it clicks
into position.
Foglight switch(es)
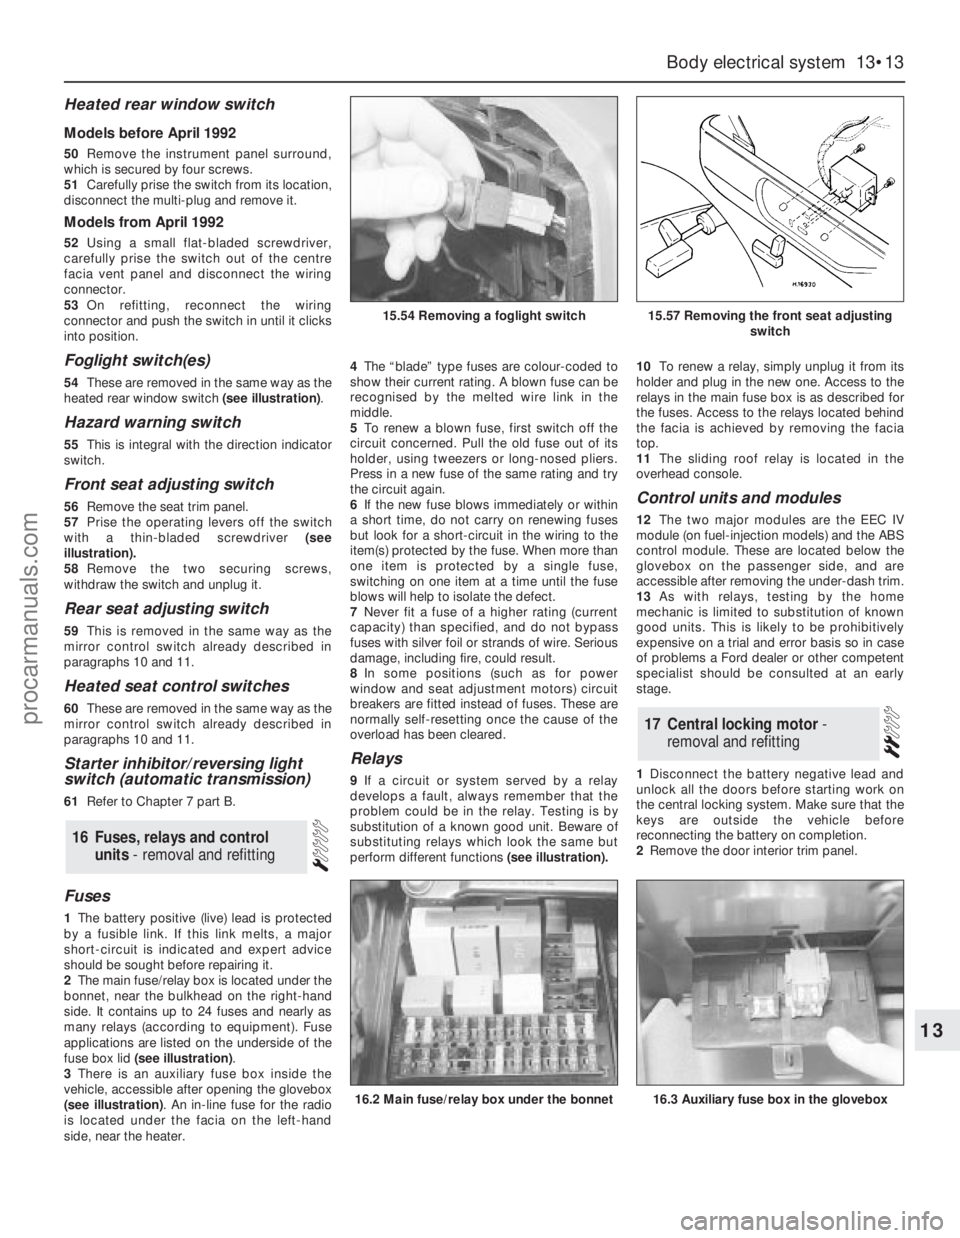
54These are removed in the same way as the
heated rear window switch (see illustration).
Hazard warning switch
55This is integral with the direction indicator
switch.
Front seat adjusting switch
56Remove the seat trim panel.
57Prise the operating levers off the switch
with a thin-bladed screwdriver (see
illustration).
58Remove the two securing screws,
withdraw the switch and unplug it.
Rear seat adjusting switch
59This is removed in the same way as the
mirror control switch already described in
paragraphs 10 and 11.
Heated seat control switches
60These are removed in the same way as the
mirror control switch already described in
paragraphs 10 and 11.
Starter inhibitor/reversing light
switch (automatic transmission)
61Refer to Chapter 7 part B.
Fuses
1The battery positive (live) lead is protected
by a fusible link. If this link melts, a major
short-circuit is indicated and expert advice
should be sought before repairing it.
2The main fuse/relay box is located under the
bonnet, near the bulkhead on the right-hand
side. It contains up to 24 fuses and nearly as
many relays (according to equipment). Fuse
applications are listed on the underside of the
fuse box lid (see illustration).
3There is an auxiliary fuse box inside the
vehicle, accessible after opening the glovebox
(see illustration). An in-line fuse for the radio
is located under the facia on the left-hand
side, near the heater.4The“blade” type fuses are colour-coded to
show their current rating. A blown fuse can be
recognised by the melted wire link in the
middle.
5To renew a blown fuse, first switch off the
circuit concerned. Pull the old fuse out of its
holder, using tweezers or long-nosed pliers.
Press in a new fuse of the same rating and try
the circuit again.
6If the new fuse blows immediately or within
a short time, do not carry on renewing fuses
but look for a short-circuit in the wiring to the
item(s) protected by the fuse. When more than
one item is protected by a single fuse,
switching on one item at a time until the fuse
blows will help to isolate the defect.
7Never fit a fuse of a higher rating (current
capacity) than specified, and do not bypass
fuses with silver foil or strands of wire. Serious
damage, including fire, could result.
8In some positions (such as for power
window and seat adjustment motors) circuit
breakers are fitted instead of fuses. These are
normally self-resetting once the cause of the
overload has been cleared.
Relays
9If a circuit or system served by a relay
develops a fault, always remember that the
problem could be in the relay. Testing is by
substitution of a known good unit. Beware of
substituting relays which look the same but
perform different functions(see illustration).10To renew a relay, simply unplug it from its
holder and plug in the new one. Access to the
relays in the main fuse box is as described for
the fuses. Access to the relays located behind
the facia is achieved by removing the facia
top.
11The sliding roof relay is located in the
overhead console.
Control units and modules
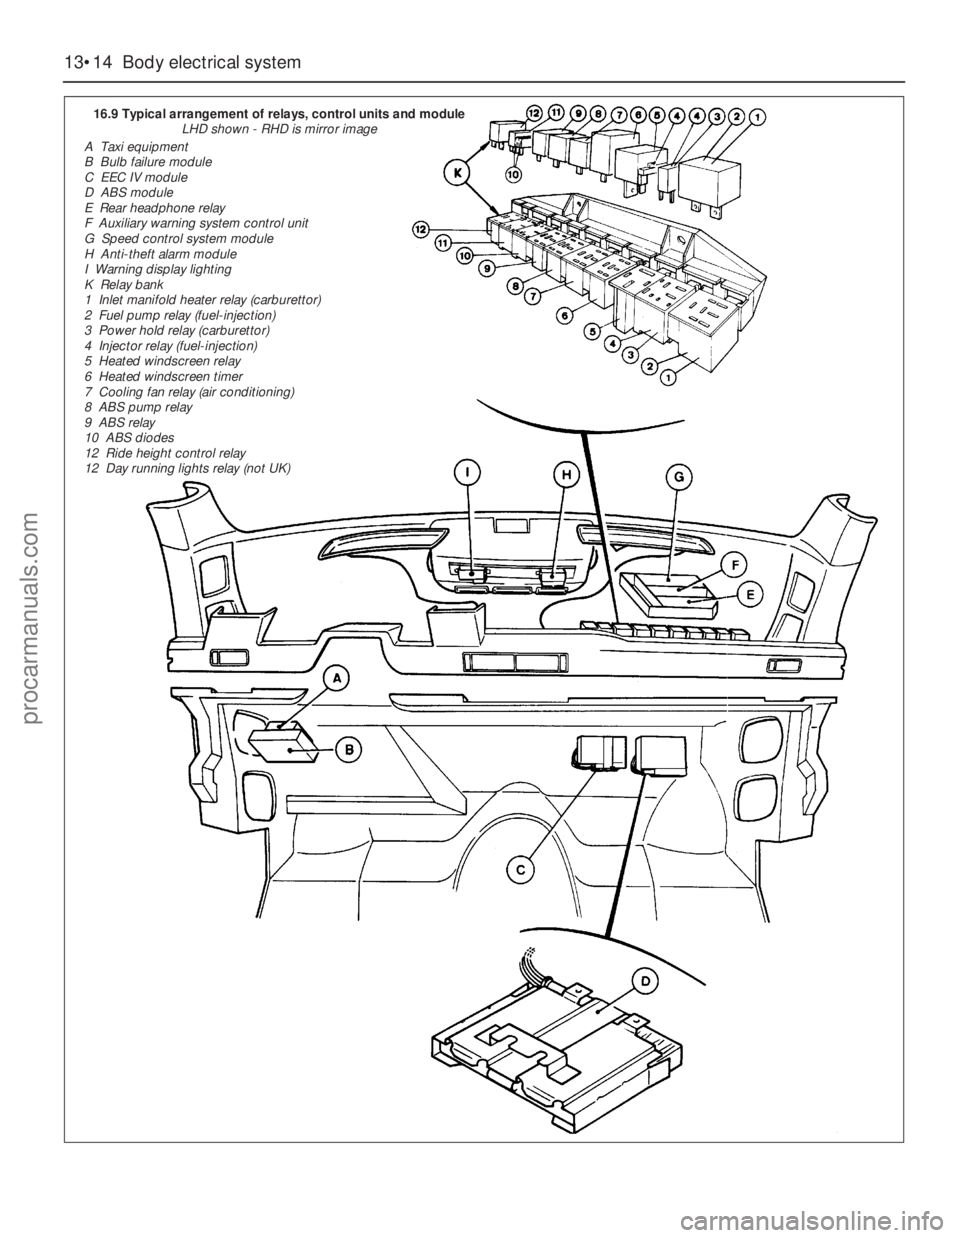
12The two major modules are the EEC IV
module (on fuel-injection models) and the ABS
control module. These are located below the
glovebox on the passenger side, and are
accessible after removing the under-dash trim.
13As with relays, testing by the home
mechanic is limited to substitution of known
good units. This is likely to be prohibitively
expensive on a trial and error basis so in case
of problems a Ford dealer or other competent
specialist should be consulted at an early
stage.
1Disconnect the battery negative lead and
unlock all the doors before starting work on
the central locking system. Make sure that the
keys are outside the vehicle before
reconnecting the battery on completion.
2Remove the door interior trim panel.
17Central locking motor -
removal and refitting
16Fuses, relays and control
units - removal and refitting
Body electrical system 13•13
13
15.54 Removing a foglight switch15.57 Removing the front seat adjusting
switch
16.2 Main fuse/relay box under the bonnet16.3 Auxiliary fuse box in the glovebox
procarmanuals.com
Page 191 of 255
13•14Body electrical system
16.9 Typical arrangement of relays, control units and module
LHD shown - RHD is mirror image
A Taxi equipment
B Bulb failure module
C EEC IV module
D ABS module
E Rear headphone relay
F Auxiliary warning system control unit
G Speed control system module
H Anti-theft alarm module
I Warning display lighting
K Relay bank
1 Inlet manifold heater relay (carburettor)
2 Fuel pump relay (fuel-injection)
3 Power hold relay (carburettor)
4 Injector relay (fuel-injection)
5 Heated windscreen relay
6 Heated windscreen timer
7 Cooling fan relay (air conditioning)
8 ABS pump relay
9 ABS relay
10 ABS diodes
12 Ride height control relay
12 Day running lights relay (not UK)
procarmanuals.com
Page 192 of 255
3Carefully peel away the foam rubber sheet
in the area of the lock motor.
4Remove the two securing screws, unhook
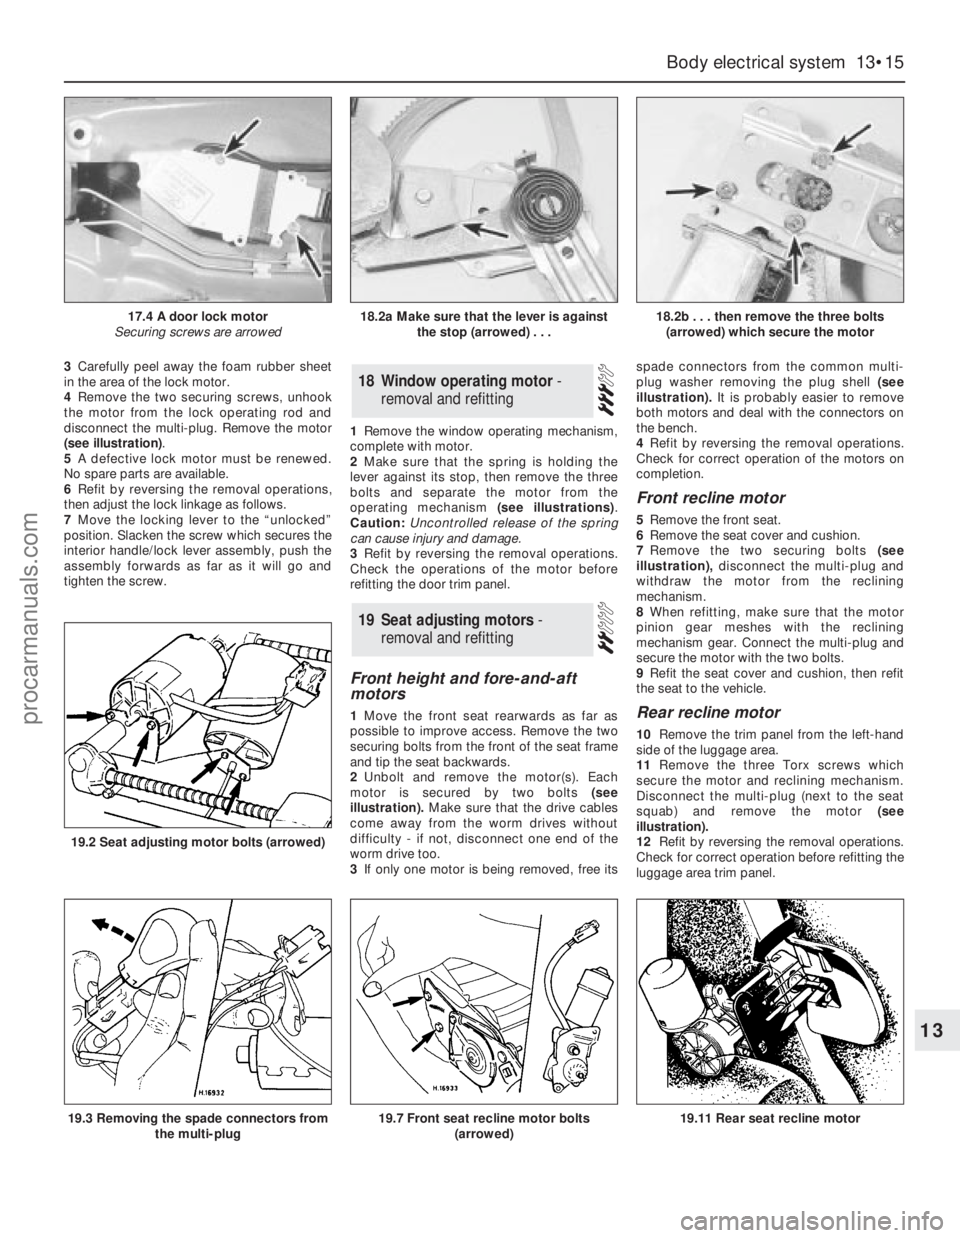
the motor from the lock operating rod and
disconnect the multi-plug. Remove the motor
(see illustration).
5A defective lock motor must be renewed.
No spare parts are available.
6Refit by reversing the removal operations,
then adjust the lock linkage as follows.
7Move the locking lever to the “unlocked”
position. Slacken the screw which secures the
interior handle/lock lever assembly, push the
assembly forwards as far as it will go and
tighten the screw.1Remove the window operating mechanism,
complete with motor.
2Make sure that the spring is holding the
lever against its stop, then remove the three
bolts and separate the motor from the
operating mechanism (see illustrations).
Caution: Uncontrolled release of the spring
can cause injury and damage.
3Refit by reversing the removal operations.
Check the operations of the motor before
refitting the door trim panel.
Front height and fore-and-aft
motors
1Move the front seat rearwards as far as
possible to improve access. Remove the two
securing bolts from the front of the seat frame
and tip the seat backwards.
2Unbolt and remove the motor(s). Each
motor is secured by two bolts (see
illustration).Make sure that the drive cables
come away from the worm drives without
difficulty - if not, disconnect one end of the
worm drive too.
3If only one motor is being removed, free itsspade connectors from the common multi-
plug washer removing the plug shell (see
illustration).It is probably easier to remove
both motors and deal with the connectors on
the bench.
4Refit by reversing the removal operations.
Check for correct operation of the motors on
completion.
Front recline motor
5Remove the front seat.
6Remove the seat cover and cushion.
7Remove the two securing bolts (see
illustration),disconnect the multi-plug and
withdraw the motor from the reclining
mechanism.
8When refitting, make sure that the motor
pinion gear meshes with the reclining
mechanism gear. Connect the multi-plug and
secure the motor with the two bolts.
9Refit the seat cover and cushion, then refit
the seat to the vehicle.
Rear recline motor
10Remove the trim panel from the left-hand
side of the luggage area.
11Remove the three Torx screws which
secure the motor and reclining mechanism.
Disconnect the multi-plug (next to the seat
squab) and remove the motor(see
illustration).
12Refit by reversing the removal operations.
Check for correct operation before refitting the
luggage area trim panel.
19Seat adjusting motors -
removal and refitting
18Window operating motor -
removal and refitting
Body electrical system 13•15
13
17.4 A door lock motor
Securing screws are arrowed18.2a Make sure that the lever is against
the stop (arrowed) . . .18.2b . . . then remove the three bolts
(arrowed) which secure the motor
19.3 Removing the spade connectors from
the multi-plug19.7 Front seat recline motor bolts
(arrowed)19.11 Rear seat recline motor
19.2 Seat adjusting motor bolts (arrowed)
procarmanuals.com
 1
1 2
2 3
3 4
4 5
5 6
6 7
7 8
8 9
9 10
10 11
11 12
12 13
13 14
14 15
15 16
16 17
17 18
18 19
19 20
20 21
21 22
22 23
23 24
24 25
25 26
26 27
27 28
28 29
29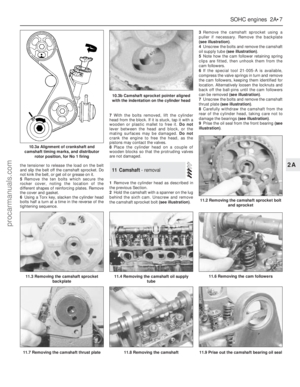 30
30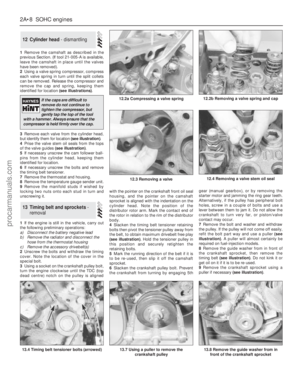 31
31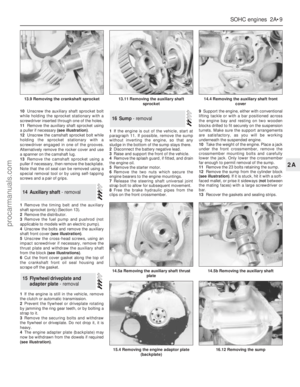 32
32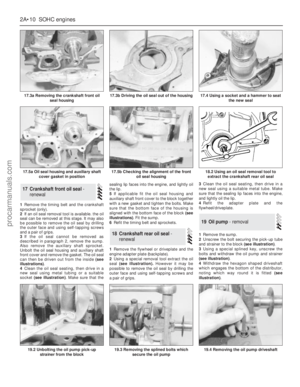 33
33 34
34 35
35 36
36 37
37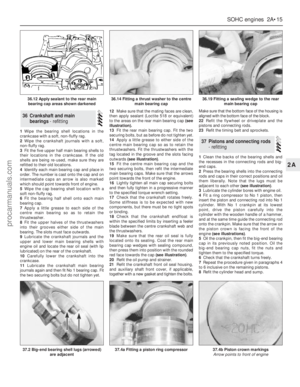 38
38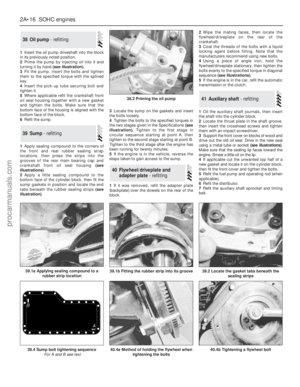 39
39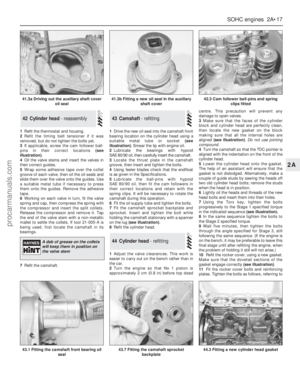 40
40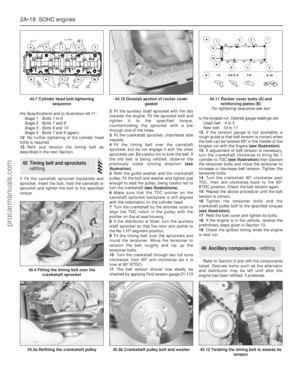 41
41 42
42 43
43 44
44 45
45 46
46 47
47 48
48 49
49 50
50 51
51 52
52 53
53 54
54 55
55 56
56 57
57 58
58 59
59 60
60 61
61 62
62 63
63 64
64 65
65 66
66 67
67 68
68 69
69 70
70 71
71 72
72 73
73 74
74 75
75 76
76 77
77 78
78 79
79 80
80 81
81 82
82 83
83 84
84 85
85 86
86 87
87 88
88 89
89 90
90 91
91 92
92 93
93 94
94 95
95 96
96 97
97 98
98 99
99 100
100 101
101 102
102 103
103 104
104 105
105 106
106 107
107 108
108 109
109 110
110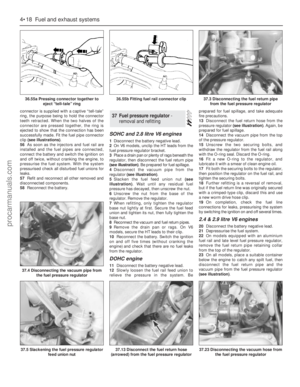 111
111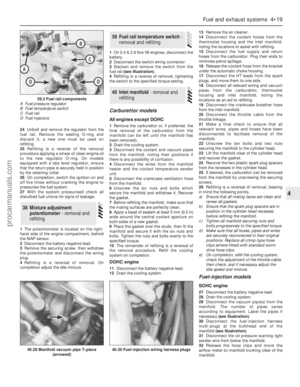 112
112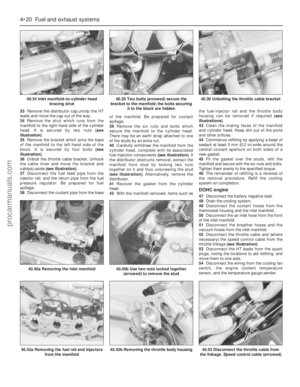 113
113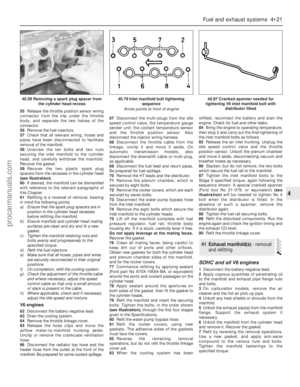 114
114 115
115 116
116 117
117 118
118 119
119 120
120 121
121 122
122 123
123 124
124 125
125 126
126 127
127 128
128 129
129 130
130 131
131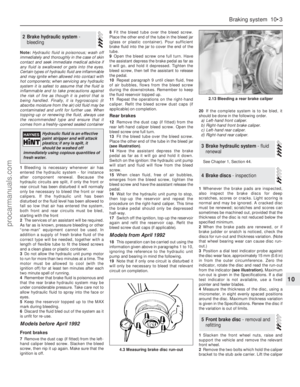 132
132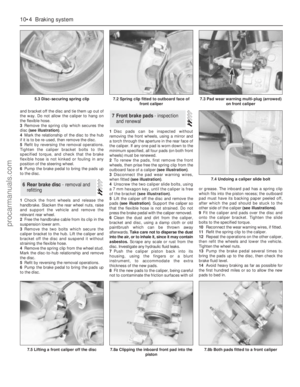 133
133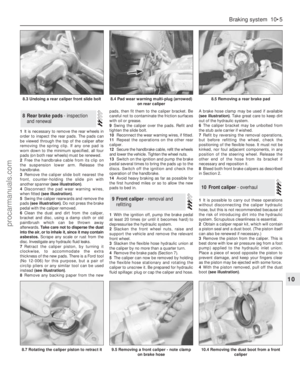 134
134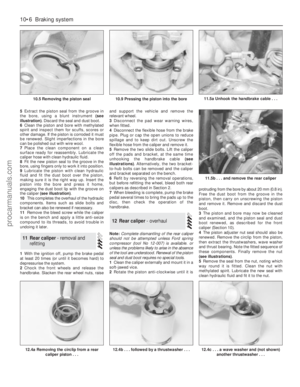 135
135 136
136 137
137 138
138 139
139 140
140 141
141 142
142 143
143 144
144 145
145 146
146 147
147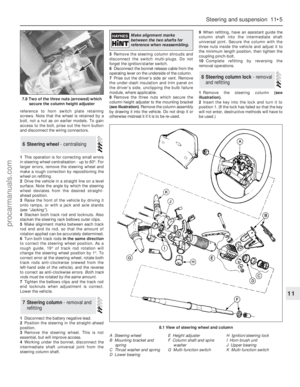 148
148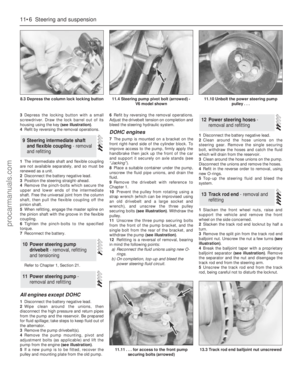 149
149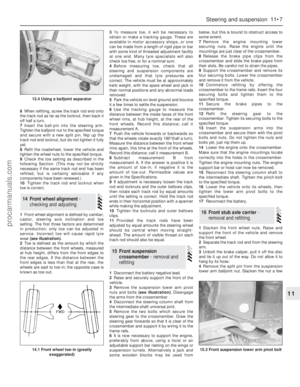 150
150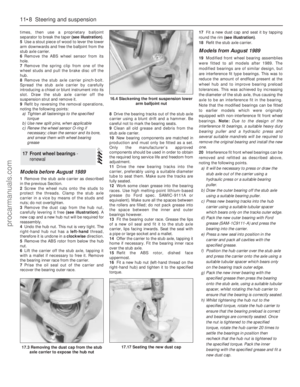 151
151 152
152 153
153 154
154 155
155 156
156 157
157 158
158 159
159 160
160 161
161 162
162 163
163 164
164 165
165 166
166 167
167 168
168 169
169 170
170 171
171 172
172 173
173 174
174 175
175 176
176 177
177 178
178 179
179 180
180 181
181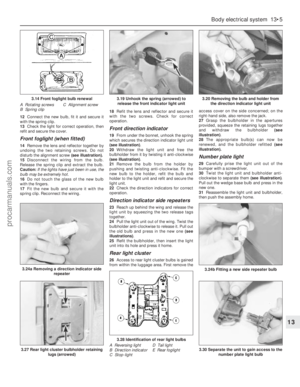 182
182 183
183 184
184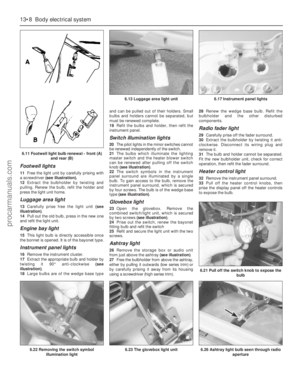 185
185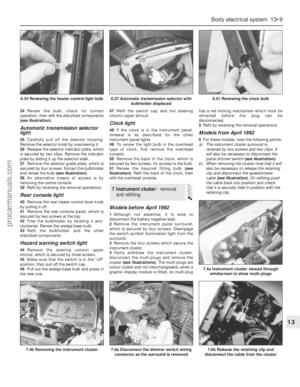 186
186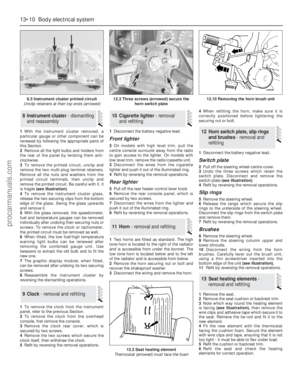 187
187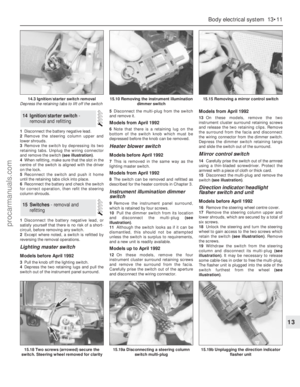 188
188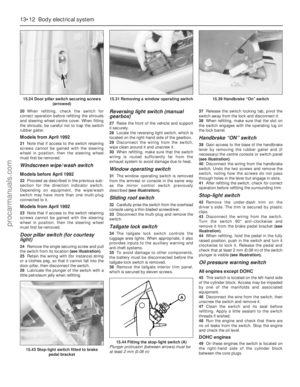 189
189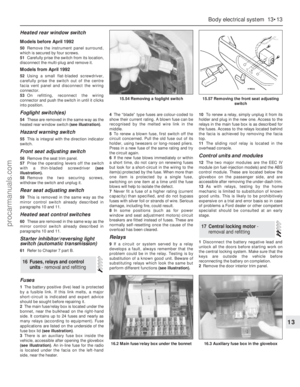 190
190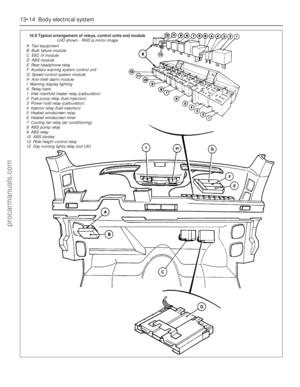 191
191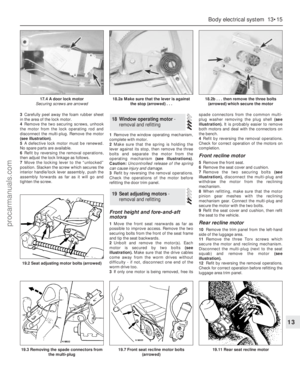 192
192 193
193 194
194 195
195 196
196 197
197 198
198 199
199 200
200 201
201 202
202 203
203 204
204 205
205 206
206 207
207 208
208 209
209 210
210 211
211 212
212 213
213 214
214 215
215 216
216 217
217 218
218 219
219 220
220 221
221 222
222 223
223 224
224 225
225 226
226 227
227 228
228 229
229 230
230 231
231 232
232 233
233 234
234 235
235 236
236 237
237 238
238 239
239 240
240 241
241 242
242 243
243 244
244 245
245 246
246 247
247 248
248 249
249 250
250 251
251 252
252 253
253 254
254


