Page 1596 of 3171
FL-12
FUEL TANK
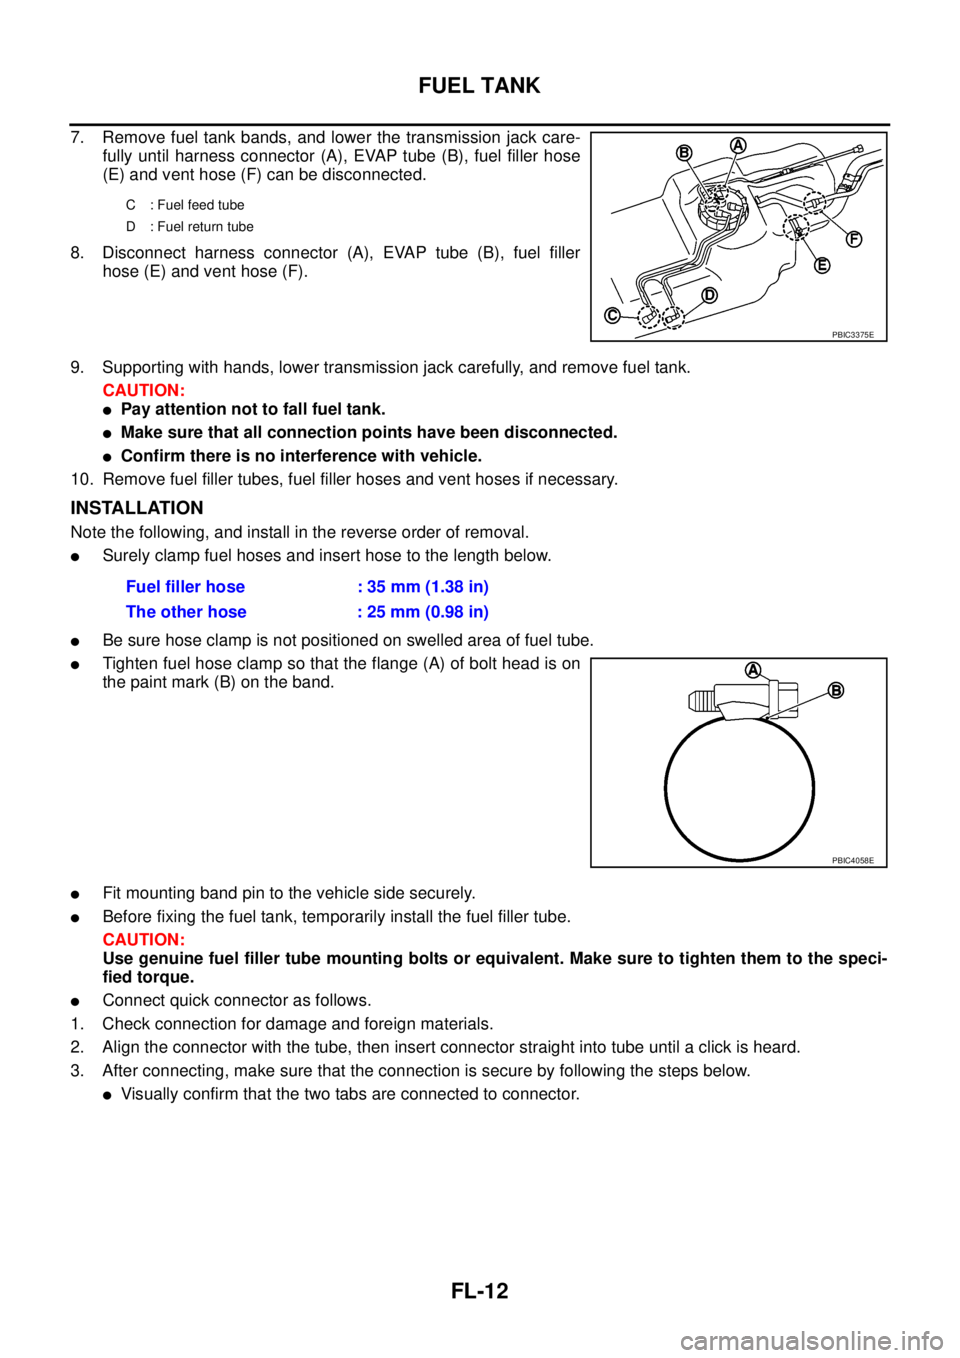
7. Remove fuel tank bands, and lower the transmission jack care-
fully until harness connector (A), EVAP tube (B), fuel filler hose
(E) and vent hose (F) can be disconnected.
8. Disconnect harness connector (A), EVAP tube (B), fuel filler
hose (E) and vent hose (F).
9. Supporting with hands, lower transmission jack carefully, and remove fuel tank.
CAUTION:
lPay attention not to fall fuel tank.
lMake sure that all connection points have been disconnected.
lConfirm there is no interference with vehicle.
10. Remove fuel filler tubes, fuel filler hoses and vent hoses if necessary.
INSTALLATION
Note the following, and install in the reverse order of removal.
lSurely clamp fuel hoses and insert hose to the length below.
lBe sure hose clamp is not positioned on swelled area of fuel tube.
lTighten fuel hose clamp so that the flange (A) of bolt head is on
the paint mark (B) on the band.
lFit mounting band pin to the vehicle side securely.
lBefore fixing the fuel tank, temporarily install the fuel filler tube.
CAUTION:
Use genuine fuel filler tube mounting bolts or equivalent. Make sure to tighten them to the speci-
fied torque.
lConnect quick connector as follows.
1. Check connection for damage and foreign materials.
2. Align the connector with the tube, then insert connector straight into tube until a click is heard.
3. After connecting, make sure that the connection is secure by following the steps below.
lVisually confirm that the two tabs are connected to connector.
C : Fuel feed tube
D : Fuel return tube
PBIC3375E
Fuel filler hose : 35 mm (1.38 in)
The other hose : 25 mm (0.98 in)
PBIC4058E
Page 1607 of 3171
ON-VEHICLE SERVICE
FSU-7
C
D
F
G
H
I
J
K
L
MA
B
FSU
ON-VEHICLE SERVICEPFP:00000
Front Suspension PartsEES002KM
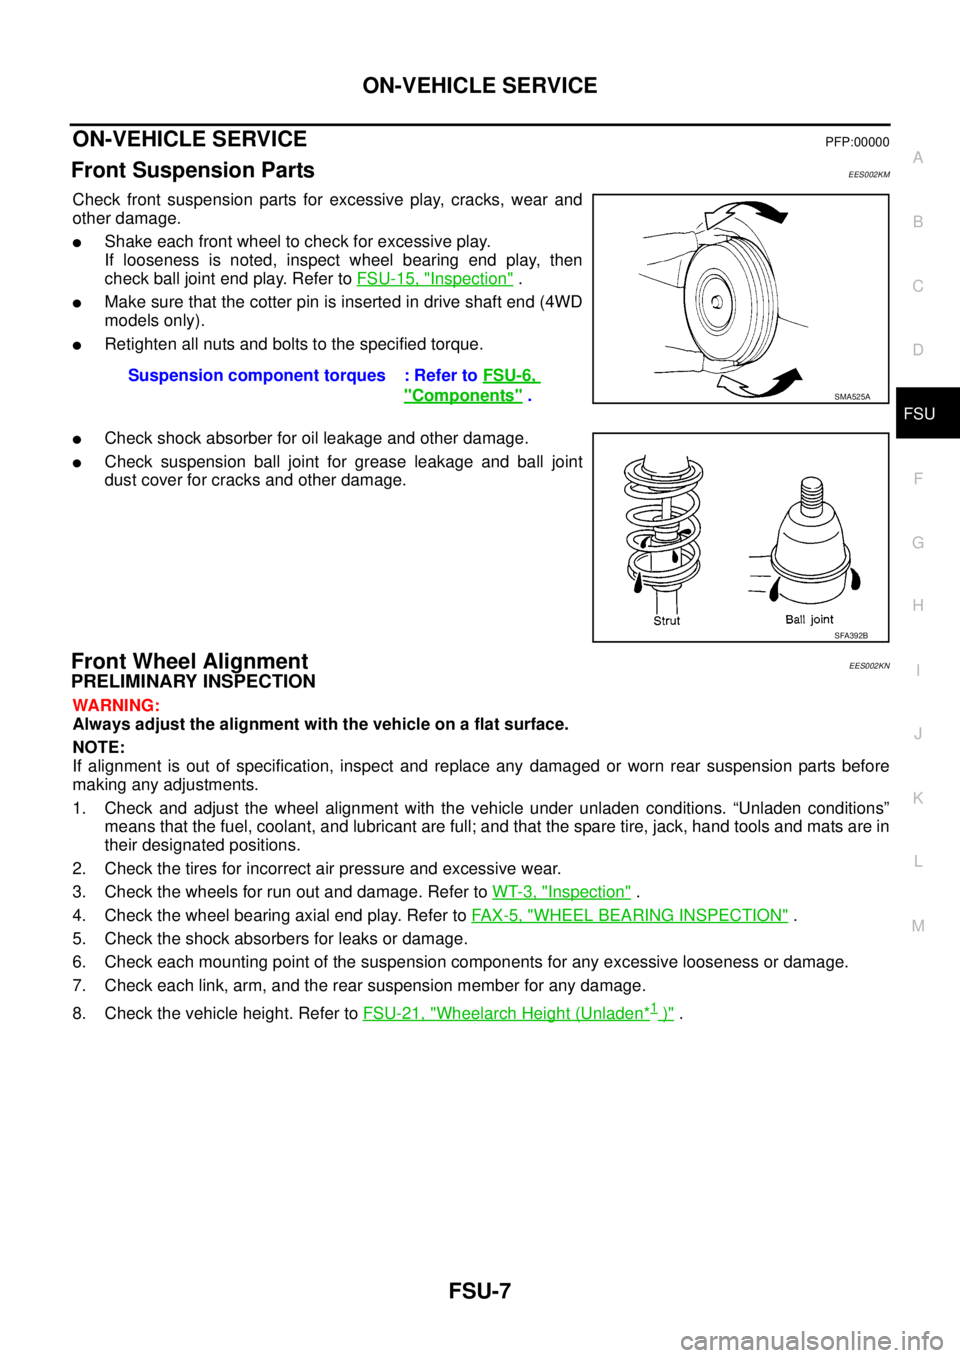
Check front suspension parts for excessive play, cracks, wear and
other damage.
lShake each front wheel to check for excessive play.
If looseness is noted, inspect wheel bearing end play, then
check ball joint end play. Refer toFSU-15, "
Inspection".
lMake sure that the cotter pin is inserted in drive shaft end (4WD
models only).
lRetighten all nuts and bolts to the specified torque.
lCheck shock absorber for oil leakage and other damage.
lCheck suspension ball joint for grease leakage and ball joint
dust cover for cracks and other damage.
Front Wheel AlignmentEES002KN
PRELIMINARY INSPECTION
WARNING:
Always adjust the alignment with the vehicle on a flat surface.
NOTE:
If alignment is out of specification, inspect and replace any damaged or worn rear suspension parts before
making any adjustments.
1. Check and adjust the wheel alignment with the vehicle under unladen conditions. “Unladen conditions”
means that the fuel, coolant, and lubricant are full; and that the spare tire, jack, hand tools and mats are in
their designated positions.
2. Check the tires for incorrect air pressure and excessive wear.
3. Check the wheels for run out and damage. Refer toWT-3, "
Inspection".
4. Check the wheel bearing axial end play. Refer toFA X - 5 , "
WHEEL BEARING INSPECTION".
5. Check the shock absorbers for leaks or damage.
6. Check each mounting point of the suspension components for any excessive looseness or damage.
7. Check each link, arm, and the rear suspension member for any damage.
8. Check the vehicle height. Refer toFSU-21, "
Wheelarch Height (Unladen*1)". Suspension component torques : Refer toFSU-6,
"Components".SMA525A
SFA392B
Page 1615 of 3171
UPPER BALL JOINT AND LOWER BALL JOINT
FSU-15
C
D
F
G
H
I
J
K
L
MA
B
FSU
UPPER BALL JOINT AND LOWER BALL JOINTPFP:40110
Removal and InstallationEES002KT
The ball joints are part of the upper and lower links. Refer toFSU-13, "Removal and Installation"(upper link),
FSU-14, "
Removal and Installation"(lower link).
InspectionEES002KU
lCheck the ball joint for excessive play. Replace the upper or lower link assembly if any of the following
exists:
lBall joint stud is worn.
lBalljointishardtoswing.
lBall joint play in axial directions or end play is excessive.
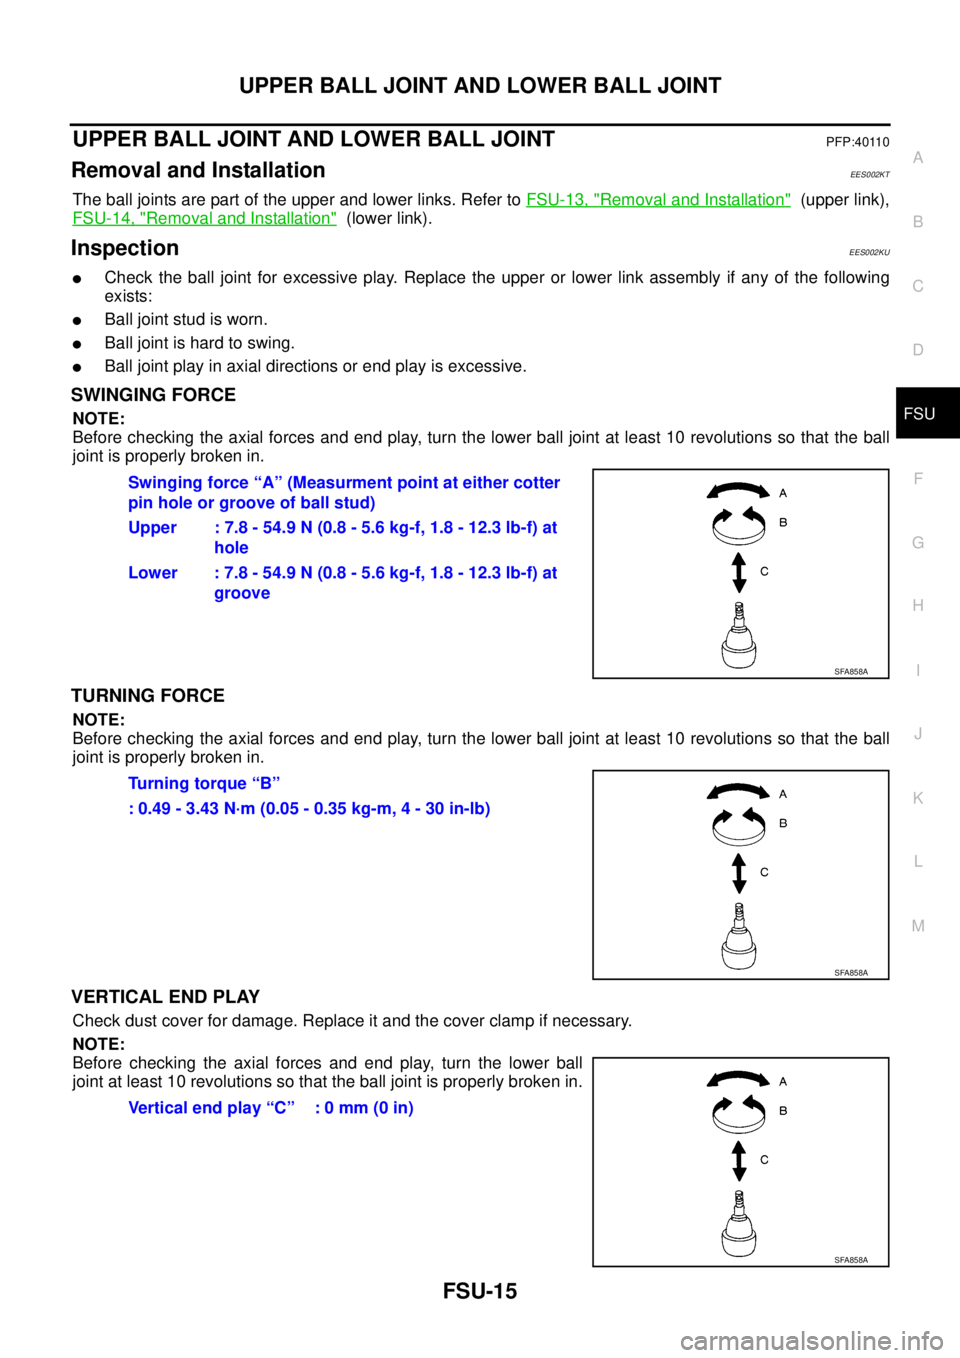
SWINGING FORCE
NOTE:
Before checking the axial forces and end play, turn the lower ball joint at least 10 revolutions so that the ball
joint is properly broken in.
TURNING FORCE
NOTE:
Before checking the axial forces and end play, turn the lower ball joint at least 10 revolutions so that the ball
joint is properly broken in.
VERTICAL END PLAY
Check dust cover for damage. Replace it and the cover clamp if necessary.
NOTE:
Before checking the axial forces and end play, turn the lower ball
joint at least 10 revolutions so that the ball joint is properly broken in.Swinging force “A” (Measurment point at either cotter
pin hole or groove of ball stud)
Upper : 7.8 - 54.9 N (0.8 - 5.6 kg-f, 1.8 - 12.3 lb-f) at
hole
Lower : 7.8 - 54.9 N (0.8 - 5.6 kg-f, 1.8 - 12.3 lb-f) at
groove
SFA858A
Turning torque “B”
: 0.49 - 3.43 N·m (0.05 - 0.35 kg-m, 4 - 30 in-lb)
SFA858A
Vertical end play “C” : 0 mm (0 in)
SFA858A
Page 1618 of 3171
FSU-18
KNUCKLE
INSTALLATION
Installation is in the reverse order of removal.
lRefer toFSU-6, "Components"for tightening torques.
CAUTION:
Discard the old cotter pin; replace with a new one.
lWhen installing disc rotor on wheel hub and bearing assembly,
align the marks.
NOTE:
When not using the alignment mark, refer toBR-24, "
FRONT
DISC BRAKE".
lWhen installing wheel and tire, refer toWT-5, "Rotation".
lPerform wheel alignment. Refer toFSU-7, "Front Wheel Align-
ment".
WDIA0044E
Page 1620 of 3171
FSU-20
SERVICE DATA AND SPECIFICATIONS (SDS)
Ball Joint
EES002KZ
Swinging force “A” 7.8 - 54.9 N (0.8 - 5.6 kg-f, 1.8 - 12.3 lb-f)
Turning torque “B” 0.49 - 3.43 N·m (0.05 - 0.35 kg-m, 4 - 30 in-lb)
Vertical end play “C”0mm(0in)
SFA858A
Page 1624 of 3171

GI-2
TIGHTENING TORQUE OF STANDARD BOLTS .... 55
Tightening Torque Table ......................................... 55
IDENTIFICATION INFORMATION ............................ 56
Model Variation ....................................................... 56
Identification Number .............................................. 57
VEHICLE IDENTIFICATION NUMBER
ARRANGEMENT ................................................. 57
IDENTIFICATION PLATE .................................... 58
ENGINE SERIAL NUMBER ................................ 58TRANSFER SERIAL NUMBER ........................... 58
AUTOMATIC TRANSMISSION NUMBER ........... 58
MANUAL TRANSMISSION NUMBER ................. 59
Dimensions ............................................................. 60
KING CAB ............................................................ 60
DOUBLE CAB ...................................................... 60
Wheels & Tyres ....................................................... 60
TERMINOLOGY ........................................................ 61
ISO 15031-2 Terminology List ................................. 61
Page 1631 of 3171
HOW TO USE THIS MANUAL
GI-9
C
D
E
F
G
H
I
J
K
L
MB
GI
HOW TO USE THIS MANUALPFP:00008
DescriptionEAS001GS
This volume explains “Removal, Disassembly, Installation, Inspection and Adjustment” and “Trouble Diag-
noses”.
TermsEAS001GT
lThe captionsWARNINGandCAUTIONwarn you of steps that must be followed to prevent personal
injury and/or damage to some part of the vehicle.
WARNINGindicates the possibility of personal injury if instructions are not followed.
CAUTIONindicates the possibility of component damage if instructions are not followed.
BOLD TYPED STATEMENTSexceptWARNINGandCAUTIONgive you helpful information.
Standard value:Tolerance at inspection and adjustment.
Limit value:The maximum or minimum limit value that should not be exceeded at inspection and adjust-
ment.
UnitsEAS001GU
lTheUNITSgiven in this manual are primarily expressed as the SI UNIT (International System of Unit),
and alternatively expressed in the metric system and in the yard/pound system.
Also with regard to tightening torque of bolts and nuts, there are descriptions both about range and about
the standard tightening torque.
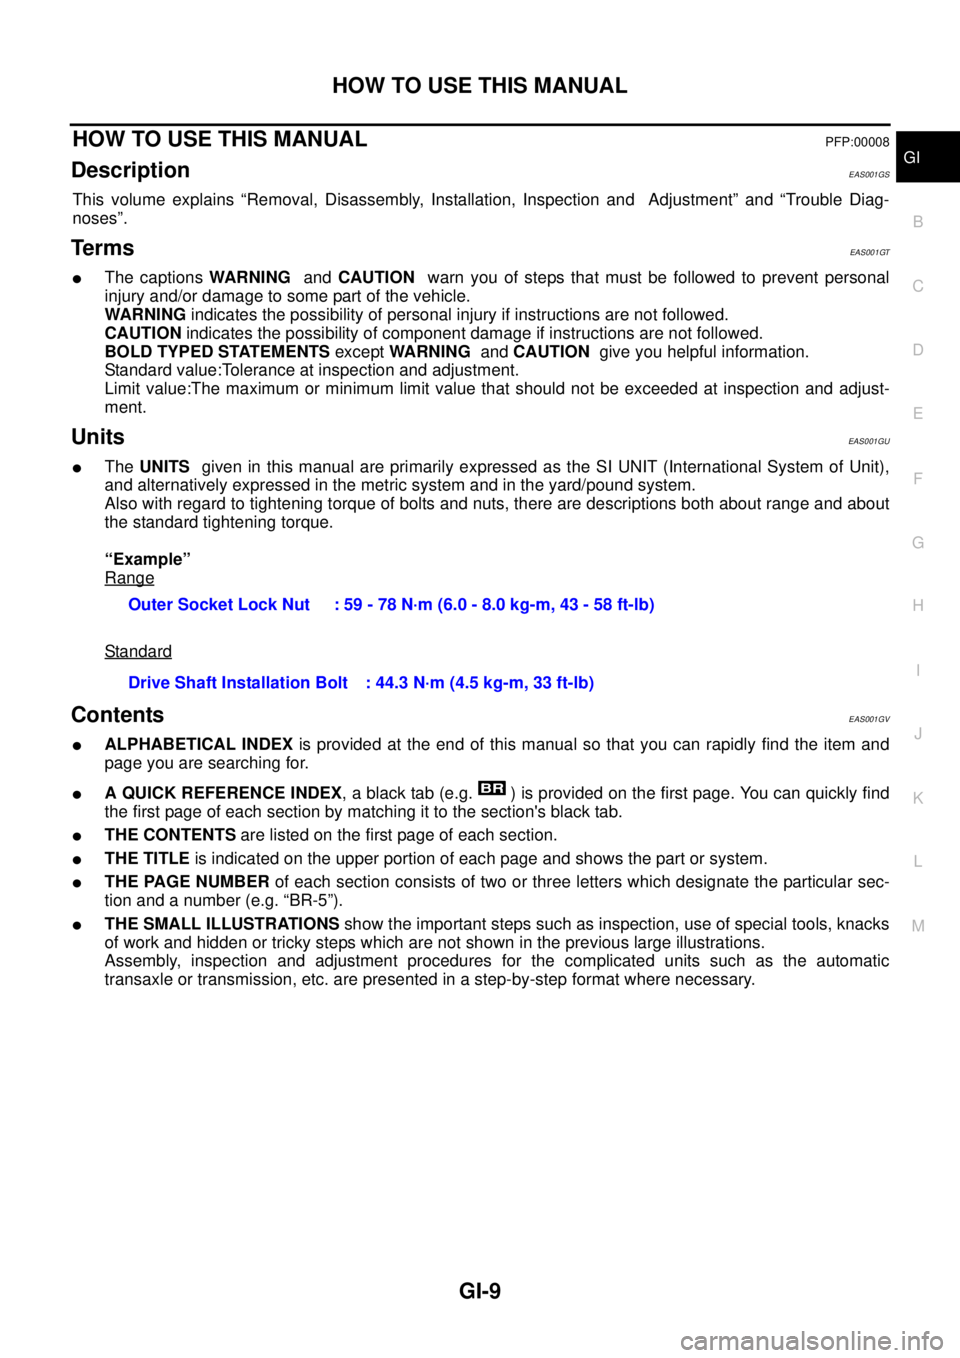
“Example”
Range
Standard
ContentsEAS001GV
lALPHABETICAL INDEXis provided at the end of this manual so that you can rapidly find the item and
page you are searching for.
lA QUICK REFERENCE INDEX, a black tab (e.g. ) is provided on the first page. You can quickly find
the first page of each section by matching it to the section's black tab.
lTHE CONTENTSare listed on the first page of each section.
lTHE TITLEis indicated on the upper portion of each page and shows the part or system.
lTHE PAGE NUMBERof each section consists of two or three letters which designate the particular sec-
tion and a number (e.g. “BR-5”).
lTHE SMALL ILLUSTRATIONSshow the important steps such as inspection, use of special tools, knacks
of work and hidden or tricky steps which are not shown in the previous large illustrations.
Assembly, inspection and adjustment procedures for the complicated units such as the automatic
transaxle or transmission, etc. are presented in a step-by-step format where necessary.Outer Socket Lock Nut : 59 - 78 N·m (6.0 - 8.0 kg-m, 43 - 58 ft-lb)
Drive Shaft Installation Bolt : 44.3 N·m (4.5 kg-m, 33 ft-lb)
Page 1632 of 3171
GI-10
HOW TO USE THIS MANUAL
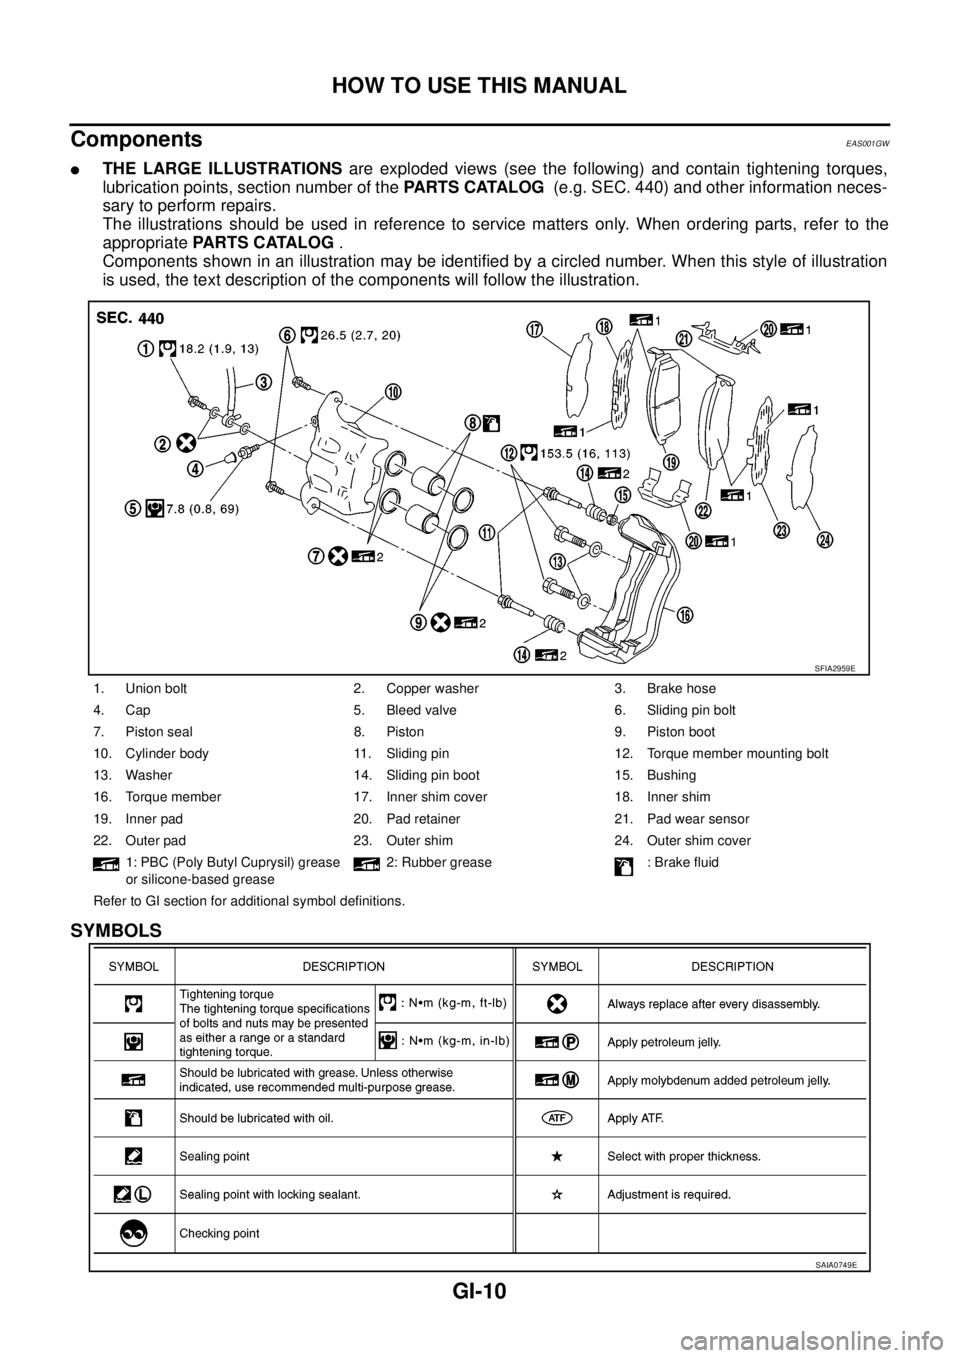
Components
EAS001GW
lTHE LARGE ILLUSTRATIONSare exploded views (see the following) and contain tightening torques,
lubrication points, section number of thePARTS CATALOG(e.g. SEC. 440) and other information neces-
sary to perform repairs.
The illustrations should be used in reference to service matters only. When ordering parts, refer to the
appropriatePARTS CATALOG.
Components shown in an illustration may be identified by a circled number. When this style of illustration
is used, the text description of the components will follow the illustration.
SYMBOLS
1. Union bolt 2. Copper washer 3. Brake hose
4. Cap 5. Bleed valve 6. Sliding pin bolt
7. Piston seal 8. Piston 9. Piston boot
10. Cylinder body 11. Sliding pin 12. Torque member mounting bolt
13. Washer 14. Sliding pin boot 15. Bushing
16. Torque member 17. Inner shim cover 18. Inner shim
19. Inner pad 20. Pad retainer 21. Pad wear sensor
22. Outer pad 23. Outer shim 24. Outer shim cover
1: PBC (Poly Butyl Cuprysil) grease
or silicone-based grease2: Rubber grease : Brake fluid
Refer to GI section for additional symbol definitions.
SFIA2959E
SAIA0749E