2006 LAND ROVER FRELANDER 2 lock
[x] Cancel search: lockPage 2432 of 3229
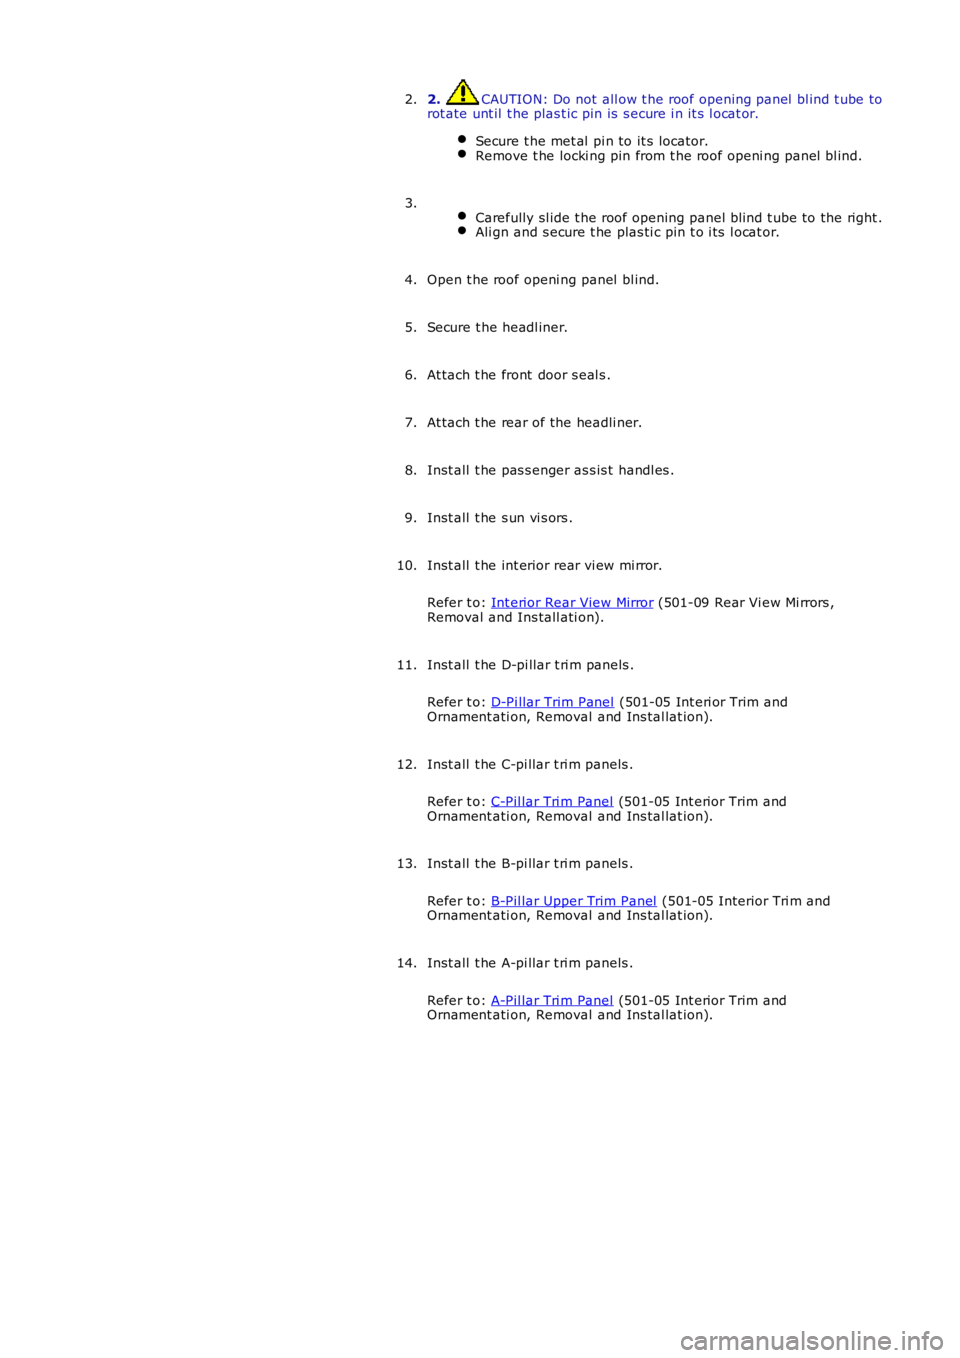
2. CAUTION: Do not all ow t he roof opening panel bl ind t ube to
rot ate unt il t he plas t ic pin is s ecure i n it s l ocat or.
Secure t he met al pi n to it s locator. Remove t he locki ng pin from t he roof openi ng panel bl ind.2.
Carefully sl ide t he roof opening panel bl ind t ube to the right . Ali gn and s ecure t he plas ti c pin t o i ts l ocat or.3.
Open t he roof openi ng panel bl ind.
4.
Secure t he headl iner.
5.
At tach t he front door s eal s .
6.
At tach t he rear of the headli ner.
7.
Inst all t he pas s enger as s is t handl es .
8.
Inst all t he s un vi s ors .
9.
Inst all t he int erior rear vi ew mi rror.
Refer t o: Int erior Rear View Mirror (501-09 Rear Vi ew Mi rrors ,
Removal and Ins tall ati on).
10.
Inst all t he D-pi llar t ri m panels .
Refer t o: D-Pi llar Trim Panel (501-05 Int eri or Trim and
Ornament ati on, Removal and Ins tal lat ion).
11.
Inst all t he C-pi llar t ri m panels .
Refer t o: C-Pil lar Tri m Panel (501-05 Int erior Trim and
Ornament ati on, Removal and Ins tal lat ion).
12.
Inst all t he B-pi llar t ri m panels .
Refer t o: B-Pil lar Upper Trim Panel (501-05 Interior Tri m and
Ornament ati on, Removal and Ins tal lat ion).
13.
Inst all t he A-pi llar t ri m panels .
Refer t o: A-Pil lar Tri m Panel (501-05 Int erior Trim and
Ornament ati on, Removal and Ins tal lat ion).
14.
Page 2449 of 3229
Publi s hed: 11-May-2011
Safety Belt System - Safety Belt System
Des cript ion and Operat ion
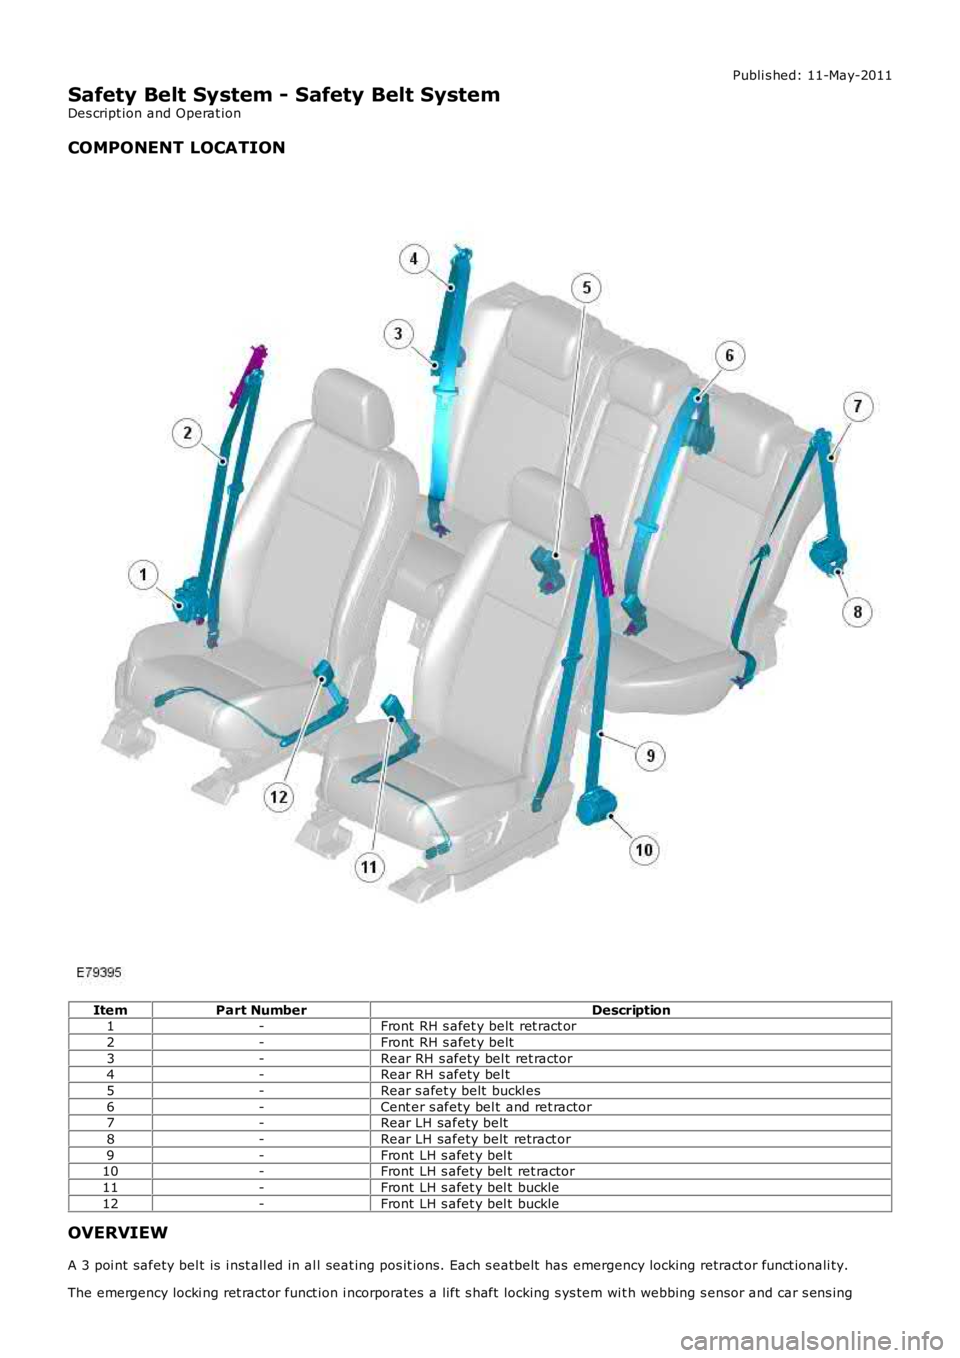
COMPONENT LOCATION
ItemPart NumberDescription1-Front RH s afet y belt ret ract or
2-Front RH s afet y belt
3-Rear RH s afety bel t ret ractor4-Rear RH s afety bel t
5-Rear s afet y belt buckl es
6-Cent er s afety bel t and ret ractor7-Rear LH safety belt
8-Rear LH safety belt retract or
9-Front LH s afet y bel t10-Front LH s afet y bel t ret ractor
11-Front LH s afet y bel t buckle
12-Front LH s afet y bel t buckle
OVERVIEW
A 3 poi nt safety bel t is i nst all ed in al l seat ing pos it ions. Each s eatbelt has emergency locking retract or funct ionali ty.
The emergency locki ng ret ract or funct ion i ncorporates a lift s haft locking s ys tem wit h webbing s ensor and car s ens ing
Page 2450 of 3229
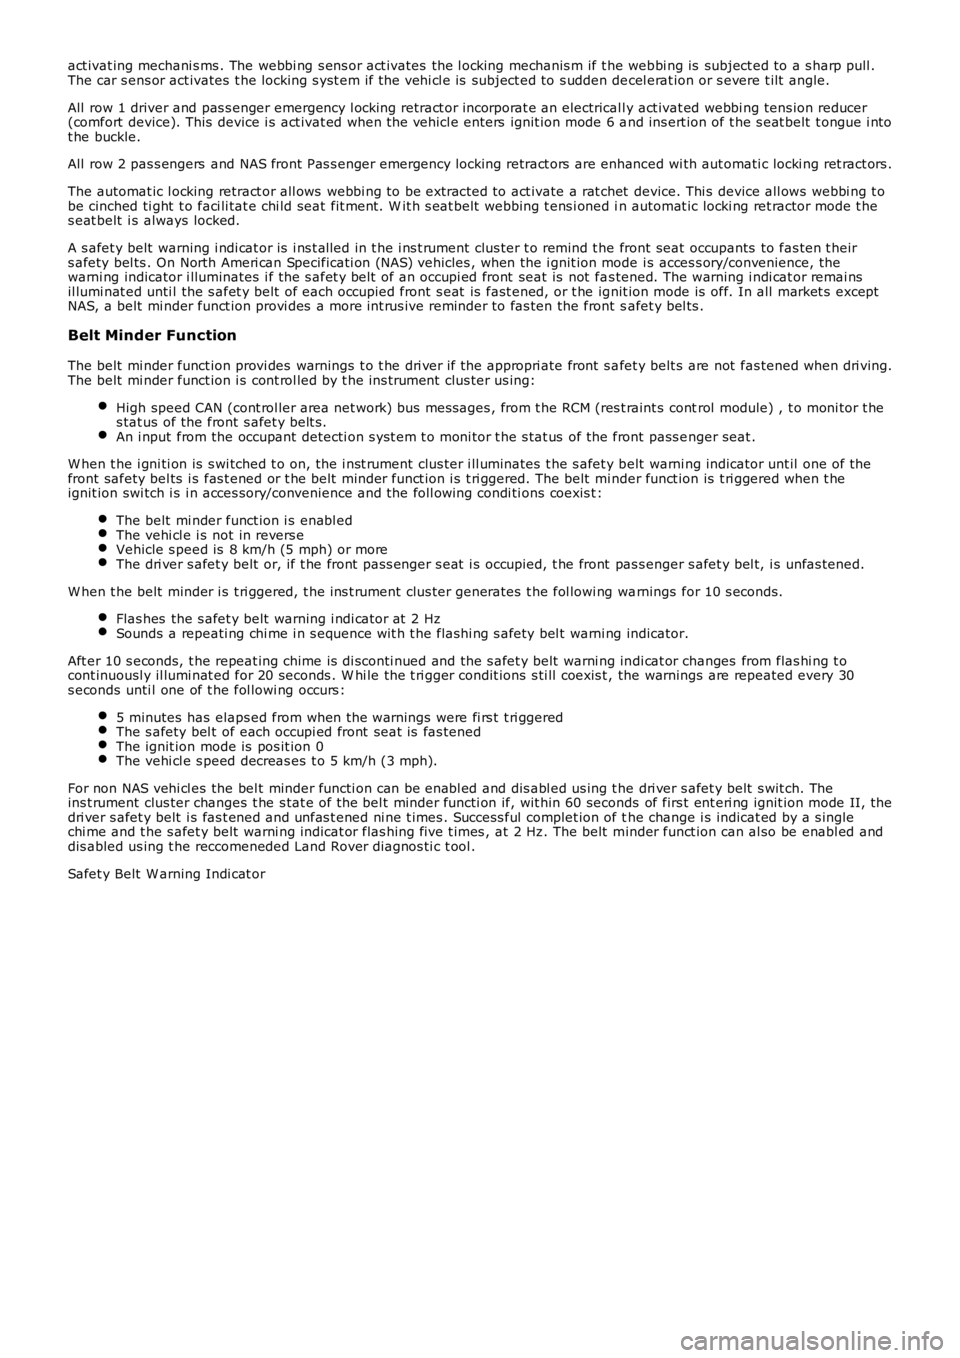
act ivat ing mechani s ms . The webbi ng s ens or act ivates the l ocking mechanis m if t he webbi ng is subject ed to a s harp pull .The car s ens or act ivates t he locking s yst em if t he vehi cl e is subject ed to s udden decel erat ion or s evere t ilt angle.
All row 1 driver and pas s enger emergency l ocking retract or incorporat e an electricall y act ivat ed webbi ng tens ion reducer(comfort device). This device i s act ivat ed when the vehicl e enters ignit ion mode 6 and ins ert ion of t he s eat belt t ongue i ntot he buckle.
All row 2 pas s engers and NAS front Pas s enger emergency locking retract ors are enhanced wi th aut omati c locki ng ret ract ors .
The automat ic l ocking retract or all ows webbi ng to be extract ed to act ivate a rat chet device. Thi s device all ows webbi ng t obe cinched ti ght t o faci li tat e chi ld seat fit ment. W it h s eat belt webbing t ens i oned in automat ic locki ng ret ractor mode t hes eat belt i s always locked.
A s afet y belt warning i ndi cat or is i ns t alled in t he i ns t rument clus ter t o remind t he front seat occupants to fas ten t heirs afety bel ts . On North Ameri can Specificati on (NAS) vehicles , when the i gnit ion mode i s acces s ory/convenience, thewarni ng indicator i lluminates i f the s afet y belt of an occupi ed front seat is not fas tened. The warning i ndi cat or remai nsil lumi nat ed unti l the s afet y belt of each occupied front s eat is fast ened, or t he ignit ion mode is off. In all market s exceptNAS, a belt mi nder funct ion provi des a more int rus ive reminder to fas ten the front safet y bel ts .
Belt Minder Function
The belt mi nder funct ion provi des warnings t o t he dri ver i f the appropri ate front s afet y belt s are not fas tened when dri ving.The belt mi nder funct ion i s cont rol led by t he ins t rument clus ter us ing:
High speed CAN (cont rol ler area net work) bus mes sages , from t he RCM (res t raint s control module) , t o moni tor t hes tat us of the front s afet y belt s.An i nput from the occupant detecti on s yst em t o moni tor t he s tat us of the front pass enger seat .
W hen t he i gni ti on is s wi tched t o on, the i nst rument clus ter i ll uminates t he s afet y belt warni ng indicator unt il one of thefront safety bel ts i s fas t ened or t he belt minder funct ion i s t ri ggered. The belt minder funct ion is t ri ggered when t heignit ion swi tch i s i n acces sory/convenience and the foll owing condi ti ons coexis t :
The belt mi nder funct ion i s enabl edThe vehi cl e i s not in revers eVehicle s peed is 8 km/h (5 mph) or moreThe dri ver s afet y belt or, if t he front pas s enger s eat i s occupied, t he front pas s enger s afet y bel t, i s unfas tened.
W hen t he belt minder i s t ri ggered, t he ins t rument clus ter generates t he fol lowi ng warnings for 10 s econds.
Flas hes the s afet y belt warning i ndi cat or at 2 HzSounds a repeati ng chi me i n s equence wit h t he flas hi ng s afety bel t warni ng indicator.
Aft er 10 s econds, t he repeat ing chime is di sconti nued and the s afet y belt warni ng indi cat or changes from flas hi ng t ocont inuousl y il lumi nat ed for 20 seconds . W hi le the t ri gger condit ions s ti ll coexis t , the warnings are repeated every 30s econds unti l one of t he fol lowi ng occurs :
5 minutes has elaps ed from when the warnings were fi rs t t ri ggeredThe s afety bel t of each occupi ed front seat is fas tenedThe ignit ion mode is pos it ion 0The vehi cl e s peed decreas es t o 5 km/h (3 mph).
For non NAS vehi cl es the bel t minder functi on can be enabl ed and dis abl ed us ing t he dri ver s afet y belt s wit ch. Theins t rument clus ter changes t he s tat e of the bel t minder functi on if, wit hin 60 seconds of firs t ent eri ng ignit ion mode II, thedri ver s afet y belt i s fas t ened and unfas t ened ni ne t imes . Success ful complet ion of the change i s indicat ed by a s inglechi me and t he s afet y belt warni ng indicat or flas hing five t imes , at 2 Hz. The belt minder funct ion can al so be enabl ed anddis abled us ing t he reccomeneded Land Rover di agnos ti c t ool .
Safet y Belt W arning Indi cat or
Page 2452 of 3229
Publi s hed: 21-Nov-2011
Safety Belt System - Safety Belt System
Diagnosi s and Tes ti ng
Principle of Operation
For a detail ed descripti on of the safet y belt s ys tem and operati on, refer t o t he relevant des cri pti on and operati on s ect ionof the workshop manual REFER to: Safet y Belt Sys tem (501-20A Safety Bel t Sys t em, Des cri pti on and Operati on).
Safety Information
• W ARNINGS:
To avoid accidental depl oyment t he back-up power supply must be depl et ed before begi nning any work on the SRSs ys t em or i ts component s . Fai lure to foll ow t his i nst ruct ion may res ul t in pers onal injury
Do not us e a mult imet er to probe an SRS module. It is pos s ible for the power from the mult imet er bat tery t o triggert he act ivati on of the modul e. Fai lure to foll ow t his i ns t ructi on may resul t in personal injury
• NOTE: Do not t o us e a cell ul ar phone or t o have a cell ul ar phone i n clos e proximity when worki ng on the SRS sys t em orcomponents
Power supply deplet ion
Before begi nni ng any work on the SRS sys tem or rel at ed component s:
1. Remove the i gnit ion key1.
2. Dis connect the bat tery leads , ground fi rs t2.
3. W ait 2 mi nut es for t he power ci rcuit t o dis charge3.
There are comprehens i ve ins truct ions on t he correct procedures for SRS s ys tem repairs , refer t o t he rel evant s ect ion of t heworks hop manual
Inspection and Verification
CAUTION: Di agnos is by s ubs ti tut ion from a donor vehicle is NO T acceptabl e. Subs ti tut ion of cont rol modules doesnot guarant ee confirmat ion of a faul t and may al so caus e addit ional fault s in the vehicle bei ng checked and/or the donorvehi cl e
• NOTE: Check and recti fy bas ic faul ts before beginni ng diagnos t ic rout ines i ncl udi ng pinpoint t es t s
1. Verify t he cus t omer concern by operat ing t he s afet y belt1.
2. Vis ually ins pect for obvious s igns of mechani cal or electrical damage2.
Visual InspectionMechanicalElectrical
Check for t he ins tal lati on of non-s tandard acces s ori es which may affect orobs truct t he functi on of the safet y belt s ys temFrayed or damaged webbi ngMi ss i ng or damaged but ton s t opPret ensi oner(s ) Buckl es/Stal ks
FusesW iri ng harnes s faultCorrect engagement ofelectrical connect orsLoose or corroded connect ionsW arning l amp bulb(s)Impact s ens or(s )Buckl e s ens or(s )Pret ensi oner(s )Belt t ensi on s ens or(s )Res traints cont rol module
3. If an obvious cause for an obs erved or report ed concern is found, correct t he caus e (if pos s ible) beforeproceeding t o t he next s t ep3.
4. If t he caus e is not vis ually evi dent , carry out t he t es t met hods des cri bed bel ow, alternat ively check fordi agnos ti c troubl e codes and refer t o t he rel evant diagnost ic troubl e code index4.
For a compl ete lis t of all di agnos ti c troubl e codes that coul d be l ogged on t his vehicle, pleas e refer to s ect ion 100-00.REFER to: Di agnos ti c Trouble Code (DTC) Index - DTC: Res trai nts Cont rol Module (RCM) (100-00 General Informati on,Des cript ion and Operat ion).
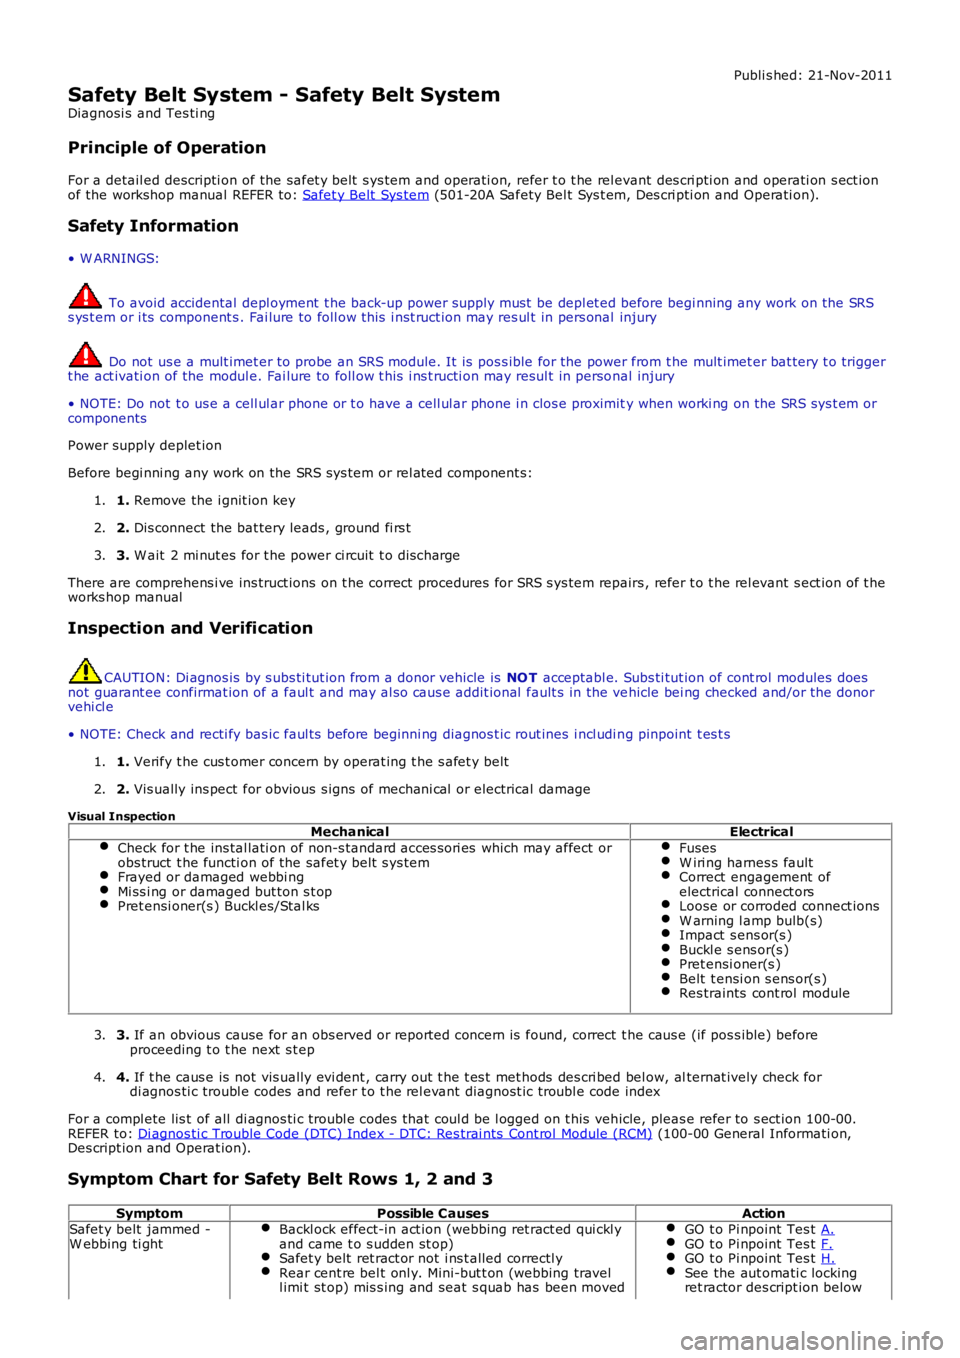
Symptom Chart for Safety Belt Rows 1, 2 and 3
SymptomPossible CausesActionSafet y belt jammed -W ebbing ti ghtBackl ock effect-in act ion (webbing ret ract ed qui ckl yand came t o s udden st op)Safet y belt ret ract or not i ns t alled correctl yRear cent re bel t onl y. Mini-but t on (webbing travell imi t st op) mis s ing and seat s quab has been moved
GO t o Pi npoint Tes t A.GO t o Pi npoint Tes t F.GO t o Pi npoint Tes t H.See the aut omati c lockingret ractor des cript ion below
Page 2453 of 3229
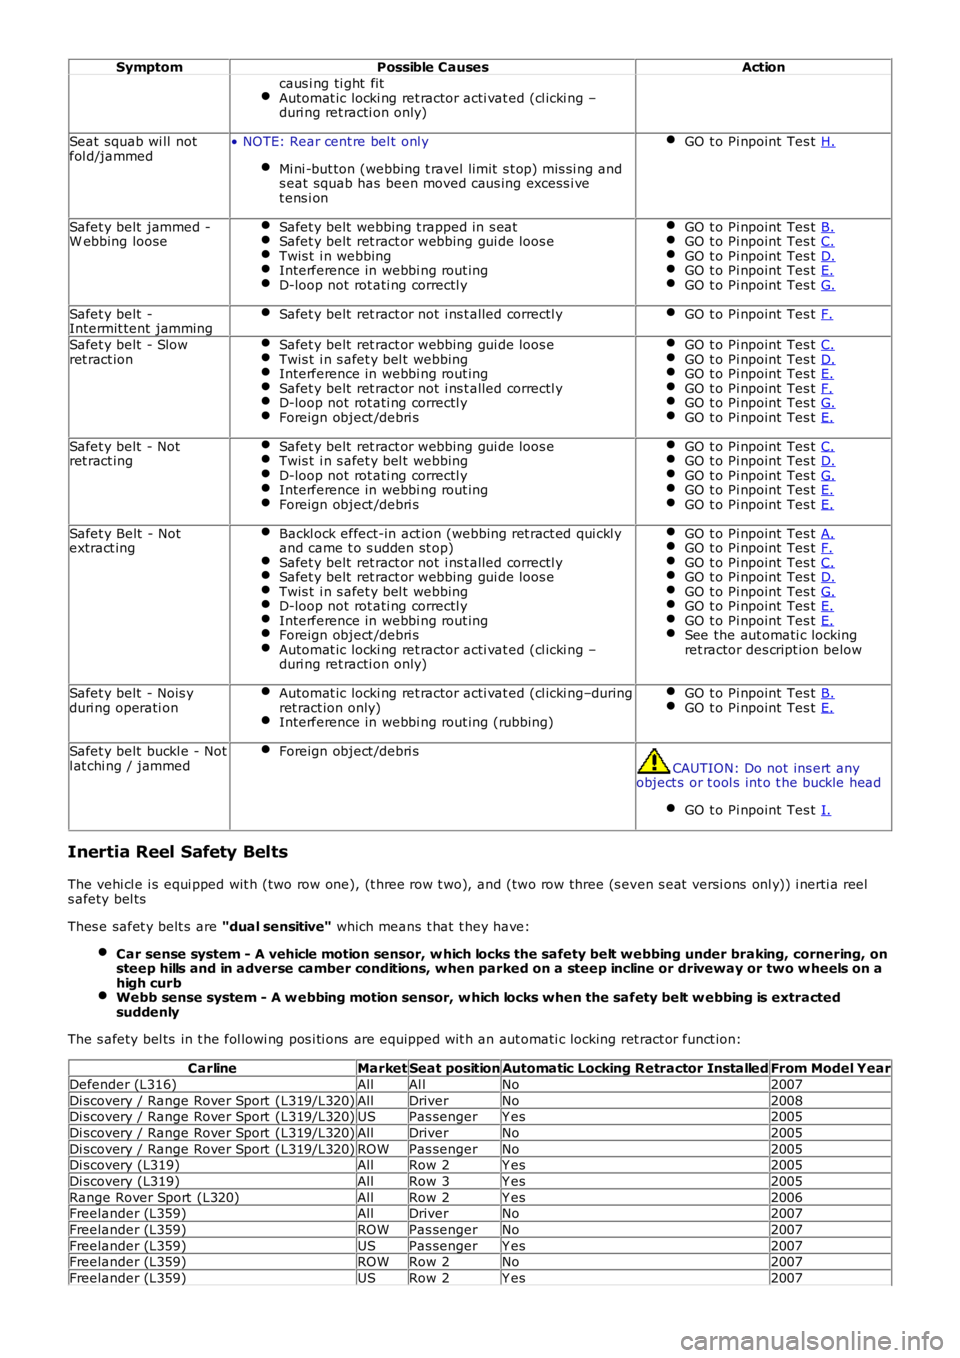
SymptomPossible CausesAction
caus i ng ti ght fitAutomat ic locki ng ret ractor acti vat ed (cl icki ng –duri ng ret racti on only)
Seat squab wi ll notfol d/jammed• NOTE: Rear cent re bel t onl y
Mi ni -but ton (webbing t ravel limit s t op) mis si ng ands eat squab has been moved caus ing excess i vet ens i on
GO t o Pi npoint Tes t H.
Safet y belt jammed -W ebbing looseSafet y belt webbing t rapped in s eatSafet y belt ret ract or webbing gui de loos eTwis t i n webbingInterference in webbi ng rout ingD-loop not rot ati ng correctl y
GO t o Pi npoint Tes t B.GO t o Pi npoint Tes t C.GO t o Pi npoint Tes t D.GO t o Pi npoint Tes t E.GO t o Pi npoint Tes t G.
Safet y belt -Intermit tent jammingSafet y belt ret ract or not i ns t alled correctl yGO t o Pi npoint Tes t F.
Safet y belt - Slowret ract ionSafet y belt ret ract or webbing gui de loos eTwis t i n s afet y bel t webbingInterference in webbi ng rout ingSafet y belt ret ract or not i ns t alled correctl yD-loop not rot ati ng correctl yForeign object /debri s
GO t o Pi npoint Tes t C.GO t o Pi npoint Tes t D.GO t o Pi npoint Tes t E.GO t o Pi npoint Tes t F.GO t o Pi npoint Tes t G.GO t o Pi npoint Tes t E.
Safet y belt - Notret ract ingSafet y belt ret ract or webbing gui de loos eTwis t i n s afet y bel t webbingD-loop not rot ati ng correctl yInterference in webbi ng rout ingForeign object /debri s
GO t o Pi npoint Tes t C.GO t o Pi npoint Tes t D.GO t o Pi npoint Tes t G.GO t o Pi npoint Tes t E.GO t o Pi npoint Tes t E.
Safet y Belt - Notextract ingBackl ock effect-in act ion (webbing ret ract ed qui ckl yand came t o s udden st op)Safet y belt ret ract or not i ns t alled correctl ySafet y belt ret ract or webbing gui de loos eTwis t i n s afet y bel t webbingD-loop not rot ati ng correctl yInterference in webbi ng rout ingForeign object /debri sAutomat ic locki ng ret ractor acti vat ed (cl icki ng –duri ng ret racti on only)
GO t o Pi npoint Tes t A.GO t o Pi npoint Tes t F.GO t o Pi npoint Tes t C.GO t o Pi npoint Tes t D.GO t o Pi npoint Tes t G.GO t o Pi npoint Tes t E.GO t o Pi npoint Tes t E.See the aut omati c lockingret ractor des cript ion below
Safet y belt - Nois yduri ng operati onAutomat ic locki ng ret ractor acti vat ed (cl icki ng–duringret ract ion only)Interference in webbi ng rout ing (rubbing)
GO t o Pi npoint Tes t B.GO t o Pi npoint Tes t E.
Safet y belt buckl e - Notl at chi ng / jammedForeign object /debri s
CAUTION: Do not ins ert anyobject s or t ool s int o t he buckle head
GO t o Pi npoint Tes t I.
Inertia Reel Safety Belts
The vehi cl e i s equi pped wit h (two row one), (t hree row t wo), and (two row three (s even s eat versi ons onl y)) i nerti a reels afety bel ts
Thes e safet y belt s are "dual sensitive" which means t hat t hey have:
Car sense system - A vehicle motion sensor, w hich locks the safety belt webbing under braking, cornering, onsteep hills and in adverse camber conditions, when parked on a steep incline or driveway or two w heels on ahigh curbWebb sense system - A w ebbing motion sensor, w hich locks when the safety belt w ebbing is extractedsuddenly
The s afety bel ts in t he fol lowi ng pos i ti ons are equipped wit h an aut omati c locking ret ract or funct ion:
CarlineMarketSeat positionAutomatic Locking Retractor InstalledFrom Model Year
Defender (L316)AllAl lNo2007
Di scovery / Range Rover Sport (L319/L320)AllDriverNo2008Di scovery / Range Rover Sport (L319/L320)USPas sengerY es2005
Di scovery / Range Rover Sport (L319/L320)AllDriverNo2005
Di scovery / Range Rover Sport (L319/L320)ROWPas sengerNo2005Di scovery (L319)AllRow 2Y es2005
Di scovery (L319)AllRow 3Y es2005
Range Rover Sport (L320)AllRow 2Y es2006Freelander (L359)AllDriverNo2007
Freelander (L359)ROWPas sengerNo2007
Freelander (L359)USPas sengerY es2007Freelander (L359)ROWRow 2No2007
Freelander (L359)USRow 2Y es2007
Page 2454 of 3229
1
2
3
1
2
3
4
1
2
3
4
5
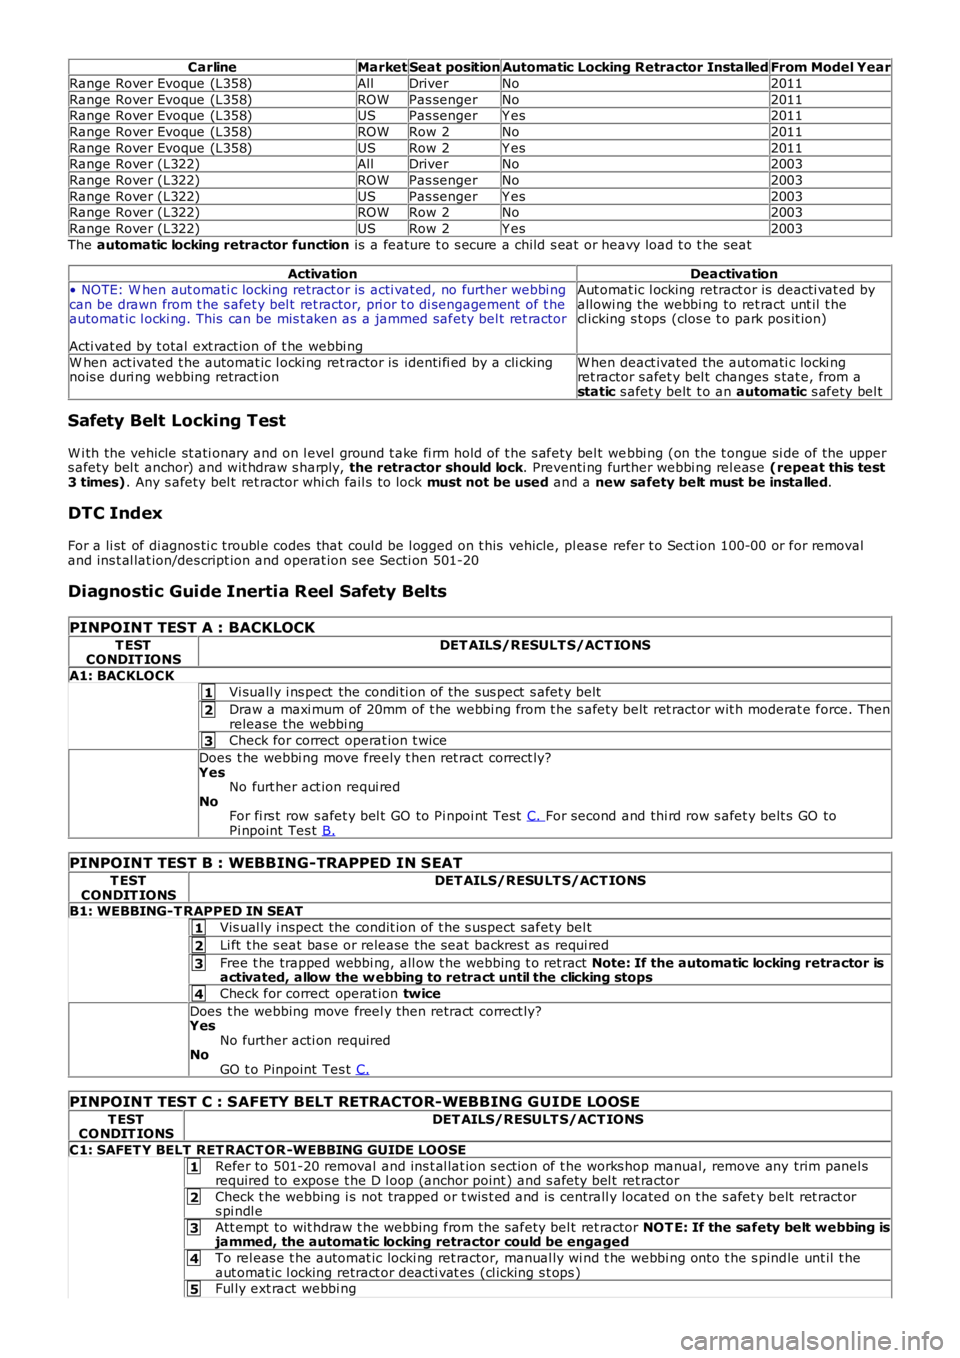
CarlineMarketSeat positionAutomatic Locking Retractor InstalledFrom Model Year
Range Rover Evoque (L358)AllDriverNo2011
Range Rover Evoque (L358)ROWPas sengerNo2011Range Rover Evoque (L358)USPas sengerY es2011
Range Rover Evoque (L358)ROWRow 2No2011
Range Rover Evoque (L358)USRow 2Y es2011Range Rover (L322)AllDriverNo2003
Range Rover (L322)ROWPas sengerNo2003
Range Rover (L322)USPas sengerY es2003Range Rover (L322)ROWRow 2No2003
Range Rover (L322)USRow 2Y es2003
The automatic locking retractor function is a feature t o s ecure a child s eat or heavy load t o t he seat
ActivationDeactivation• NOTE: W hen aut omati c locking retract or is acti vat ed, no further webbi ngcan be drawn from t he s afet y bel t ret ractor, pri or t o di sengagement of t heautomat ic l ocki ng. This can be mis t aken as a jammed safety bel t ret ractor
Acti vat ed by t otal ext ract ion of t he webbi ng
Aut omat ic l ocking retract or is deacti vat ed byallowi ng the webbi ng to ret ract unt il t hecl icking s t ops (clos e t o park pos it ion)
W hen act ivated t he automat ic l ocki ng ret ractor is identi fi ed by a cli ckingnois e duri ng webbing retract ionW hen deact ivated the aut omati c locki ngret ractor s afet y bel t changes s tat e, from astatic s afet y belt t o an automatic s afety bel t
Safety Belt Locking Test
W i th the vehicle st ati onary and on l evel ground t ake fi rm hold of t he s afety bel t webbi ng (on the t ongue si de of the uppers afety bel t anchor) and wit hdraw s harply, the retractor should lock. Preventi ng further webbi ng rel eas e (repeat this test3 times). Any s afety bel t ret ractor whi ch fail s t o lock must not be used and a new safety belt must be installed.
DTC Index
For a li st of di agnos ti c troubl e codes that coul d be l ogged on t his vehicle, pl eas e refer t o Sect ion 100-00 or for removaland ins t al lat ion/des cript ion and operat ion s ee Secti on 501-20
Diagnostic Guide Inertia Reel Safety Belts
PINPOINT TEST A : BACKLOCK
T ESTCONDIT IONSDET AILS/RESULT S/ACT IONS
A1: BACKLOCK
Vi suall y i ns pect the condi ti on of the sus pect s afet y belt
Draw a maxi mum of 20mm of t he webbi ng from t he s afet y belt ret ract or wit h moderat e force. Thenrelease the webbi ng
Check for correct operat ion t wice
Does t he webbi ng move freely t hen ret ract correct ly?YesNo furt her act ion requi redNoFor fi rs t row s afet y bel t GO to Pi npoi nt Tes t C. For second and thi rd row s afet y belt s GO toPi npoint Tes t B.
PINPOINT TEST B : WEBBING-TRAPPED IN SEAT
T ESTCONDIT IONSDET AILS/RESULT S/ACT IONS
B1: WEBBING-T RAPPED IN SEAT
Vis ual ly i nspect the condit ion of t he s uspect safety bel t
Li ft t he s eat bas e or release the s eat backres t as requi red
Free t he trapped webbi ng, all ow t he webbing t o ret ract Note: If the automatic locking retractor isactivated, allow the w ebbing to retract until the clicking stops
Check for correct operat ion twice
Does t he webbing move freel y then retract correct ly?YesNo further acti on requiredNoGO t o Pinpoint Tes t C.
PINPOINT TEST C : SAFETY BELT RETRACTOR-WEBBING G UIDE LOOSE
T ESTCO NDIT IONSDET AILS/RESULT S/ACT IONS
C1: SAFET Y BELT RET RACT OR -WEBBING GUIDE LOOSE
Refer to 501-20 removal and ins t al lat ion s ect ion of t he works hop manual, remove any trim panel srequired to expos e t he D l oop (anchor point ) and s afety bel t ret ractor
Check t he webbing i s not trapped or t wis t ed and is centrall y located on t he s afet y belt ret ract ors pi ndl e
Att empt to wit hdraw t he webbing from t he safety bel t ret ractor NOT E: If the safety belt webbing isjammed, the automatic locking retractor could be engaged
To rel eas e t he automat ic locki ng ret ractor, manual ly wi nd t he webbi ng onto t he s pindle unt il t heaut omat ic l ocking retract or deacti vat es (cl icking s t ops )Ful ly ext ract webbi ng
Page 2465 of 3229
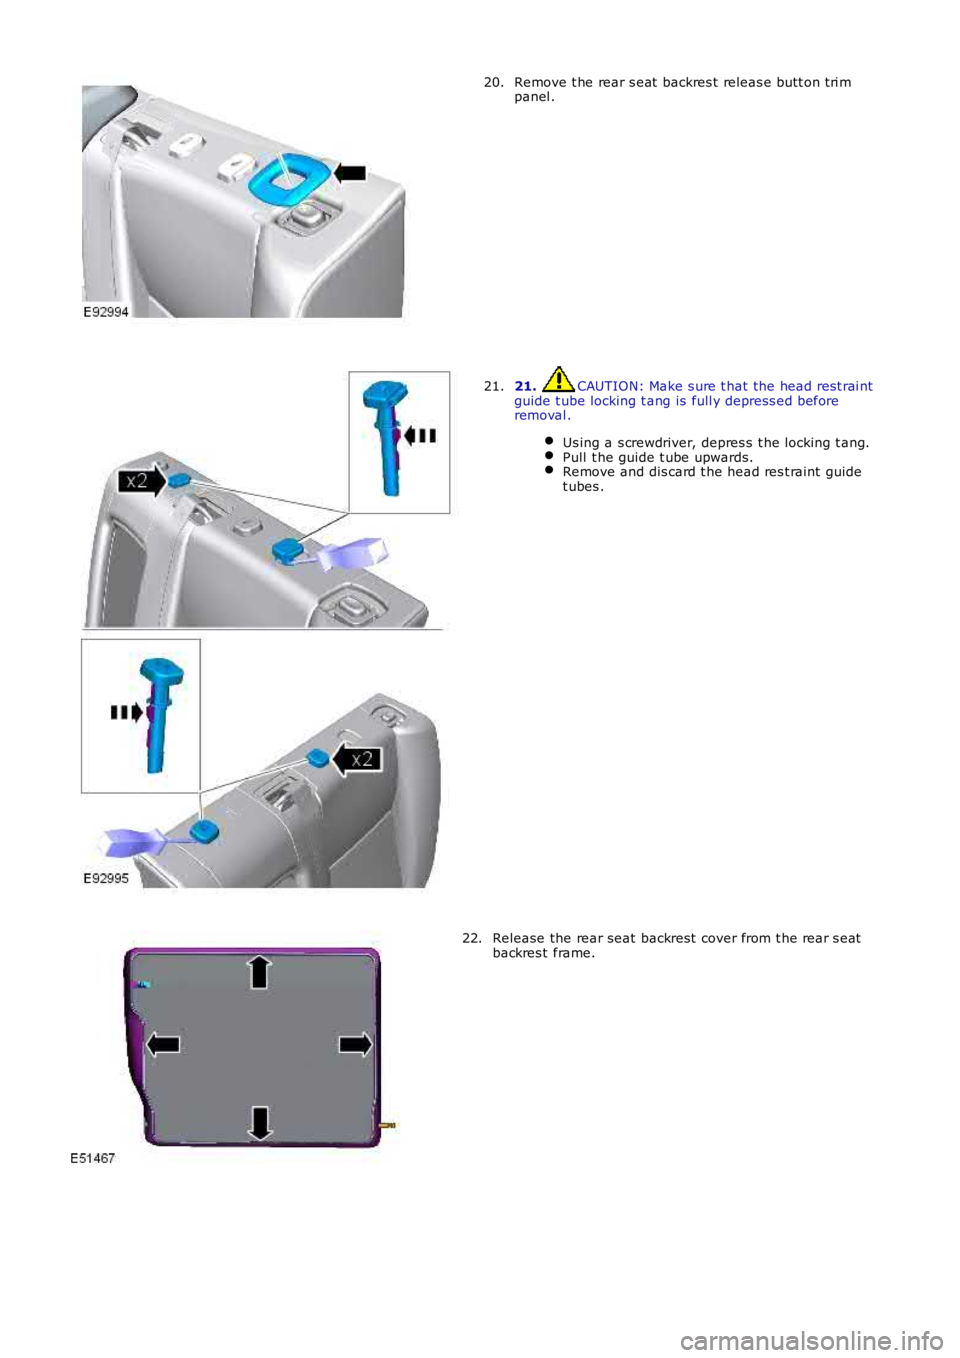
Remove t he rear s eat backres t releas e butt on t ri mpanel .20.
21. CAUTION: Make s ure t hat the head rest rai ntguide t ube locking t ang is full y depress ed beforeremoval .
Us ing a s crewdriver, depres s t he locking t ang.Pull t he guide t ube upwards.Remove and dis card t he head res t raint guidet ubes .
21.
Release the rear seat backrest cover from t he rear s eatbackres t frame.22.
Page 2467 of 3229
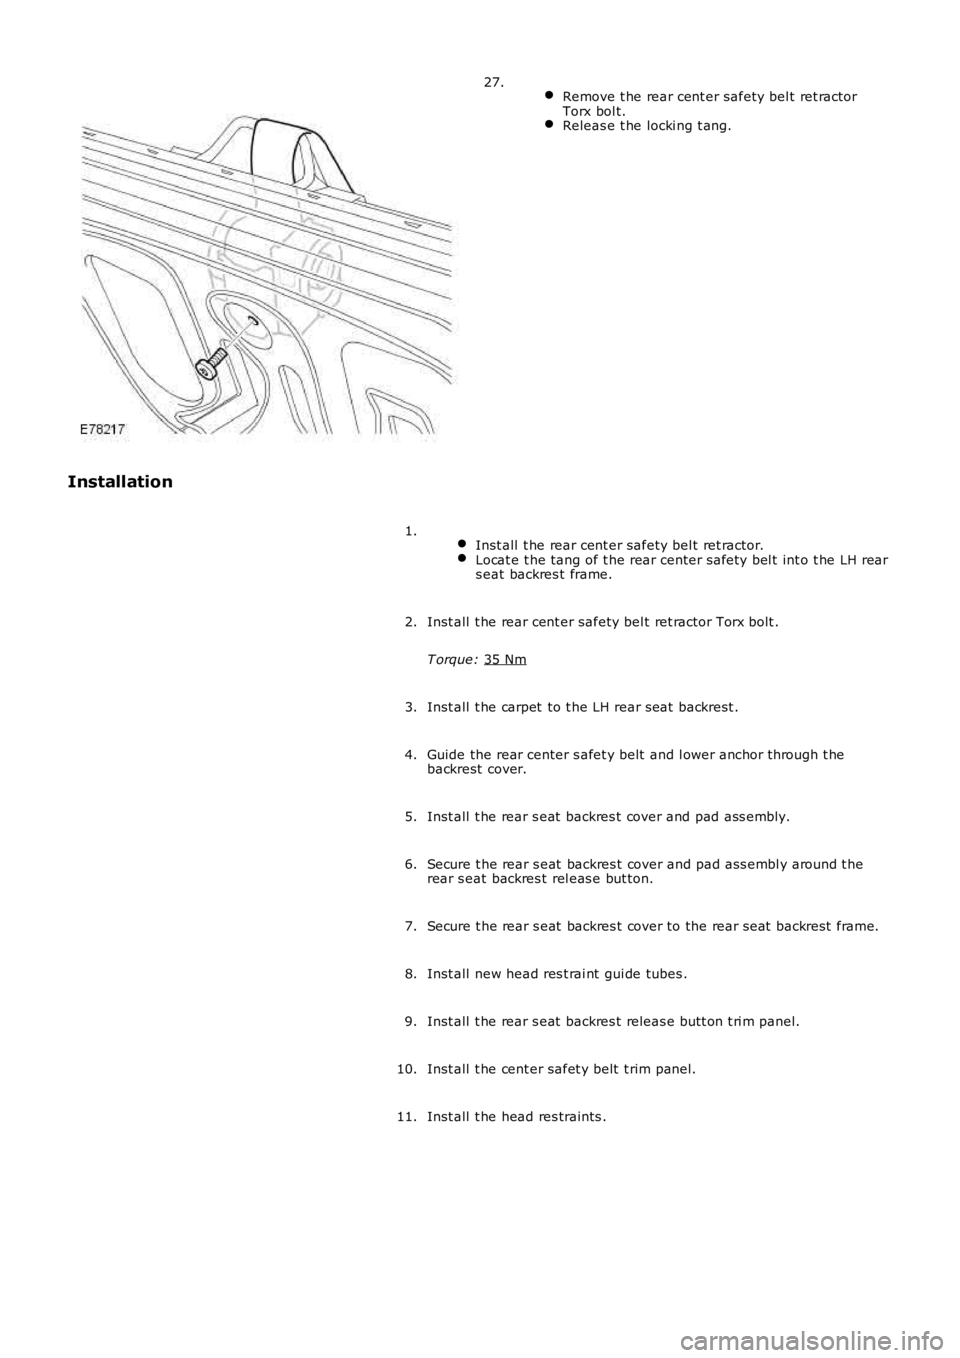
Remove t he rear cent er safety bel t ret ractor
Torx bol t. Releas e t he locki ng t ang.27.
Installation Inst all t he rear cent er safety bel t ret ractor. Locat e t he tang of t he rear center s afety bel t int o t he LH rear
s eat backres t frame. 1.
Inst all t he rear cent er safety bel t ret ractor Torx bolt .
T orque: 35 Nm 2.
Inst all t he carpet to t he LH rear seat backrest .
3.
Guide the rear center s afet y belt and l ower anchor t hrough t he
backrest cover.
4.
Inst all t he rear s eat backres t cover and pad ass embly.
5.
Secure t he rear s eat backres t cover and pad ass embl y around t he
rear s eat backres t rel eas e but ton.
6.
Secure t he rear s eat backres t cover to the rear seat backrest frame.
7.
Inst all new head res t rai nt gui de tubes .
8.
Inst all t he rear s eat backres t releas e butt on t ri m panel.
9.
Inst all t he cent er safet y belt t rim panel.
10.
Inst all t he head res traints .
11.