2006 LAND ROVER FRELANDER 2 window
[x] Cancel search: windowPage 2814 of 3229
Windows and mirrors
94
L
Window reset
The windows will need to be reset if the battery
is disconnected, beco mes discharged, or
power supply is interrupted.
Reset as follows :-
1. Close the window fully.
2. Release the switch, then lift it to the close
position and hold for two seconds.
3. Open the window fully.
4. Release the switch, then push it to the
open position and hold for two seconds.
5. Lift and release the switch to operate the
one touch function.
6. Repeat the procedure on each window.
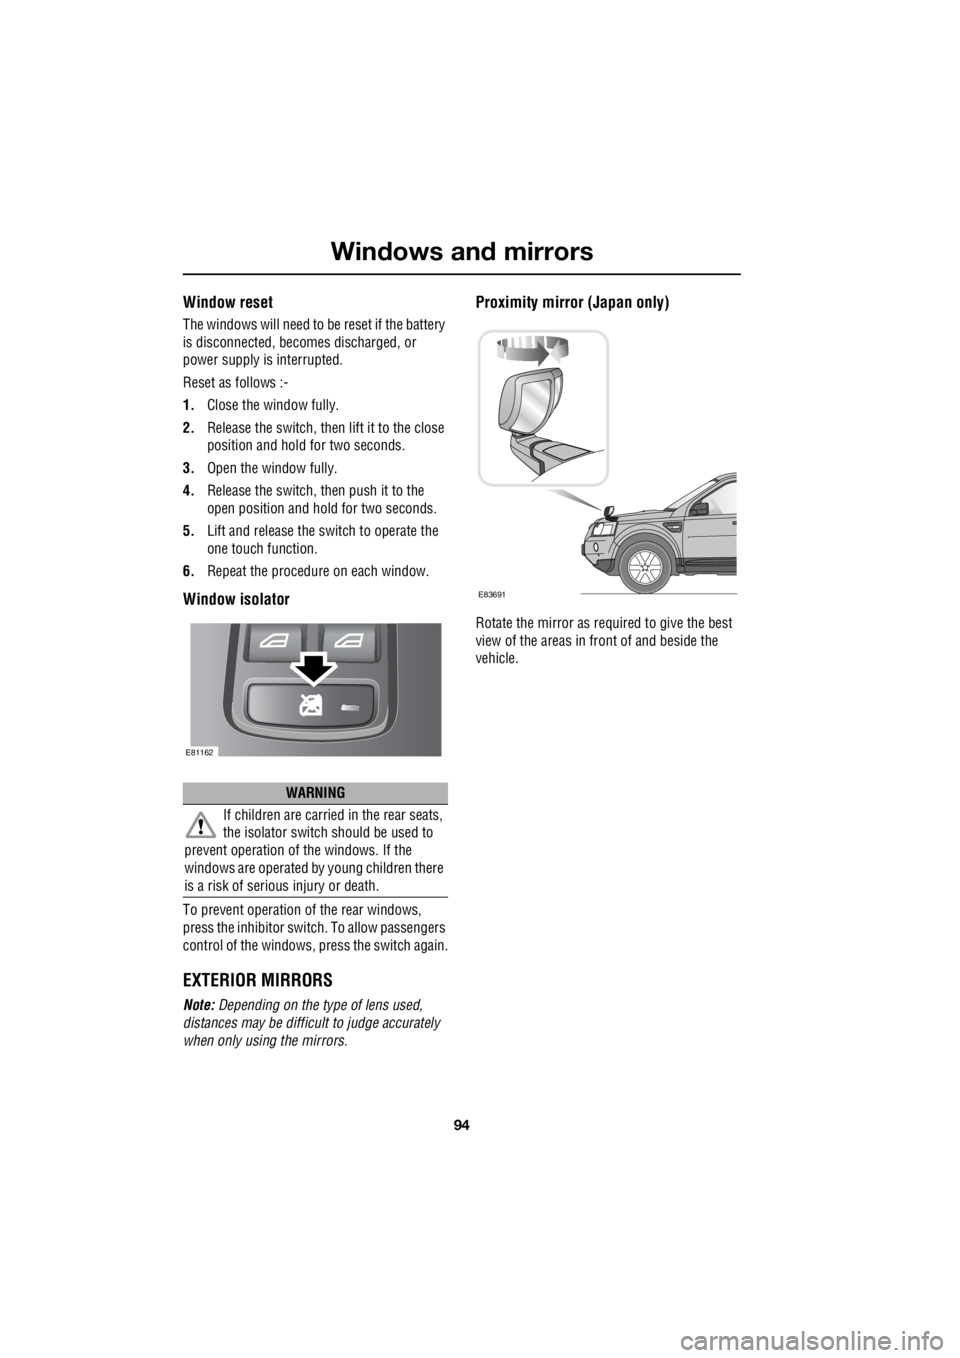
Window isolator
To prevent operation of the rear windows,
press the inhibitor switch. To allow passengers
control of the windows, press the switch again.
EXTERIOR MIRRORS
Note: Depending on the type of lens used,
distances may be difficu lt to judge accurately
when only using the mirrors.
Proximity mirror (Japan only)
Rotate the mirror as required to give the best
view of the areas in front of and beside the
vehicle.
WARNING
If children are carried in the rear seats,
the isolator switch should be used to
prevent operation of the windows. If the
windows are operated by young children there
is a risk of serious injury or death.
E81162
E83691
Page 2815 of 3229
95
Windows and mirrors
R
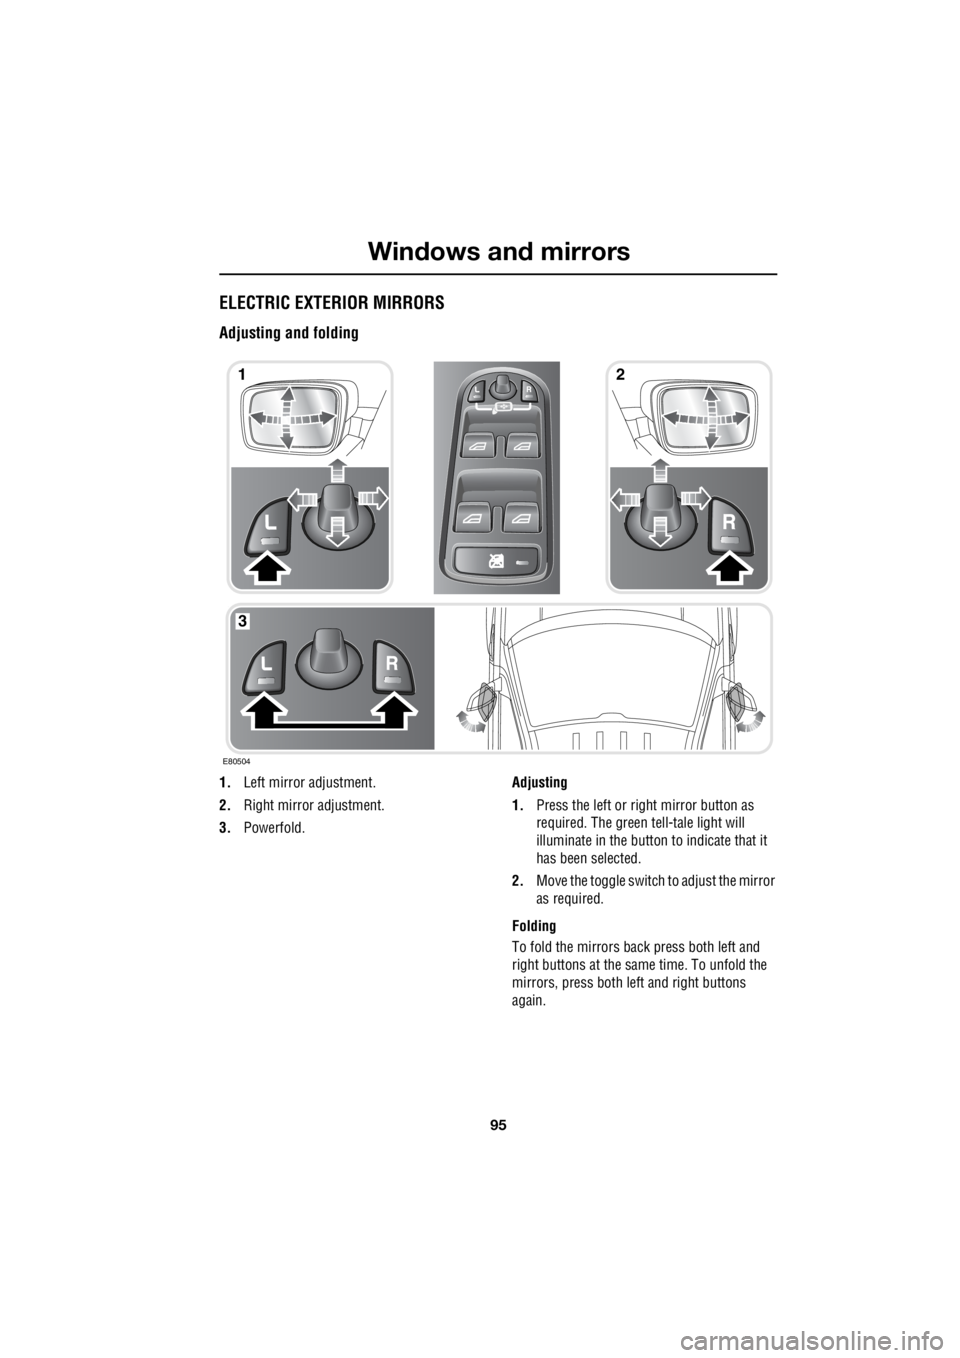
ELECTRIC EXTERIOR MIRRORS
Adjusting and folding
1. Left mirror adjustment.
2. Right mirror adjustment.
3. Powerfold. Adjusting
1. Press the left or right mirror button as
required. The green tell-tale light will
illuminate in the button to indicate that it
has been selected.
2. Move the toggle switch to adjust the mirror
as required.
Folding
To fold the mirrors back press both left and
right buttons at the sa me time. To unfold the
mirrors, press both le ft and right buttons
again.
12
3
E80504
Page 2816 of 3229
Windows and mirrors
96
L
Note: If the mirrors are folded manually, or
knocked into the folded position accidentally,
the mirror head will be loose. To re-engage the
mechanism, fold, then unfold the mirrors using
the switches.
The system is protected by a thermal cut-out
which will temporarily disable the powerfold
feature if the switches are operated repeatedly.
If the cut-out operates when the mirrors are
folded, they can be unfolded manually.
Powerfold will only opera te if the vehicle is
stationary, or travelling at 20 km/h (12 mph) or
less.
Automatic folding The mirrors can be configured by
your land Rover De aler/Authorised
repairer to automa tically fold when
the vehicle is locked, and unfold when it is
unlocked.
Note: If the mirrors were folded using the
switches, they will not unfold when the vehicle
is unlocked.
Mirror dip when reversing
When reverse gear is selected the driver and
passenger door mirrors are automatically
adjusted to provide an improved viewing angle
for reversing.
The exact dipped position can be adjusted
when the mirrors are dipped. The next time
reverse is selected, the newly adjusted position
will be selected.
When the gear selector is moved out of
reverse, the mirrors will return to their previous
position.
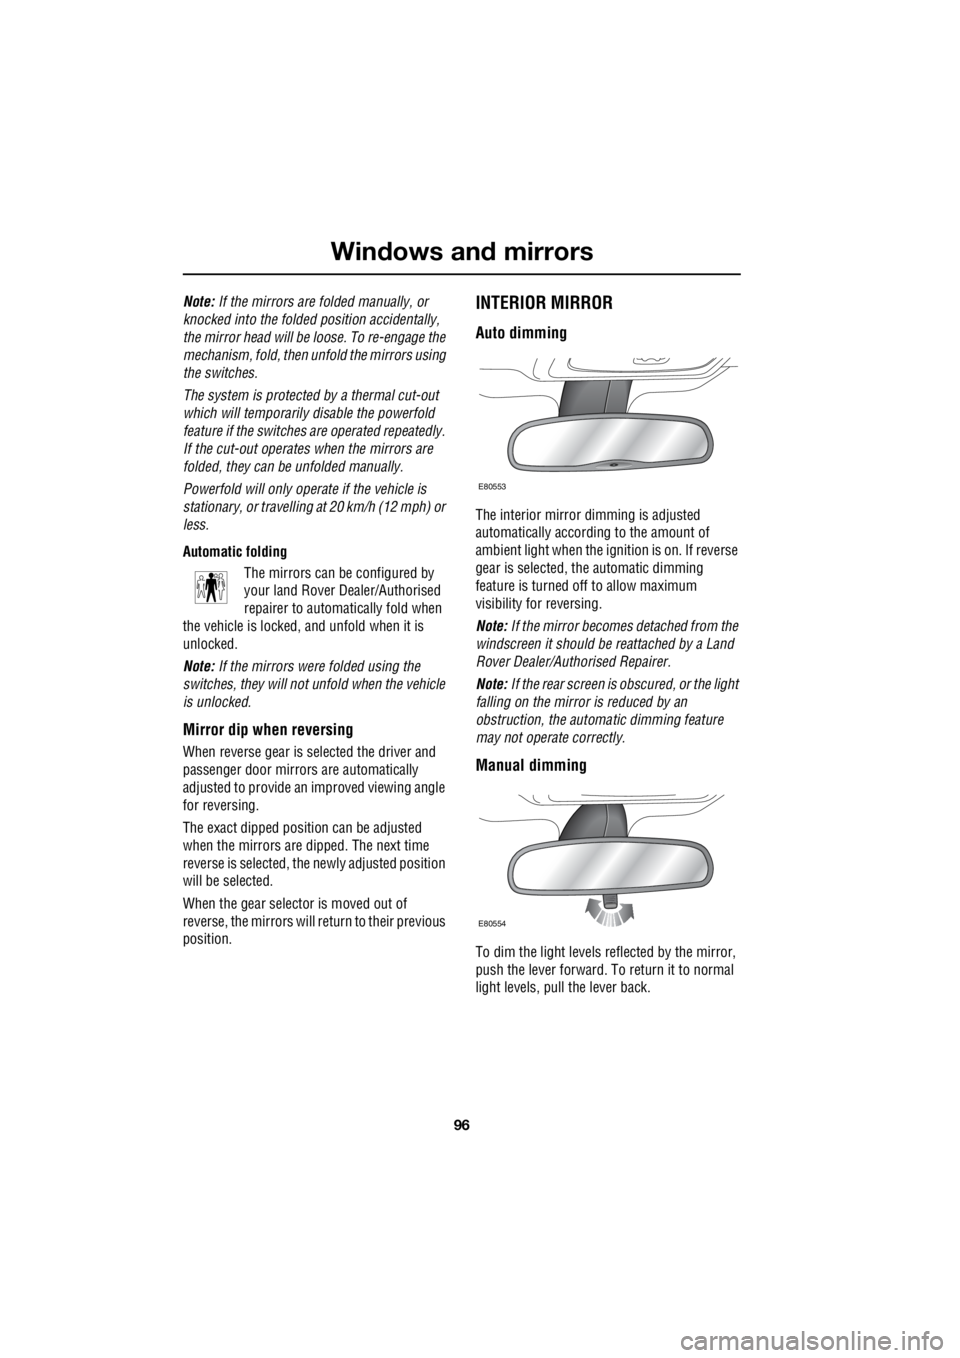
INTERIOR MIRROR
Auto dimming
The interior mirror dimming is adjusted
automatically according to the amount of
ambient light when the i gnition is on. If reverse
gear is selected, the automatic dimming
feature is turned off to allow maximum
visibility for reversing.
Note: If the mirror becomes detached from the
windscreen it should be reattached by a Land
Rover Dealer/Authorised Repairer.
Note: If the rear screen is obscured, or the light
falling on the mirror is reduced by an
obstruction, the automa tic dimming feature
may not operate correctly.
Manual dimming
To dim the light levels re flected by the mirror,
push the lever forward. To return it to normal
light levels, pull the lever back.
E80553
E80554
Page 2822 of 3229
Climate control
102
L
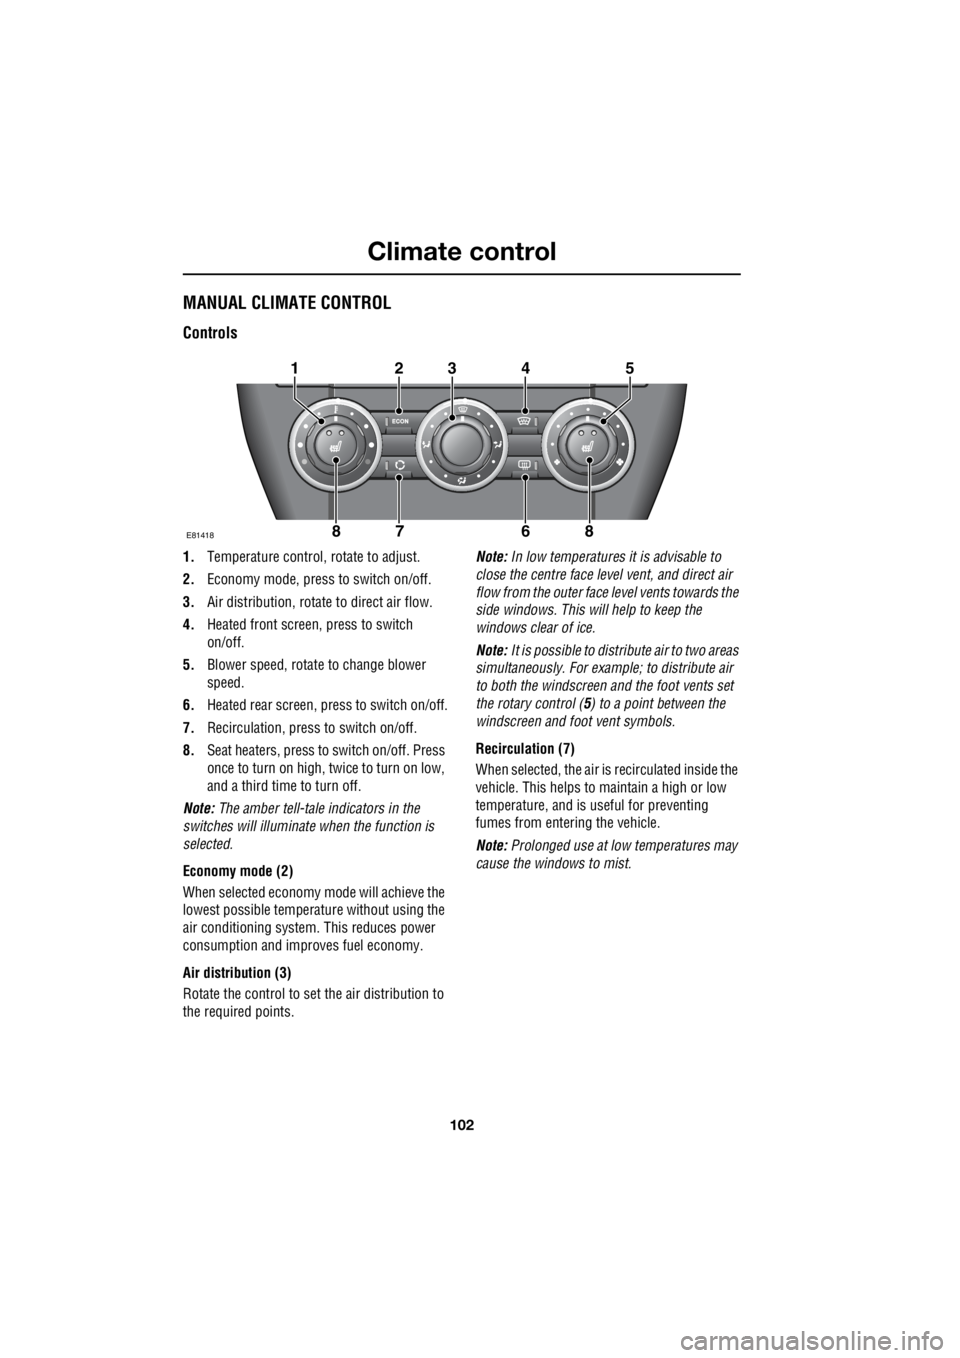
MANUAL CLIMATE CONTROL
Controls
1. Temperature control, rotate to adjust.
2. Economy mode, press to switch on/off.
3. Air distribution, rotate to direct air flow.
4. Heated front screen, press to switch
on/off.
5. Blower speed, rotate to change blower
speed.
6. Heated rear screen, press to switch on/off.
7. Recirculation, pres s to switch on/off.
8. Seat heaters, press to switch on/off. Press
once to turn on high, twice to turn on low,
and a third time to turn off.
Note: The amber tell-tale indicators in the
switches will illuminate when the function is
selected.
Economy mode (2)
When selected economy mo de will achieve the
lowest possible temperature without using the
air conditioning system . This reduces power
consumption and impr oves fuel economy.
Air distribution (3)
Rotate the control to set the air distribution to
the required points. Note:
In low temperatures it is advisable to
close the centre face le vel vent, and direct air
flow from the outer face level vents towards the
side windows. This will help to keep the
windows clear of ice.
Note: It is possible to distribute air to two areas
simultaneously. For example; to distribute air
to both the windscreen a nd the foot vents set
the rotary control ( 5) to a point between the
windscreen and foot vent symbols.
Recirculation (7)
When selected, the air is recirculated inside the
vehicle. This helps to maintain a high or low
temperature, and is useful for preventing
fumes from entering the vehicle.
Note: Prolonged use at low temperatures may
cause the windows to mist.
E81418
12345
8678
Page 2823 of 3229
103
Climate control
R
AUTOMATIC CLIMATE CONTROL
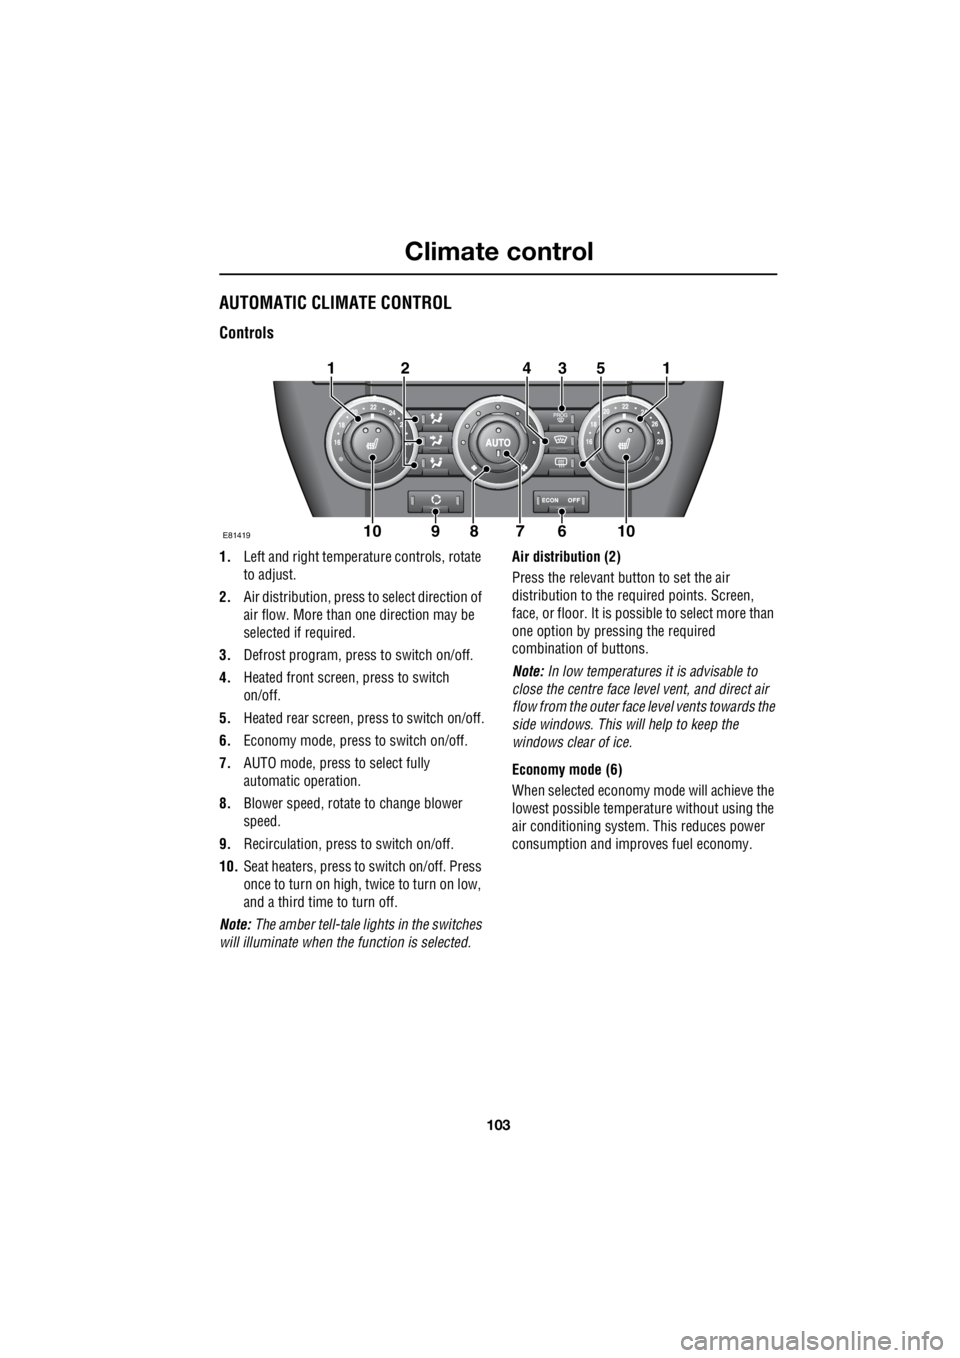
Controls
1. Left and right temperat ure controls, rotate
to adjust.
2. Air distribution, press to select direction of
air flow. More than one direction may be
selected if required.
3. Defrost program, press to switch on/off.
4. Heated front screen, press to switch
on/off.
5. Heated rear screen, press to switch on/off.
6. Economy mode, press to switch on/off.
7. AUTO mode, press to select fully
automatic operation.
8. Blower speed, rotate to change blower
speed.
9. Recirculation, press to switch on/off.
10. Seat heaters, press to switch on/off. Press
once to turn on high, twice to turn on low,
and a third time to turn off.
Note: The amber tell-tale lights in the switches
will illuminate when the function is selected. Air distribution (2)
Press the relevant button to set the air
distribution to the required points. Screen,
face, or floor. It is possible to select more than
one option by pressing the required
combination of buttons.
Note: In low temperatures it is advisable to
close the centre face leve l vent, and direct air
flow from the outer face level vents towards the
side windows. This will help to keep the
windows clear of ice.
Economy mode (6)
When selected economy mode will achieve the
lowest possible temperat ure without using the
air conditioning system . This reduces power
consumption and impr oves fuel economy.
E81419
131
6910
254
1078
Page 2824 of 3229
Climate control
104
L
Auto mode (7)
When the Auto function is selected, you have
the opportunity to select a fully automatic
operation, or manually adjust the fan speed and
the direction of air flow. All other adjustments
which are necessary to maintain the
temperature that you have selected are made
automatically by the climate control system.
There are two tell-tale indicators on the Auto
button. The round indicator represents the
blower control, and th e rectangular indicator
the air distribution control. In fully automatic
mode both indicators illuminate, the round
indicator will extinguish if the blower speed is
changed manually, and the rectangular
indicator extinguishes if the air distribution is
changed manually.
To resume fully automatic operation at any
time, press the Auto button.
Recirculation (9)
When selected, the air is recirculated inside the
vehicle. This helps to ma intain a high or low
temperature, and is useful for preventing
fumes from entering the vehicle.
A single brief press will se lect recirculation for
four minutes. The system will then revert to
fresh air intake to prevent misting.
Pressing and holding the button will select
recirculation until it is switched off. This state
is indicated by three flashes of the tell-tale lamp
in the switch.
Note: Prolonged use at low temperatures may
cause the windows to mist.HEATED WINDOWS AND MIRRORS
The heated windscreen is switched on by
briefly pressing the switch (4).
Note: The operation of the heated mirrors is
fully automatic, and requires no driver
intervention.
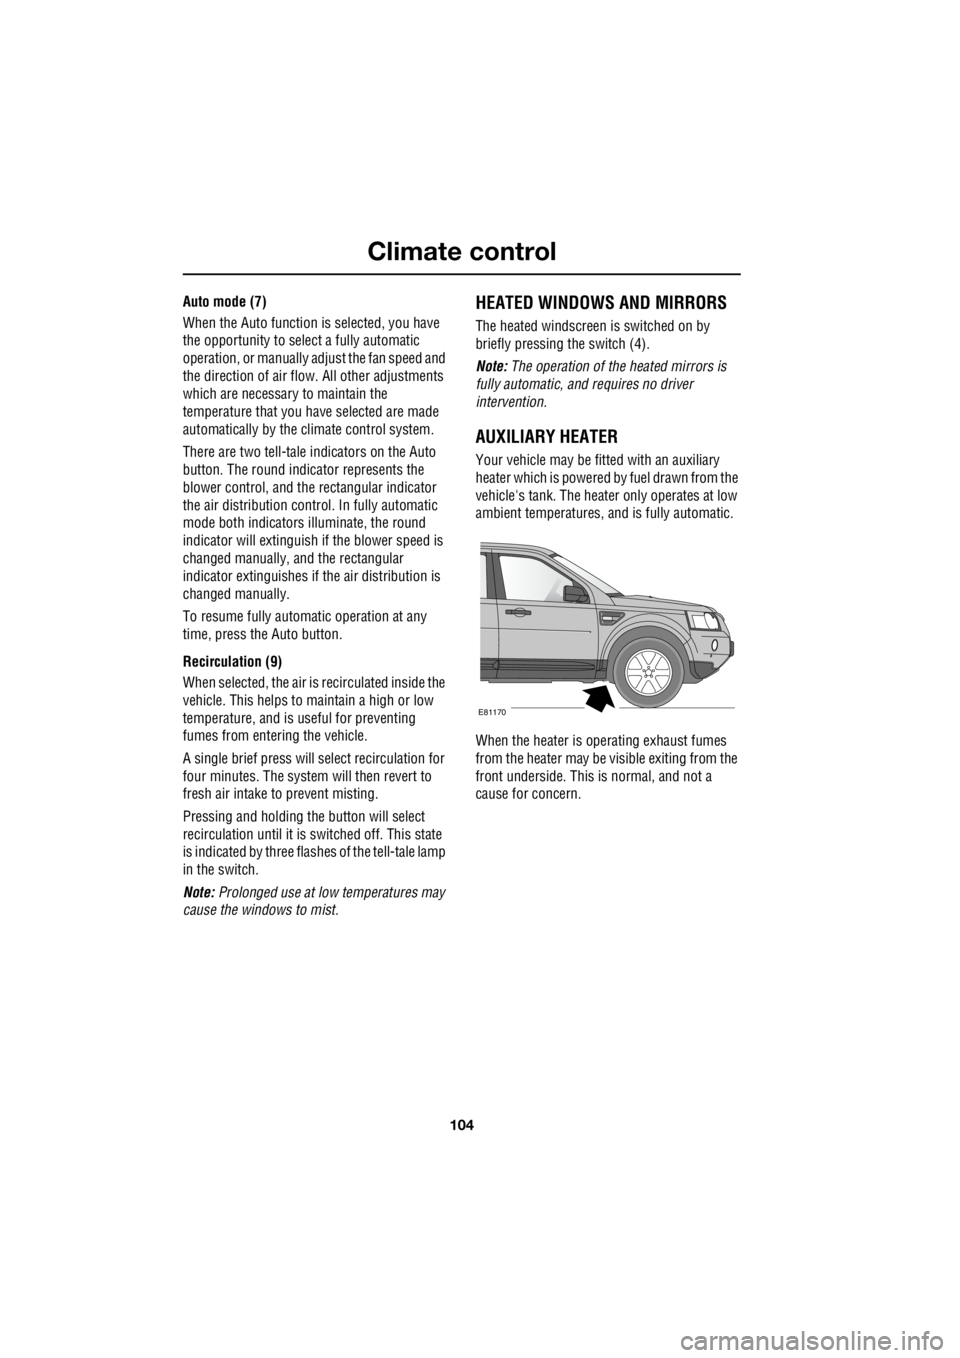
AUXILIARY HEATER
Your vehicle may be fitted with an auxiliary
heater which is powered by fuel drawn from the
vehicle's tank. The heater only operates at low
ambient temperatures, and is fully automatic.
When the heater is operating exhaust fumes
from the heater may be visible exiting from the
front underside. This is normal, and not a
cause for concern.
E81170
Page 2865 of 3229
145
Fuel and refuelling
R
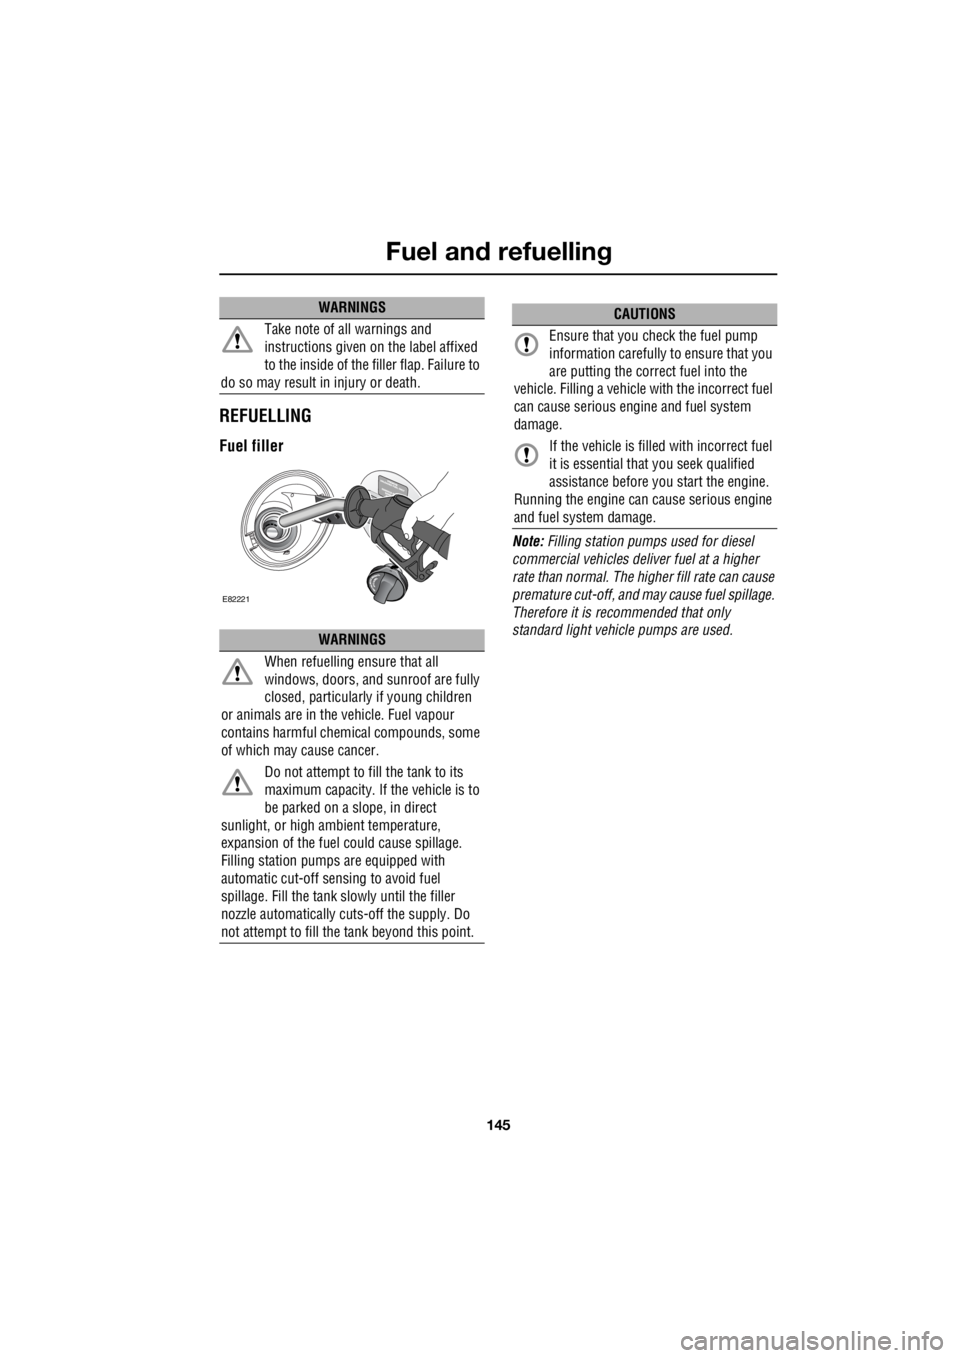
REFUELLING
Fuel filler
Note: Filling station pumps used for diesel
commercial vehicles deliver fuel at a higher
rate than normal. The hi gher fill rate can cause
premature cut-off, and may cause fuel spillage.
Therefore it is recommended that only
standard light vehicle pumps are used.
Take note of all warnings and
instructions given on the label affixed
to the inside of the filler flap. Failure to
do so may result in injury or death.
WARNINGS
When refuelling ensure that all
windows, doors, and sunroof are fully
closed, particularly if young children
or animals are in the vehicle. Fuel vapour
contains harmful chem ical compounds, some
of which may cause cancer.
Do not attempt to fill the tank to its
maximum capacity. If the vehicle is to
be parked on a slope, in direct
sunlight, or high ambient temperature,
expansion of the fuel could cause spillage.
Filling station pumps are equipped with
automatic cut-off sensing to avoid fuel
spillage. Fill the tank sl owly until the filler
nozzle automatically cuts -off the supply. Do
not attempt to fill the tank beyond this point.
WARNINGS
E82221
CAUTIONS
Ensure that you check the fuel pump
information carefully to ensure that you
are putting the correct fuel into the
vehicle. Filling a vehicle with the incorrect fuel
can cause serious engi ne and fuel system
damage.
If the vehicle is filled with incorrect fuel
it is essential that you seek qualified
assistance before you start the engine.
Running the engine can cause serious engine
and fuel system damage.
Page 2874 of 3229
Vehicle care
154
L
Vehicle careCLEANING THE ALLOY WHEELS
Wash the wheels with soap and water, this
should be done more frequently when the
wheels are exposed to he avy dirt deposits, salt,
clay etc. If you are unsure how often to clean
the wheels in particular conditions, seek advice
from your Land Rover Dealer/Authorised
Repairer.
Land Rover approved wheel cleaner should be
used to remove heavy soiling.
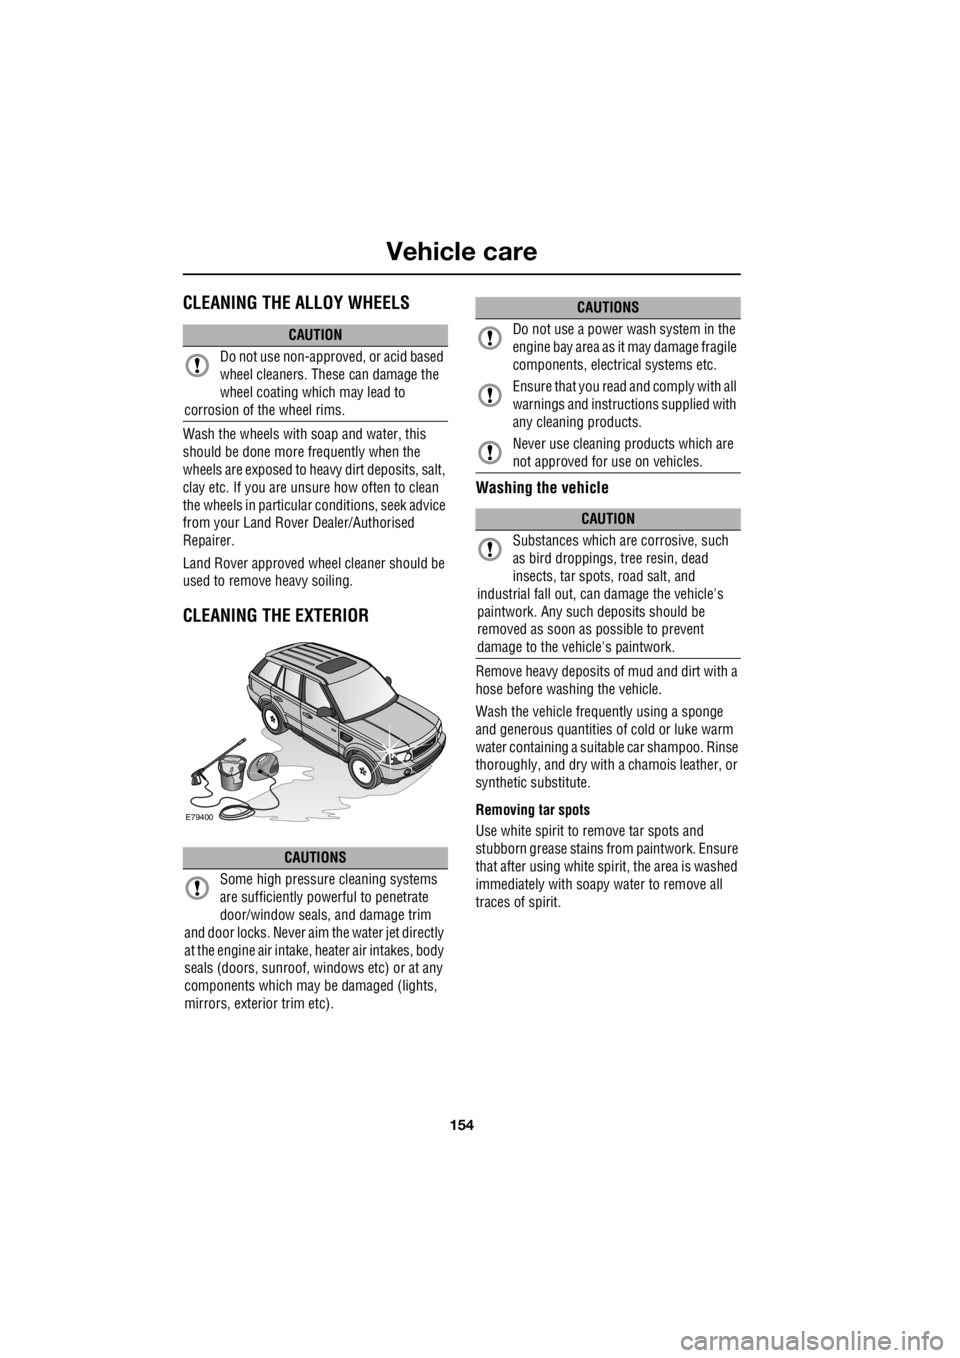
CLEANING THE EXTERIOR
Washing the vehicle
Remove heavy deposits of mud and dirt with a
hose before washing the vehicle.
Wash the vehicle frequently using a sponge
and generous quantities of cold or luke warm
water containing a suit able car shampoo. Rinse
thoroughly, and dry with a chamois leather, or
synthetic substitute.
Removing tar spots
Use white spirit to remove tar spots and
stubborn grease stains from paintwork. Ensure
that after using white spirit, the area is washed
immediately with soapy water to remove all
traces of spirit.
CAUTION
Do not use non-approved, or acid based
wheel cleaners. These can damage the
wheel coating which may lead to
corrosion of the wheel rims.
CAUTIONS
Some high pressure cleaning systems
are sufficiently pow erful to penetrate
door/window seals, and damage trim
and door locks. Never aim the water jet directly
at the engine air intake, heater air intakes, body
seals (doors, sunroof, windows etc) or at any
components which may be damaged (lights,
mirrors, exterior trim etc).
E79400
Do not use a power wash system in the
engine bay area as it may damage fragile
components, electrical systems etc.
Ensure that you read and comply with all
warnings and instruct ions supplied with
any cleaning products.
Never use cleaning products which are
not approved for use on vehicles.
CAUTION
Substances which are corrosive, such
as bird droppings, tr ee resin, dead
insects, tar spots, road salt, and
industrial fall out, can damage the vehicle's
paintwork. Any such deposits should be
removed as soon as possible to prevent
damage to the vehicle's paintwork.
CAUTIONS