Page 161 of 364

STORAGE BIN SAFETY
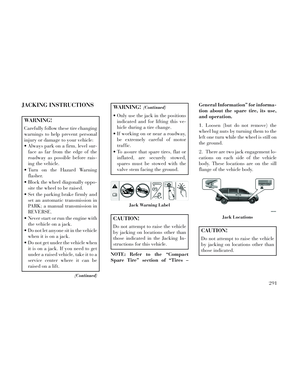
WARNING
Carefully follow these warnings to
help prevent personal injury or dam-
age to your vehicle:
WARNING!
Always close the storage bin cov-ers when your vehicle is unat-
tended.
Do not allow children to have ac- cess to the second row seat stor-
age bins. Once in the storage bin,
young children may not be able to
escape. If trapped in the storage
bin, children can die from suffo-
cation or heat stroke.
In a collision, serious injury could result if the seat storage bin cov-
ers are not properly latched.
Do not drive the vehicle with the storage bin covers open. Keep the
storage bin covers closed and
latched while the vehicle is in mo-
tion.
(Continued)
WARNING!(Continued)
Do not operate the storage bincovers while the vehicle is in mo-
tion.
Do not use a storage bin latch as a tie down.
CAUTION!
The storage bin cover must be flat
and locked to avoid damage from
contact with the front seat tracks,
which have minimal clearance to
the cover.
NOTE: In the event of an indi-
vidual being locked inside the
storage bin, the storage bin cover
can be opened from inside of the
bin by pushing on the glow-in-the-
dark lever attached to the storage
bin cover latching mechanism. Seat Storage Bin Cover
Emergency Release Lever
As a security measure, the Seat Stor-
age Bin Cover has an Emergency Re-
lease Lever built into the latching
mechanism.
NOTE: In the event of an indi-
vidual being locked inside the
storage bin, the storage bin cover
can be opened from inside of the
bin by pushing on the glow-in-the-
dark lever attached to the storage
bin cover latching mechanism.
Storage Bin Cover Emergency Release
Lever
155
Page 162 of 364

CENTER AND REAR
OVERHEAD CONSOLE
STORAGE (for
version/markets, where
provided)
The overhead storage system comes in
several options.
COAT HOOKS
Coat hooks are located along the
headliner for the second and third row
seating positions. The coat hook load
limit is 4.5 kg . Exceeding the recom-
mended load limit can cause the coat
hooks to break or disengage from the
vehicle.
CARGO AREA STORAGE
The liftgate sill plate has a raised line
with the statement “Load To This
Line”. This line indicates how far
rearward cargo can be placed without
interfering with liftgate closing.NOTE: With all rear seats stowed
or removed, 1.2 x 2.4 m sheets of
building material will fit on the
vehicle floor with the liftgate
closed. The front seats must be
moved slightly forward of the rear-
most position.
In addition to the rear cargo area, on
some models there are open storage
areas located in the rear trim panels.
CONSOLE FEATURES
There are three consoles available:
Basic, Premium and Super.
Overhead Console Features
1 — DVD15 — Storage
2 — Rear HVAC 6 — DVD1
3 — Courtesy
Lights 7 — Courtesy
Lights
4 — Storage 8 — Halo Light-
ing
1(for versions/markets, where pro-
vided)Rear Cargo Area Loading Limit
Trim Panel Storage Area
156
Page 163 of 364

WARNING!
Do not operate this vehicle with a
console compartment lid in the
open position. Cellular phones, mu-
sic players, and other handheld
electronic devices should be stowed
while driving. Use of these devices
while driving can cause an accident
due to distraction, resulting in
death or injury.
BASIC CONSOLE
Basic Console features consist of the
following:
The basic console profile allows ve-hicle occupants to easily pass
through the first row to the second.
Four cupholders accept up to extra large size beverage cups or 0.6 L
plastic bottles. Cupholders are
dishwasher safe for cleaning.
The cupholders are removable to access a large storage bin. The basic console is removable
from the vehicle for additional floor
space by removing the cap and clip
at the console base.
To Remove The Basic Floor
Console
1. Remove the front anchor cup plug
and clip.
2. Slide the console base forward
while lifting slightly to clear the rear
load floor hook.
3. Remove the console.
To Reinstall The Basic Floor
Console
1. Position the console at a slight
angle (front slightly higher than the
rear).
2. Slide the console rearward into the
floor bracket/hook.
3. Align the console until the front
anchor cup plug hole is centered on
the winch hole. 4. Reinstall the clip first and then
while pushing downward on the con-
sole with slight pressure, reinstall the
cover plug.
5. Pull up on the console to be sure it
is firmly latched.
WARNING!
In an accident, serious injury could
result if the removable floor console
is not properly installed. Always be
sure the removable floor console is
fully latched.
PREMIUM CONSOLE (for
versions/markets, where
provided)
The three-compartment console with
sliding storage bin, sliding upper tray
with storage and large console storage
bin offers multiple configurations.
Four cupholders with dishwasher
safe liners for cleaning. The cup-
holders can accept plastic bottles,
large cups or mugs with handles.
Top tray storage
157
Page 164 of 364

Upper storage bin can hold nineregular or 18 thin CDs or other
items
Large console center storage will store headphones for the available
rear DVD entertainment system or
other items
12 Volt DC power outlet provides continuous power inside the con-
sole for cell phones or other
electronics.
Rear occupant accessible
Multiple adjustments
Removable from vehicle for addi- tional floor space.
The top and center console sections
slide forward and rearward to provide
added user comfort. A one-piece cup
holder insert for both cavities can eas-
ily be removed for cleaning. The cup-
holders will also accommodate large
size cups and 0.6 L bottles.
Position 1 shows the console closed
with four cupholders and a conve-
nient storage tray. Position 2 shows the raised storage
tray revealing a large storage area be-
low.
Dual Storage Bins
Position 3 shows the top portion of the
console in a rearward position. This is
accomplished by lifting the upper
most latch at the front of the console.This provides easy access to the stor-
age area below and provides two of
the four cupholders for the second
row passengers.
Position 4 shows the complete console
in its rearmost position. Again, lifting
second latch handle at the front of the
console, allows complete access to a
lower storage bin and provides addi-
tional cupholders for rear passengers.
Console Position 1
Console Position 2
Console Position 3
Console Position 4
158
Page 165 of 364

To Remove The Premium Floor
Console
1. Pull up on the bottom release
handle in the front of the console.
2. Lift the rear of the console up sev-
eral inches/centimeters.
3. Pull rearward to disengage from
floor and remove console.
To Reinstall The Premium Floor
Console:
1. Position the console at a slight
angle (rear slightly higher than the
front).
2. Slide the console forward into the
floor bracket.
3. Rotate the rear of the console
down until it is resting on the floor
bracket.
4. Push down on the rear of the con-
sole until it is seated in the rear floor
bracket.
5. Pull up on the console to be sure it
is firmly latched.WARNING!
In an accident, serious injury could
result if the removable floor console
is not properly installed. Always be
sure the removable floor console is
fully latched.
SUPER CONSOLE (for
versions/markets, where
provided)
The Super Console contains multiple
storage areas, front lower pass
through, top forward bin, top rear-
ward bin and rear pull out drawer.
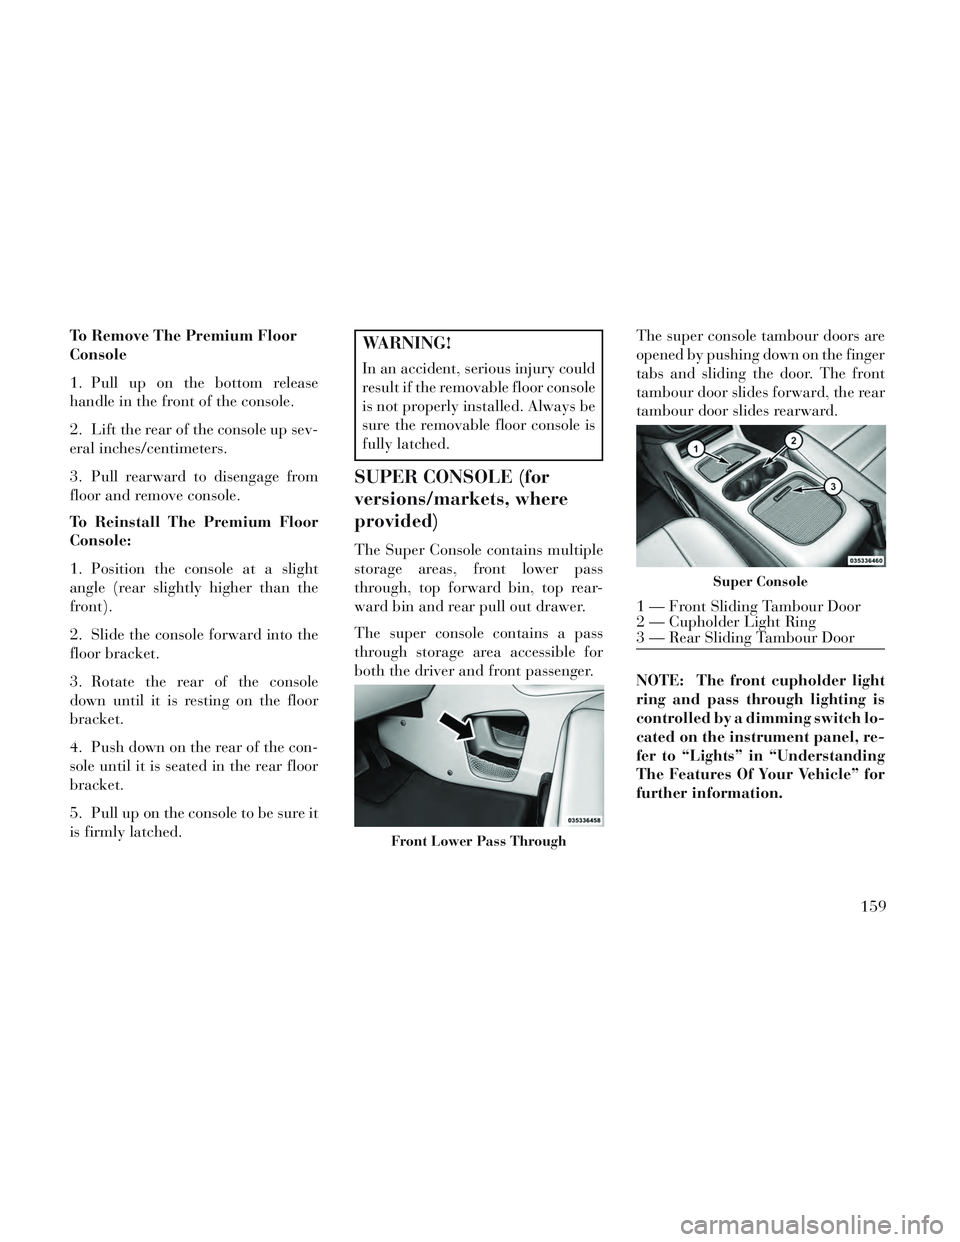
The super console contains a pass
through storage area accessible for
both the driver and front passenger.The super console tambour doors are
opened by pushing down on the finger
tabs and sliding the door. The front
tambour door slides forward, the rear
tambour door slides rearward.
NOTE: The front cupholder light
ring and pass through lighting is
controlled by a dimming switch lo-
cated on the instrument panel, re-
fer to “Lights” in “Understanding
The Features Of Your Vehicle” for
further information.
Front Lower Pass Through
Super Console
1 — Front Sliding Tambour Door
2 — Cupholder Light Ring
3 — Rear Sliding Tambour Door
159
Page 166 of 364

Located in the back of the super con-
sole is a storage drawer and cuphold-
ers for the rear passengers.
CARGO AREA FEATURES
RECHARGEABLE
FLASHLIGHT (for
versions/markets, where
provided)
The rechargeable flashlight is
mounted on the right side of the cargo
area. The flashlight snaps out of the
bezel when needed. The flashlight
features two bright LED light bulbs
and is powered by a lithium battery
that recharges when snapped back
into place and the vehicle is either
running or the key is in the accessory
position.Press in on the flashlight to release it.
To operate the flashlight, press the
switch once for high, twice for low,
and a third time to return to off.
REAR WINDOW
FEATURES
REAR WINDOW
DEFROSTER
The rear window defroster
button is located on the cli-
mate control (Mode) knob. Press this
button to turn on the rear window
defroster and the heated outside mir-
rors (for versions/markets, where
provided). An indicator in the button
will illuminate when the rear window
defroster is on. The rear window de-
froster automatically turns off after
approximately 10 minutes. For an ad-
ditional five minutes of operation,
press the button a second time.
NOTE:
You can turn off the heated mir- ror feature at anytime by press-
ing the rear window defroster
switch a second time.
Rear Drawer Storage
Press And Release
Three-Press Switch
160
Page 167 of 364

To prevent excessive batterydrain, use the rear window de-
froster only when the engine is
operating.
CAUTION!
Failure to follow these cautions can
cause damage to the heating ele-
ments:
Use care when washing the insideof the rear window. Do not use
abrasive window cleaners on the
interior surface of the window.
Use a soft cloth and a mild wash-
ing solution, wiping parallel to
the heating elements. Labels can
be peeled off after soaking with
warm water.
Do not use scrapers, sharp instru- ments, or abrasive window clean-
ers on the interior surface of the
window.
Keep all objects a safe distance from the window.
ROOF LUGGAGE RACK
(for versions/markets,
where provided)
The crossbars on your vehicle are de-
livered stowed within the roof rack
side rails. If adding cargo, deploy the
crossbars. Distribute cargo weight
evenly on the roof rack crossbars, to
maximum of 68 kg. The roof rack
does not increase the total load carry-
ing capacity of the vehicle. Be sure the
total load of cargo inside the vehicle
plus that on the external rack does not
exceed the maximum vehicle load ca-
pacity.
The crossbars and side rails are de-
signed to carry weight on vehicles
equipped with a luggage rack. The load must not exceed 68 kg, and
should be uniformly distributed over
the luggage rack crossbars.
NOTE:
Crossbars are error-proofed and
cannot be deployed or stowed in
the incorrect positions.
To help control wind noise, stow the crossbars in the side rails
when they are not in use.
DEPLOYING THE
CROSSBARS
To deploy the crossbars, completely
loosen the thumb screws at both ends
of the crossbar and lift the crossbar
from its stowed position in the side
rail. Repeat with crossbar on the op-
posite side.
Crossbar Stowed In Side Rail
Loosening Crossbars
161
Page 168 of 364

CAUTION!
Use care when removing and han-
dling the crossbars to prevent dam-
age to the vehicle.
Bend the crossbar supports at each
end, taking care to keep hand clear of
pivoting joint. Slide the thumb screw
down. Then, position the crossbars across
the roof.
NOTE: The crossbars are identi-
cal and can be placed in any two of
the three deploy positions.
Make sure the directional arrows on
the crossbars align with the direc-
tional arrows on the side rails. Set the
crossbars into the deployed positions.Once the crossbars are set into posi-
tion, tighten the thumb screws com-
pletely.
Stowing the Crossbars
Reverse the procedure to stow the
crossbars, again, taking care to keep
hand clear of pivoting joint. Crossbars
are identical and can be stowed in
either rail nest. Once the crossbars are
stowed, tighten the thumb screws
completely.
NOTE: Load should always be se-
cured to crossbars first, with rail
tie down loops used as additional
securing points if needed. Tie
loops are intended as supplemen-
tary tie down points only. Do not
use ratcheting mechanisms with
the tie loops.
Stowed Position
Deployed Position
Deploy Positions – Choose Two Of
Three
Crossbar To Side Rail Installation
Tightening Crossbar
162