Page 1522 of 2103
FRONT AXLE Drive Shaft
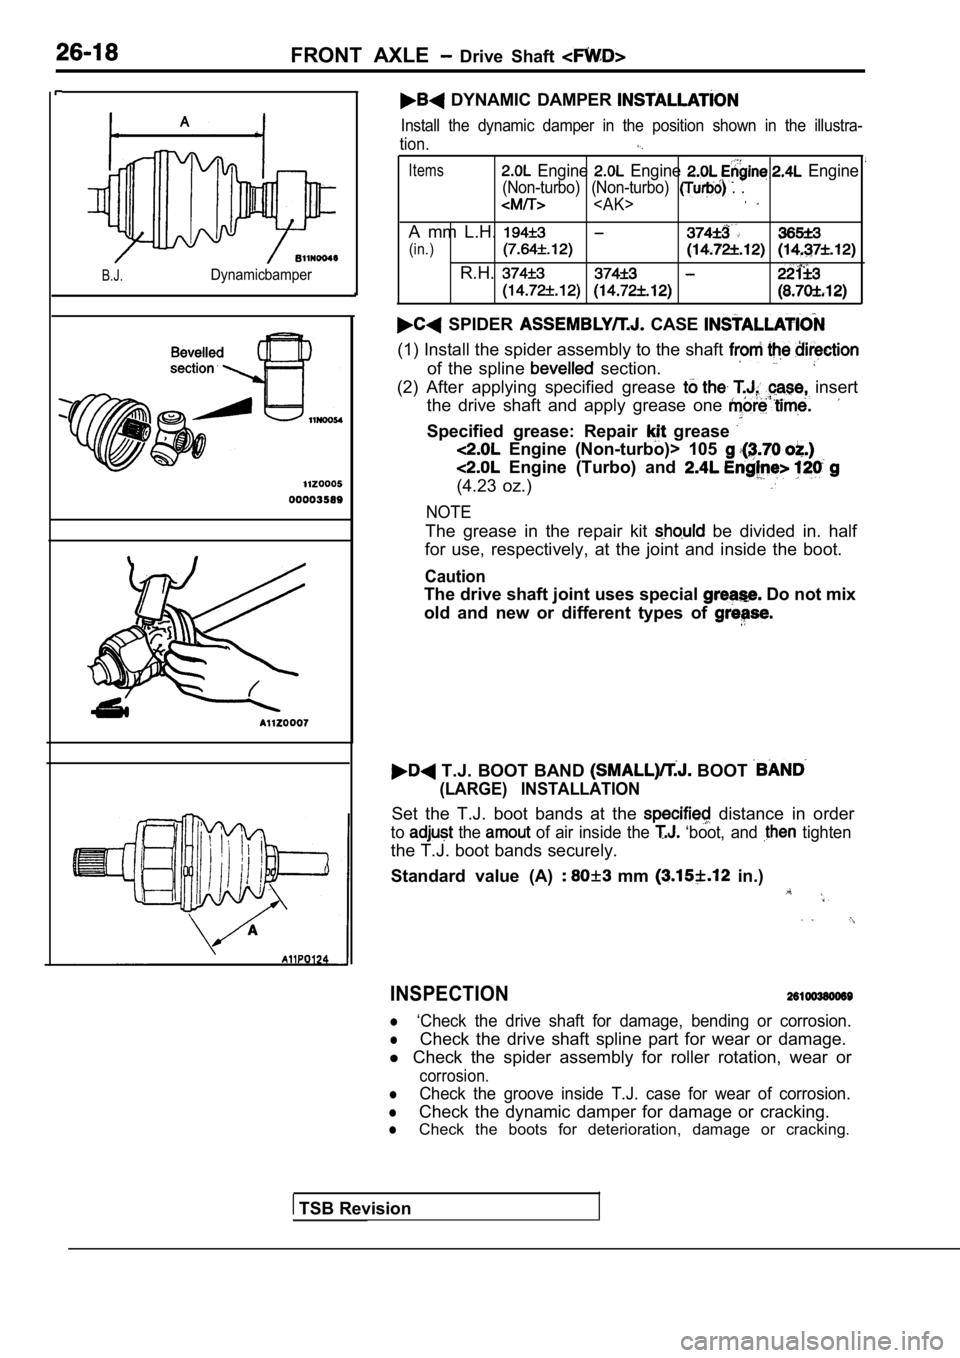
B.J.Dynamicbamper
DYNAMIC DAMPER
Install the dynamic damper in the position shown in the illustra-
tion.
Items Engine Engine Engine
(Non-turbo) (Non-turbo) . .
A mm L.H.
(in.)
R.H.
SPIDER CASE
(1) Install the spider assembly to the shaft
of the spline section.
(2) After applying specified grease insert
the drive shaft and apply grease one
Specified grease: Repair grease
Engine (Non-turbo)> 105
Engine (Turbo) and
(4.23 oz.)
NOTE
The grease in the repair kit be divided in. half
for use, respectively, at the joint and inside the boot.
Caution
The drive shaft joint uses special Do not mix
old and new or different types of
T.J. BOOT BAND BOOT
(LARGE) INSTALLATION
Set the T.J. boot bands at the distance in order
to the of air inside the ‘boot, and tighten
the T.J. boot bands securely.
Standard value (A)
mm in.)
INSPECTION
l‘Check the drive shaft for damage, bending or corro sion.
lCheck the drive shaft spline part for wear or damage.
l Check the spider assembly for roller rotation, wear or
corrosion.
lCheck the groove inside T.J. case for wear of corro sion.
lCheck the dynamic damper for damage or cracking.
lCheck the boots for deterioration, damage or cracking.
TSB Revision
Page 1524 of 2103
FRONT AXLE Drive Shaft
Ball joint
Cord
Nut
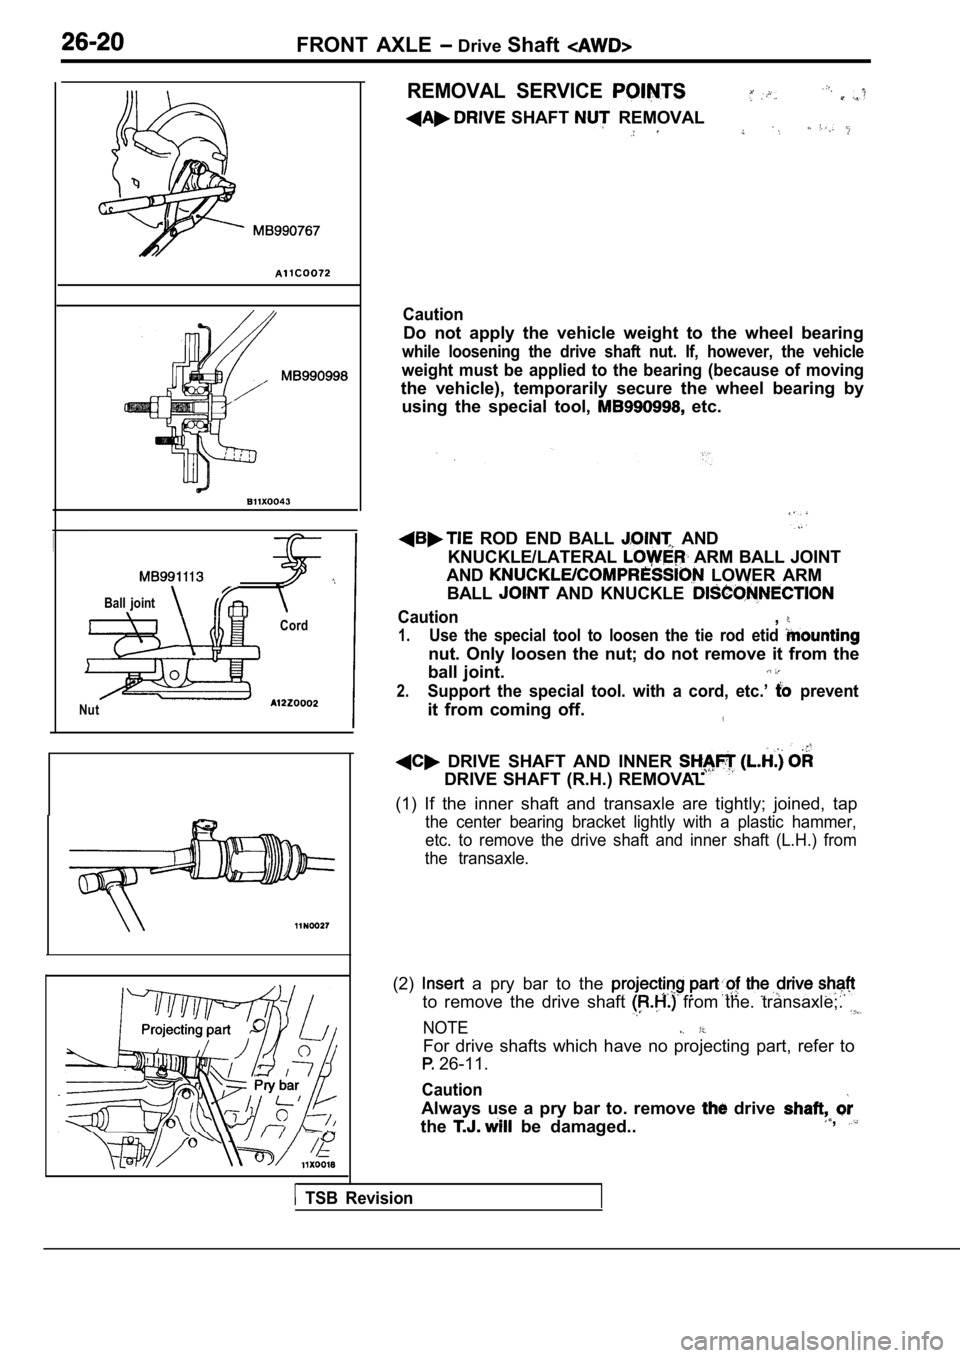
REMOVAL SERVICE
SHAFT REMOVAL
Caution
Do not apply the vehicle weight to the wheel bearin g
while loosening the drive shaft nut. If, however, the vehicle
weight must be applied to the bearing (because of m oving
the vehicle), temporarily secure the wheel bearing by
using the special tool,
etc.
ROD END BALL AND
KNUCKLE/LATERAL
ARM BALL JOINT
AND
LOWER ARM
BALL
AND KNUCKLE
Caution,
1.Use the special tool to loosen the tie rod etid
nut. Only loosen the nut; do not remove it from the
ball joint.
2.Support the special tool. with a cord, etc.’ prevent
it from coming off.
DRIVE SHAFT AND INNER
DRIVE SHAFT (R.H.) REMOVAL
(1) If the inner shaft and transaxle are tightly; j oined, tap
the center bearing bracket lightly with a plastic h ammer,
etc. to remove the drive shaft and inner shaft (L.H .) from
the transaxle.
(2) a pry bar to the
to remove the drive shaft from the. transaxle;.
NOTE
For drive shafts which have no projecting part, ref er to
26-11.
Caution
Always use a pry bar to. remove drive
the
be damaged..,
TSB Revision
Page 1525 of 2103
FRONT AXLE Drive
(3)Use the toot as not to let
get into the transaxle case.
SERVICE POINT
DRIVE SHAFT NUT INSTALLATION
(1) Install the drive shaft washer in the specified direction.
(2) Use the special tool to tighten the drive shaft
Caution
Before securely tightening the drive shaft nuts,
sure there is no load on the wheel bearings.
(3) If the position of the cotter pin holes does no t match,
tighten the nut up to 255 Nm (188
in
(4) Install the cotter pin in the first and bend
it securely.
,
lCheck the drive shaft boot for damage or deteriorat ion.
lCheck the ball joints for wear or operating conditi on.
l Check the
part for wear or damage.,
.
,
. .
TSB Revision
Page 1530 of 2103
FRONT AXLE Drive Shaft
0 0 0 0 3 4 2 1
0 0 0 0 3 4 2 2
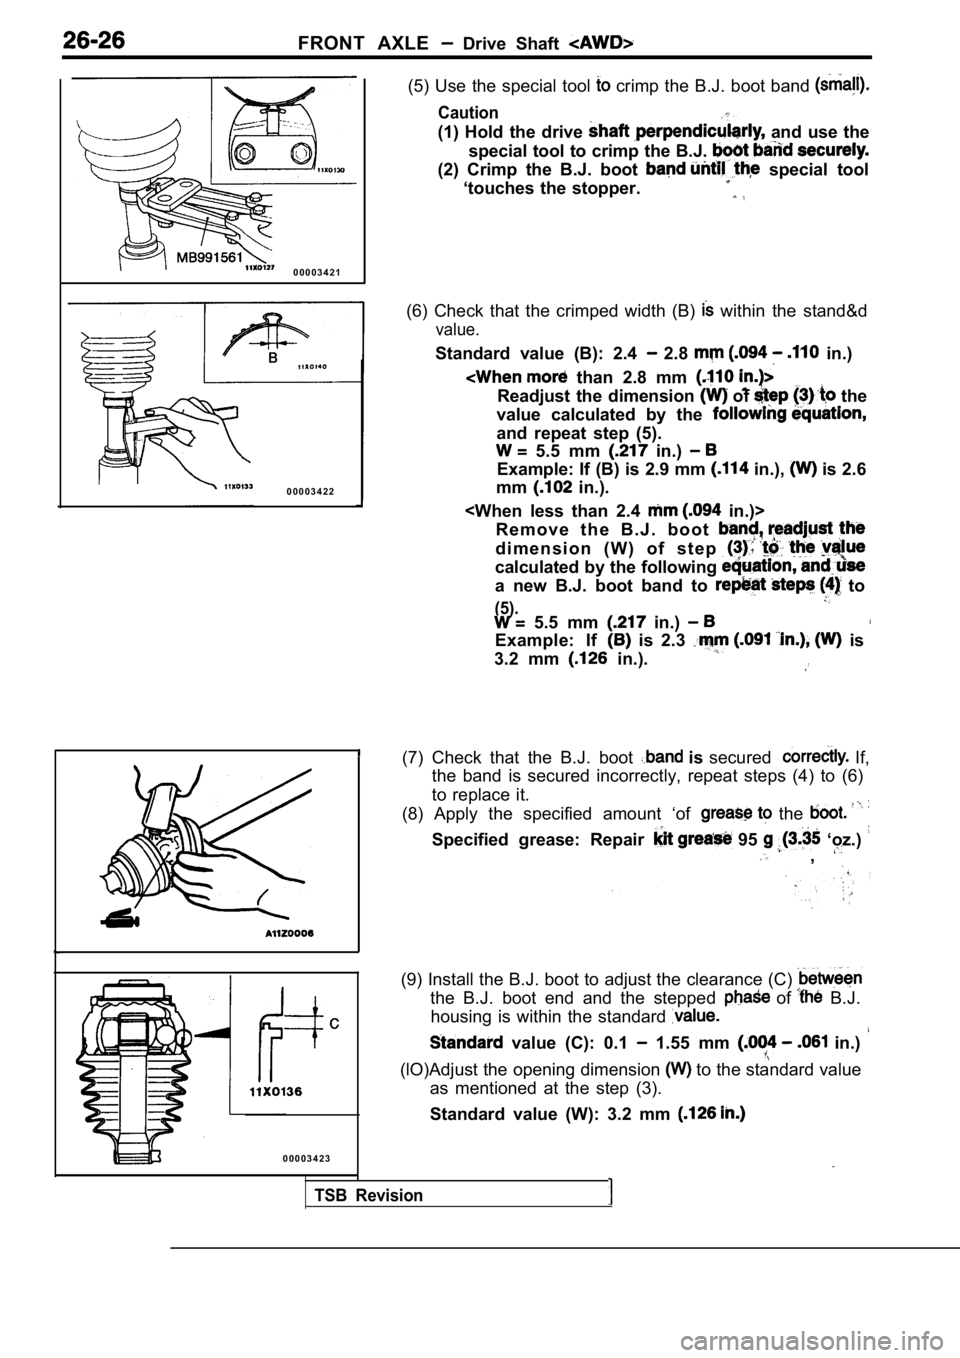
0 0 0 0 3 4 2 3 (5) Use the special tool
crimp the B.J. boot band
Caution
(1) Hold the drive and use the
special tool to crimp the B.J.
(2) Crimp the B.J. boot special tool
‘touches the stopper.
(6) Check that the crimped width (B) within the stand&d
value.
Standard value (B): 2.4 2.8 in.)
than 2.8 mm
Readjust the dimension of the
value calculated by the
and repeat step (5).
5.5 mm in.)
Example: If (B) is 2.9 mm in.), is 2.6
mm
in.).
in.)>
R e m o v e t h e B . J . b o o t
d i m e n s i o n ( W ) o f s t e p
calculated by the following
a new B.J. boot band to to
(5). 5.5 mm in.)
Example: If is 2.3 is
3.2 mm
in.).
(7) Check that the B.J. boot is secured If,
the band is secured incorrectly, repeat steps (4) t o (6)
to replace it.
(8) Apply the specified amount ‘of
the
Specified grease: Repair 95 ‘oz.) ,
(9) Install the B.J. boot to adjust the clearance ( C)
the B.J. boot end and the stepped of B.J.
housing is within the standard
value (C): 0.1 1.55 mm in.)
(lO)Adjust the opening dimension to the standard value
as mentioned at the step (3).
Standard value (W): 3.2 mm
TSB Revision
Page 1531 of 2103
F R O N T A X L E __ ,
Protrudingportion
B.J. boot band
the B.J. boot band (large) along, the
portion, and install it so that,, there is
the other side.
the special tool to crimp the B.J.
in the same way as the step
I
section
Bearing
that the crimped width (E) is within the
value.
Standard value (E): 2.4 2.8
Readjust the dimension of (10) to
the value calculated equation,’
and repeat step (12).
5.8 mm in.)
Example: If (E) is 2.9 mm in.), is 2.9
mm
in.):
in.)>
Remove the B.J. boot band, readjust the
dimension (W) of step (10) to the value
calculated by equation, and use
a new B.J. boot band to repeat steps (11) to.
5.8 mm in.)
Example: If (E) is 2.3 is 3.5
mm
in.).
that the boot band is correctly.
is secured incorrectly, repeat steps (13) to replace
it.
SPIDER ASSEMBLY’ INSTALLATION
Install the spider assembly to the shaft from the d irection
of the
s e c t i o n .
CENTER BEARING INSTALLATION
Page 1533 of 2103
FRONT AXLE Drive Shaft
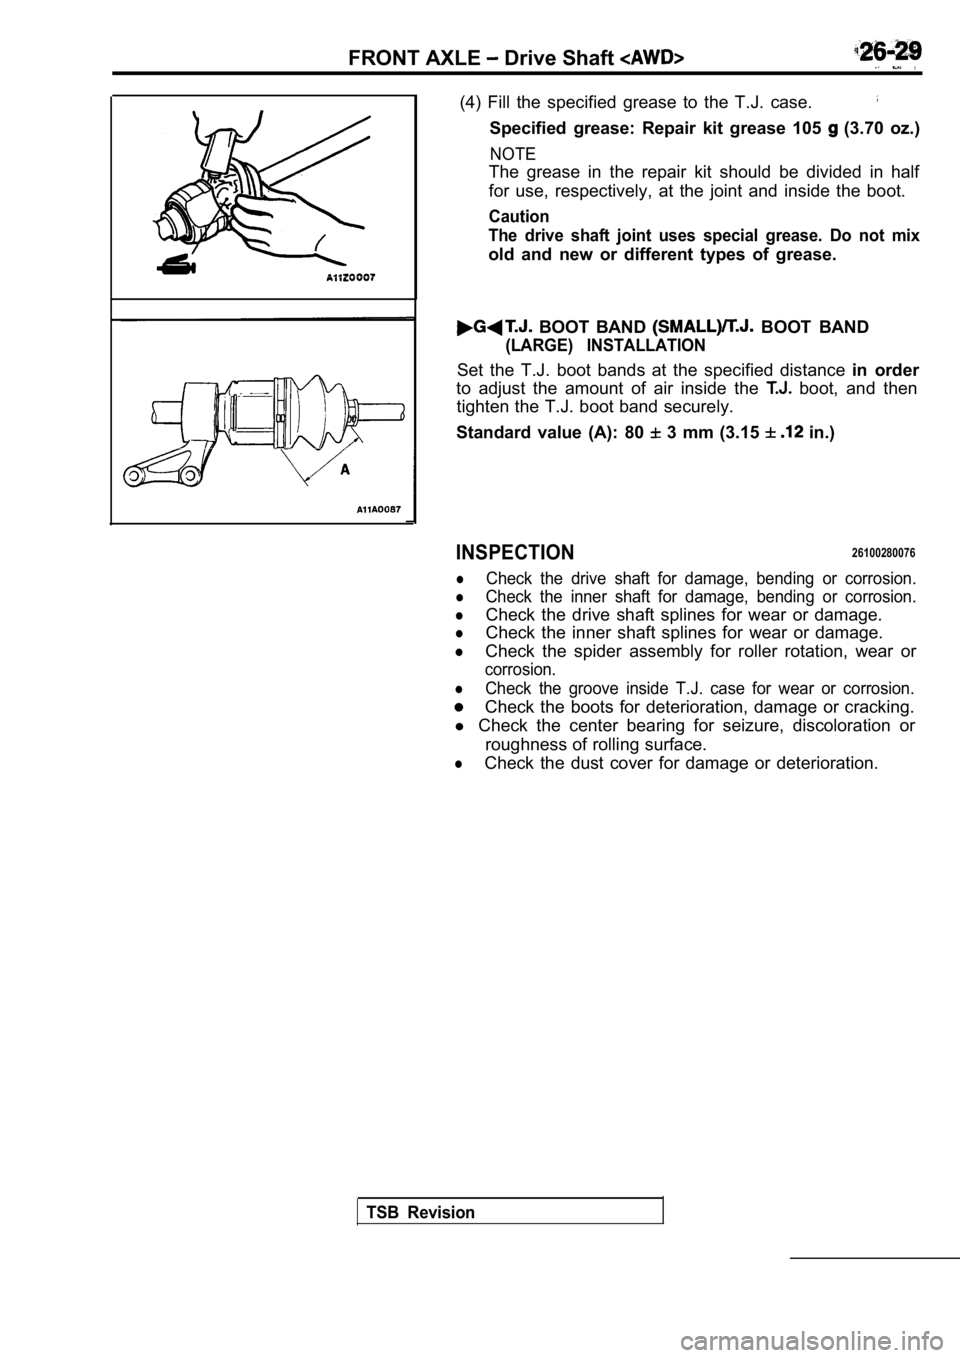
(4) Fill the specified grease to the T.J. case.
Specified grease: Repair kit grease 105 (3.70 oz.)
NOTE
The grease in the repair kit should be divided in half
for use, respectively, at the joint and inside the boot.
Caution
The drive shaft joint uses special grease. Do not m ix
old and new or different types of grease.
BOOT BAND BOOT BAND
(LARGE) INSTALLATION
Set the T.J. boot bands at the specified distance in order
to adjust the amount of air inside the
boot, and then
tighten the T.J. boot band securely.
Standard value (A): 80
3 mm (3.15 in.)
INSPECTION26100280076
lCheck the drive shaft for damage, bending or corros ion.
lCheck the inner shaft for damage, bending or corros ion.
lCheck the drive shaft splines for wear or damage.
lCheck the inner shaft splines for wear or damage.
lCheck the spider assembly for roller rotation, wear or
corrosion.
lCheck the groove inside T.J. case for wear or corro sion.
Check the boots for deterioration, damage or cracking.
l Check the center bearing for seizure, discoloration or
roughness of rolling surface.
lCheck the dust cover for damage or deterioration.
TSB Revision
Page 1538 of 2103
REAR AXLE On-vehicle Service
HUB BOLT
1. Remove the caliper assembly and with
so that it does not fall.
2. Remove the brake drum and- brake disc.
3.For vehicles with disc brakes;’
assembly..
4. Pull the hub bolt using the special
NOTE
For vehicles with drum
near the retainer in
order to maintain
C a u t i o n
Be sure to tie the cord of a nearby
part.,
5.Use the wheel nuts to securely install the new hub bolts,
while being careful of the serrations of the hub bo lts and
hub.
TSB Revision
.
,
,
,
Page 1557 of 2103
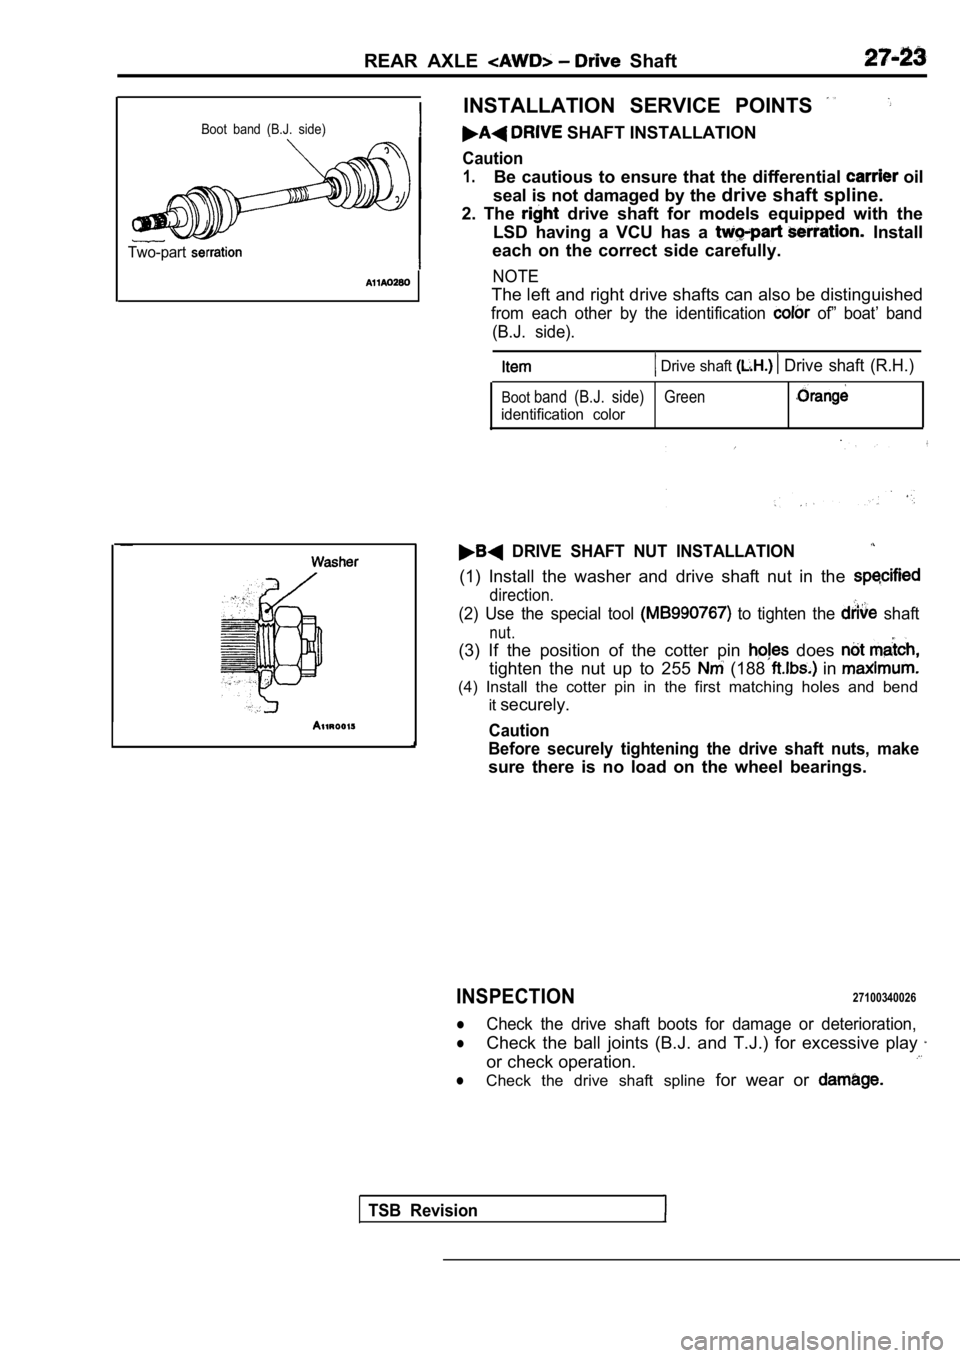
REAR AXLE Shaft
Boot band (B.J. side)
Two-part
INSTALLATION SERVICE POINTS
SHAFT INSTALLATION
Caution
1.Be cautious to ensure that the differential oil
seal is not damaged by the drive shaft spline.
2. The
drive shaft for models equipped with the
LSD having a VCU has a
Install
each on the correct side carefully.
NOTE
The left and right drive shafts can also be disting uished
from each other by the identification of” boat’ band
(B.J. side).
Drive shaft Drive shaft (R.H.)
Bootband (B.J. side) Green
identification color
DRIVE SHAFT NUT INSTALLATION
(1) Install the washer and drive shaft nut in the
direction.
(2) Use the special tool to tighten the shaft
nut.
(3) If the position of the cotter pin does
tighten the nut up to 255 (188 in
(4) Install the cotter pin in the first matching ho les and bend
it securely.
Caution
Before securely tightening the drive shaft nuts, ma ke
sure there is no load on the wheel bearings.
INSPECTION27100340026
lCheck the drive shaft boots for damage or deterioration,
lCheck the ball joints (B.J. and T.J.) for excessive play
or check operation.
lCheck the drive shaft spline for wear or
TSB Revision