Page 265 of 432

Hill Start Assist System
259
Starting and Operating7
– CONTINUED –
NOTEIf you make an error when performing
any steps in the following procedure,
place the ignition switch in the “OFF”
position once and then start over
again.▼ To deactivate
1. Park your vehicle in a flat and safe
location and apply the parking brake.
2. Turn the ignition switch to the “OFF”
position.
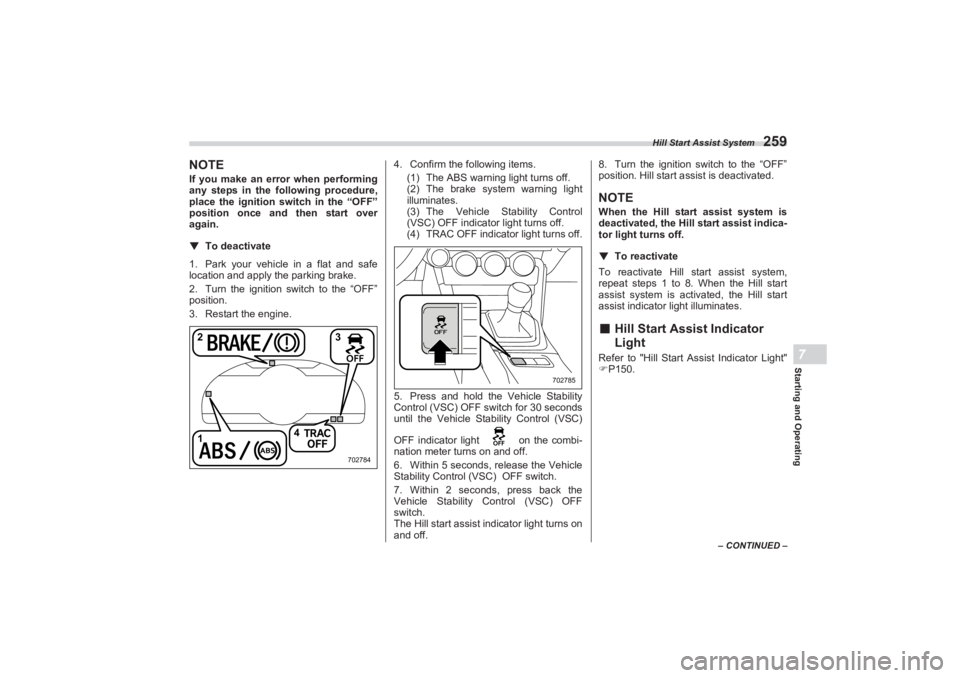
3. Restart the engine. 4. Confirm the following items.
(1) The ABS warning light turns off.
(2) The brake system warning light
illuminates.
(3) The Vehicle Stability Control
(VSC) OFF indicator light turns off.
(4) TRAC OFF indicator light turns off.
5. Press and hold the Vehicle Stability
Control (VSC) OFF switch for 30 seconds
until the Vehicle Stability Control (VSC)
OFF indicator light on the combi-
nation meter turns on and off.
6. Within 5 seconds, release the Vehicle
Stability Control ( VSC) OFF switch.
7. Within 2 seconds, press back the
Vehicle Stability Control (VSC) OFF
switch.
The Hill start assist i ndicator light turns on
and off. 8. Turn the ignition switch to the “OFF”
position. Hill start a ssist is deactivated.
NOTEWhen the Hill start assist system is
deactivated, the Hill start assist indica-
tor light turns off.
▼ To reactivate
To reactivate Hill start assist system,
repeat steps 1 to 8. When the Hill start
assist system is activa ted, the Hill start
assist indicator light illuminates.■ Hill Start Assist Indicator
LightRefer to "Hill Start A ssist Indicator Light"
P150.
1 4
23
702784
702785
BRZ_U.book 259 ページ 2022年3月29日 火曜日 午後3時59分
Page 266 of 432

Cruise Control (Models without the EyeSight system)
2607-18. Cruise Control (Models without the EyeSight system)NOTEFor models with the EyeSight system:
Refer to the Owner’s Manual supple-
ment for the EyeSight system.
Cruise control enables you to maintain a
constant vehicle speed without holding
your foot on the accelerator pedal and it is
operative when the vehicle speed is 20
mph (30 km/h) or more.
NOTEMake sure the cruise control system is
turned off when the cruise control is
not in use to avoid unintentionally set-
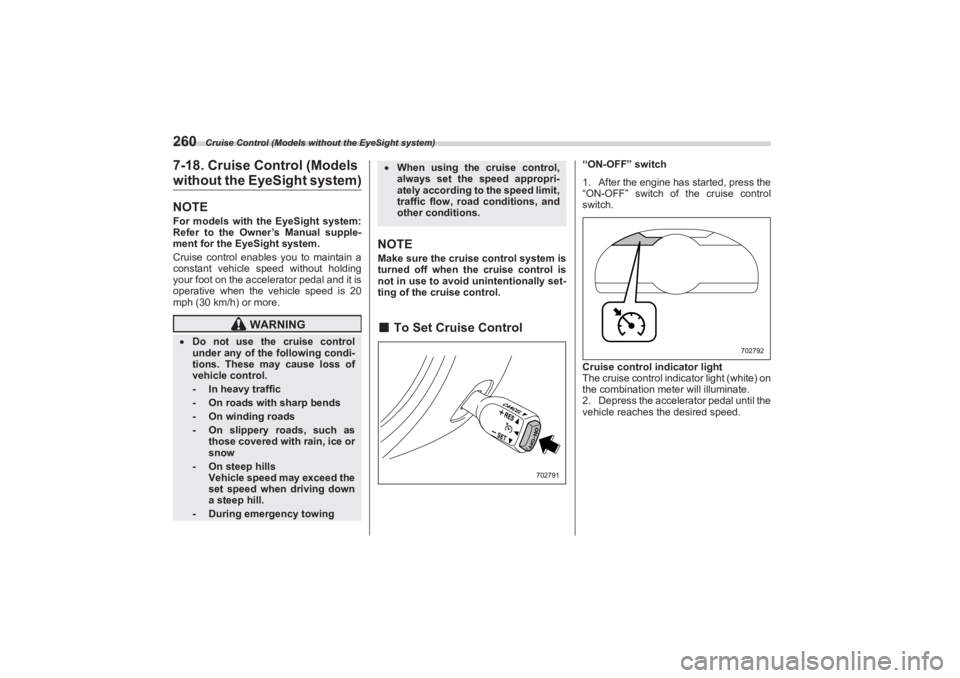
ting of the cruise control.■ To Set Cruise Control
“ON-OFF” switch
1. After the engine has started, press the
“ON-OFF” switch of the cruise control
switch.
Cruise control indicator light
The cruise control indicator light (white) on
the combination meter will illuminate.
2. Depress the accelerator pedal until the
vehicle reaches the desired speed.
WARNING
Do not use the cruise control
under any of the following condi-
tions. These may cause loss of
vehicle control.
- In heavy traffic- On roads with sharp bends- On winding roads- On slippery roads, such as
those covered with rain, ice or
snow- On steep hills
Vehicle speed may exceed the
set speed when driving down
a steep hill.- During emergency towing
When using the cruise control,
always set the speed appropri-
ately according to the speed limit,
traffic flow, road conditions, and
other conditions.
702791
702792
BRZ_U.book 260 ページ 2022年3月29日 火曜日 午後3時59分
Page 267 of 432

Cruise Control (Models without the EyeSight system)
261
Starting and Operating7
– CONTINUED –
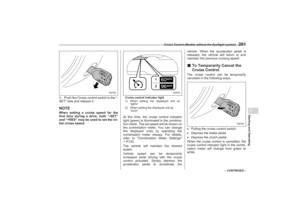
3. Push the Cruise control switch to the “-
SET” side and release it.NOTEWhen setting a cruise speed for the
first time during a drive, both “-SET”
and “+RES” may be u sed to set the ini-
tial cruise speed.
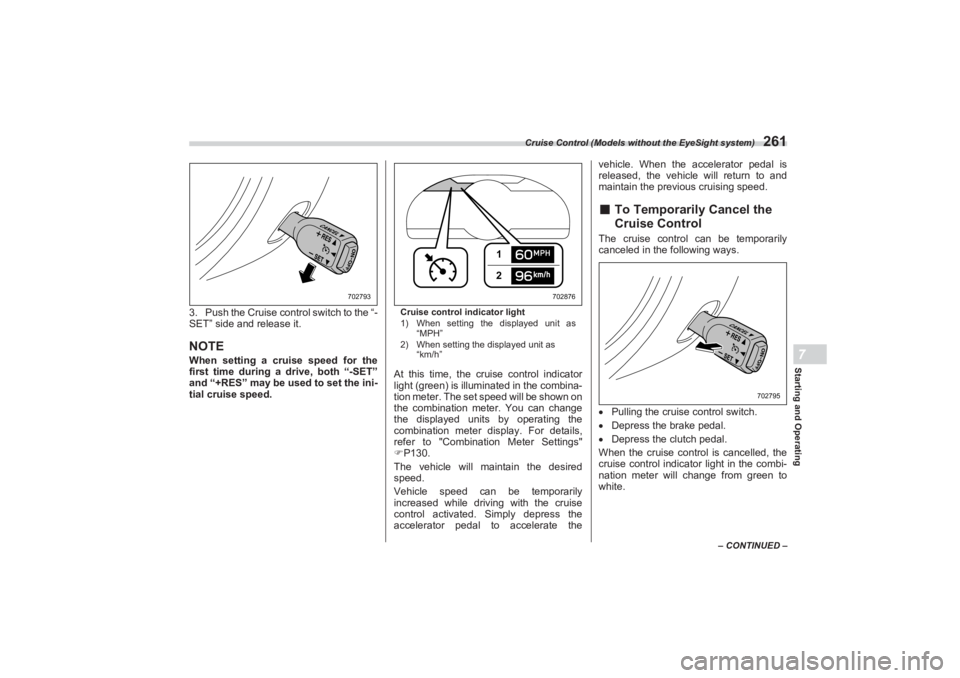
Cruise control indicator light
1) When setting the displayed unit as
“MPH”
2) When setting the displayed unit as
“km/h”At this time, the cruise control indicator
light (green) is illuminated in the combina-
tion meter. The set speed will be shown on
the combination meter. You can change
the displayed units by operating the
combination meter display. For details,
refer to "Combination Meter Settings"
P130.
The vehicle will maintain the desired
speed.
Vehicle speed can be temporarily
increased while driving with the cruise
control activated. Simply depress the
accelerator pedal to accelerate the vehicle. When the accelerator pedal is
released, the vehicle will return to and
maintain the previous cruising speed.
■ To Temporarily Cancel the
Cruise ControlThe cruise control can be temporarily
canceled in the following ways.
Pulling the cruise control switch.
Depress the brake pedal.
Depress the clutch pedal.
When the cruise control is cancelled, the
cruise control indicator light in the combi-
nation meter will change from green to
white.
702793
12
702876
702795
BRZ_U.book 261 ページ 2022年3月29日 火曜日 午後3時59分
Page 268 of 432

Cruise Control (Models without the EyeSight system)
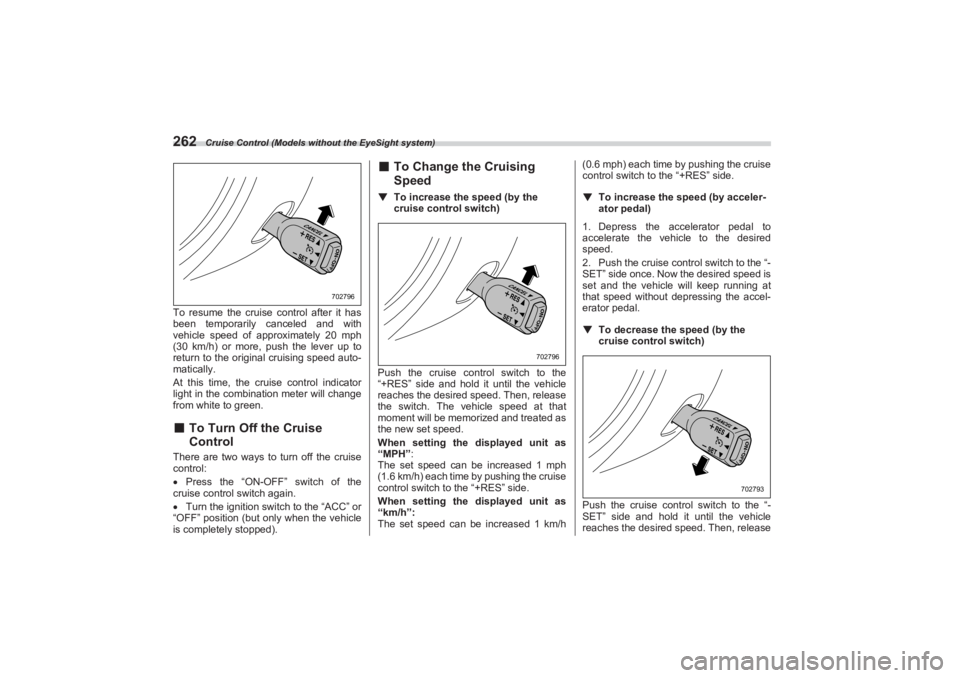
262To resume the cruise control after it has
been temporarily canceled and with
vehicle speed of approximately 20 mph
(30 km/h) or more, pu sh the lever up to
return to the original cruising speed auto-
matically.
At this time, the cruise control indicator
light in the combination meter will change
from white to green.■ To Turn Off the Cruise
ControlThere are two ways to turn off the cruise
control:
Press the “ON-OFF” switch of the
cruise control switch again.
Turn the ignition switch to the “ACC” or
“OFF” position (but only when the vehicle
is completely stopped).
■ To Change the Cruising
Speed▼ To increase the speed (by the
cruise control switch)
Push the cruise cont rol switch to the
“+RES” side and hold it until the vehicle
reaches the desired speed. Then, release
the switch. The vehicle speed at that
moment will be memorized and treated as
the new set speed.
When setting the displayed unit as
“MPH”:
The set speed can be increased 1 mph
(1.6 km/h) each time by pushing the cruise
control switch to the “+RES” side.
When setting the displayed unit as
“km/h”:
The set speed can be increased 1 km/h (0.6 mph) each time by pushing the cruise
control switch to the “+RES” side.
▼ To increase the speed (by acceler -
ator pedal)
1. Depress the accelerator pedal to
accelerate the vehicle to the desired
speed.
2. Push the cruise control switch to the “-
SET” side once. Now the desired speed is
set and the vehicle will keep running at
that speed without depressing the accel-
erator pedal.
▼ To decrease the speed (by the
cruise control switch)
Push the cruise cont rol switch to the “-
SET” side and hold it until the vehicle
reaches the desired speed. Then, release
702796
702796
702793
BRZ_U.book 262 ページ 2022年3月29日 火曜日 午後3時59分
Page 269 of 432

Rear View Camera
263
Starting and Operating7
– CONTINUED –
the switch. The vehicle speed at that
moment will be memorized and treated as
the new set speed.
When setting the displayed unit as
“MPH”:
The set speed can be decreased 1 mph
(1.6 km/h) each time by pushing the cruise
control switch to the “-SET” side.
When setting the displayed unit as
“km/h”:
The set speed can be decreased 1 km/h
(0.6 mph) each time by pushing the cruise
control switch to the “-SET” side.▼ To decrease the speed (by brake
pedal)
1. Depress the brake pedal to release
cruise control temporarily.
2. When the speed decreases to the
desired speed, push the cruise control
switch to the “-SET” side once. Now the
desired speed is set and the vehicle will
keep running at that speed without
depressing the accelerator pedal.■ Cruise Control Indicator
LightRefer to "Combination Meter Settings"
P130.
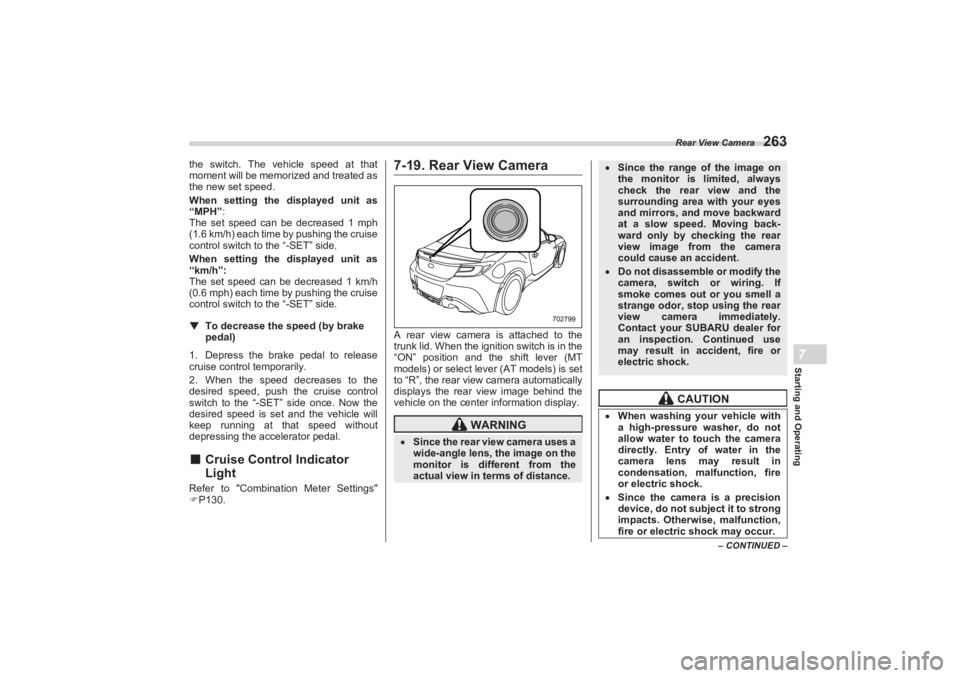
7-19. Rear View CameraA rear view camera is attached to the
trunk lid. When the ignition switch is in the
“ON” position and the shift lever (MT
models) or select lever (AT models) is set
to “R”, the rear view camera automatically
displays the rear view image behind the
vehicle on the center information display.
WARNING
Since the rear view camera uses a
wide-angle lens, the image on the
monitor is diffe rent from the
actual view in terms of distance.
702799
Since the range of the image on
the monitor is limited, always
check the rear view and the
surrounding area with your eyes
and mirrors, and move backward
at a slow speed. Moving back-
ward only by checking the rear
view image from the camera
could cause an accident. Do not disassemble or modify the
camera, switch or wiring. If
smoke comes out or you smell a
strange odor, stop using the rear
view camera immediately.
Contact your SUBARU dealer for
an inspection. Continued use
may result in accident, fire or
electric shock.
CAUTION
When washing your vehicle with
a high-pressure washer, do not
allow water to touch the camera
directly. Entry of water in the
camera lens may result in
condensation, malfunction, fire
or electric shock. Since the camera is a precision
device, do not subject it to strong
impacts. Otherwise, malfunction,
fire or electric shock may occur.
BRZ_U.book 263 ページ 2022年3月29日 火曜日 午後3時59分
Page 270 of 432

Rear View Camera
264NOTEDo not wipe the camera with
alcohol, benzine or paint thinner.
Otherwise, discoloration may occur.
To remove contamination, wipe the
camera with a cloth moistened with a
diluted neutral detergent. Then wipe it
with a soft, dry cloth.
When waxing the vehicle, be careful
not to apply the wax to the camera. If it
comes in contact with the camera,
moisten a clean cloth with a diluted
neutral detergent to remove the wax.
The camera lens has a hard coating
to help prevent scratches. However,
when washing the vehicle or cleaning
the camera lens, be careful not to
scratch the camera lens. Do not use a
washing brush directly on the camera
lens. The image quality of the rear view
camera may deteriorate.
Strong light shined on the camera
lens may develop vertical lines around
the light source. This is not a malfunc-
tion.
Under the fluorescent light, the
display may flicker. However, this is
not a malfunction.
The image of the rear view camera
may be slightly different from the
actual color of the objects.
If there is a malfunction on the
center information display, refer to
"Malfunctions of the Center Informa-
tion Display" P327.
■ How to Use the Rear View
CameraWhen the shift lever/se lect lever is set to
“R”, the rear view camera automatically
displays the rear view image from the vehicle. When the lever is set to other
positions, the image before setting to “R”
is displayed.
1. Set the ignition switch to “ON”.
2. Set the shift lever/ select lever to “R”.
NOTEThe image of the rear view camera is
horizontally reversed as is the case
with the vehicle inside mirror or the
outside mirror.
When “Rear Camera Delay Control”
is on, the rear view image from the rear
view camera will be displayed on the
center information display for a certain
amount of time after the shift lever (MT
models) or select lever (AT models) is
shifted from “R” to another position.
When any of the following conditions
are met, the rear view image will be
canceled: - The select lever is shifted to “P”
(AT models)
- The vehicle speed becomes
approximately 5 mph (8 km/h) or
more
- The parking brake is engaged
- 9 seconds have elapsed since
the shift lever (MT models) or select
lever (AT models) was shifted from
“R” to another position
If mud or snow sticks to or is
frozen on the camera, you must
be very careful when removing it.
Otherwise, damage to the camera
may cause a fire or electric shock.
Pour water or lukewarm water
over the camera to remove mud
and ice, and wipe it with a soft,
dry cloth. Do not put a flame close to the
camera or wiring. Otherwise,
damage or fire may occur. When replacing the fuse, be sure
to use a fuse with the specified
rating. Use of a fuse with a
different rating may result in a
malfunction. If you use the rear view camera
for a long time wh ile the engine is
not operated, the battery may
become completely discharged.
BRZ_U.book 264 ページ 2022年3月29日 火曜日 午後3時59分
Page 271 of 432

Rear View Camera
265
Starting and Operating7
– CONTINUED –
To turn the function on and off, refer to
"General settings" P161.
It may be difficult to see the image of
the rear view camera in the following
cases. This is not a malfunction of the
camera. - The vehicle is in a dark place (at
night, in a tunnel, etc.).
- The vehicle is in an extremely hot
or cold place.
- An object (such as raindrops,
snow, dirt, etc.) that disturbs the
view of the rear view camera sticks
to the lens of the camera.
- Strong light is shining directly on
the camera lens (occasionally, there
are vertical lines on the screen).■ Viewing Range on the Screen
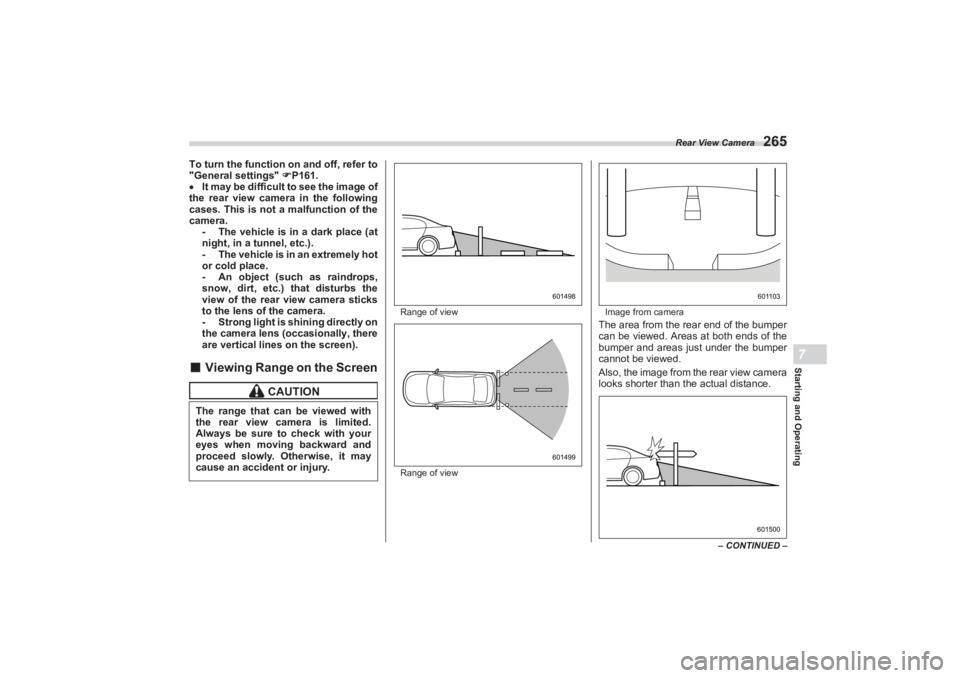
Range of view
Range of view Image from camera
The area from the rear end of the bumper
can be viewed. Areas at both ends of the
bumper and areas just under the bumper
cannot be viewed.
Also, the image from the rear view camera
looks shorter than the actual distance.
CAUTION
The range that can be viewed with
the rear view camera is limited.
Always be sure to check with your
eyes when moving backward and
proceed slowly. Otherwise, it may
cause an accident or injury.
601498601499
601103601500
BRZ_U.book 265 ページ 2022年3月29日 火曜日 午後3時59分
Page 272 of 432

Rear View Camera
266Range of view
Image from cameraThe area above the camera cannot be
viewed. If there is an object that has a
wide projection on its upper part such as a
sign pole behind the vehicle, the projec-
tion cannot be seen on the screen.■ Help LinesThe help lines are a guide to help you
realize the actual distance from the screen
image.NOTEIf you shift to the “R” range within sev-
eral seconds after turning on the igni-
tion switch, the warning message may
not be displayed. Wait for several sec-
onds after turning on the ignition switch before shif
ting to the “R”
range. Then, the warning message will
be displayed.
Help lines
1) Vehicle width line (oblique vertical line)
2) Approx. 10 ft (3 m) from the bumper
(green horizontal line)
3) Approx. 6 ft (2 m) from the bumper
(green horizontal line)
4) Approx. 3 ft (1 m) from the bumper
(yellow horizontal line)
5) Approx. 1.5 ft (0.5 m) from the bumper
(red horizontal line)
6) Vehicle centerline
7) Dynamic guidelinesWhen the shift lever/se lect lever is set to
“R”, the monitor screen displays the help
lines together with the rear view image.
NOTEWhen “Steering Angle Lines” is off,
the dynamic guidelines will be disap-
pear on the center information display.
To turn the dynamic guidelines on and
off, refer to "G eneral settings" P161.
▼ Difference between screen image
and actual roadThe distance markers show the distance
for a level road when the vehicle is not
loaded. It may be different from the actual
distance depending on the loading condi-
tions or road conditions.
601105
702392
5 4
3
2 1
6 7
Check Surroundings Before Backing Up
CAUTION
When moving backward, always
check the back with your eyes
without relying on the help lines.
Otherwise, it may cause an acci-
dent or injury. The actual position may be
different from the indication of
the help lines. Differences may oc cur due to the
number of passengers or the
loaded cargo. When the vehicle is on a slope or
inclined against the road, the
indication is diffe rent from the
actual position.
BRZ_U.book 266 ページ 2022年3月29日 火曜日 午後3時59分