Page 177 of 432
Center Information Display (CID)
171
Instruments and Controls3
– CONTINUED –
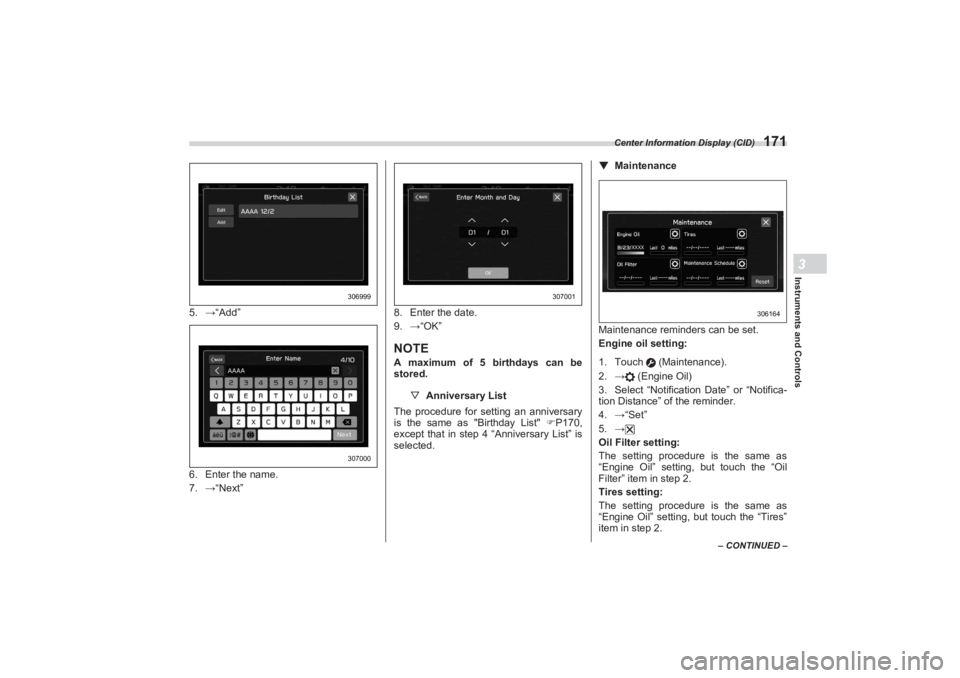
5.→“Add”
6. Enter the name.
7. →“Next” 8. Enter the date.
9.
→“OK”
NOTEA maximum of 5 birthdays can be
stored.
▽ Anniversary List
The procedure for setting an anniversary
is the same as "Birthday List" P170,
except that in step 4 “Anniversary List” is
selected. ▼
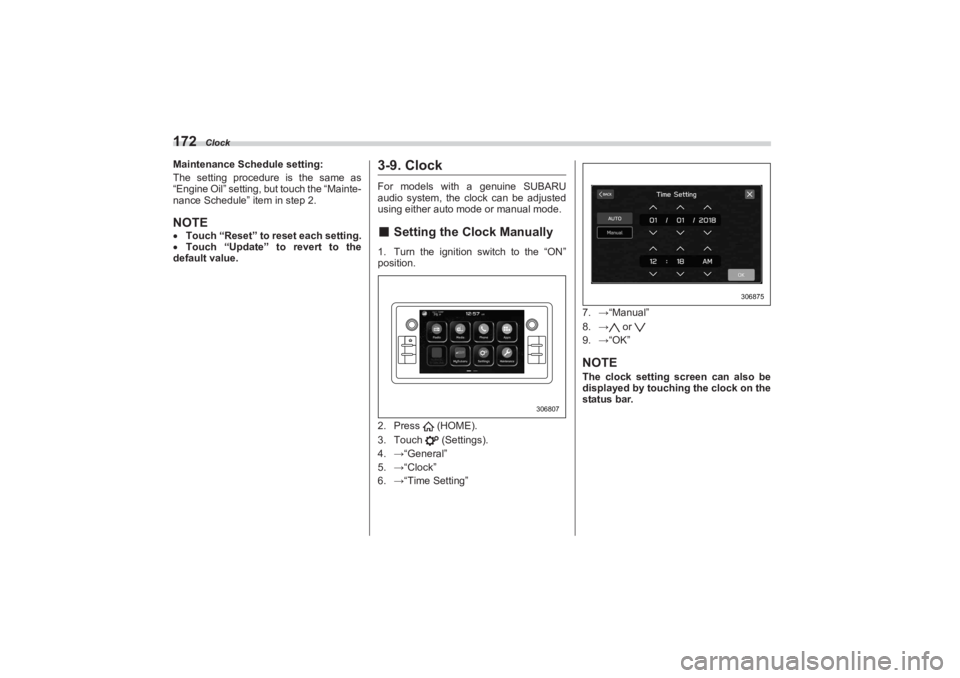
Maintenance
Maintenance reminders can be set.
Engine oil setting:
1. Touch (Maintenance).
2.→ (Engine Oil)
3. Select “Notificatio n Date” or “Notifica-
tion Distance” of the reminder.
4. →“Set”
5. →
Oil Filter setting:
The setting procedure is the same as
“Engine Oil” setting, but touch the “Oil
Filter” item in step 2.
Tires setting:
The setting procedure is the same as
“Engine Oil” setting, but touch the “Tires”
item in step 2.
306999307000
307001
XXXX
306164
BRZ_U.book 171 ページ 2022年3月29日 火曜日 午後3時59分
Page 178 of 432
Clock
172Maintenance Schedule setting:
The setting procedure is the same as
“Engine Oil” setting, but touch the “Mainte-
nance Schedule” item in step 2.NOTE Touch “Reset” to reset each setting.
Touch “Update” to revert to the
default value.
3-9. ClockFor models with a genuine SUBARU
audio system, the clock can be adjusted
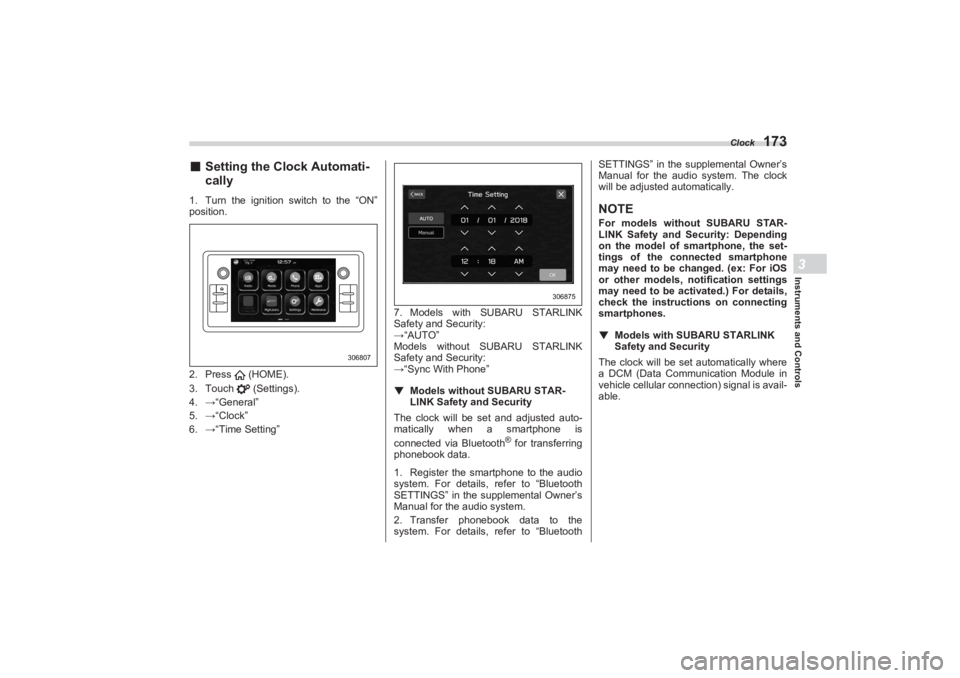
using either auto mode or manual mode.■ Setting the Clock Manually1. Turn the ignition switch to the “ON”
position.
2. Press (HOME).
3. Touch (Settings).
4. →“General”
5. →“Clock”
6. →“Time Setting” 7.
→“Manual”
8. → or
9. →“OK”
NOTEThe clock setting screen can also be
displayed by touching the clock on the
status bar.
306807
306875
BRZ_U.book 172 ページ 2022年3月29日 火曜日 午後3時59分
Page 179 of 432

Clock
173
Instruments and Controls3
■Setting the Clock Automati-
cally1. Turn the ignition switch to the “ON”
position.
2. Press (HOME).
3. Touch (Settings).
4. →“General”
5. →“Clock”
6. →“Time Setting” 7. Models with SUBARU STARLINK
Safety and Security:
→ “AUTO”
Models without SUBARU STARLINK
Safety and Security:
→ “Sync With Phone”
▼ Models without SUBARU STAR -
LINK Safety and Security
The clock will be set and adjusted auto-
ma tically when a smartphone is
connected via Bluetooth
® for transferring
phonebook data.
1. Register the smartphone to the audio
system. For details, refer to “Bluetooth
SETTINGS” in the supplemental Owner’s
Manual for the audio system.
2. Transfer phonebook data to the
system. For details, refer to “Bluetooth SETTINGS” in the supplemental Owner’s
Manual for the audi o system. The clock
will be adjusted automatically.
NOTEFor models with out SUBARU STAR-
LINK Safety and Security: Depending
on the model of smartphone, the set-
tings of the connected smartphone
may need to be changed. (ex: For iOS
or other models, notification settings
may need to be activated.) For details,
check the instructions on connecting
smartphones.
▼ Models with SUBAR U STARLINK
Safety and SecurityThe clock will be set automatically where
a DCM (Data Communication Module in
vehicle cellular connection) signal is avail-
able.
306807
306875
BRZ_U.book 173 ページ 2022年3月29日 火曜日 午後3時59分
Page 180 of 432

Light Control Switch
1743-10. Light Control SwitchThe light control switch operates when the
push-button ignition switch is in the “ACC”
or “ON” position.
Regardless of the pos ition of the light
control switch, the illuminated lights are
turned off when the push-button ignition
switch is turned off.NOTEThe light control switch can be oper-
ated (except auto on/off headlights),
even the push-button ignition switch
is turned off.
If the driver’s door is opened while the
headlights are illuminated under such conditions, a chirp sound will inform
the driver that the lights are illumi-
nated.
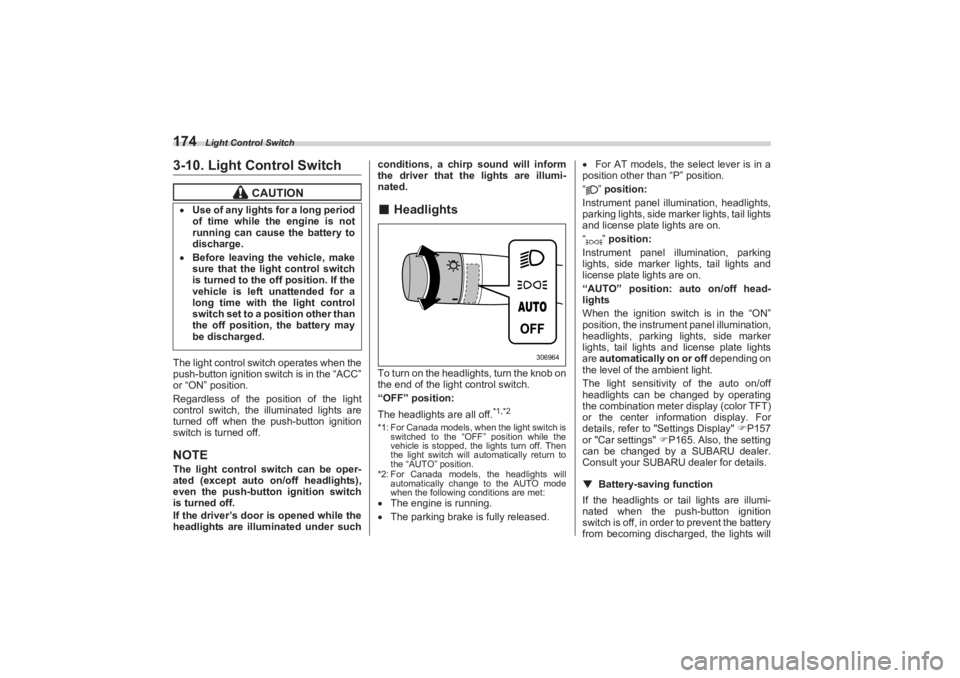
■ HeadlightsTo turn on the headlights, turn the knob on
the end of the light control switch.
“OFF” position:
The headlights are all off.
*1,*2
*1: For Canada models, when the light switch is
switched to the “OFF” position while the
vehicle is stopped, the lights turn off. Then
the light switch will automatically return to
the “AUTO” position.
*2: For Canada models, the headlights will automatically change to the AUTO mode
when the following conditions are met: The engine is running.
The parking brake is fully released.
For AT models, the select lever is in a
position other than “P” position.
“” position:
Instrument panel illumination, headlights,
parking lights, side marker lights, tail lights
and license plate lights are on.
“” position:
Instrument panel illumination, parking
lights, side marker lights, tail lights and
license plate lights are on.
“AUTO” position: auto on/off head-
lights
When the ignition switch is in the “ON”
position, the instrum ent panel illumination,
headlights, parking lights, side marker
lights, tail lights and license plate lights
are automatically on or off depending on
the level of the ambient light.
The light sensitivity of the auto on/off
headlights can be changed by operating
the combination meter display (color TFT)
or the center information display. For
details, refer to "Settings Display" P157
or "Car settings" P165. Also, the setting
can be changed by a SUBARU dealer.
Consult your SUBARU dealer for details.
▼ Battery-saving function
If the headlights or tail lights are illumi-
nated when the push-button ignition
switch is off, in order to prevent the battery
from becoming discharg ed, the lights will
CAUTION
Use of any lights for a long period
of time while the engine is not
running can cause the battery to
discharge. Before leaving the vehicle, make
sure that the light control switch
is turned to the off position. If the
vehicle is left unattended for a
long time with the light control
switch set to a position other than
the off position, the battery may
be discharged.
306964
BRZ_U.book 174 ページ 2022年3月29日 火曜日 午後3時59分
Page 181 of 432

Light Control Switch
175
Instruments and Controls3
– CONTINUED –
automatically be turned off after approxi-
mately 20 minutes.
If a door is opened or closed, the battery
saving function will temporarily be
canceled and the lights will automatically
be turned off after approximately 20
minutes.▼ Auto-on/off wiper-linked headlights
While the light control switch is in the
“AUTO” position, the headlights will auto-
matically turn on when the windshield
wipers operate several times. The head-
lights will automatica lly turn off approxi-
mately 1 minute after the wiper stops.
The ON/OFF setting of this function can
be changed by operating the combination
meter display (color TFT) or the center
information display. For details, refer to
"Settings Display" P157 or "Car
settings" P165. Also, the setting can be
changed by a SUBARU dealer. Consult
your SUBARU dealer for details.
▼ Welcome lighting function
The welcome lighting function turns on the
low beam headlight for smooth
approaching to or exiting from the vehicle
at night or in a dark place.
The function is activated while all of the
following conditions are met.
The light control swit ch is in the “AUTO”
position
It is dark enough to turn on the auto on/
off headlights
NOTEIf the engine is turn ed off after turning
off the light swit ch, the welcome
lighting function may not operate (for
Canada models).
▽ When approaching
While the welcome lighting function is acti-
vated, the low beam headlights will auto-
matically illuminate when unlocking the
doors by using the remote keyless entry
system.
The low beam headlights will remain illu-
minated for 30 seconds
*1 and then turn
off. However, if any of the following opera-
tions is done, the low beam headlights will
turn off.
The ignition switch is turned to the “ON”
position.
The doors are locked.
The light control switch is turned to a
position other than “AUTO”. ▽
When exiting
While the welcome lighting function is acti-
vated, the low beam headlights will remain
illuminated even when the push-button
ignition switch is turned to the “OFF”
status.
The low beam headlights will turn off
under any of the following conditions.
30 seconds have passed since the
door is opened and closed.
*1
The light control switch is turned to a
position other than “AUTO”.
The locking procedure is performed
twice. When performing the unlocking
procedure after performing the locking
procedure, perform the locking procedure
twice again.*1: The setting for the period of time in which
the low beam headlights remain on by the
welcome lighting function can be changed
by a SUBARU dealer. Contact your
SUBARU dealer for details. Also, you can
change the setting by operating the combi-
nation meter display (color TFT) or the
center information display. For details, refer
to "Settings Display" P157 or "Car
settings" P165.
BRZ_U.book 175 ページ 2022年3月29日 火曜日 午後3時59分
Page 182 of 432

Light Control Switch
176▼Sensor for the auto on/off head -
lights
The sensor is on the instrument panel as
shown in the illustration.NOTE If the light control switch is in the
“AUTO” position and the headlights do
not turn on when it becomes dark
outside, turn the light switch to “ ”
position. If this happens, have your vehicle inspected
by your SUBARU
dealer as soon as possible.
The light sensor may not operate
correctly for light other than sunlight.
■ High/Low Beam Change
(Dimmer)While the light control switch is in the “ ”
or “AUTO” position in a dark place, the
headlights will turn on.
Pushing the lever forward and releasing it
will activate the high beam. Pulling the
lever rearward and releasing it will switch
the headlights to low beam.
For models with the High Beam Assist,
when the light control switch is in the
“AUTO” position, pushing the lever
forward turns the High Beam Assist is on. Refer to "High Beam Assist Function (If
Equipped)" P177.
When the headlights are on high beam,
the high beam indicator light “ ” on the
combination meter is also on.
■ Headlight FlasherTo flash the headlights, pull the lever
toward you and then release it. The high
beam will stay on for as long as you hold
the lever. The headlight flasher works
even though the lighting sw itch is in the off
position.
CAUTION
If any object is placed on or near the
sensor, the sensor may not detect
the level of the ambient light cor-
rectly and the auto on/off headlights
may not operate properly.
306810
306965
CAUTION
Do not hold the lever in the flashing
position for more than just a few
seconds.
306966
BRZ_U.book 176 ページ 2022年3月29日 火曜日 午後3時59分
Page 183 of 432

Light Control Switch
177
Instruments and Controls3
– CONTINUED –
When the headlights are on high beam,
the high beam indicator light “ ” on the
combination meter also illuminates.■ High Beam Assist Function
(If Equipped)
NOTE The high beam assist function
utilizes the stereo camera installed at
the position of th e front map lights.
For details on how to handle the
stereo camera, refer to the Owner’s
Manual supplement for the EyeSight
system.
The high beam assist function automati-
cally changes the headlight from high
beam to low beam (or vice versa).
When all of the following conditions are
met, the headlight will change to high
beam.
When the vehicle speed increases to or
above 20 mph (32 km/h).
There is no preceding or oncoming
vehicle.
The forward area of the vehicle is dark.
The road does not have a sharp curve.
When any of the following conditions are
met, the headlight will change to low
beam.
When the vehicle speed decreases to
or below 10 mph (16 km/h).
When the forward area of the vehicle is
bright.
When there is a preceding or oncoming
vehicle.
When the EyeSight system is malfunc-
tioning or is temporarily stopped.
NOTE Do not overestimate the capacity of
the high beam assist function. The
driver always has the responsibility to
understand the surrounding situation,
to drive safely, and to change the head-
light mode manually if necessary.
The factory setting (default setting)
for this function is set as “operational”.
This setting can be changed to OFF
(non-operation) at SUBARU dealers.
For more details, contact a SUBARU
dealer.
▼ How to use the high beam assist
function
The high beam assist function will be acti-
vated when all the following conditions are
met.
The light control swit ch is in the “AUTO”
position and the low beam headlights are
on automatically.
The turn signal lever is pushed forward.
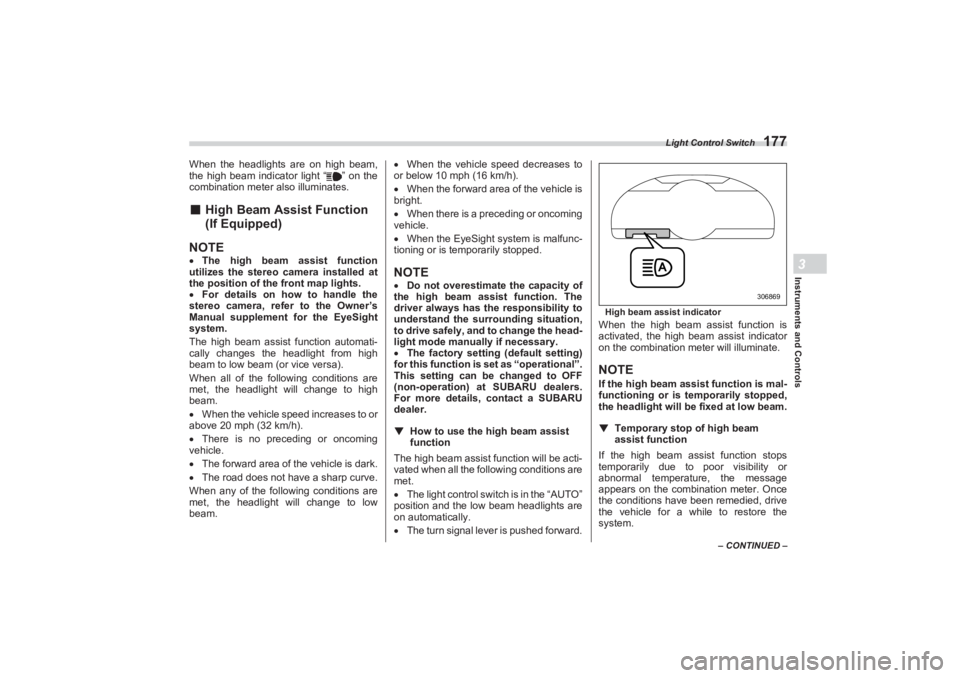
High beam assist indicatorWhen the high beam assist function is
activated, the high beam assist indicator
on the combination meter will illuminate.NOTEIf the high beam ass ist function is mal-
functioning or is temporarily stopped,
the headlight will be fixed at low beam.
▼ Temporary stop of high beam
assist functionIf the high beam assist function stops
temporarily due to poor visibility or
abnormal temperature, the message
appears on the combination meter. Once
the conditions have been remedied, drive
the vehicle for a while to restore the
system.
306869
BRZ_U.book 177 ページ 2022年3月29日 火曜日 午後3時59分
Page 184 of 432

Light Control Switch
178NOTEEven when the operation conditions of
the high beam assist function are met,
there may be a case in which the high
beam assist indicator does not illumi-
nate.▼ How to temporarily lower the sensi -
tivity of the high beam assist func -
tion
The sensitivity of the high beam assist
function can be lowered by using the
following operations.
1. After turning the ignition switch to the
“ON” position, set the light control switch
to the “AUTO” position and push the
signal lever forward (high beam position).
2. After the high beam assist indicator on
the combination meter will illuminate, turn
the ignition switch to the “OFF” position.
3. Turn the ignition switch to the “ON”
position and within approximately 15
seconds, press the “ ” (following
distance setting) switch more than 10
times consecutively.
When the sensitivity of the high beam
assist function is lowered, the high beam
assist indicator light “ ” on the combina-
tion meter display (col or TFT) will flash.
NOTEThe sensitivity of the high beam
assist function cannot be lowered in
the following conditions. - Cruise control or Adaptive
Cruise Control indicator is illumi-
nated.
- The EyeSight warning indicator
(yellow) is illuminated
The sensitivity of the high beam
assist function retu rns to normal level
the next time the ignition switch is
turned to the “OFF ” position and the
engine is restarted.
▼ How to change the headlight mode
manually
Change to the low beam:
Set the light control switch to “ ”.
Pull the lever while the high beam is
turning on and release it.
Change to the high beam:
Push the lever forward and release it.
At this time, the high beam assist function
will turn off, the high beam assist indicator
will turn off and the high beam indicator
light will turn on.NOTE After manually changing the head-
light mode to the high beam, if you turn on the high beam assist function, push
the lever forward and release it.
When manually changing the head-
light mode to the high beam, if you turn
the light control switch to the “ ”
position, the parking lights, side
marker lights, tail lights and license
plate lights will turn on.
▼ Tips for the high beam assist
system
The high beam assist function recog-
nizes the condition surrounding the
vehicle based on the brightness of illumi-
nation ahead of your vehicle, etc. There-
fore, the headlight mode may switch in
some situations that do not match to the
driver’s sense.
A bicycle or cargo cycle may not be
detected.
Under the following situations, the
brightness of ambient illumination may not
be detected correctly and the high beam
assist function may not work properly. As
a result, the glare of the high beam may
disturb the oncoming vehicle or vehicle
ahead. Also, the low beam mode may
continue although there are no oncoming
vehicles and vehicles ahead. In the such
cases, change the headlight mode manu-
ally.
BRZ_U.book 178 ページ 2022年3月29日 火曜日 午後3時59分