Page 4428 of 4770
TOYOTA VIP RS3000 PROGRAMMING ± ALL MODELS ± AX005±99 April 9, 1999
Page 2 of 4
For location of the RS3000 ECU, refer to ECU Mounting Locations, Page 4.
I. To program (add) a REMOTE CONTROL to the system:
1. Insert the key into ignition switch,
and turn it to ªONº.
2. Press and hold the ECU's
PROGRAMMING SWITCH for 3
seconds.
The STATUS MONITOR LED
turns on for 5 seconds.
NOTE:
YOU MUST PERFORM THE NEXT
STEP WITHIN 5 SECONDS.
3. Press and release a REMOTE
CONTROL's top or bottom
button.*
The STATUS MONITOR LED
turns off.
The Piezo ªchirperº chirps once.
The exterior lights flash once.
4. Turn off the ignition. The ECU will
now operate with the REMOTE
CONTROL just programmed.
* Either button on your REMOTE CONTROL can be programmed to operate the system. The bottom
button can be programmed to operate a second vehicle with the Toyota VIP.
Programming
Procedure
Press and Hold
for 3 Seconds
Lights Up
Press Once
Page 4429 of 4770
TOYOTA VIP RS3000 PROGRAMMING ± ALL MODELS ± AX005±99 April 9, 1999
Page 3 of 4
II. To erase all REMOTE CONTROL codes from the system:
1. Insert key into the ignition switch,
and turn it to ªONº.
2. Press and hold the ECU's
PROGRAMMING SWITCH for 3
seconds.
The STATUS MONITOR LED
turns on for 5 seconds.
NOTE:
YOU MUST PERFORM THE NEXT
STEP WITHIN 5 SECONDS.
3. Press and hold the ECU's
PROGRAMMING SWITCH for
over 2 seconds again.
The STATUS MONITOR LED
turns off, then flashes 3 times.
The Piezo ªchirperº chirps three
times and the exterior lights flash
3 times.
4. Turn off the ignition. The ECU has cleared all REMOTE CONTROL codes; until
another REMOTE CONTROL is programmed, the system will not work with any
REMOTE CONTROL.
Programming
Procedure
(Continued)
Press and Hold
for 3 Seconds
Lights Up
Press and Hold Again, for 2
Seconds
Page 4430 of 4770
TOYOTA VIP RS3000 PROGRAMMING ± ALL MODELS ± AX005±99 April 9, 1999
Page 4 of 4
1. '98 Model and prior has ECU located beneath the driver's seat.
2. '97 Model and prior has ECU located beneath the driver's seat.
ECU MOUNTING LOCATIONS
Page 4433 of 4770

Toyota Supports ASE CertificationPage 1 of 2
AX006±99Title:
RS3000 TVIP PROGRAMMING CHANGES
FOR GBS
Models:
All Models
Technical Service
BULLETIN
April 23, 1999
Starting with 1999 MY, the programming in the RS3000 ECU for the Glass Breakage
Sensor (GBS) to trigger the alarm has been changed to improve the Toyota Vehicle
Intrusion Protection (TVIP) system's theft warning feature when glass breakage or impact
to the glass is detected.
Previous operation of GBS (for 1998 MY and prior):
�Upon (first) detection of breakage of the vehicle's glass, the GBS will sound the
security system for 5 seconds (3 horn honks).
�If there is a second detection of glass breakage, within 5 seconds of the first
detection, the security system will sound for the full duration of 59 seconds.
Improved operation of GBS (from 1999 MY):
�Upon (first) detection of breakage of the vehicle's glass, the GBS will sound the
security system for 20 seconds.
�If there is a second detection of glass breakage, the security system will sound for the
full duration of 59 seconds, regardless of time between the first and second
detections.
�After the first detection, any subsequent detection will trigger the alarm for the full
duration of 59 seconds as long as the security system is armed. The GBS trigger
cycle will reset once the security system is disarmed and then rearmed.
This improvement is intended to enhance the previous trigger cycle of the security
system and ward off an intruder.
The color of the previous (1998 MY and prior) RS3000 ECU was black. The new
RS3000 ECU color is gray.
�All Models
PREVIOUS PART NUMBERCURRENT PART NUMBERPART NAME
08585±00921SAMERS3000 Base Kit
OP CODEDESCRIPTIONTIMEOPNT1T2
N/ANot applicable to warranty ±±±±
ACCESSORIES
Introduction
Affected
Vehicles
Parts
Information
Warranty
Information
Page 4434 of 4770

RS3000 TVIP PROGRAMMING CHANGES FOR GBS ± AX006±99 April 23, 1999
Page 2 of 2
When performing the RS3000 System Test, check the Glass Breakage Sensor sensitivity
as follows:
1. Press and release the Remote Control's top button to arm the system.
2. Wait two seconds.
3. With the tip of the ignition key (or striker tool), softly tap the center of the driver's door
window glass.
�If the system is triggered (horn sounds for 20 seconds), the sensitivity must be
adjusted. Turn the Glass Breakage Sensor ECU's adjustment screw clockwise
one notch, and repeat this step again.
4. If the system is not triggered, repeat the glass tapping with moderate force.
�The system should trigger when the glass is tapped with moderate force. If it is
not triggered, turn the Glass Breakage Sensor ECU's adjustment screw clockwise
one notch, and repeat this step again.
CAUTION:
Use caution when performing the step above. Do not tap the window glass with too
much force, or the glass may crack or break. Use extra caution when the temperature
is extremely cold.
NOTE:
The Owner's Guide included in the RS3000 Base Kit is changed to reflect the
(GBS logic) improvement. There is no change to the GBS ECU itself. Repair
Procedure
Page 4441 of 4770

SEAT BELT EXTENDER: '98 ± '00 ± BO002±00 January 21, 2000
Page 6 of 7
Failure to follow the recommendations indicated below could result in less effectiveness
of the seat belt restraint system in case of vehicle collision, causing personal injury.
The Seat Belt Extender must not be used:
A. By anyone other than for whom it was provided (name recorded on seat belt
extender).
B. In any vehicle and/or seat position other than the one for which it was provided.
C. When the Seat Belt Extender is provided for rear seat positions (with automatic
locking retractor), make sure the retractor is locked when in use.
If your seat belt cannot be fastened securely because it is not long enough, a
personalized seat belt extender is available from your Toyota dealer free of charge.
Please contact your local Toyota dealer so that the dealer can order the proper required
length for the extender. Bring the heaviest coat you expect to wear for proper
measurement and selection of length. Additional ordering information is available at your
Toyota dealer.
CAUTION:
When using the seat belt extender, observe the following. Failure to follow these
instructions could result in less effectiveness of the seat belt restraint system in case
of vehicle accident, increasing the chance of personal injury.
�Never use the Seat Belt Extender if you can COMFORTABLY fasten the seat belt
without it.
�The Seat Belt Extender must never be used with any child safety seats.
�Remember that the extender provided for you may not be safe when used on a
different vehicle, or for another person or at a different seating position than the
one originally intended for.
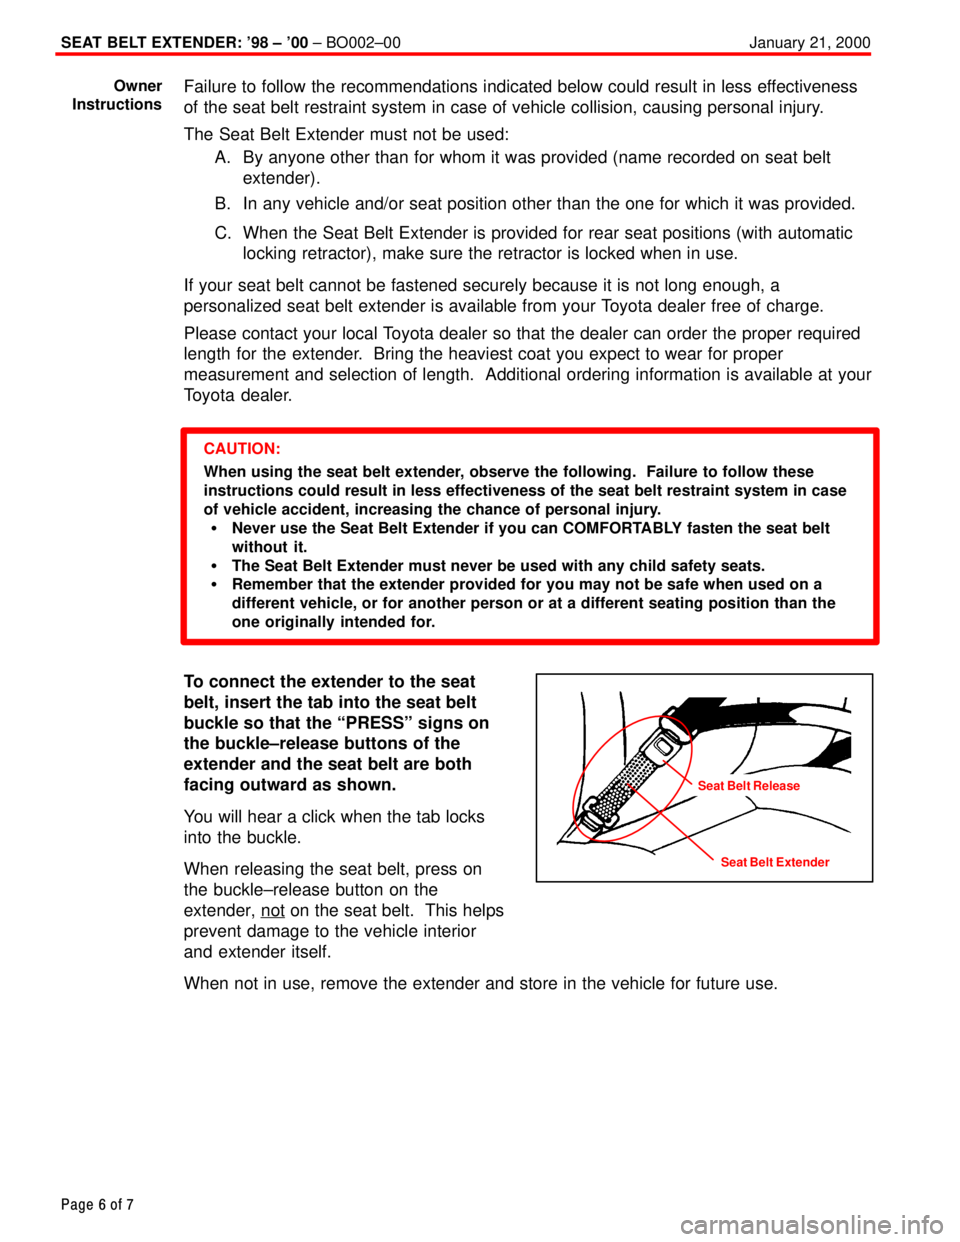
To connect the extender to the seat
belt, insert the tab into the seat belt
buckle so that the ªPRESSº signs on
the buckle±release buttons of the
extender and the seat belt are both
facing outward as shown.
You will hear a click when the tab locks
into the buckle.
When releasing the seat belt, press on
the buckle±release button on the
extender, not
on the seat belt. This helps
prevent damage to the vehicle interior
and extender itself.
When not in use, remove the extender and store in the vehicle for future use.
Owner
Instructions
Seat Belt Extender
Seat Belt Release
Page 4448 of 4770

SEAT BELT EXTENDER: '99±'01 MODEL YEAR ± BO002-01 January 26, 2001
Page 6 of 7
Failure to follow the recommendations indicated below could result in reduced
effectiveness of the seat belt restraint system in case of vehicle collision, causing
personal injury.
The Seat Belt Extender must not be used:
a. By anyone other than for whom it was provided (name recorded on seat belt
extender).
b. In any vehicle and/or seat position other than the one for which it was provided.
c. When the Seat Belt Extender is provided for rear seat positions (with automatic
locking retractor), make sure the retractor is locked when in use.
If your seat belt cannot be fastened securely because it is not long enough, a
personalized Seat Belt Extender is available from your Toyota dealer free of charge.
Please contact your local Toyota dealer so that the dealer can order the proper required
length for the extender. Bring the heaviest coat you expect to wear for proper
measurement and selection of length. Additional ordering information is available at your
Toyota dealer.
CAUTION:
When using the Seat Belt Extender, observe the following. Failure to follow these
instructions could result in reduced effectiveness of the seat belt restraint system in
case of vehicle accident, increasing the chance of personal injury.
�Never use the Seat Belt Extender if you can COMFORTABLY fasten the seat belt
without it.
�The Seat Belt Extender must never be used with any child safety seats.
�Remember that the extender provided for you may not be safe when used on a
different vehicle, or for another person or at a different seating position than the
one originally intended for.
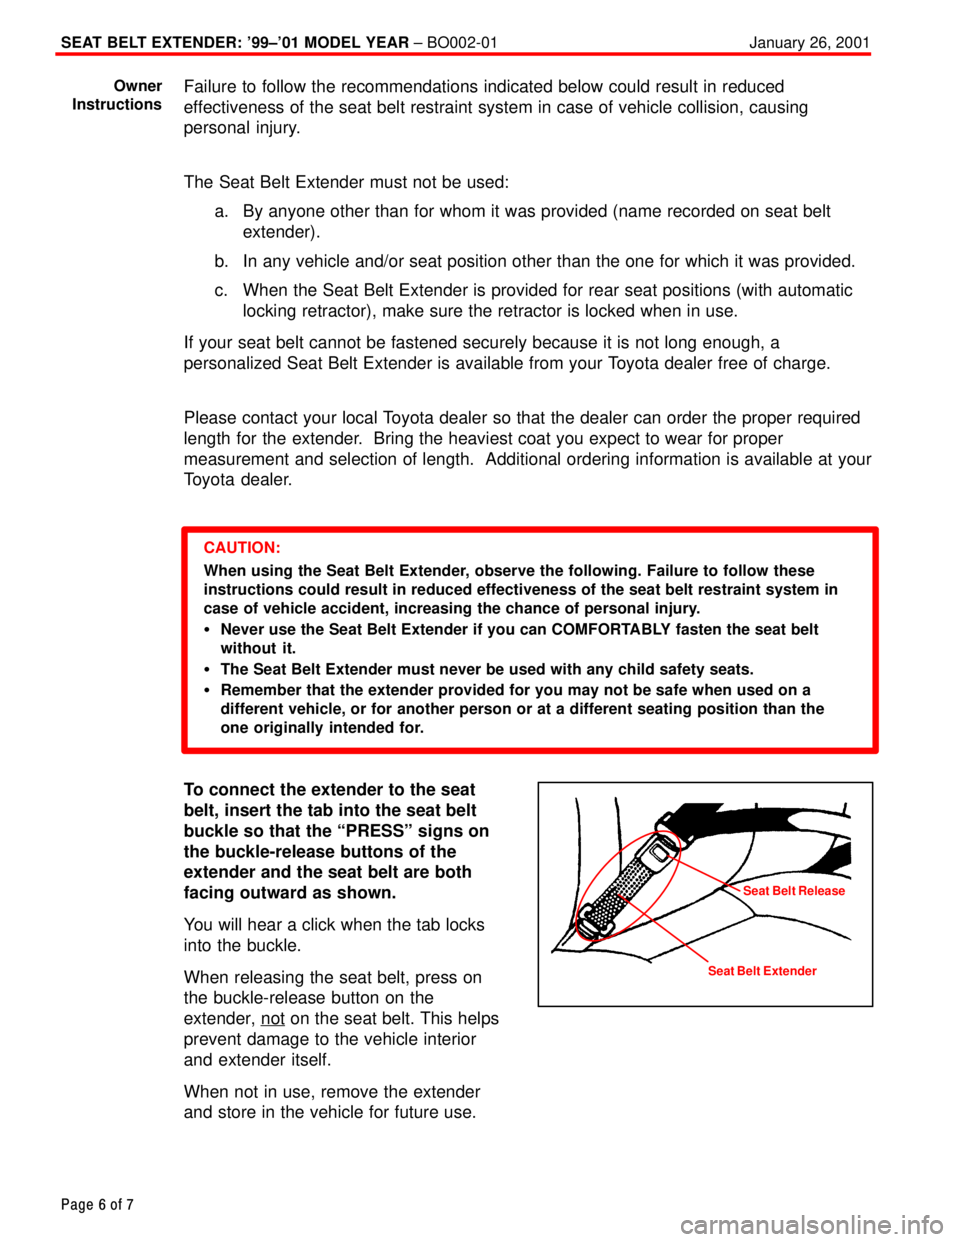
To connect the extender to the seat
belt, insert the tab into the seat belt
buckle so that the ªPRESSº signs on
the buckle-release buttons of the
extender and the seat belt are both
facing outward as shown.
You will hear a click when the tab locks
into the buckle.
When releasing the seat belt, press on
the buckle-release button on the
extender, not
on the seat belt. This helps
prevent damage to the vehicle interior
and extender itself.
When not in use, remove the extender
and store in the vehicle for future use.
Owner
Instructions
Seat Belt ExtenderSeat Belt Release
Page 4455 of 4770
The following procedures explain in detail how to install the 1997 Camry Door Mirrors.
CAUTION:Should the door mirror be installed incorrectly, a wind noise (air leakage noise)
might be generated.
INSTALLATION PROCEDURES:
1. Remove the retaining clip and tweeter (if
applicable) from the door. Discard the
removed clip.
2. In order to secure the door mirror to the
correct position, insert the 2 pins of the
door mirror base into the holes of the
door.
3. Push the door mirror against the door
and check that the door mirror base
edge is in contact with the door frame
molding lip.
NOTE:This area is critical to wind noise
reduction.
1997 CAMRY DOOR MIRROR INSTALLATIONPage 1 of 2
NOVEMBER 22, 1986
BODY
BO010±96
CAM
ClipTweeter
Pins
Molding Lip
Mirror Base