Page 794 of 4770

'99camry U
28
CAUTION
The SRS side airbags are installed in
the driver and front passenger seats.
Observe the following precautions.
�Do not lean against the front door
when the vehicle is in use. The side
airbag inflates with considerable
speed and force; you may be killed
or seriously injured.
�Do not modify or replace the seats
or surface of the front seats with
the side airbags. Such changes may
disable the system or cause the
side airbags to inflate, resulting in
death or serious injury. Consult
your Toyota dealer.
�Do not use accessories for the
seats which cover the parts where
the side airbags should inflate.
Such accessories may prevent the
side airbags from activating correct-
ly, causing death or serious injury.
Adjust the driver's seat so that the foot
pedals, steering wheel and instrument
panel controls are within easy reach of
the driver.
CAUTION
�Adjustments should not be made
while the vehicle is moving, as the
seat may unexpectedly move and
cause the driver to lose control of
the vehicle.
�When adjusting the seat, be careful
not to hit the seat against a pas-
senger or luggage.
�After adjusting the seat position,
try sliding it forward and backward
to make sure it is locked in posi-
tion.
�After adjusting the seatback, exert
body pressure to make sure it is
locked in position.
�Do not put objects under the seats.
The objects may interfere with the
seat±lock mechanism or unexpect-
edly push up the seat position ad-
justing lever; the seat may suddenly
move, causing the driver to lose
control of the vehicle.
�While adjusting the seat, do not put
your hands under the seat or near
the moving parts. You may catch
and injure your hands or fingers.
Front seatsÐ
ÐFront seat precautions
(with SRS side airbags)ÐSeat adjustment
precautions
Page 798 of 4770

'99camry U
32
Head restraints
Front
Rear
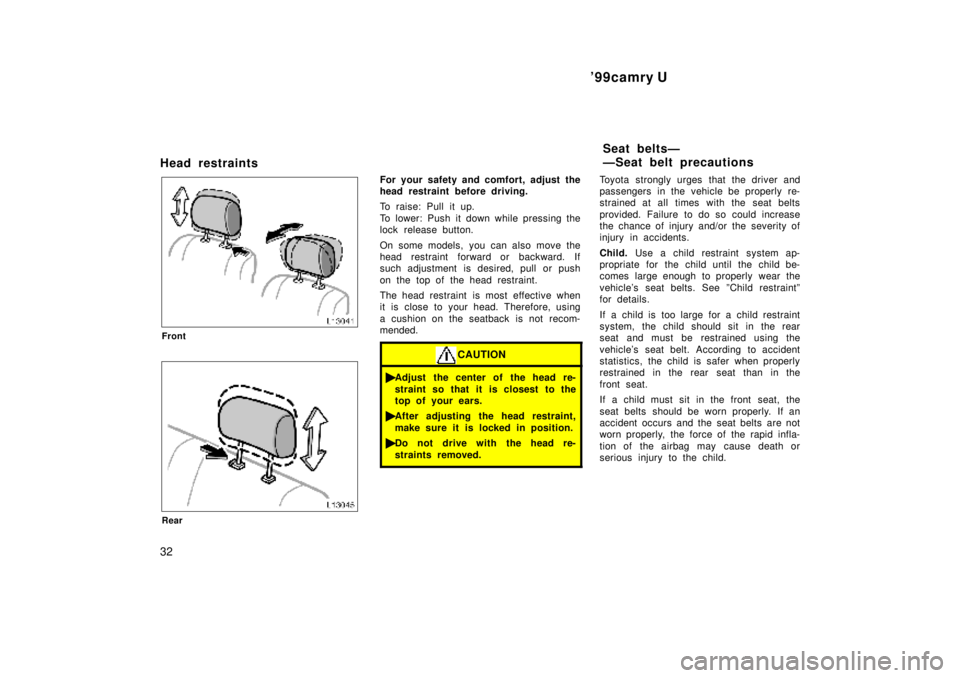
For your safety and comfort, adjust the
head restraint before driving.
To raise: Pull it up.
To lower: Push it down while pressing the
lock release button.
On some models, you can also move the
head restraint forward or backward. If
such adjustment is desired, pull or push
on the top of the head restraint.
The head restraint is most effective when
it is close to your head. Therefore, using
a cushion on the seatback is not recom-
mended.
CAUTION
�Adjust the center of the head re-
straint so that it is closest to the
top of your ears.
�After adjusting the head restraint,
make sure it is locked in position.
�Do not drive with the head re-
straints removed.
Toyota strongly urges that the driver and
passengers in the vehicle be properly re-
strained at all times with the seat belts
provided. Failure to do so could increase
the chance of injury and/or the severity of
injury in accidents.
Child. Use a child restraint system ap-
propriate for the child until the child be-
comes large enough to properly wear the
vehicle's seat belts. See ºChild restraintº
for details.
If a child is too large for a child restraint
system, the child should sit in the rear
seat and must be restrained using the
vehicle's seat belt. According to accident
statistics, the child is safer when properly
restrained in the rear seat than in the
front seat.
If a child must sit in the front seat, the
seat belts should be worn properly. If an
accident occurs and the seat belts are not
worn properly, the force of the rapid infla-
tion of the airbag may cause death or
serious injury to the child.
Seat beltsÐ
ÐSeat belt precautions
Page 3646 of 4770

BE20X±01
I21909
For Adjustment
in Vertical Direction
BE±28
± BODY ELECTRICALHEADLIGHT AND TAILLIGHT SYSTEM
2238 Author�: Date�:
2001 CAMRY (RM819U)
ADJUSTMENT
ADJUST HEADLIGHT AIM ONLY
(a) Place the vehicle in the following conditions.
�The area around the headlight is not deformed.
�The vehicle is parked on a level surface.
�Tire inflation pressure is the specified value.
�A driver is in the driver's seat and the vehicle is in a state ready for driving (with a tank full).
�The vehicle has been bounced several times.
(b) Check the headlight aiming.
(1) Prepare a thick white paper.
(2) Stand the paper perpendicular to the ground at the position 9.84 ft away from the headlights.
(3) Ensure that the center line of the vehicle and the paper face forms a 90±degree angle as shown
in the illustration.
(4) Draw a horizontal line (H line) on the paper, showing where the headlights should strike.
(5) Draw a vertical line (V line) to where the center line of the vehicle is to be.
(6) Draw 2 vertical lines to where the the headlights should strike (V RH and V LH lines).
(7) Draw a horizontal line (by connecting the both low beam center marks) to where the headlights
should strike (H RH and H LH lines).
HINT:
The H RH and H LH line is 0.4° below the horizontal line (H line) of the light axis.
(8) Start the engine.