Page 4471 of 4770
Toyota Supports ASE CertificationPage 1 of 2
BO015±00
Title:
DOOR MIRROR INSTALLATION
Models:
'97 ± '00 Japan Built Camry
Technical Service
BULLETIN
March 24, 2000
The procedures in this bulletin explain in detail how to install the door mirrors.
CAUTION:
If the door mirror is installed incorrectly, a wind noise (air leakage noise) might be
generated.
�1997 ± 2000 model year Japan built Camry
OP CODEDESCRIPTIONTIMEOPNT1T2
N/ANot Applicable to Warranty ±±±±
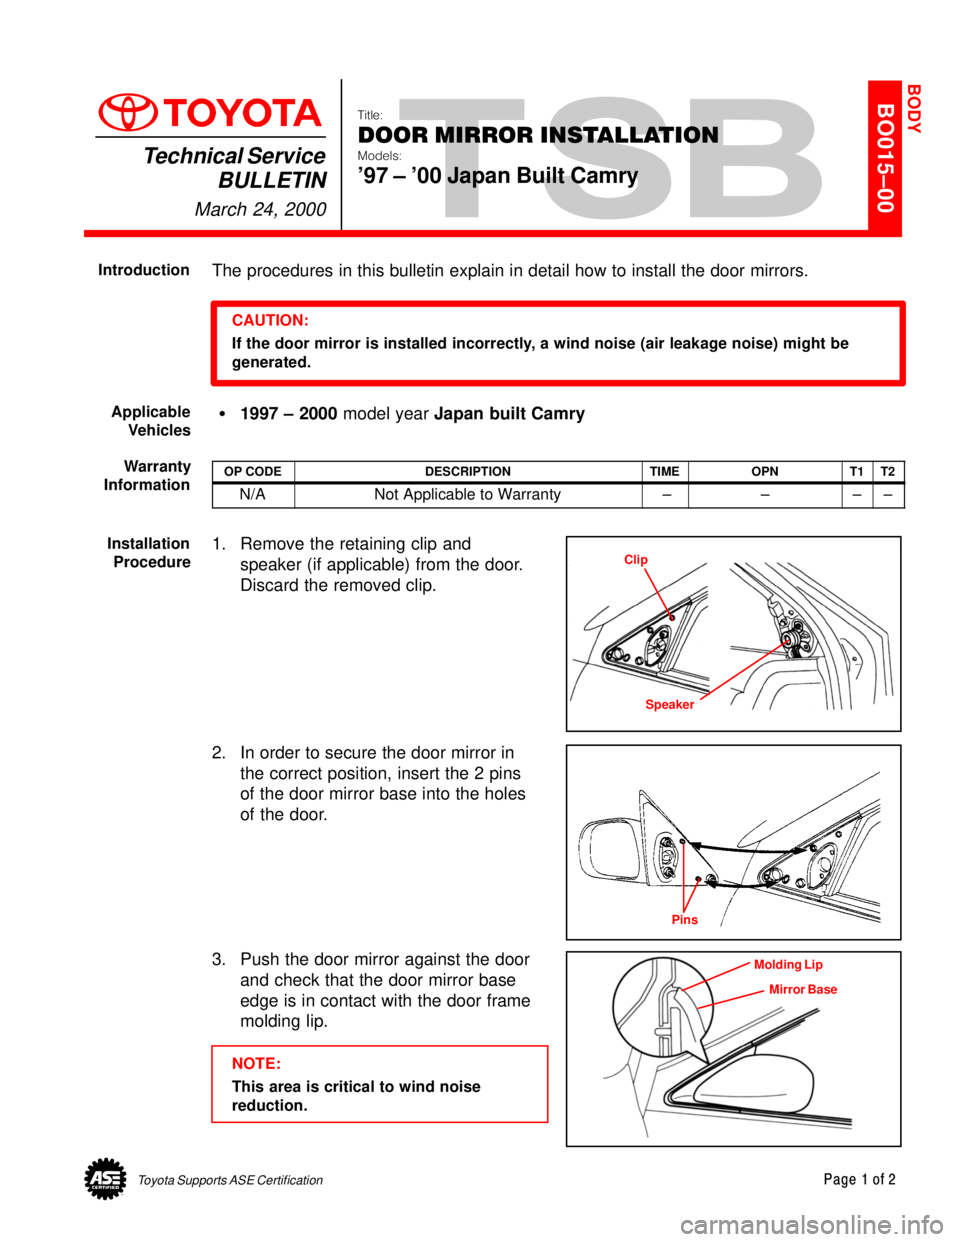
1. Remove the retaining clip and
speaker (if applicable) from the door.
Discard the removed clip.
2. In order to secure the door mirror in
the correct position, insert the 2 pins
of the door mirror base into the holes
of the door.
3. Push the door mirror against the door
and check that the door mirror base
edge is in contact with the door frame
molding lip.
NOTE:
This area is critical to wind noise
reduction.
BODY
Introduction
Applicable
Vehicles
Warranty
Information
Installation
Procedure
Clip
Speaker
Pins
Molding Lip
Mirror Base
Page 4474 of 4770
POWER SEAT MOTOR CABLE REPAIR TIP ± BO017-01 Revised May 25, 2001
Page 2 of 2
1. Remove the seat assembly from the
vehicle.
Turn the seat over and detach motors
from the mounting brackets.
NOTE:
The lower seat cushion must be
removed from the seat frame to access
the motor mounting screws on some
models.
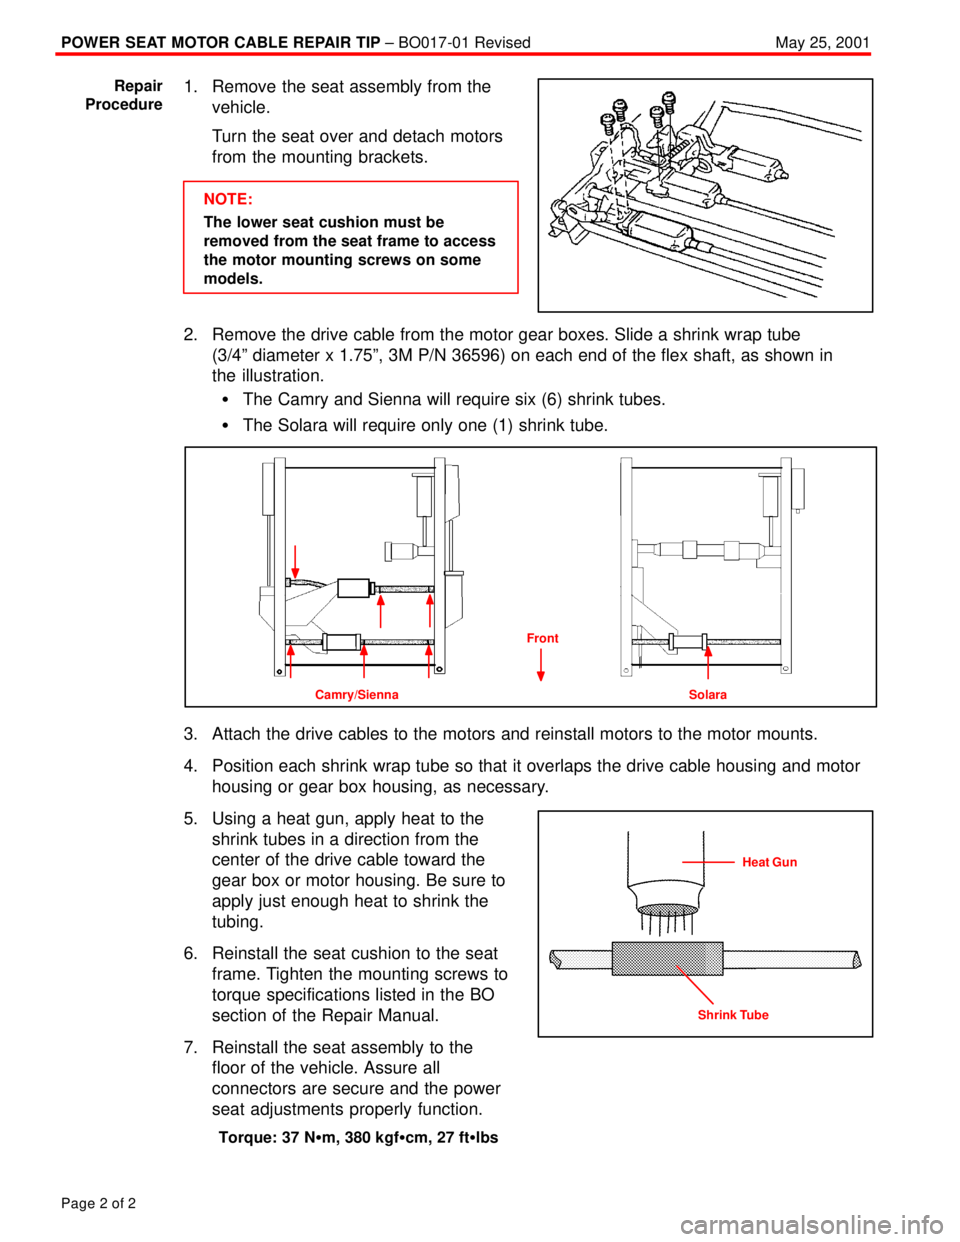
2. Remove the drive cable from the motor gear boxes. Slide a shrink wrap tube
(3/4º diameter x 1.75º, 3M P/N 36596) on each end of the flex shaft, as shown in
the illustration.
�The Camry and Sienna will require six (6) shrink tubes.
�The Solara will require only one (1) shrink tube.
Camry/Sienna Solara
Front
3. Attach the drive cables to the motors and reinstall motors to the motor mounts.
4. Position each shrink wrap tube so that it overlaps the drive cable housing and motor
housing or gear box housing, as necessary.
5. Using a heat gun, apply heat to the
shrink tubes in a direction from the
center of the drive cable toward the
gear box or motor housing. Be sure to
apply just enough heat to shrink the
tubing.
6. Reinstall the seat cushion to the seat
frame. Tighten the mounting screws to
torque specifications listed in the BO
section of the Repair Manual.
7. Reinstall the seat assembly to the
floor of the vehicle. Assure all
connectors are secure and the power
seat adjustments properly function.
Torque: 37 N�m, 380 kgf�cm, 27 ft�lbs
Repair
Procedure
Heat Gun
Shrink Tube
Page 4478 of 4770
Toyota Supports ASE CertificationPage 1 of 2
BO019±99
Title:
DOOR MIRROR WIND NOISE
Models:
'97 ± '99 Camry
Technical Service
BULLETIN
December 3, 1999
Wind/road noise heard around the door mirrors of some Japan produced Camry vehicles
may be caused by an improperly positioned mirror wire harness grommet and/or harness
connector.
�1997 through 1999 Camry vehicles. (Japan produced only)
PLANTSTARTING VIN
TMC
JT2BG22K * X0367325
JT2BG28K * X0367352
TMCJT2BG28K X0367352
JT2BF22K * X0227381
JT2BF28K * X0227306
OP CODEDESCRIPTIONTIMEOPNT1T2
BD9006Adjust the Wire Harness Grommet
and/or Connector (both sides)0.487910±331505957
Applicable Warranty*:
This repair is covered under the Toyota Basic Warranty. This warranty is in effect for
36 months or 36,000 miles, whichever occurs first, from the vehicle's in±service date.
* Warranty application is limited to correction of a problem based upon a customer's specific complaint.
1. Carefully pry off the door speaker
cover and remove the nut using a 10
mm socket that secures the speaker
to the door.
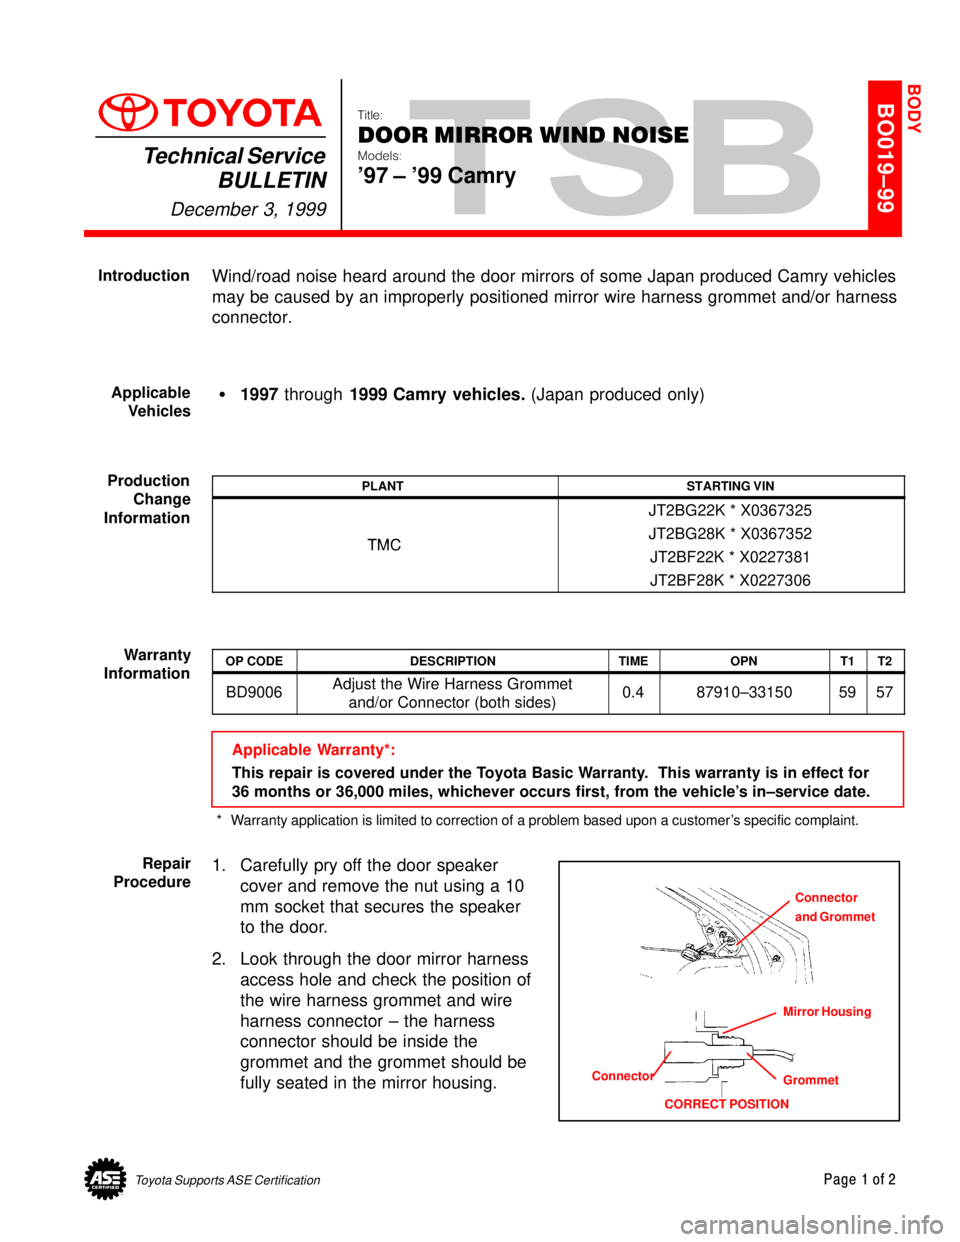
2. Look through the door mirror harness
access hole and check the position of
the wire harness grommet and wire
harness connector ± the harness
connector should be inside the
grommet and the grommet should be
fully seated in the mirror housing.
BODY
Introduction
Applicable
Vehicles
Production
Change
Information
Warranty
Information
Connector
and Grommet
Mirror Housing
Grommet Connector
CORRECT POSITION
Repair
Procedure
Page 4479 of 4770
DOOR MIRROR WIND NOISE ± BO019±99 December 3, 1999
Page 2 of 2
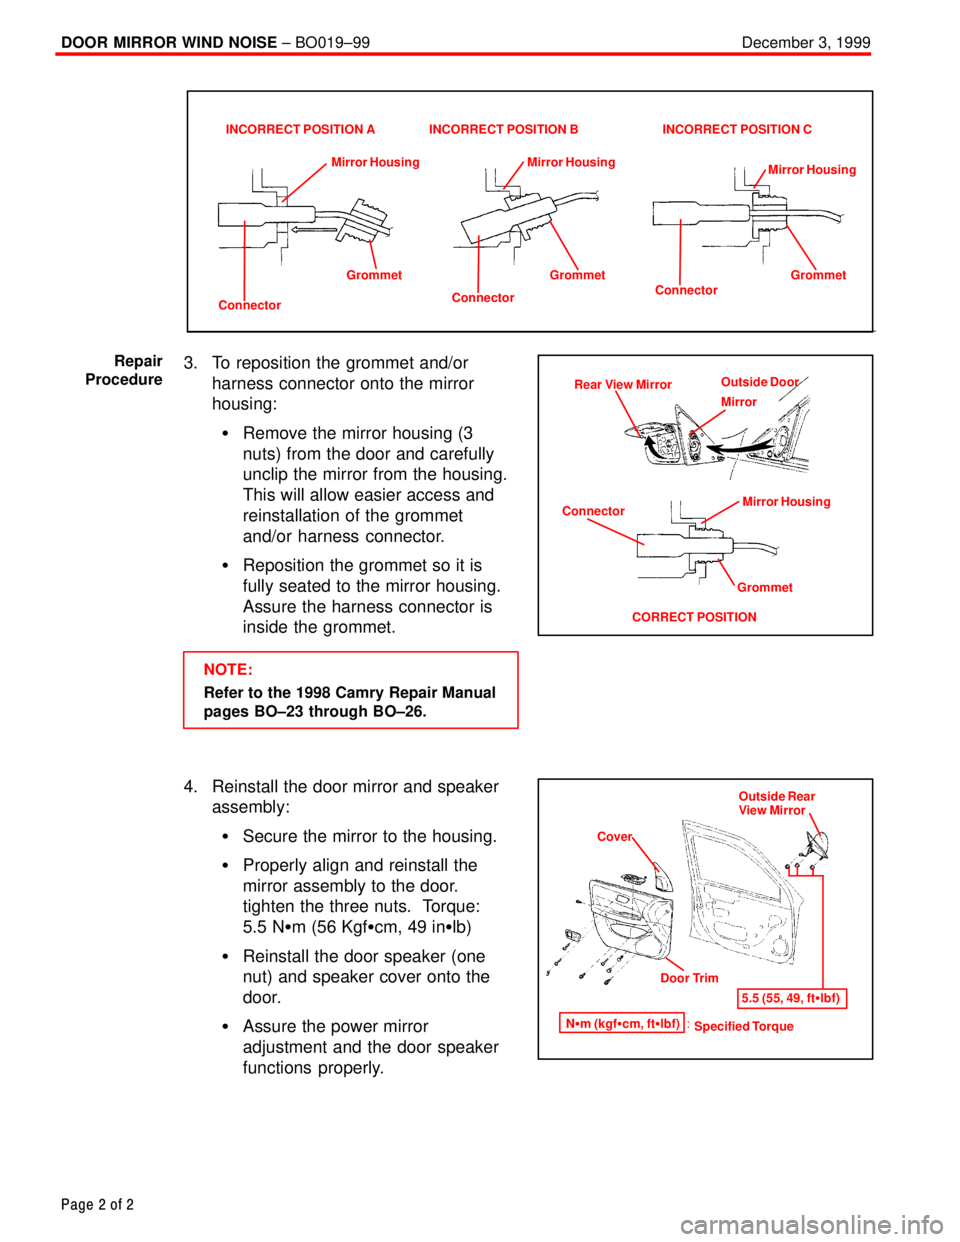
INCORRECT POSITION A INCORRECT POSITION B INCORRECT POSITION C
Mirror Housing
ConnectorGrommetMirror Housing
Mirror Housing
Grommet Grommet
ConnectorConnector
3. To reposition the grommet and/or
harness connector onto the mirror
housing:
�Remove the mirror housing (3
nuts) from the door and carefully
unclip the mirror from the housing.
This will allow easier access and
reinstallation of the grommet
and/or harness connector.
�Reposition the grommet so it is
fully seated to the mirror housing.
Assure the harness connector is
inside the grommet.
NOTE:
Refer to the 1998 Camry Repair Manual
pages BO±23 through BO±26.
4. Reinstall the door mirror and speaker
assembly:
�Secure the mirror to the housing.
�Properly align and reinstall the
mirror assembly to the door.
tighten the three nuts. Torque:
5.5 N�m (56 Kgf�cm, 49 in�lb)
�Reinstall the door speaker (one
nut) and speaker cover onto the
door.
�Assure the power mirror
adjustment and the door speaker
functions properly.
ConnectorRear View MirrorOutside Door
Mirror
Mirror Housing
Grommet
CORRECT POSITION
Repair
Procedure
CoverOutside Rear
View Mirror
Door Trim
Specified Torque N�m (kgf�cm, ft�lbf) :5.5 (55, 49, ft�lbf)
Page 4485 of 4770
SEAT BELT EXTENDERS: '95 ± '99 ± BO020±98 July 3, 1998
Page 6 of 7
Failure to follow the recommendations indicated below could result in less effectiveness
of the seat belt restraint system in case of vehicle collision, causing personal injury.
The seat belt extender must not be used:
A. By anyone other than for whom it was provided (name recorded on seat belt
extender).
B. In any vehicle and/or seat position other than the one for which it was provided.
C. When the seat belt extender is provided for rear seat positions (with automatic
locking retractor), make sure the retractor is locked when in use.
If your seat belt cannot be fastened securely because it is not long enough, a
personalized seat belt extender is available from your Toyota dealer free of charge.
Please contact your local Toyota dealer so that the dealer can order the proper required
length for the extender. Bring the heaviest coat you expect to wear for proper
measurement and selection of length. Additional ordering information is available at your
Toyota dealer.
CAUTION:
When using the seat belt extender, observe the following. Failure to follow these
instructions could result in less effectiveness of the seat belt restraint system in case
of vehicle accident, increasing the chance of personal injury.
�Never use the seat belt extender if you can COMFORTABLY fasten the seat belt
without it.
�Remember that the extender provided for you may not be safe when used on a
different vehicle, or for another person or at a different seating position than the
one originally intended for.
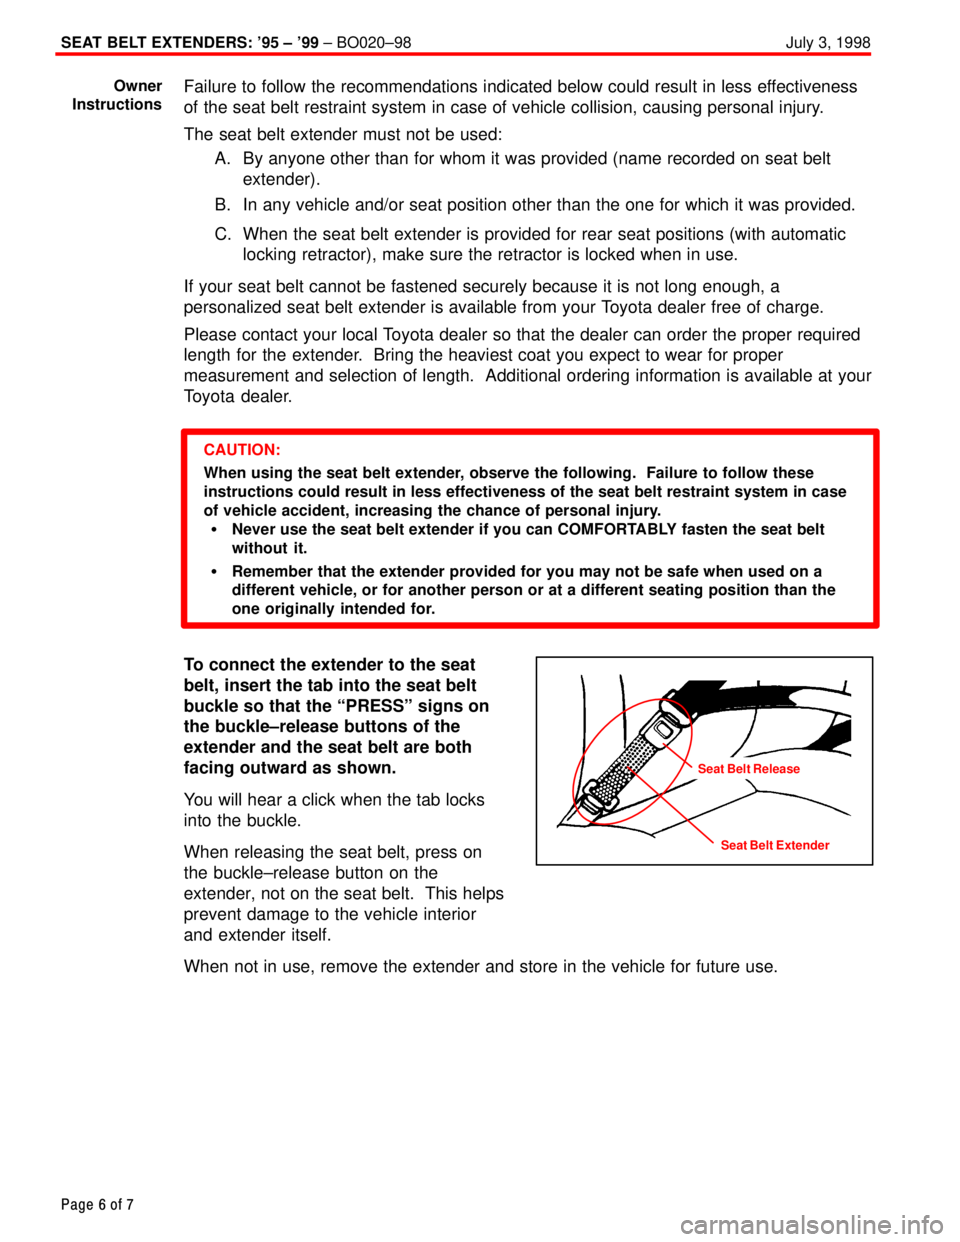
To connect the extender to the seat
belt, insert the tab into the seat belt
buckle so that the ªPRESSº signs on
the buckle±release buttons of the
extender and the seat belt are both
facing outward as shown.
You will hear a click when the tab locks
into the buckle.
When releasing the seat belt, press on
the buckle±release button on the
extender, not on the seat belt. This helps
prevent damage to the vehicle interior
and extender itself.
When not in use, remove the extender and store in the vehicle for future use.
Owner
Instructions
Seat Belt Extender
Seat Belt Release
Page 4492 of 4770
SEAT BELT EXTENDER: '99 ± '01 MODEL YEAR ± BO020±00 August 11, 2000
Page 6 of 7
Failure to follow the recommendations indicated below could result in less effectiveness
of the seat belt restraint system in case of vehicle collision, causing personal injury.
The Seat Belt Extender must not be used:
a. By anyone other than for whom it was provided (name recorded on seat belt
extender).
b. In any vehicle and/or seat position other than the one for which it was
provided.
c. When the Seat Belt Extender is provided for rear seat positions (with
automatic locking retractor), make sure the retractor is locked when in use.
If your seat belt cannot be fastened securely because it is not long enough, a
personalized seat belt extender is available from your Toyota dealer free of charge.
Please contact your local Toyota dealer so that the dealer can order the proper required
length for the extender. Bring the heaviest coat you expect to wear for proper
measurement and selection of length. Additional ordering information is available at your
Toyota dealer.
CAUTION:
When using the seat belt extender, observe the following. Failure to follow these
instructions could result in less effectiveness of the seat belt restraint system in case
of vehicle accident, increasing the chance of personal injury.
�Never use the Seat Belt Extender if you can comfortably fasten the seat belt
without it.
�The Seat Belt Extender must never be used with any child safety seats.
�Remember that the extender provided for you may not be safe when used on a
different vehicle, or for another person or at a different seating position than the
one originally intended for.
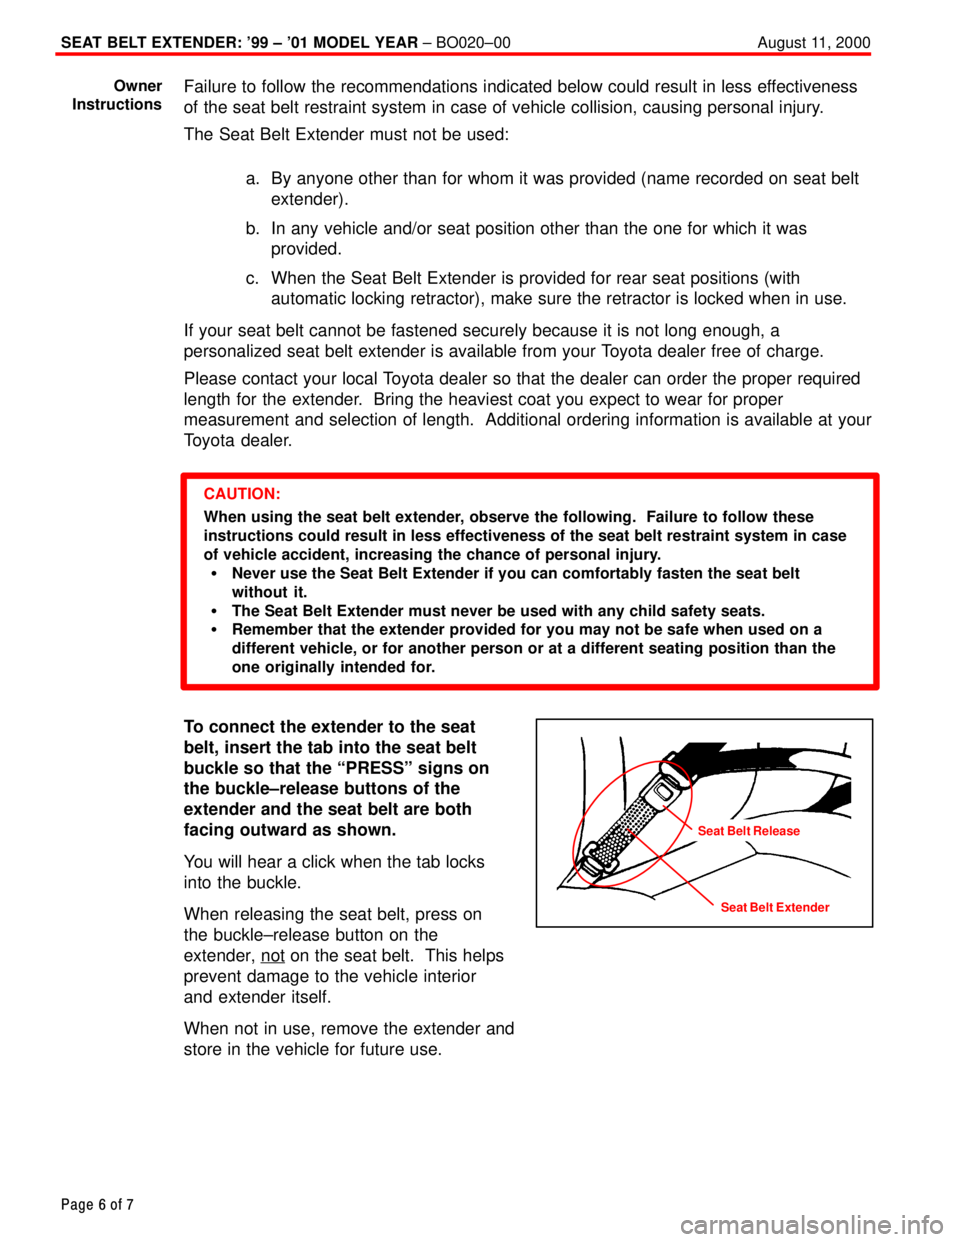
To connect the extender to the seat
belt, insert the tab into the seat belt
buckle so that the ªPRESSº signs on
the buckle±release buttons of the
extender and the seat belt are both
facing outward as shown.
You will hear a click when the tab locks
into the buckle.
When releasing the seat belt, press on
the buckle±release button on the
extender, not
on the seat belt. This helps
prevent damage to the vehicle interior
and extender itself.
When not in use, remove the extender and
store in the vehicle for future use.
Owner
Instructions
Seat Belt Extender
Seat Belt Release
Page 4509 of 4770
October 19, 2001SHOULDER BELT ANCHOR TAPE SET ± BO026-01
Page 3 of 4
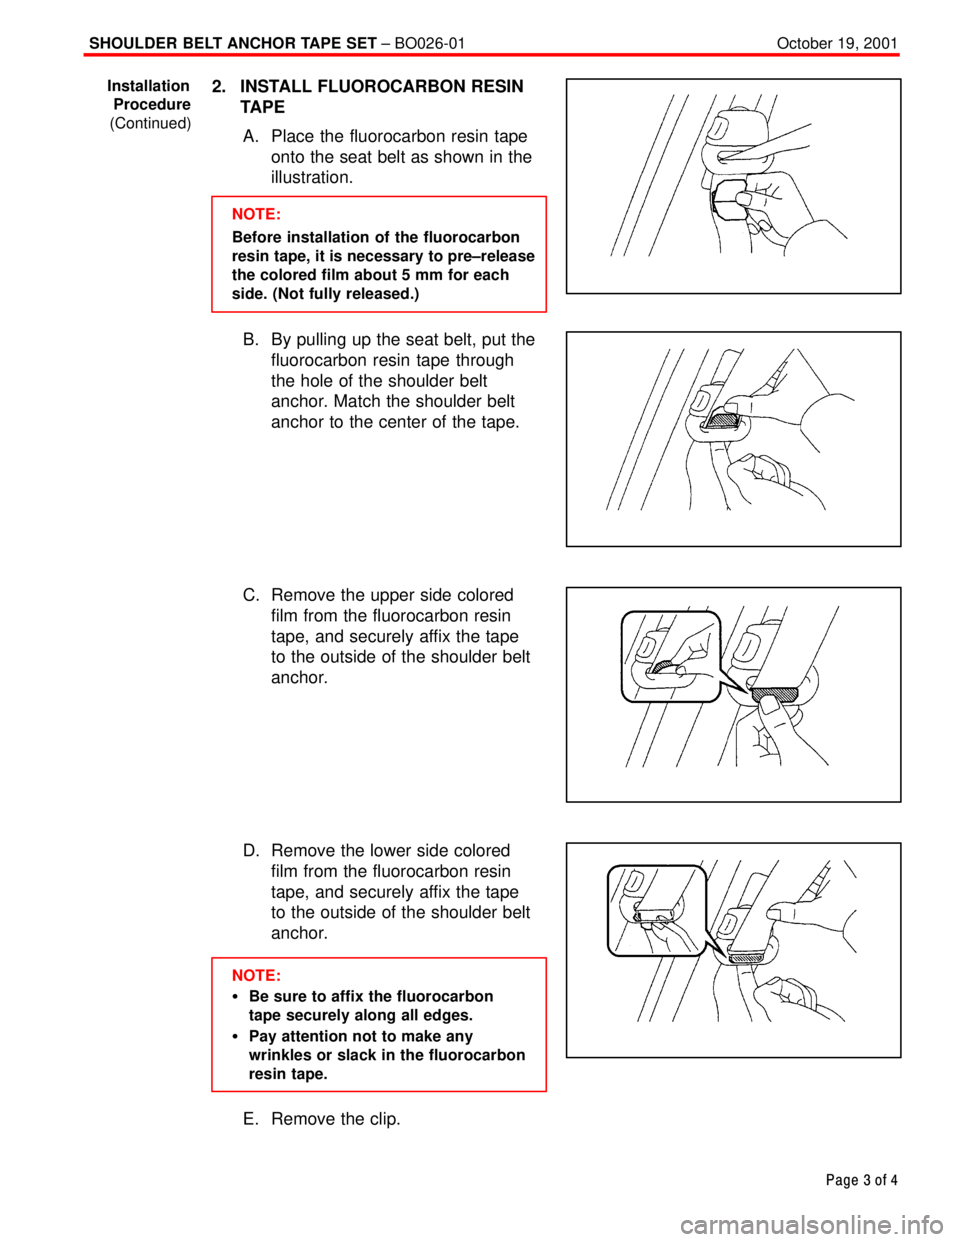
2. INSTALL FLUOROCARBON RESIN
TAPE
A. Place the fluorocarbon resin tape
onto the seat belt as shown in the
illustration.
NOTE:
Before installation of the fluorocarbon
resin tape, it is necessary to pre±release
the colored film about 5 mm for each
side. (Not fully released.)
B. By pulling up the seat belt, put the
fluorocarbon resin tape through
the hole of the shoulder belt
anchor. Match the shoulder belt
anchor to the center of the tape.
C. Remove the upper side colored
film from the fluorocarbon resin
tape, and securely affix the tape
to the outside of the shoulder belt
anchor.
D. Remove the lower side colored
film from the fluorocarbon resin
tape, and securely affix the tape
to the outside of the shoulder belt
anchor.
NOTE:
�Be sure to affix the fluorocarbon
tape securely along all edges.
�Pay attention not to make any
wrinkles or slack in the fluorocarbon
resin tape.
E. Remove the clip.
Installation
Procedure
(Continued)
Page 4510 of 4770
October 19, 2001SHOULDER BELT ANCHOR TAPE SET ± BO026-01
Page 4 of 4
F. By pulling the seat belt up and
down several times, as shown in
the illustration, securely affix the
fluorocarbon resin tape and
confirm the smoothness of the
belt movement.
NOTE:
Affix the fluorocarbon resin tape on
the shoulder belt anchor to the other
side following the same procedure.
NOTE:
If the seat belt requires cleaning to
remove dirt, only use a neutral
detergent or lukewarm water to clean.
Use the seat belt after it is completely
dried, to confirm proper operation.
Installation
Procedure
(Continued)