Page 4609 of 4770

DOOR MIRROR WIND NOISE ± NV007±00 March 31, 2000
Page 2 of 2
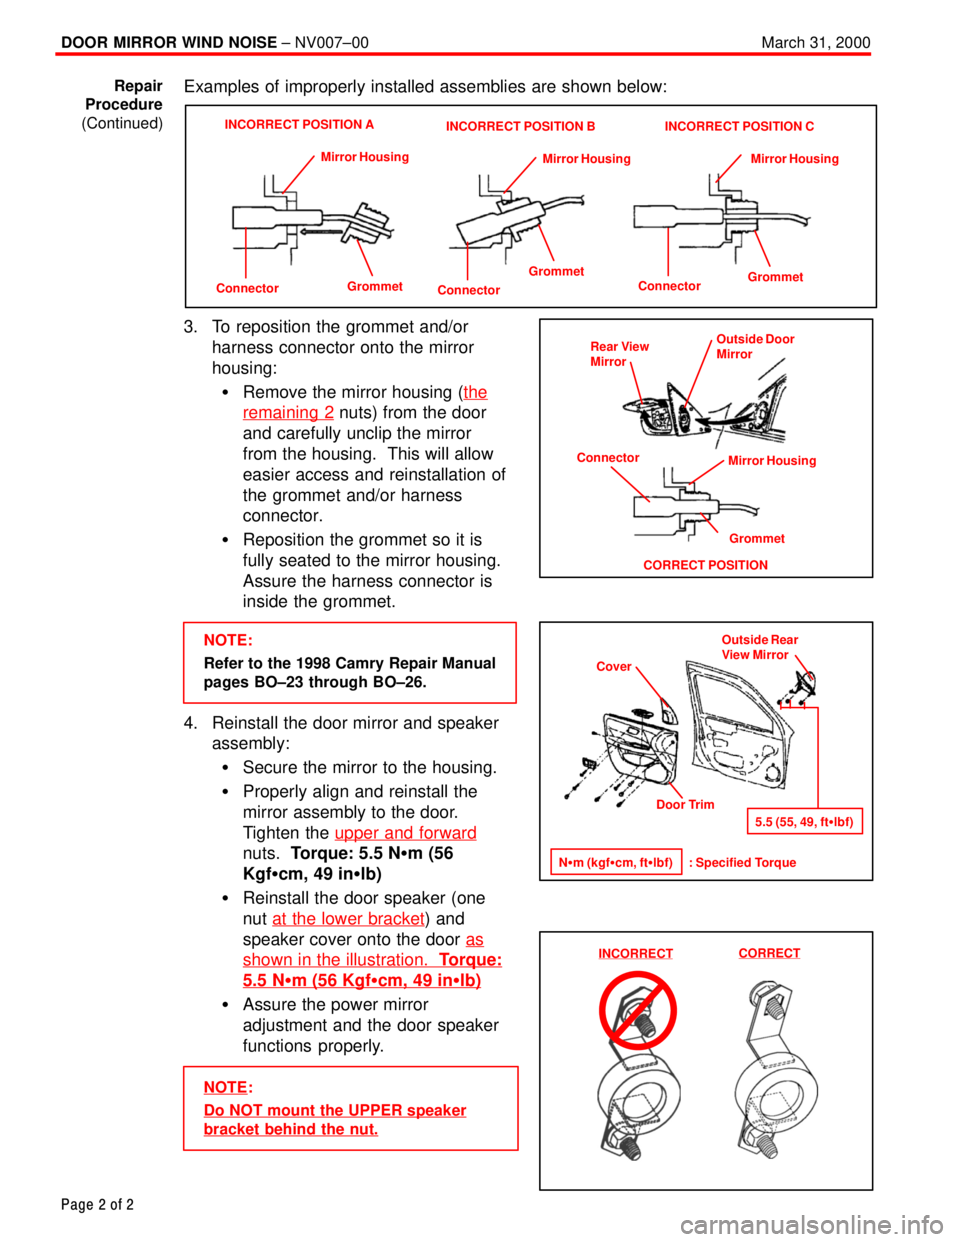
Examples of improperly installed assemblies are shown below:
ConnectorGrommet Mirror Housing
INCORRECT POSITION A
Connector
GrommetMirror Housing
INCORRECT POSITION B
Connector
GrommetMirror Housing
INCORRECT POSITION C
3. To reposition the grommet and/or
harness connector onto the mirror
housing:
�Remove the mirror housing (the
remaining 2 nuts) from the door
and carefully unclip the mirror
from the housing. This will allow
easier access and reinstallation of
the grommet and/or harness
connector.
�Reposition the grommet so it is
fully seated to the mirror housing.
Assure the harness connector is
inside the grommet.
NOTE:
Refer to the 1998 Camry Repair Manual
pages BO±23 through BO±26.
4. Reinstall the door mirror and speaker
assembly:
�Secure the mirror to the housing.
�Properly align and reinstall the
mirror assembly to the door.
Tighten the upper and forward
nuts. Torque: 5.5 N�m (56
Kgf�cm, 49 in�lb)
�Reinstall the door speaker (one
nut at the lower bracket
) and
speaker cover onto the door as
shown in the illustration. Torque:
5.5 N�m (56 Kgf�cm, 49 in�lb)
�Assure the power mirror
adjustment and the door speaker
functions properly.
NOTE:
Do NOT mount the UPPER speaker
bracket behind the nut.
Repair
Procedure
(Continued)
Rear View
Mirror
Grommet
CORRECT POSITIONOutside Door
Mirror
Mirror Housing
Connector
Cover
Door Trim
N�m (kgf�cm, ft�lbf) : Specified TorqueOutside Rear
View Mirror
5.5 (55, 49, ft�lbf)
INCORRECTCORRECT
Page 4663 of 4770

Toyota Supports ASE CertificationPage 1 of 9
SS001±99Title:
SCANTOOL IMMOBILIZER KEY CODE
UTILITY
Models:
'98 & '99 Avalon, Camry, Land Cruiser & Sienna
'99 Solara & 4Runner
Technical Service
BULLETIN
April 9, 1999
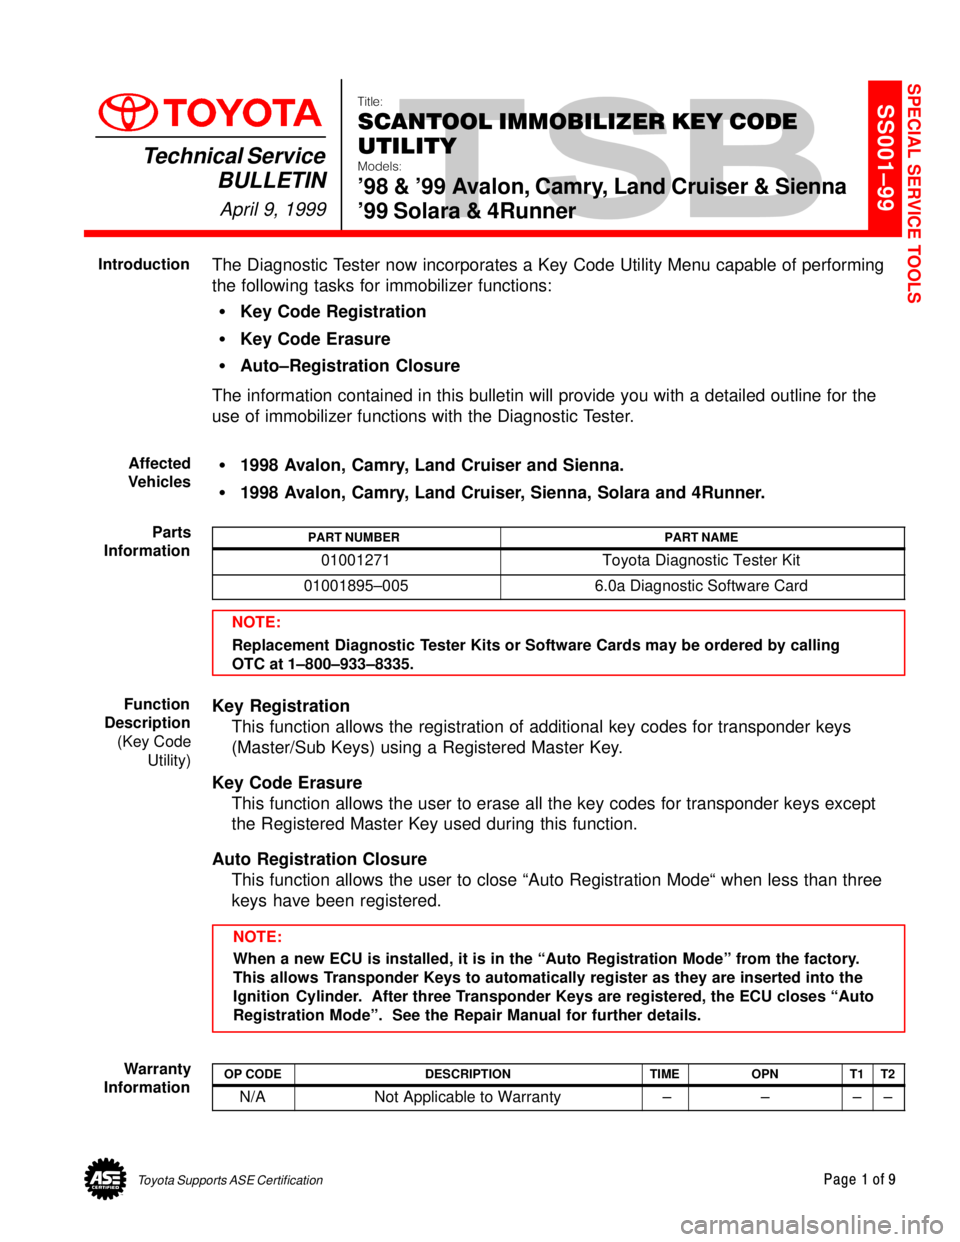
The Diagnostic Tester now incorporates a Key Code Utility Menu capable of performing
the following tasks for immobilizer functions:
�Key Code Registration
�Key Code Erasure
�Auto±Registration Closure
The information contained in this bulletin will provide you with a detailed outline for the
use of immobilizer functions with the Diagnostic Tester.
�1998 Avalon, Camry, Land Cruiser and Sienna.
�1998 Avalon, Camry, Land Cruiser, Sienna, Solara and 4Runner.
PART NUMBERPART NAME
01001271Toyota Diagnostic Tester Kit
01001895±0056.0a Diagnostic Software Card
NOTE:
Replacement Diagnostic Tester Kits or Software Cards may be ordered by calling
OTC at 1±800±933±8335.
Key Registration
This function allows the registration of additional key codes for transponder keys
(Master/Sub Keys) using a Registered Master Key.
Key Code Erasure
This function allows the user to erase all the key codes for transponder keys except
the Registered Master Key used during this function.
Auto Registration Closure
This function allows the user to close ªAuto Registration Modeª when less than three
keys have been registered.
NOTE:
When a new ECU is installed, it is in the ªAuto Registration Modeº from the factory.
This allows Transponder Keys to automatically register as they are inserted into the
Ignition Cylinder. After three Transponder Keys are registered, the ECU closes ªAuto
Registration Modeº. See the Repair Manual for further details.
OP CODEDESCRIPTIONTIMEOPNT1T2
N/ANot Applicable to Warranty ±±±±
SPECIAL SERVICE TOOLS
Introduction
Affected
Vehicles
Parts
Information
Function
Description
(Key Code
Utility)
Warranty
Information
Page 4667 of 4770
SCANTOOL IMMOBILIZER KEY CODE UTILITY ± SS001±99 April 9, 1999
Page 5 of 9
3. From the ªKEY SELECTIONº menu
(Screen C), select the Transponder
Key type to be registered and press
the (ENTER) key.
NOTE:
Do not register a SUB KEY as a
MASTER KEY. The SUB KEY is
typically left with an attendant when
the vehicle is parked. A Registered
Master Key allows the user to
add/erase transponder keys.
4. From ªKEY SELECTIONº (Screen D),
confirm the type of Transponder Key
to be registered and press the
(ENTER) key.
5. After pressing the (YES) key, remove
the Registered Master Key from the
Ignition Cylinder within 20 seconds.
After removing the key, press the
(ENTER) key.
6. Insert the New Transponder Key into
the Ignition Cylinder within 10
seconds and press the (ENTER) key.
HINT:
Look at the Security Indicator Light. It
will begin to flash as the New
Transponder Key is inserted.
Page 4668 of 4770
SCANTOOL IMMOBILIZER KEY CODE UTILITY ± SS001±99 April 9, 1999
Page 6 of 9
7. The registration of the New
Transponder Key will be completed in
approximately 60 seconds.
HINT:
The Security Indicator continues to
flash during registration.
8. Screen H will be shown at completion
of registration. Confirm the Security
Indicator turns OFF and press the
(ENTER) key.
HINT:
The Security Indicator will stop
flashing when Key Registration is
complete.
9. Insert the New Registered Master Key
into the Ignition Cylinder and turn to
the ON position and press the
(ENTER) key.
This function allows the user to erase all the Key Codes for Transponder Keys except the
Registered Master Key used during this function. The following screens show how to
perform Key Code Erasure.
HINT:
This function requires the use of one Registered Master Key. The use of a Sub Key
will NOT complete Key Code Erasure. Key
Registration
(Continued)
Key Code
Erasure
Page 4669 of 4770
SCANTOOL IMMOBILIZER KEY CODE UTILITY ± SS001±99 April 9, 1999
Page 7 of 9
1. From the ªKEY CODE UTILITYª menu
(Screen A), select [2: KEY CODE
ERASURE].
2. Confirm the instruction on Screen B
and press the (ENTER) key.
3. Confirm the instruction on Screen C
and press the (YES) key.
NOTE:
By pressing the (YES) key, all
Transponder Key Codes will be erased
except the Registered Master Key in
the Ignition Cylinder.
HINT:
After pressing the (YES) key, the
Security Indicator will start to flash.
4. Pull out the Registered Master Key
from the Ignition Cylinder within 10
seconds (Screen D).
HINT:
Security Indicator continues to flash. Key Code
Erasure
(Continued)
Page 4670 of 4770

SCANTOOL IMMOBILIZER KEY CODE UTILITY ± SS001±99 April 9, 1999
Page 8 of 9
5. If Step 4 was completed correctly,
Screen E will confirm ERASURE was
sucessful.
HINT:
If the Erasure completed, the security
indicator should still be blinking.
6. Insert the Registered Master Key into
the Ignition Cylinder and turn to the
ON position and press the (ENTER)
key.
HINT:
Look at the Security Indicator Light.
Inserting a Registered Master Key
causes the Security Indicator to
immediately stop blinking.
This function allows the user to close Auto Registration Mode when less than three keys
have been registered.
NOTE:
When a New ECU is installed, it is in the Auto Registration Mode. This mode allows
the Transponder Keys to automatically register as they are inserted into the Ignition
Cylinder. See the Repair Manual for further details.
CAUTION:
This function requires the use of one Registered Master Key. The use of a Sub Key
will NOT complete Auto Registration Closure. The use of a non±transponder
key
during this function may damage the ECU
.
1. From the ªKEY CODE UTILITYª menu
(Screen A), select [3: AUTO REG
CLOSURE].
Key Code
Erasure
(Continued)
Auto
Registration
Closure
Page 4691 of 4770

Toyota Supports ASE CertificationPage 1 of 1
SS004-00Title:
DIAGNOSTIC TESTER COMMUNICATION
ERROR WITH T.I.S.
Models:
All Models
Technical Service
BULLETIN
December 8, 2000
Certain Diagnostic Testers (SST P/N 02002019) may experience a communication
error with the Technical Information System (T.I.S.). To correct this condition, the tester
manufacturer, Vetronix Corporation, will recall and update affected units. The following
explains how to determine which Diagnostic Testers may exhibit this problem and
outlines the procedure to return the tester for repair.
Diagnostic Testers within the serial number range below are known to experience these
communication errors.
STARTING SERIAL NUMBERENDING SERIAL NUMBER
31 00000031 000100
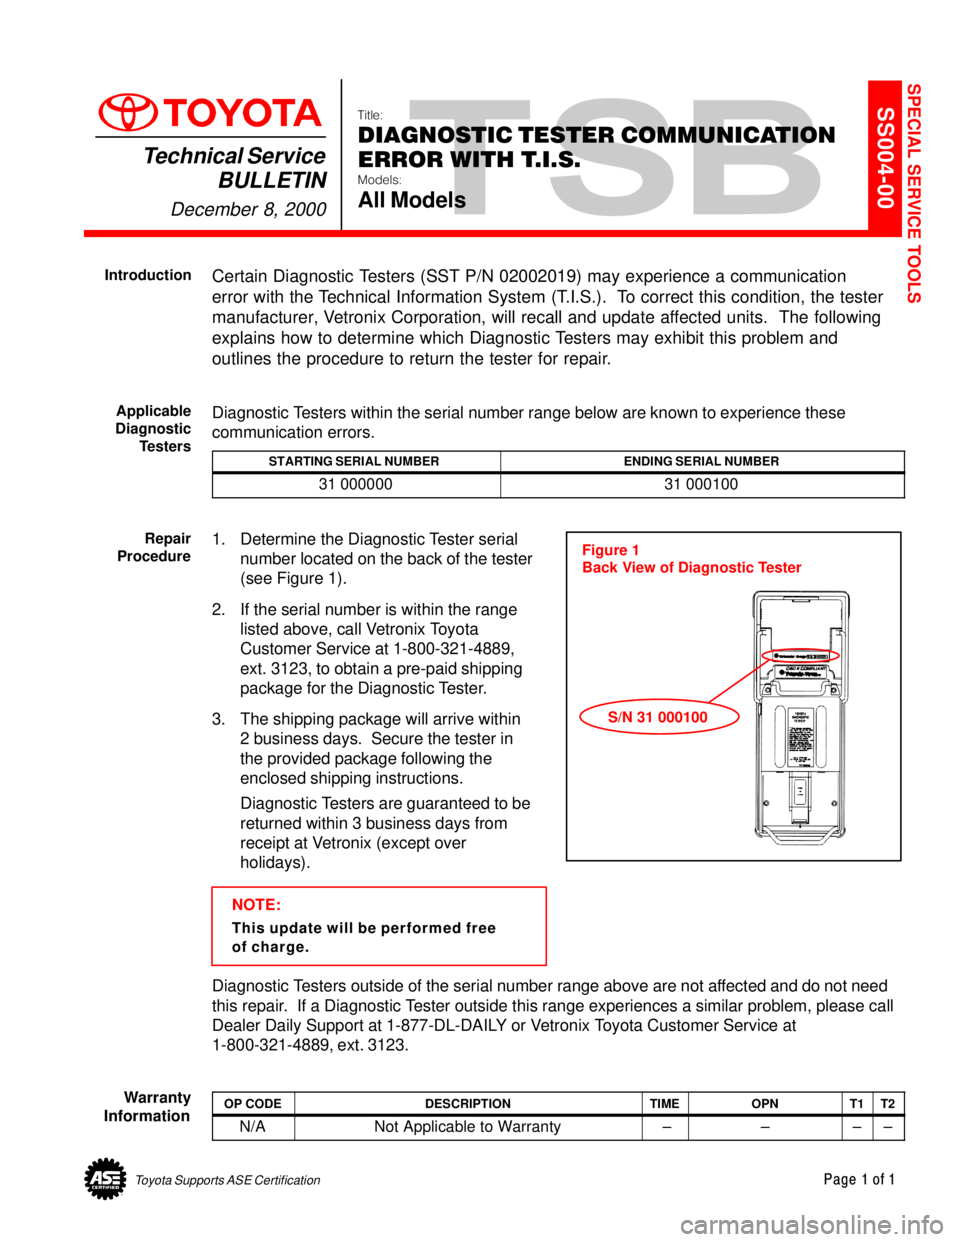
1. Determine the Diagnostic Tester serial
number located on the back of the tester
(see Figure 1).
2. If the serial number is within the range
listed above, call Vetronix Toyota
Customer Service at 1-800-321-4889,
ext. 3123, to obtain a pre-paid shipping
package for the Diagnostic Tester.
3. The shipping package will arrive within
2 business days. Secure the tester in
the provided package following the
enclosed shipping instructions.
Diagnostic Testers are guaranteed to be
returned within 3 business days from
receipt at Vetronix (except over
holidays).
NOTE:
This update will be performed free
of charge.
Diagnostic Testers outside of the serial number range above are not affected and do not need
this repair. If a Diagnostic Tester outside this range experiences a similar problem, please call
Dealer Daily Support at 1-877-DL-DAILY or Vetronix Toyota Customer Service at
1-800-321-4889, ext. 3123.
OP CODEDESCRIPTIONTIMEOPNT1T2
N/ANot Applicable to Warranty ±±±±
SPECIAL SERVICE TOOLS
Introduction
Applicable
Diagnostic
Testers
Repair
Procedure
Figure 1
Back View of Diagnostic Tester
S/N 31 000100
Warranty
Information
Page 4699 of 4770

Toyota Supports ASE CertificationPage 1 of 2
SU001-02Title:
REAR BEARING O-RING SERVICE TIP
Models:
'97 ± '01 Camry, '00 ± '02 Avalon &
'99 ± '02 Solara
Technical Service
BULLETIN
March 1, 2002
When replacing the rear hub bearing assemblies on 1997 ± 2001 model year Camry,
2000 ± 2002 Avalon and 1999 ± 2002 Solara vehicles, replace the O±ring.
�1997 ± 2001 model year Camry vehicles.
�2000 ± 2002 model year Avalon vehicles produced before the VIN shown below.
�1999 ± 2002 model year Solara vehicles produced before the VIN shown below.
MODELSTARTING VIN
Avalon4T1BF28B#2U223623
Solara2T1##2#P#2C005335
PART NUMBERPART NAME
90301±63006O±Ring
OP CODEDESCRIPTIONTIMEOPNT1T2
N/ANot Applicable to Warranty±±±±
REMOVAL
1. Remove Rear Wheel.
Torque: 103 N�m (1,050 kgf�cm, 76 ft�lbf)
2. With Disc Brake:
Remove Brake Caliper and Disc.
A. Remove the brake caliper and disc.
Torque: 47 N�m (475 kgf�cm, 34 ft�lbf)
B. Support the brake caliper securely.
3. With Drum Brake:
Remove Brake Drum.
SUSPENSION
Introduction
Applicable
Vehicles
Production
Change
Information
Parts
Information
Warranty
Information
Repair
Procedure