Page 1794 of 2103
STEERING Power Steerina
R e m o v a l s t e p s
7.Stay (L.H.)
6.Stay (R.H.)
Caution
9. Centermember assembly
10. Clamp
11. Gear box assembly12.Return tube
The fasteners marked l be temporarily tightened
before they are finally tightened once the total we ight of
the engine has been placed on the
body.
REMOVAL SERVICE POINTS
BRAKE FLUID RESERVOIR ASSEMBLY
REMOVAL
Disconnect the brake fluid level sensor connector a nd remove
the brake fluid reservoir assembly from the dash pa nel with
the hose still attached.
NOTE
Place the removed reservoir where it
will not be a hindrance
power steering gear box, and
REMOVAL
Disconnect the and remove the
compressor from the
the hose
attached.
NOTE
Place the removed A/C compressor in a place where i t will
not be a hindrance when removing and installing the brake
fluid reservoir assembly, and tie it with a cord.
Caution
Do not damage the joint between the NC hose and the
pipe.
TSB Revision. .
Page 1806 of 2103
STEERING Power Steering OilPump Engine,
POWER STEERING OIL PUMP
. . . .
REMOVAL AND INSTALLATION
On-vehicle Service.)l Power Fluid Line Bleeding (Refer to l
Oil Pump Pressure Check to
39 Nm
29
57 Nm
.
39 Nm29
Removal steps
1. Drive-belt
2. Suction hose
3. Pressure hose
4. Gasket
uc ion ose
5. Pressure switch connector 6. Oil pump assembly 7. Oil pump bracket
REMOVAL SERVICE
Caution
A/C is below oil A/C
compressor with a before hose.
.
,
Revision
Page 1809 of 2103
S T E E R I N G Power Steering Oil Pump Engine
9or
PressureportunionOilswitch
3
Rear pump housing,
Side plate
4
Suction port union
5 ’
TSB
D I S A S S E M B L Y S E R V I C E
PULLEY REMOVAL
the special tool to pulley,
the pulley mounting
.
R I N G
Remove the snap ring from the shaft with snap
and separate the rotor from the shaft.
,
REASSEMBLY SERVICE.
SEAL INSTALLATION
INSTALLATION
Apply specified fluid on O-rings to
No.I.D. mm (in.)
1
21 1 . 8 1 . 6
311.0
447.4 1.8
518.8 1.9
Specified fluid:
II”
,
,
Page 1814 of 2103
STEERING Power Steering Pump Engine (Turbo) and Engine>
Suction
REMOVAL SERVICE POINT
SUCTION’ HOSE/PRESSURE HOSE
Caution
Generator is below the oil pump,
with a shop towel before removing of, the ‘hoses.
INSTALLATION SERVICE POINT
PRESSURE HOSE INSTALLATION
Connect the pressure hose so that its notch part co ntacts
the suction connector.
INSPECTION
l Check the drive-belt for
lCheck the pulley assembly for rdtation.
TSB RevisionI
Page 1816 of 2103
203
Drive shaft
ConnectorSide plate
Terminal assembly
Suction connector
mounting portion
of oil pump body
DRIVE PULLEY REMOVAL
Use the special tool to secure the drive pulley, an d then
remove the drive pulley mounting nuts.
REASSEMBLY SERVICE POINTS
SEAL INSTALLATION
DRIVE ASSEMBLY INSTALLATION
Use the special tool to press-fit the drive shaft a ssembly.
O-RINGS INSTALLATION
Apply specified fluid on O-rings.
No. mm (in.)
11 I
I
I
“I
5
Specified fluid:
Automatic transmission Fluid “DEXRON II”
TSB RevisionI
Page 1820 of 2103
STEERING Power Steering Hoses Engine .
White line
REMOVAL POINT
PRESSURE HOSE REMOVAL
Caution
A/C compressor is below the oil pump, so coverthe
compressor with a shop towel before removing-any
INSTALLATION SERVICE POINT
PRESSURE HOSE INSTALLATION
When the pressure hose is installed, align the white line on
the
hose with the white line on the pressure tube
so that together they form a straight line.
Revision
Page 1821 of 2103
STEERING Power Steering Hoses Engine (Turbo) and
POWER STEERING HOSES
ENGINE (TURBO) AND ENGINE>
REMOVAL AND INSTALLATION
Post-installation Operationl Front Bumper Installation(Refer to GROUP 51 Front Bumper.)lDrive-belt Tension Adjustment Engine (Turbo):Refer to GROUP On-vehicle Service, Engine: Refer to GROUP 11 E-On-vehicle Service.)lPower Steering Fluid Supplying l Power Steering Fluid Line Bleeding (Refer to
23-26 Nm
34 Nm
25
11 Nm 11 Nm88
118
Removal steps
1. Brake fluid reservoir assembly
2. Clutch fluid reservoir assembly
3. A/C compressor4.Oil reservoir
hose
Suction hose
8.Return hose
9.Return hose
10.Return tube11.Pressure tube 12. Pressure hose13.Return hosePressure tube
15.Return tube16. fascia bracket
17. Air guide duct
18.Cooler tube
TSB Revision
Page 1822 of 2103

STEERING Power Steering Hoses Engine (Turbo) and Engine>
REMOVAL SERVICE
BRAKE FLUID RESERVOIR ASSEMBLY
REMOVAL
Disconnect the brake fluid level sensor connector and
the brake fluid reservoir assembly from the dash panel with
the hose still attached.
NOTE
Place the removed reservoir assembly in a place whe re it
will not be a hindrance when removing and installin g the
power steering gear box, and tie it with a cord.
CLUTCH FLUID RESERVOIR ASSEMBLY
REMOVAL
Remove the clutch fluid reservoir assembly from the dash
panel with the hose still attached.
NOTE
Place the removed reservoir assembly in a place whe re it
will not be a hindrance when removing and installin g the
power steering hoses, and tie it with a cord.
A/C COMPRESSOR REMOVAL
Disconnect the A/C compressor connector remove the
compressor from the compressor bracket with the hos e still
attached.
NOTE
Place the removed in a where it will not be a hindrance when
removing and installing the power steering hoses an d tie
it with a cord.
Caution
Do not damage the joint between the A/C hose and the
A/C pipe.
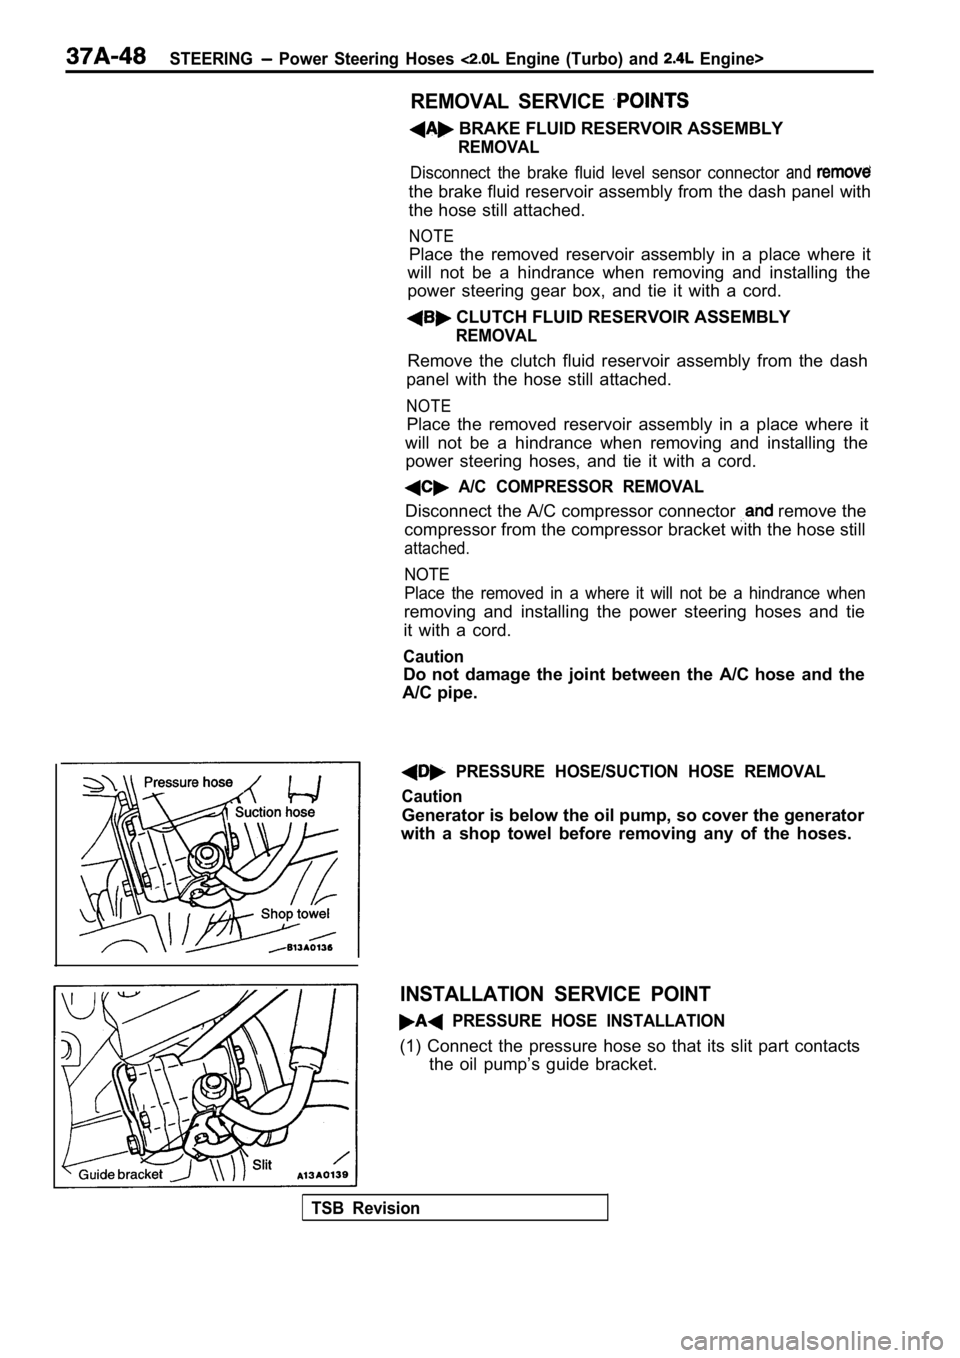
PRESSURE HOSE/SUCTION HOSE REMOVAL
Caution
Generator is below the oil pump, so cover the gener ator
with a shop towel before removing any of the hoses.
INSTALLATION SERVICE POINT
PRESSURE HOSE INSTALLATION
(1) Connect the pressure hose so that its slit part contacts
the oil pump’s guide bracket.
TSB Revision