Page 36 of 2103

Lubrication and
GENERAL Lubricants and Lubricant Capacities Table
Use of fuels containing alcohol is not recommended
unless the nature of the blend can be determined
as being satisfactory.
Gasohol
A mixture of 10% ethanol (grain alcohol)
and 90% unleaded gasoline may be used in your
car.
If problems are experienced as a result
of using gasohol, it is recommended that the car
be operated on gasoline.
Methanol Do not use gasolines containing
methanol (wood alcohol). Use of this type of alcohol
can result in vehicle performance deterioration and
damage critical parts in the fuel system compo-
nents. Fuel system damage and performance prob-
lems, resulting from the use of gasolines containin g
methanol, may not be covered by the new car war-
ranty.
Gasolines containing
Ether)
Unleaded gasoline containing 15% or
may be used in car. Fuel containing MTBE
over 15% vol. may cause reduced engine perfor-
mance and produce vapor lock or hard starting.
MATERIALS
TO FUEL
Indiscriminate use of fuel system -cleaning’
should be avoided. Many of these materials in-
tended for gum and varnish removal
highly active solvents or similar ingredients that
can be harmful to gasket and diaphragm materials
used in fuel system component
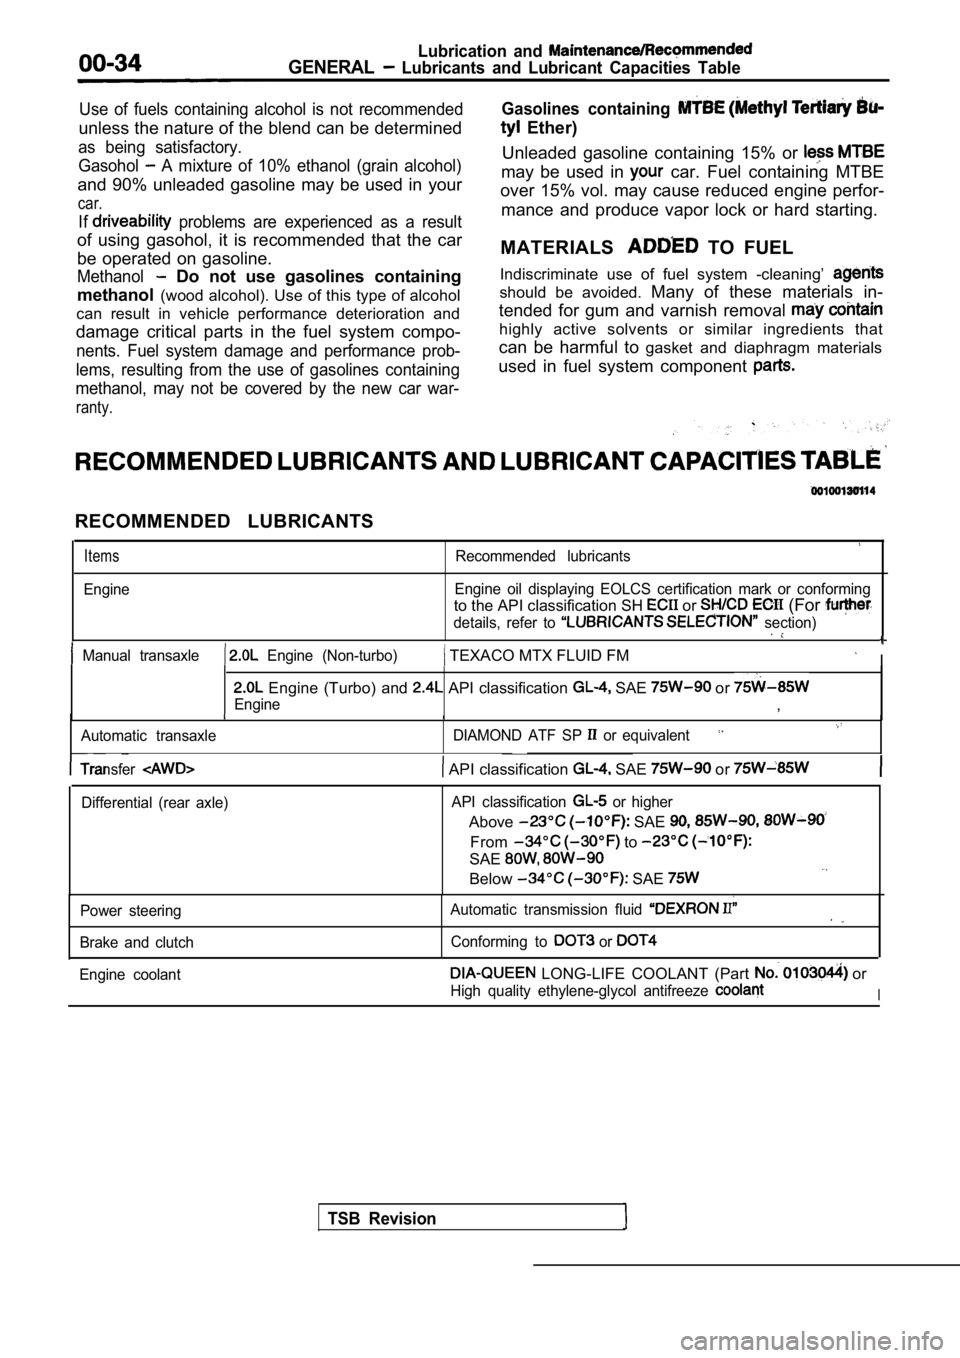
RECOMMENDED LUBRICANTS
Items
Engine
Recommended lubricants
Engine oil displaying EOLCS certification mark or c onforming
to the API classification SH or (For
details, refer to section)
Manual transaxle Engine (Non-turbo) TEXACO MTX FLUID FM I
Engine (Turbo) and API classification SAE or
Engine,
Automatic transaxle DIAMOND ATF SP or equivalent
TSB Revision
Transfer API classification SAE or
Differential (rear axle)API classification or higher
Above SAE
From to
SAE
Below SAE
Power steering
Brake and clutch Automatic transmission fluid
Conforming to or
Engine coolant LONG-LIFE COOLANT (Part or
High quality ethylene-glycol antifreeze I
Page 923 of 2103
MANUAL OVERHAUL
Transaxle
Oil seal
OIL SEAL INSTALLATION
Install the oil seal flange part so hole
faces the bottom of the transaxle.
Caution
Apply transmission oil to the oil lip
,
,
,
I N S T A L L A T I O N
(1) Place two pieces of solder measuring about
in.) in length and 3 mm in.) in at illustrated
locations on the transaxle and install each outer
(2) Place two of solder measuring about mm
in.) in length and 3 mm 2 in,) in diameter on the beanng
outer race as shown in .
(3) install the transaxle case
bolts to the
specified torque.
(4) Remove the transaxle case and remove the
(5) Measure the thickness of the a mi-
crometer and select and install a- spacer of. thick ness
gives standard preload end play.
Standard value:
Front output shaft
m m in.)
Front differential case
mm
TSB Revision
Page 965 of 2103
MANUAL TRANSAXLE OVERHAUL,.
Case“ , ,
I , ,
SPACER
(1) Use the existing spacer assemble the transfer case.
(2) Using the special
that the rotating
drive torque is within the standard value.
Standard value:
(3) If the rotating drive torque is outside of the stan dard value,
adjust using adjusting spacers.
NOTE
For adjustment, use two spacers of which thickness is
as close as possible to each other.
O-RING INSTALLATION .Caution
Apply transmission oil to
. . . ..
TSB Revision
Page 1095 of 2103
AUTOMATIC TRANSAXLE
ENGINE (TURBO) AND ENGINE> On-vehicle Service
23100170047
1. Drain out the automatic transmission fluid.
2. Remove the oil pan.
3. Remove the oil filter.
4. Remove the oil temperature sensor.
5.Press the solenoid valve harness grommet and connec tor
into the transaxle case.
6.Press the catches of the solenoid valve harness grommets
and pass the connector through the case hole.
7.Remove the valve body assembly. The manual
come out, so be careful not to drop it.
valve can
Page 1222 of 2103

6AUTOMATIC TRANSAXLE
OVERHAUL Transaxle
70. Clamp
71.
Gasket
72. Oil pan
73.
Gasket
74.Drain plug
75.O-ring
76.Set screw77.O-ring78.Detent plate
79. Sprag rod support
80. Parking sprag rod
2170046
81.Control shaft
82. D-ring
83. Transfer shaft cover
84.Lock nut
85. Driven gear
86.Outer race
87.Spacer
-88.Outer race89.Transaxle case
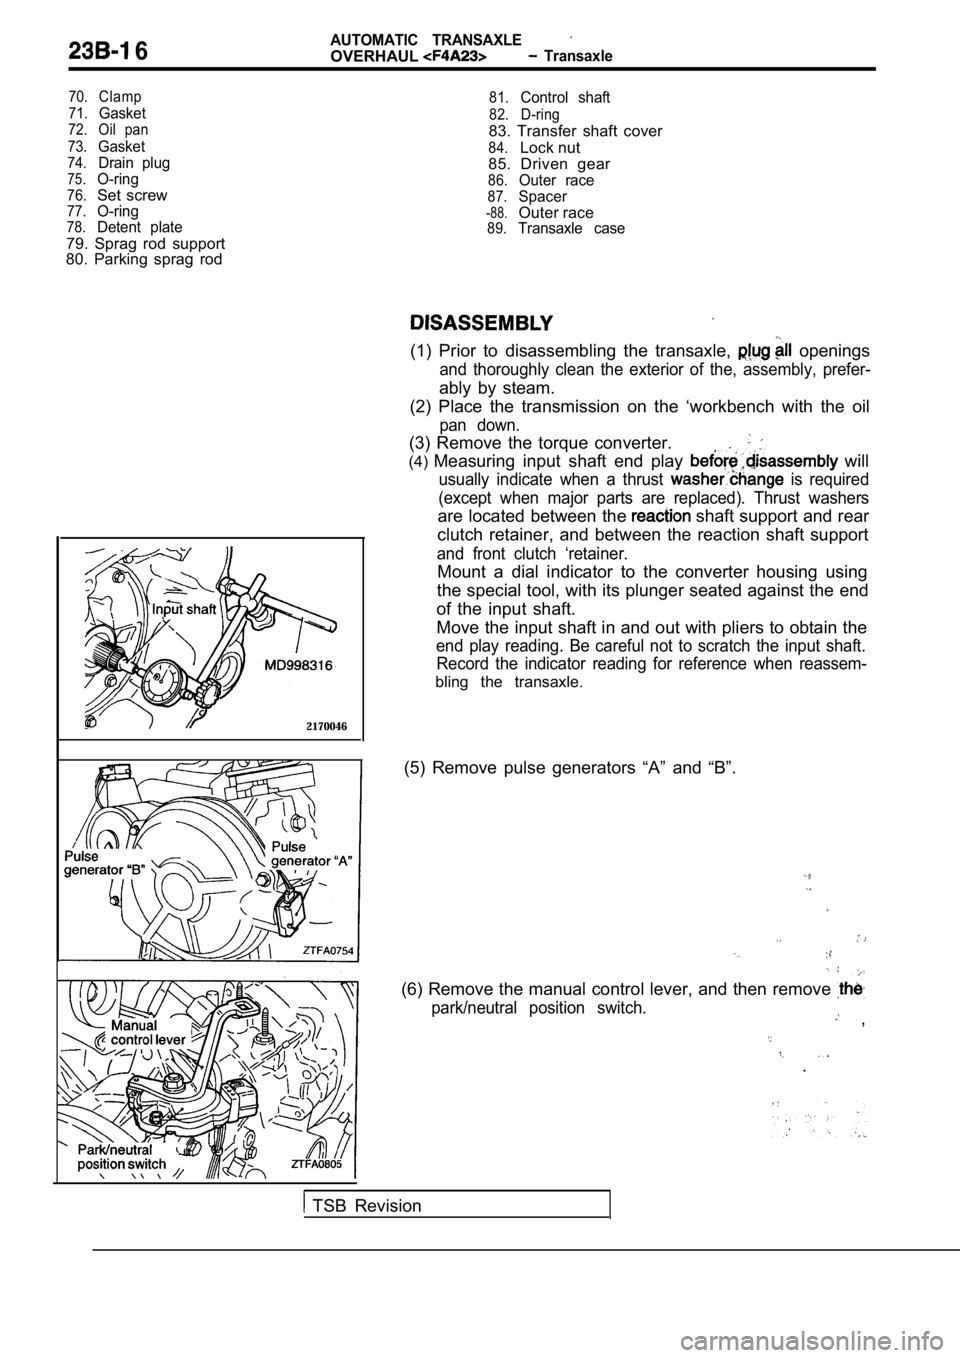
(1) Prior to disassembling the transaxle, openings
and thoroughly clean the exterior of the, assembly, prefer-
ably by steam.
(2) Place the transmission on the ‘workbench with t he oil
pan down.
(3) Remove the torque converter.
.
(4)Measuring input shaft end play will
usually indicate when a thrust is required
(except when major parts are replaced). Thrust wash ers
are located between the shaft support and rear
clutch retainer, and between the reaction shaft sup port
and front clutch ‘retainer.
Mount a dial indicator to the converter housing usi ng
the special tool, with its plunger seated against t he end
of the input shaft.
Move the input shaft in and out with pliers to obta in the
end play reading. Be careful not to scratch the inp ut shaft.
Record the indicator reading for reference when rea ssem-
bling the transaxle.
(5) Remove pulse generators “A” and “B”.
(6) Remove the manual control lever, and then remov e
park/neutral position switch. ,
.
TSB Revision
Page 1324 of 2103
AUTOMATIC TRANSAXLE
OVERHAUL
-Transaxle
a new O-ring on the rear bearing retainer,
coat the O-ring with automatic transmission fluid,; then
install in the transaxle case and tighten the mount ing
bolts to the specified torque.
Differential rear bearing
mounting
35 Nm (26
the front bearing cap and tighten the bolts to the
specified torque..
Differential front bearing cap mounting bolts: 70 Nm (51
the differential cover and a new gasket.
Differential cover mounting bolts: 11 Nm (8
the detent plate.
Detent plate mounting bolt: 11 Nm (8
,,
a new O-ring on the manual control shaft assembly,
coat the O-ring with automatic
and then
insert into the transaxle case.
the groove in the manual control shaft and the set
screw hole; then install the set screw.
Manual
shaft set screw: 9 (7
the parking roller support.
Parking roller support bolts: 24 Nm (18
TSB RevisionI
Page 1355 of 2103
AUTOMATIC TRANSAXLE
OVERHAUL -Transaxle
Detent plate
a new O-ring on the, differential retainer,
coat the O-ring with then
install in the transaxle case and tighten the mount ing
bolts to the specified torque. ,
Differential rear bearing retainer’ mounting
35
Nm (26
,
the front bearing cap and tighten the the
specified torque.
Differential front bearing cap mounting
70Nm (51
the differential cover and a’ new gasket,
D i f f e r e n t i a l
the detent . .
Detent plate mounting bolt: 11 Nm(8
a new O-ring on the manual control shaft
coat the O-ring automatic transmission fluid and then
insert into the transaxle case.
the groove in the manual control shaft and the set
screw hole; then install the set screw.
Manual control ‘shaft,
the parking roller support.
Parking roller support
bolts:
24 Nm (18
evision