Page 1825 of 2103

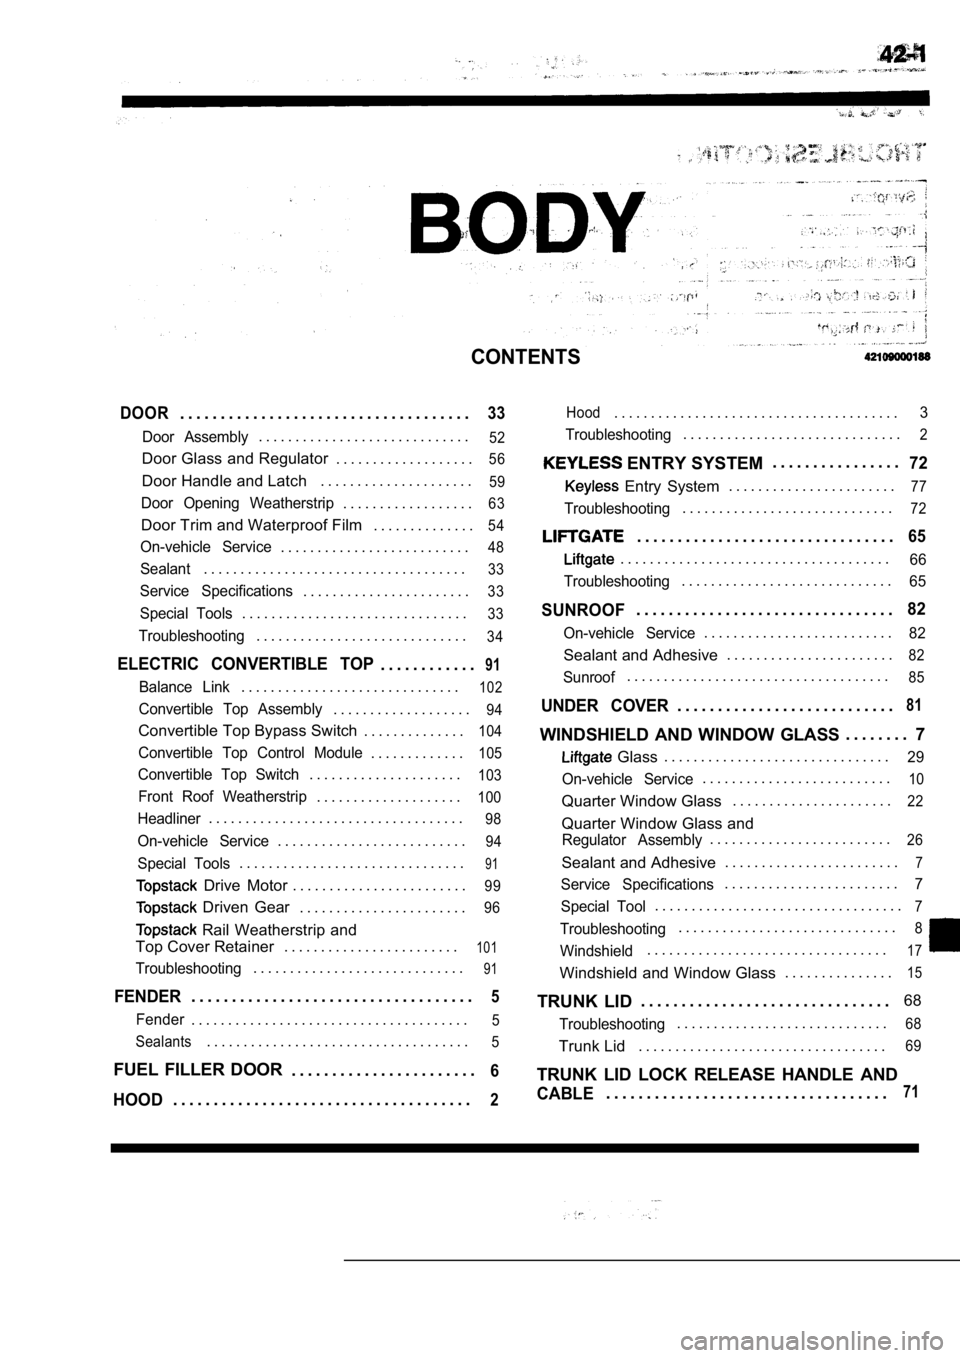
CONTENTS
DOOR. . . . . . . . . . . . . . . . . . . . . . . . . . . . . . . . . . . .33
Door Assembly. . . . . . . . . . . . . . . . . . . . . . . . . . . . .52
Door Glass and Regulator . . . . . . . . . . . . . . . . . . .56
Door Handle and Latch. . . . . . . . . . . . . . . . . . . . .59
Door Opening Weatherstrip. . . . . . . . . . . . . . . . . .63
Door Trim and Waterproof Film . . . . . . . . . . . . . .54
On-vehicle Service. . . . . . . . . . . . . . . . . . . . . . . . . .48
Sealant. . . . . . . . . . . . . . . . . . . . . . . . . . . . . . . . . . . .33
Service Specifications. . . . . . . . . . . . . . . . . . . . . . .33
Special Tools. . . . . . . . . . . . . . . . . . . . . . . . . . . . . . .33
Troubleshooting. . . . . . . . . . . . . . . . . . . . . . . . . . . . .34
ELECTRIC CONVERTIBLE TOP. . . . . . . . . . . .91
Balance Link. . . . . . . . . . . . . . . . . . . . . . . . . . . . . .102
Convertible Top Assembly. . . . . . . . . . . . . . . . . . .94
Convertible Top Bypass Switch . . . . . . . . . . . . . .104
Convertible Top Control Module. . . . . . . . . . . . .105
Convertible Top Switch. . . . . . . . . . . . . . . . . . . . .103
Front Roof Weatherstrip. . . . . . . . . . . . . . . . . . . .100
Headliner. . . . . . . . . . . . . . . . . . . . . . . . . . . . . . . . . . .98
On-vehicle Service. . . . . . . . . . . . . . . . . . . . . . . . . .94
Special Tools. . . . . . . . . . . . . . . . . . . . . . . . . . . . . . .91
Drive Motor. . . . . . . . . . . . . . . . . . . . . . . .99
Driven Gear . . . . . . . . . . . . . . . . . . . . . . .96
Rail Weatherstrip and
Top Cover Retainer . . . . . . . . . . . . . . . . . . . . . . . .
101
Troubleshooting. . . . . . . . . . . . . . . . . . . . . . . . . . . . .91
FENDER. . . . . . . . . . . . . . . . . . . . . . . . . . . . . . . . . . .5
Fender. . . . . . . . . . . . . . . . . . . . . . . . . . . . . . . . . . . . . .5
Sealants
. . . . . . . . . . . . . . . . . . . . . . . . . . . . . . . . . . . .5
FUEL FILLER DOOR . . . . . . . . . . . . . . . . . . . . . . .6
HOOD. . . . . . . . . . . . . . . . . . . . . . . . . . . . . . . . . . . . .2
Hood. . . . . . . . . . . . . . . . . . . . . . . . . . . . . . . . . . . . . . .3
Troubleshooting
. . . . . . . . . . . . . . . . . . . . . . . . . . . . . .2
ENTRY SYSTEM . . . . . . . . . . . . . . . .72
Entry System
. . . . . . . . . . . . . . . . . . . . . . .77
Troubleshooting. . . . . . . . . . . . . . . . . . . . . . . . . . . . .72
. . . . . . . . . . . . . . . . . . . . . . . . . . . . . . . .65
. . . . . . . . . . . . . . . . . . . . . . . . . . . . . . . . . . . . .66
Troubleshooting
. . . . . . . . . . . . . . . . . . . . . . . . . . . . .65
SUNROOF. . . . . . . . . . . . . . . . . . . . . . . . . . . . . . . .82
On-vehicle Service. . . . . . . . . . . . . . . . . . . . . . . . . .82
Sealant and Adhesive . . . . . . . . . . . . . . . . . . . . . . .82
Sunroof. . . . . . . . . . . . . . . . . . . . . . . . . . . . . . . . . . . .85
UNDER COVER. . . . . . . . . . . . . . . . . . . . . . . . . . .81
WINDSHIELD AND WINDOW GLASS . . . . . . . .
7
Glass. . . . . . . . . . . . . . . . . . . . . . . . . . . . . . .29
On-vehicle Service
. . . . . . . . . . . . . . . . . . . . . . . . . .10
Quarter Window Glass . . . . . . . . . . . . . . . . . . . . . .22
Quarter Window Glass and
Regulator Assembly. . . . . . . . . . . . . . . . . . . . . . . . .26
Sealant and Adhesive. . . . . . . . . . . . . . . . . . . . . . . .7
Service Specifications. . . . . . . . . . . . . . . . . . . . . . . .7
Special Tool
. . . . . . . . . . . . . . . . . . . . . . . . . . . . . . . . . .7
Troubleshooting. . . . . . . . . . . . . . . . . . . . . . . . . . . . . .8
Windshield. . . . . . . . . . . . . . . . . . . . . . . . . . . . . . . . .17
Windshield and Window Glass . . . . . . . . . . . . . . .15
TRUNK LID. . . . . . . . . . . . . . . . . . . . . . . . . . . . . . . 68
Troubleshooting. . . . . . . . . . . . . . . . . . . . . . . . . . . . .68
Trunk Lid
. . . . . . . . . . . . . . . . . . . . . . . . . . . . . . . . . .69
TRUNK LID LOCK RELEASE HANDLE AND
CABLE. . . . . . . . . . . . . . . . . . . . . . . . . . . . . . . . . . .71
Page 1828 of 2103
BODY Hood
Bumper(small)
mm (in.)Bumper
0 0 0 0 0 1 3 0
0 0 0 0 0 1 2 9
INSTALLATION SERVICE POINT
BUMPER INSTALLATION
INSPECTION
HOOD SWITCH CONTINUITY CHECK
Switch position
2
0
TSB
Revision
Page 1831 of 2103
BODY and Window Glass
SERVICE SPECIFICATIONS ,
Items
Difference in quarter window glass height from door window glass height mm (in.)
Clearance between quarter window glass sash weather strip and door window glass
mm (in.).Standard’ value 8.3 2.0
Distances between quarter window glass and quarter
Front of quarter window
belt moulding and between quarter window glass and glass
quarter belt line outer weatherstrip flushness mm (in.)Rear of quarter window
glass9.0 2.0
Quarter window glass tilt mm (in.) 3.0 2.0
SEALANTS AND ADHESIVES
Items
Windshield
Quarter window glass
Specified sealants and adhesives
No. 8609 Super Fast Urethane
Part No. 8608 Super Fast Urethane Primer or equiva lent
glass
Windshield to molding
glass to molding
ATD Part No. 6382 or
,. . , . .
S P E C I A L T O O L
ToolTool number and name
General service toolRemoval installation
Glass holder . . ,
Revision
Page 1834 of 2103

BODY Windshield and Window Glass
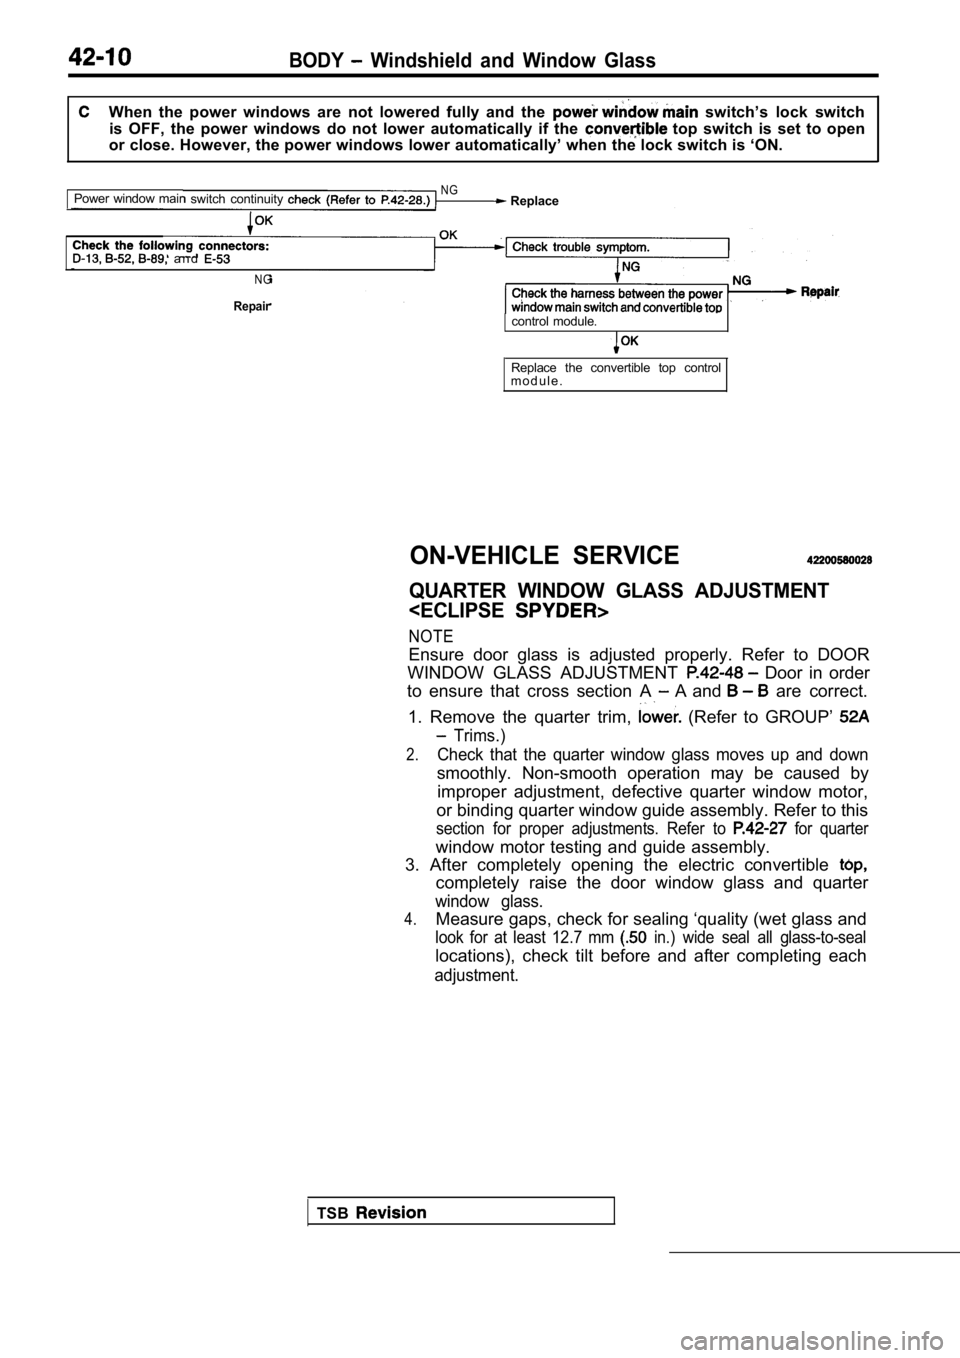
When the power windows are not lowered fully and the switch’s lock switch
is OFF, the power windows do not lower automaticall y if the
top switch is set to open
or close. However, the power windows lower automati cally’ when the lock switch is ‘ON.
Power window mair
switch continuity NG Replace
a n d
N G
Repaircontrol module.
Replace the convertible top control
m o d u l e .
ON-VEHICLE SERVICE
QUARTER WINDOW GLASS ADJUSTMENT
NOTE
Ensure door glass is adjusted properly. Refer to DO OR
WINDOW GLASS ADJUSTMENT
Door in order
to ensure that cross section A
A and are correct.
1. Remove the quarter trim,
(Refer to GROUP’
Trims.)
2.Check that the quarter window glass moves up and do wn
smoothly. Non-smooth operation may be caused by
improper adjustment, defective quarter window motor ,
or binding quarter window guide assembly. Refer to this
section for proper adjustments. Refer to for quarter
window motor testing and guide assembly.
3. After completely opening the electric convertibl e
completely raise the door window glass and quarter
window glass.
4.Measure gaps, check for sealing ‘quality (wet glass and
look for at least 12.7 mm in.) wide seal all glass-to-seal
locations), check tilt before and after completing each
adjustment.
TSB
Page 1839 of 2103

BODY Windshield and Window
SlitRear rail
ail weath
window0 0 0 0 4 8 1 1 12. Close the convertible top
quarter window glass enters the slit on the rear ra
il
weatherstrip
when the quarter windows are
Recheck all measurements. Adjustment to any of
adjusting deviceswill affect other settings.
14. Check for sealing quality (wet glass and look f or least
12.7 mm in.) wide seal all glass-to-seal locations.)
15. Install the quarter trim,lower (Refer to GROUP
Trims.)
,
WINDSHIELD AND WINDOW GLASS
GENERAL. .
The windshield and window glass are attached by a urethane-base adhesive, to the window -frame.
This adhesive not only improved glass holding and sealing, but also permi ts use of body openings
having a greater structural strength.
ADHESIVE
Adhesive kit QuantityI
ATD Part No. 8609 SUPER FAST URETHANEOne cartridge
ATD Part No. 8608 SUPER FAST URETHANE PRIMER
As required
RESERVE ITEMS
Items
Wire length)
Adhesive gun
Wiping rags
Sealer
ATD Part or eauivalent
Glass holder
Spacers (Service part)
Window molding (Service part) Dam (Service part)
(Valvoline Oil Company)
,
Applications Quantity
For cutting adhesive Five pieces of wire
0.6 mmx
in. 3.3 ft.)
For adhesive application One
As required
For prevention of water leaks andAs required
gathering after adhesive application
For
As required
T w o
As required
One
As required
As required
TSB Revision
Page 1842 of 2103

42-18BODY Windshield and Window Glass
REMOVAL SERVICE POINT
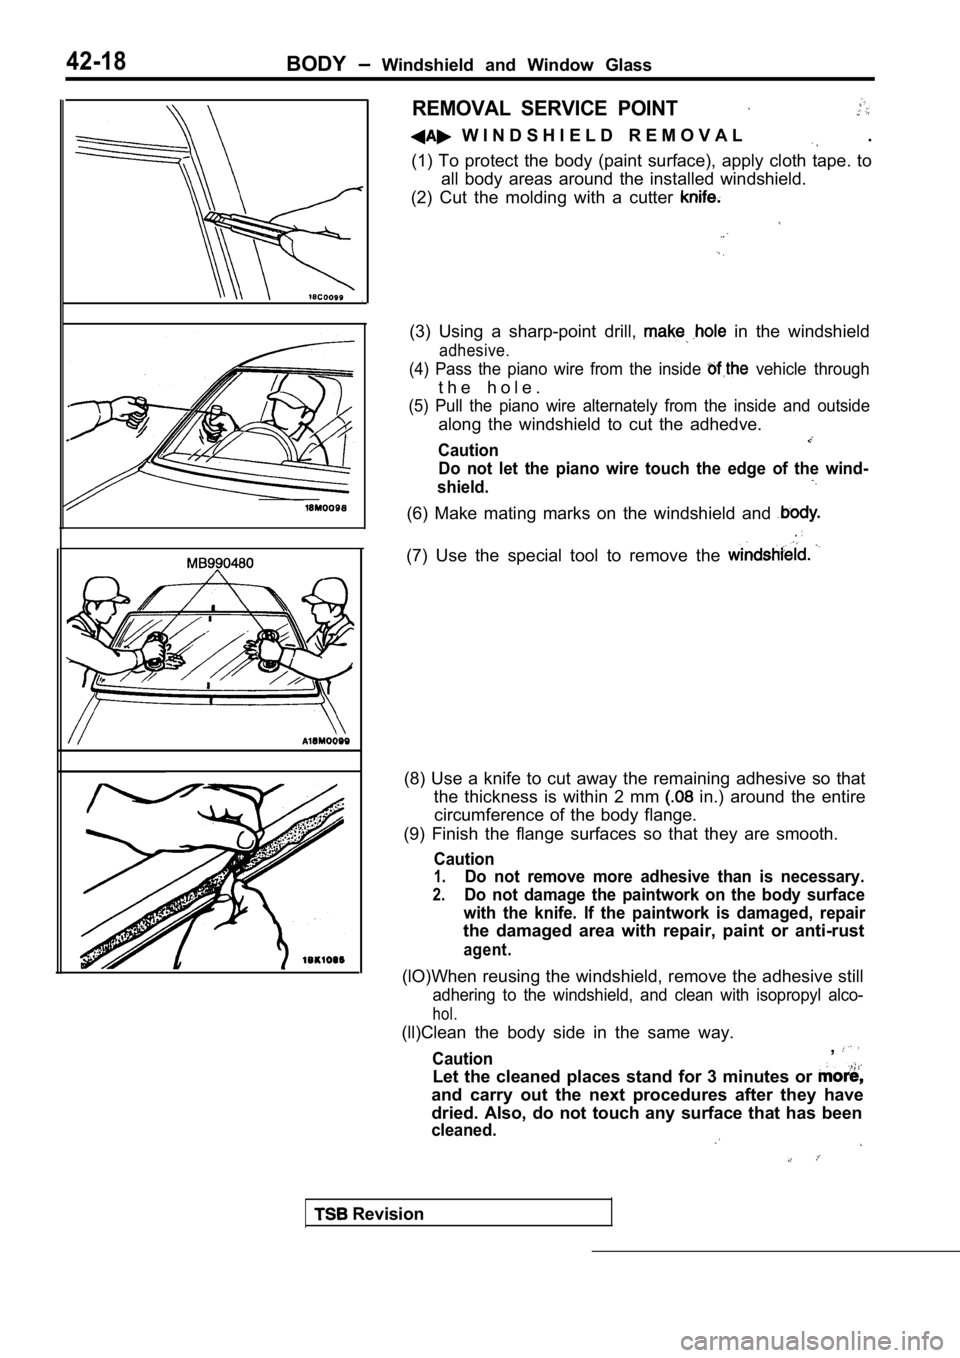
W I N D S H I E L D R E M O V A L .
(1) To protect the body (paint surface), apply clot h tape. to
all body areas around the installed windshield.
(2) Cut the molding with a cutter
(3) Using a sharp-point drill, in the windshield
adhesive.
(4) Pass the piano wire from the inside vehicle through
t h e h o l e .
(5) Pull the piano wire alternately from the inside and outside
along the windshield to cut the adhedve.
Caution
Do not let the piano wire touch the edge of the win d-
shield.
(6) Make mating marks on the windshield and
.
(7) Use the special tool to remove the
(8) Use a knife to cut away the remaining adhesive so that
the thickness is within 2 mm
in.) around the entire
circumference of the body flange.
(9) Finish the flange surfaces so that they are smo oth.
Caution
1.Do not remove more adhesive than is necessary.
2.Do not damage the paintwork on the body surface
with the knife. If the paintwork is damaged, repair
the damaged area with repair, paint or anti-rust
agent.
(lO)When reusing the windshield, remove the adhesiv e still
adhering to the windshield, and clean with isopropyl alco-
hol.
(ll)Clean the body side in the same way.
Caution,
Let the cleaned places stand for 3 minutes or
and carry out the next procedures after they have
dried. Also, do not touch any surface that has been
cleaned.
Revision
Page 1851 of 2103
BODY Windshield Window
Section A A
QUARTER GLASS ASSEMBLY
REMOVAL
(1) lower the quarter window
(2) the waterproof film.
(3) Disconnect the ball joint of from
quarter window glass through ,
Disconnect connector, from
INSTALLATION SERVICE POINT
QUARTER WINDOW GLASS ASSEMBLY
INSTALLATION
Set the length of the adjusting stud to the dimension shown
in the illustration to make adjustment of the quart er window
glass easier.
INSPECTION
POWERWINDOW MOTOR CHECK
(1) Check that the motor runs smoothly when the bat tery
is connected directly to the motor terminals.
(2) Furthermore, check that the motor operates in r everse
when the terminal connections are switched.
TSB Revision
Page 1854 of 2103
BODY Windshield and Window Glass
mm (in.)Dual-lock fastener
installation position
Section A-A R E M O V A L S E R V I C E P O I N T
GLASS
Remove the same way as the windshield. to
INSTALLATION SERVICE POINTS
DUAL-LOCK FASTENER INSTALLATION
After making sure that there are no bends or raised
sections
in the dual-lock fasteners, attach the dual-lock fasteners to
the notches in the body as shown in the illustratio n.
MOLDING INSTALLATION
Apply specified double-sided to the glass in the places
shown in the illustration, and then install the molding.
Specified adhesive tape:
ATD Part No. 6382 or equivalent
TSB Revision