1989 MITSUBISHI GALANT air condition
[x] Cancel search: air conditionPage 433 of 1273
FUEL SYSTEM
INSPECTION
Using Scan tool
Function
Data reading Item No.
11
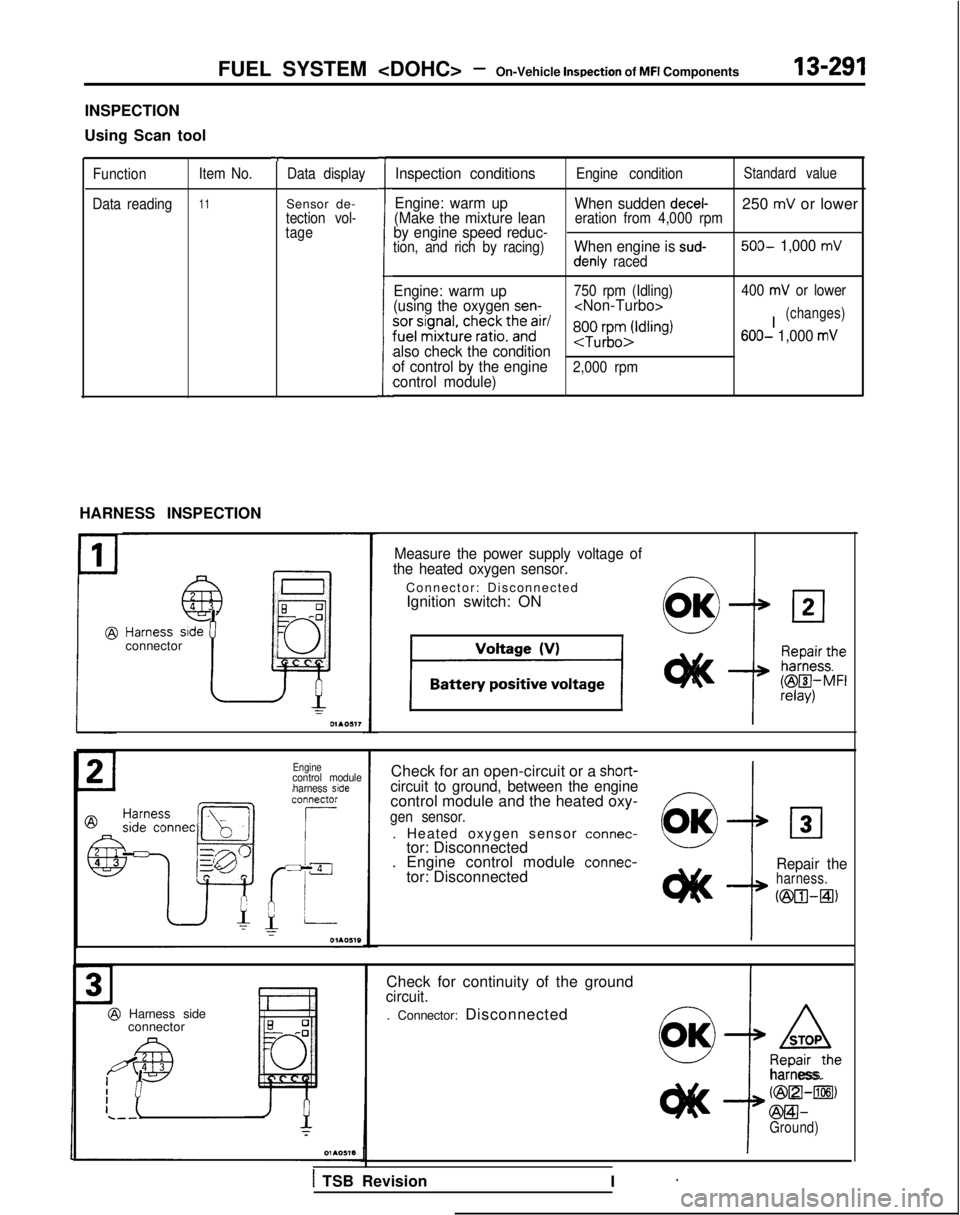
HARNESS INSPECTION
T
Data display
Sensor de-tection vol-
tage
L
Inspection conditionsEngine conditionStandard value
Engine: warm up When sudden decel-250 mV or lower(Make the mixture leaneration from 4,000 rpmby engine speed reduc-tion, and rich by racing)When engine is sud- 500- 1,000 mVdenly raced
Engine: warm up750 rpm (Idling)(using the oxygen sen-
~~~,s~~~r~hr~~i~t~~~ir’ 6JO;K~~ldling)
also check the condition
of control by the engine
2,000 rpmcontrol module)
400 mV or lower
I(changes) 600-
1,000 mV
connector
Enginecontrol module
harness side
@ ZTE-mector -La
@ El
4 3
-l
g;
@ Harness side
connector
Measure the power supply voltage of
the heated oxygen sensor.
Connector: Disconnected Ignition switch: ON
I II
Check for an open-circuit or a short-circuit to ground, between the enginecontrol module and the heated oxy-gen sensor.
. Heated oxygen sensor connec-
tor: Disconnected103
. Engine control module connec-tor: Disconnected
i
Repair theharness.
Nzm+l)
Check for continuity of the groundcircuit.
. Connector: Disconnected
@fR&eharness.
t
C@rzI-m,
@El-Ground)
1 TSB Revision I ’
Page 441 of 1273
FUEL SYSTEM
MFI Components13-299
OPERATION
l The amount of air taken in during idling is
regulated by the opening and closing of the
servo valve located in the air passage that
bypasses the throttle valve.
l The servo valve is opened or closed by the
activation of the stepper motor (incorporated
within the idle air control motor) in the forward
or reverse direction.
TROUBLESHOOTING HINTS
Hint 1: If the number of stepper motor steps increases to
IOO- 120 steps or decreases
to 0 step, the cause may be presumed to be a malfunction of the stepper motor or
damaged or disconnected wiring of the
harness.
Hint 2: If the number of stepper motor steps
deviates from the standard value even
though the results of the checking of the
harness of the idle air control motor and of
the comoonent
itself indicate no abnormal
condition, the cause may be presumed to be one of the following.
INSPECTION
Using Scan tool
lBattery power supply is supplied, by way of the
multiport fuel injection relay, to the coil of the
stepper motor. The engine control module
switches ON the power transistors (located
within the engine control module) in sequential
order, and, when current flows to the stepper motor coil, the stepper motor is activated in the
forward or reverse direction.
(1) Improper adjustment of the standard
idling speed.
(2) Deposits adhered to the throttle valve.
(3) Leakage of air into the intake manifold
from a gasket gap, etc.
(4) Incomplete close contact of the EGRvalve seat.
(5) Incomplete combustion within the
cylinder.
(Malfunction of the spark plugs, the
ignition coil, the iniectors,
the
com- pression
pressure, etc.)
FunctionItem No.Data display Check conditions Load conditionsStandard value
Data reading 45Steppermotor steps. Engine coolant tempera-
. Air conditioning
4-14Step
ture:switch: OFF
(185-205°F)
. Lights, electrical cooling
:$b::pfan and accessories: OFF
. Transaxle: neutral
. Closed throttle switch: ON
- Air conditioning 20-60 Step
switch: ON
(The compressor clutchshould be activated when
the air conditioning switch;J-;;o~P
is switched ON.)* Engine: idling
1;:!,1;:!,
/!-I\/!-I\
f$&$:”f$&$:”
! ,‘,! ,‘,
4);4);
;jj\(Q(j!jGZ-);jj\(Q(j!jGZ-)
lili
q#Q~Hq#Q~HF]F]
ii 2 L J 2 L ~ -0SClllO 4ii 2 L J 2 L ~ -0SClllO 4
NOTE
When the vehicle is new (driven approximately 500 km (300 miles) or l\
ess) the number of steps may be about
30 steps greater than the standard value indicated above.
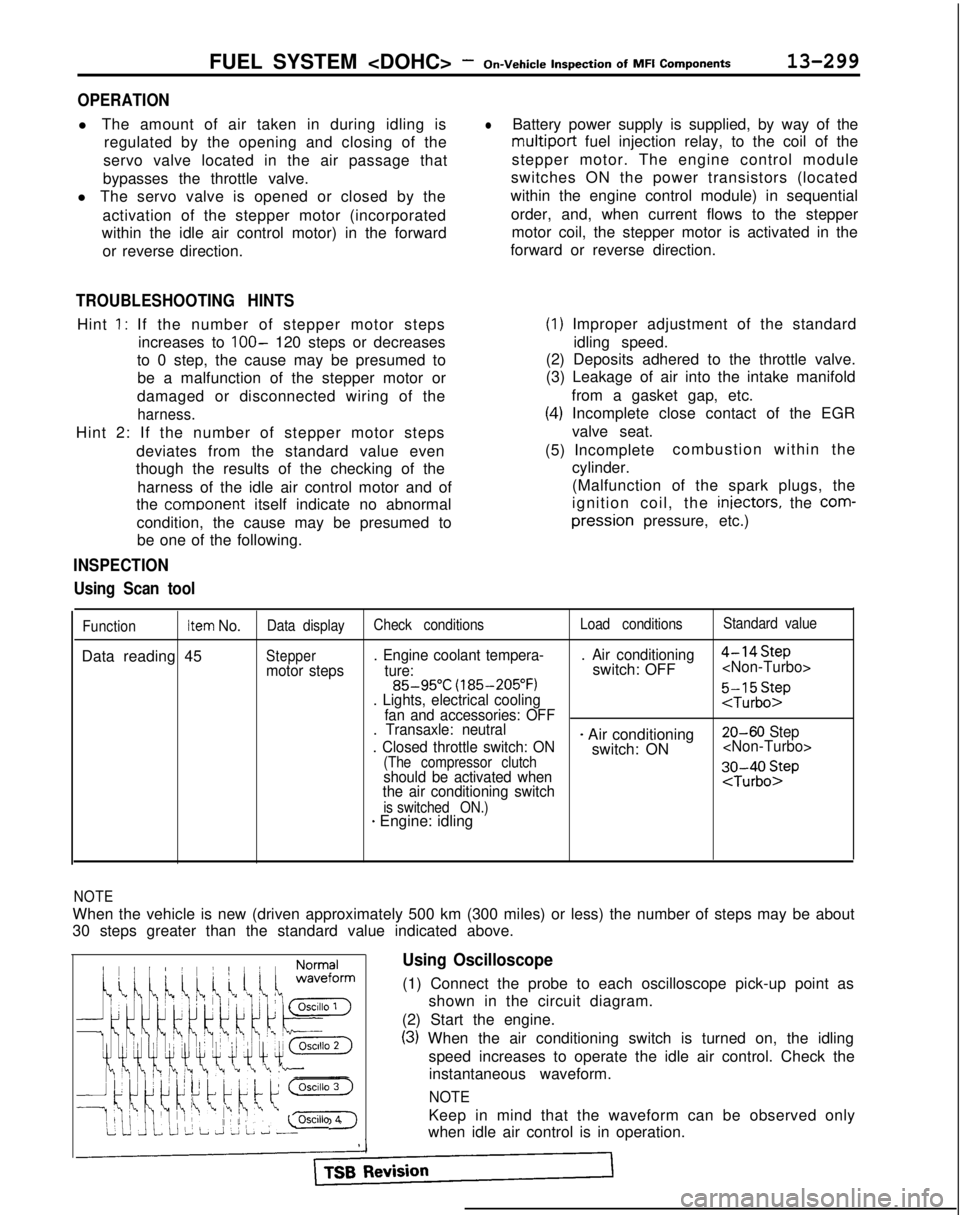
Using Oscilloscope
(1) Connect the probe to each oscilloscope pick-up point as
shown in the circuit diagram.
(2) Start the engine.
(3) When the air conditioning switch is turned on, the idling speed increases to operate the idle air control. Check theinstantaneous waveform.
NOTE
Keep in mind that the waveform can be observed only
when idle air control is in operation.
Page 445 of 1273
r
FUEL SYSTEM
of
MFI Components13-303
INSPECTION
Using Scan tool
Function Item No.
Data reading 44
Data displayInspection conditionsEngine condition Standard value
Ignition
advance
. Engine: warm
. Timing light: set750 rpm (idling)5-15” BTDC
(Use the timing light to
check the actual ignition 2,000 rpm32 - 4 1 “BTDCtiming.)
Oscillo 1
Normal waveform
Oscilio 2
!
1ov --
-
ovNormal waveform
HARNESS INSPECTION
Harness side
connectorE 0-0
J
El0
connectorI
lEnginecontrol
module
harness
sideconnector
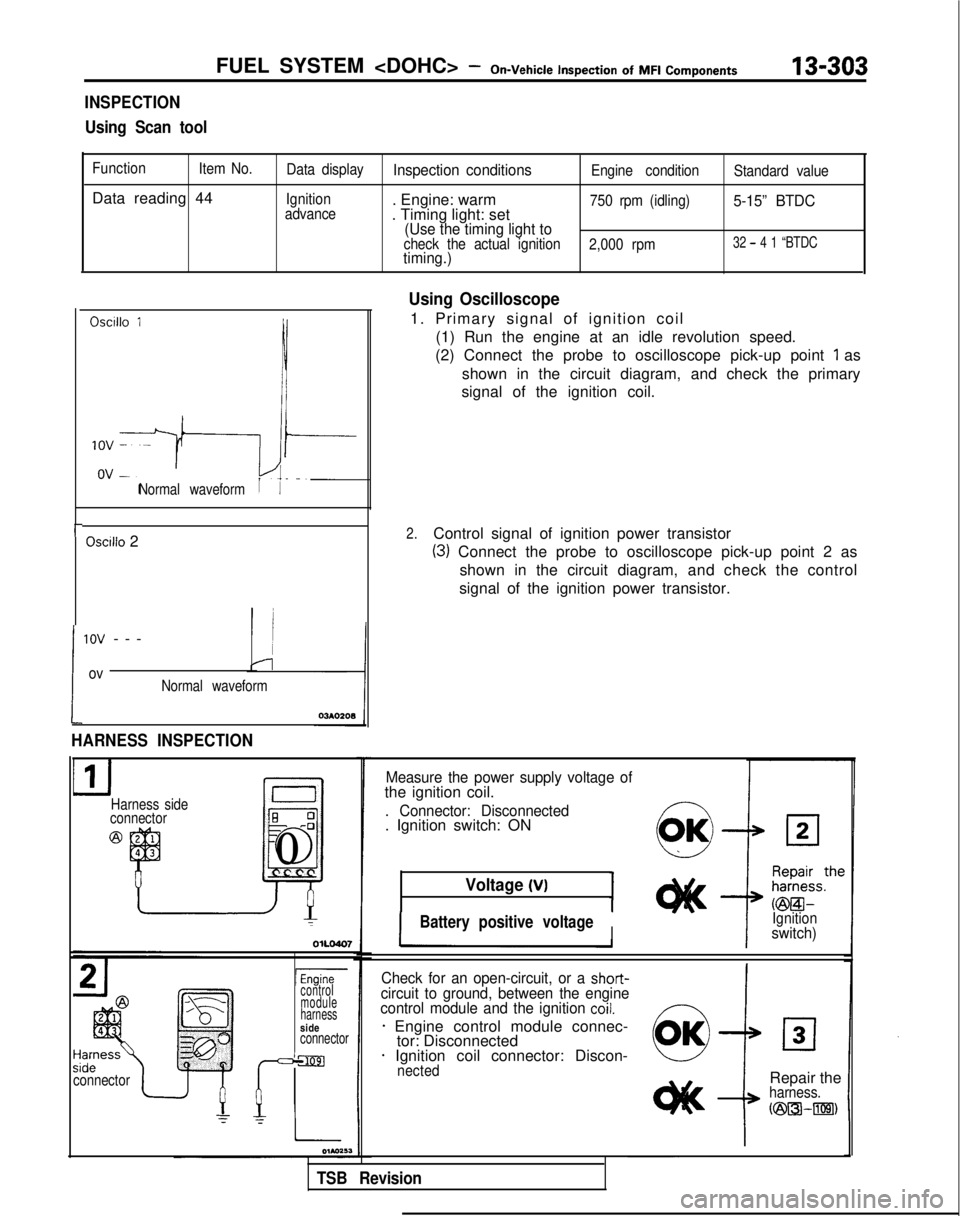
Using Oscilloscope
1. Primary signal of ignition coil
(1) Run the engine at an idle revolution speed.
(2) Connect the probe to oscilloscope pick-up point
1 as
shown in the circuit diagram, and check the primary
signal of the ignition coil.
2.Control signal of ignition power transistor
(3) Connect the probe to oscilloscope pick-up point 2 as
shown in the circuit diagram, and check the control
signal of the ignition power transistor.
Measure the power supply voltage ofthe ignition coil.
. Connector: Disconnected. Ignition switch: ON
Voltage (VI
IBattery positive voltageIIIgnitionswitch)
Check for an open-circuit, or a
short-circuit to ground, between the engine
control module and the ignition coil.
* Engine control module connec- tor: Disconnected
* Ignition coil connector: Discon-nected
i
Repair theharness.
N23l3k-m)
TSB Revision
Page 450 of 1273
13-308FUEL SYSTEM
of
MFI
Components
OPERATION
l
The fuel pressure solenoid is an ON-OFF type of
solenoid valve and changes pressure fed into
the fuel pressure regulator to intake manifold
pressure and barometric pressure.
l Battery power is supplied to the fuel pressure
solenoid via the multiport
fuel injection relay.
When the engine control module turns on the
power transistor in the unit, current flows in the
coil and barometric pressure is fed to the fuel pressure regulator.
INSPECTION
Using Scan tool
0 If engine coolant temperature (approximatel
y
95°C (203°F) or more) and also air intake
temperature (approximately
50°C (122°F) or
more) are high when the engine is started, fuel
pressure is controlled in order to maintain
pressure at approximately 260
kPa (37 psi)
immediately after starting and then, after a lapse
of approximately 30 seconds to 2 minutes, to lower it to approximately 190
kPa (27 psi).
Function Item No.
Actuator test 09
DescriptionInspection conditionsNormal condition
$$;;i;;;alve switched fromIgnition switch: ONOperating sound is
heard when driven.
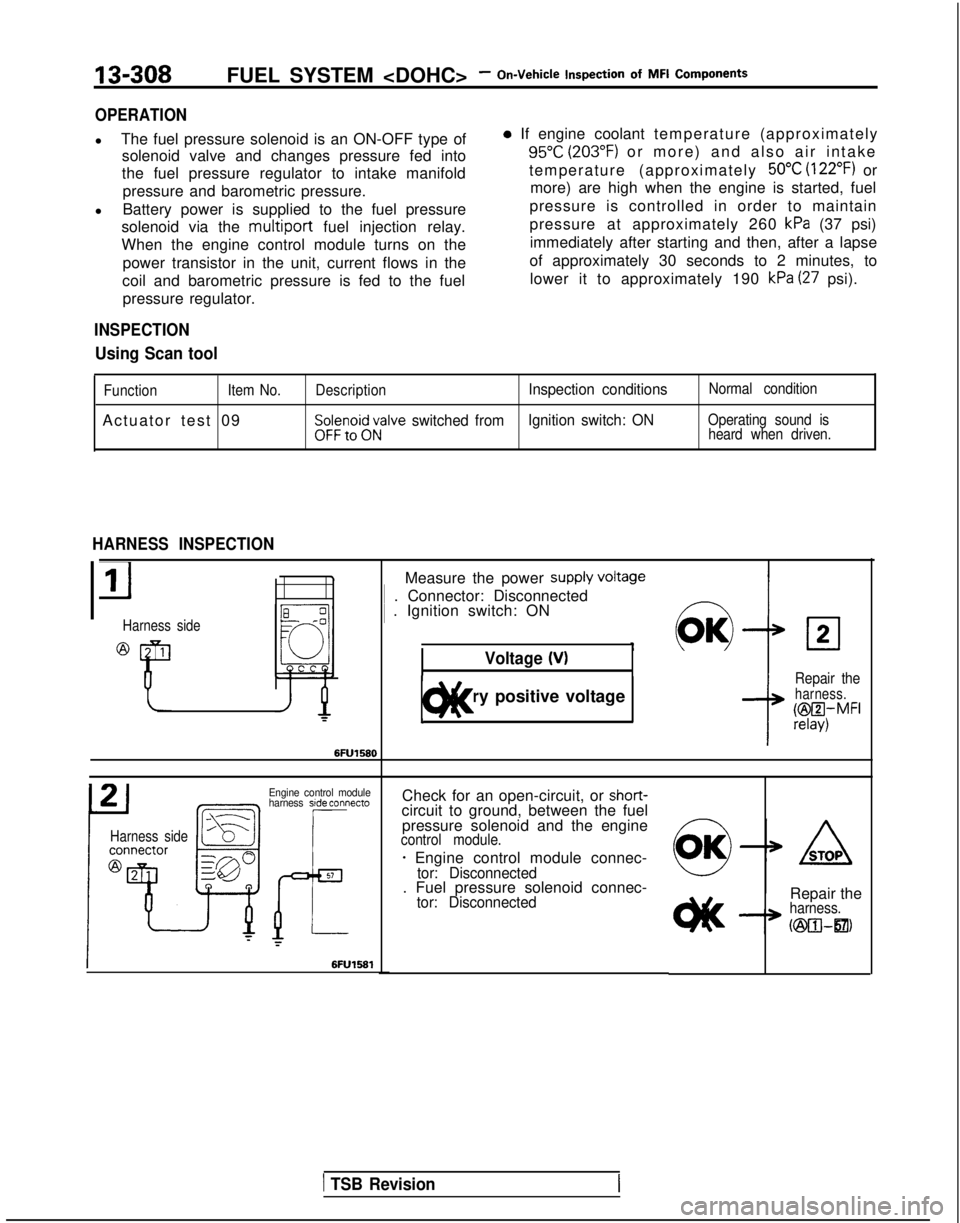
HARNESS INSPECTION
Harness side
Measure the power supply VokW 1
. Connector: Disconnected 1
. Ignition switch: ON
Voltage 04
1 Battery positive voltage 1t)lt<
02
Repair theharness.
@I4,MFI
Engine control module
harness side connecto
Harness side
Check for an open-circuit, or shot-t-circuit to ground, between the fuel
pressure solenoid and the engine
control module.
- Engine control module connec-tor: Disconnected. Fuel pressure solenoid connec-tor: DisconnectedRepair theharness.
h25xwzl21,
1 TSB Revision
Page 451 of 1273
FUEL SYSTEM
Inspection
of
MFI Components13-309
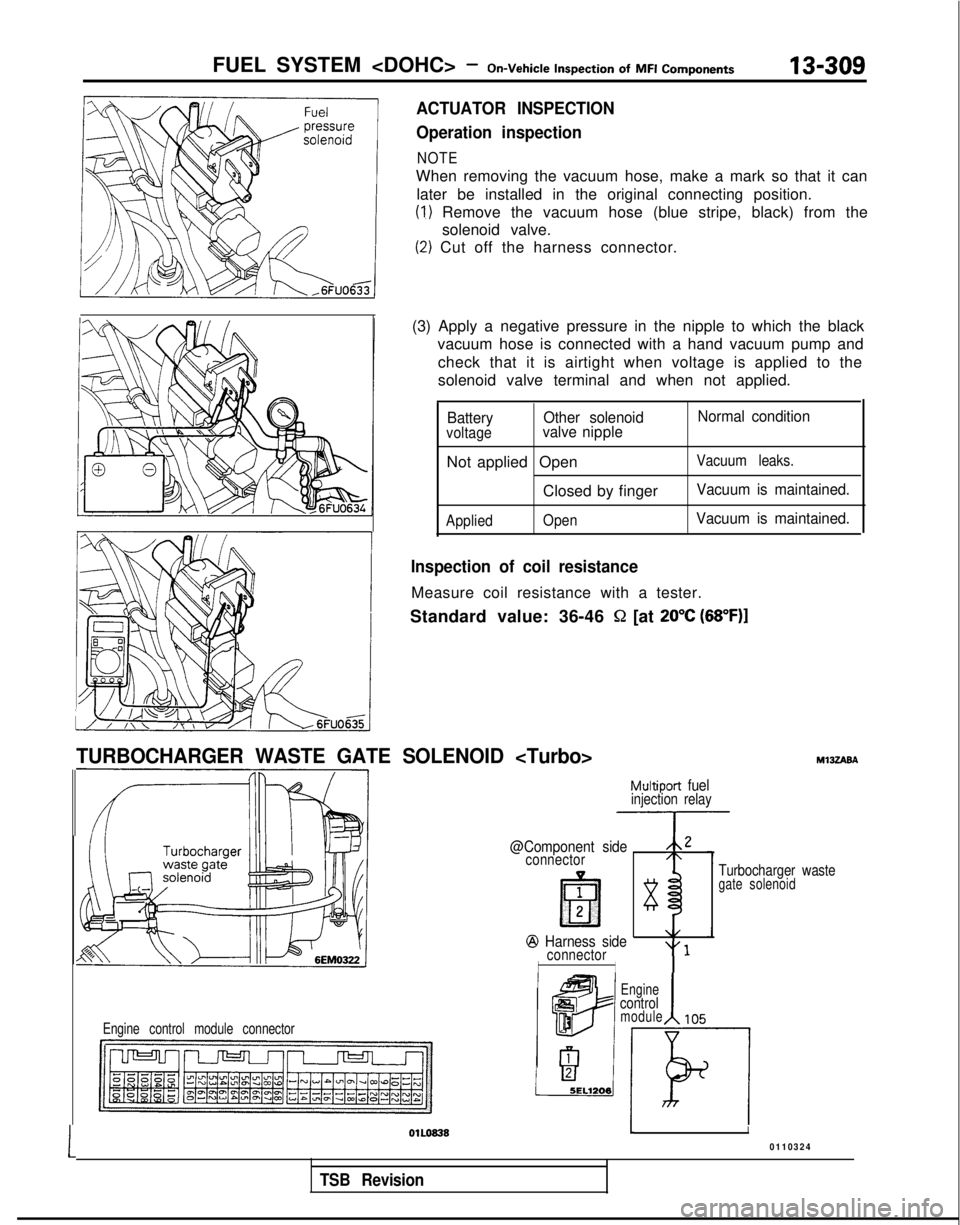
ACTUATOR INSPECTION
Operation inspection
NOTE
When removing the vacuum hose, make a mark so that it can
later be installed in the original connecting position.
(1) Remove the vacuum hose (blue stripe, black) from the solenoid valve.
(2) Cut off the harness connector.
(3) Apply a negative pressure in the nipple to which the black vacuum hose is connected with a hand vacuum pump and
check that it is airtight when voltage is applied to the
solenoid valve terminal and when not applied.
Battery Other solenoid Normal conditionvoltagevalve nipple
Not applied OpenVacuum leaks.
Closed by fingerVacuum is maintained.
Applied
OpenVacuum is maintained.
Inspection of coil resistance
Measure coil resistance with a tester.
Standard value: 36-46
S2 [at 20°C (68”F)I
TURBOCHARGER WASTE GATE SOLENOID
Multiport fuelinjection relay
@Component side,,2
connector/\
1
lE?l283
@J Harness side\/
connector“1
II
Engine control module connector
MlJZABA
Turbocharger wastegate solenoid
Engine
control
1module105
1
OlLo8381I
0110324
TSB Revision
Page 452 of 1273
13-310FUEL SYSTEM
of MFI Components
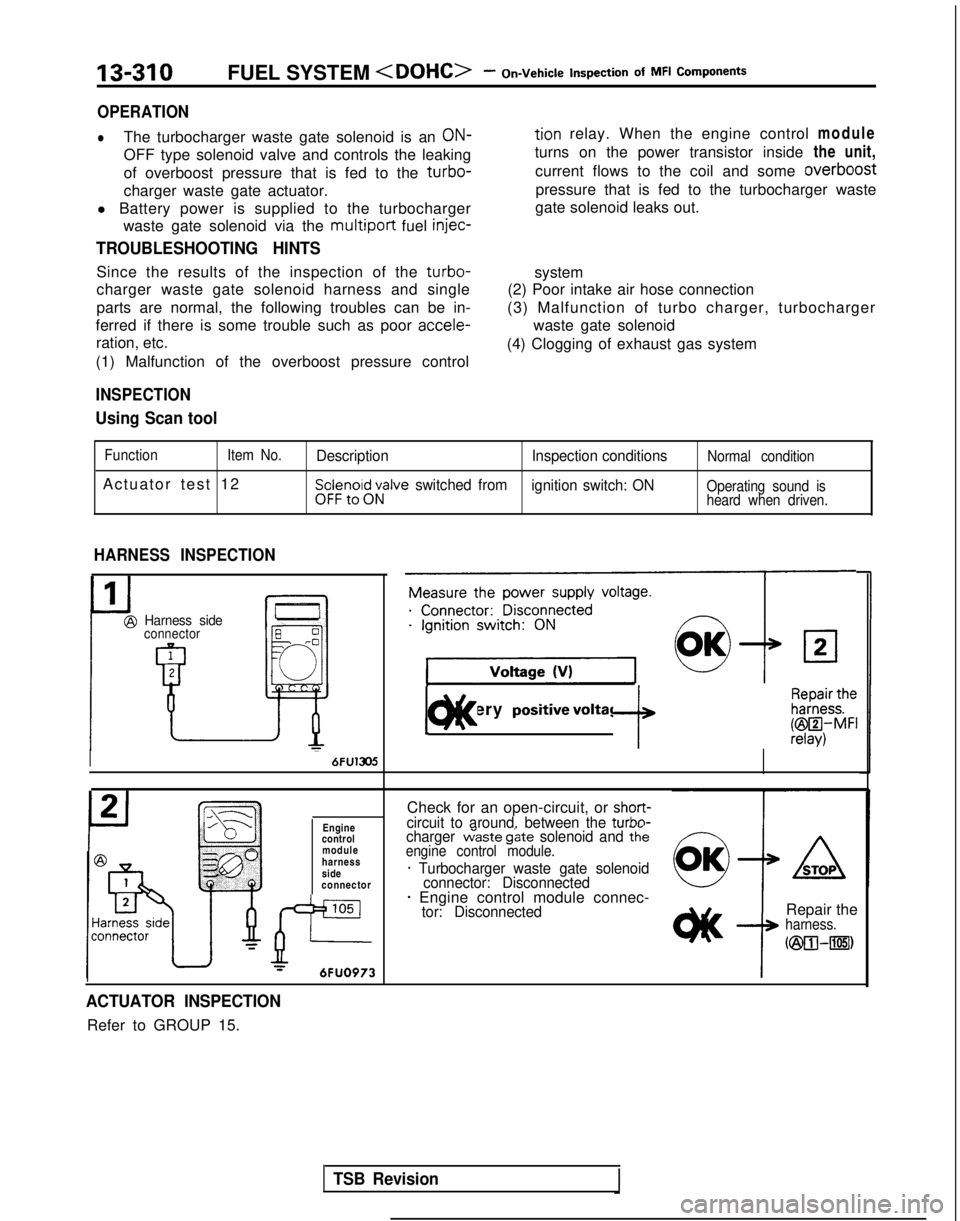
OPERATION
lThe turbocharger waste gate solenoid is an ON-tion relay. When the engine control
module
OFF type solenoid valve and controls the leaking turns on the power transistor inside
the unit,
of overboost pressure that is fed to the
turbo-current flows to the coil and some overboost
charger waste gate actuator. pressure that is fed to the turbocharger waste
l Battery power is supplied to the turbocharger gate solenoid leaks out.
waste gate solenoid via the
multiport fuel injec-
TROUBLESHOOTING HINTS
Since the results of the inspection of the turbo-
charger waste gate solenoid harness and single
parts are normal, the following troubles can be in-
ferred if there is some trouble such as poor accele-
ration, etc.
(1) Malfunction of the overboost pressure control system
(2) Poor intake air hose connection
(3) Malfunction of turbo charger, turbocharger waste gate solenoid
(4) Clogging of exhaust gas system
INSPECTION
Using Scan tool
Function Item No.
Actuator test 12
Description Inspection conditionsNormal condition
Sp:$r?,oi$;;alve switched from
ignition switch: ONOperating sound is
heard when driven.
HARNESS INSPECTION
Harness sideconnector
1
@
uI 6FU1305
Engine
control
module
harness
side
connector
105
JP--r6FUO973
Measure the power supply voltage.
9
1 Battery positivevoltage ]c)ll< f k&f$i
Check for an open-circuit, or short-circuit to around, between the turbn-charger w’aste g&e solenoid and thkengine control module.
* Turbocharger waste gate solenoid
connector: Disconnected
* Engine control module connec-tor: DisconnectedRepair theharness.
C@O--rn)
ACTUATOR INSPECTION
Refer to GROUP 15.
TSB Revision
Page 455 of 1273
FUEL SYSTEM
of MFI
Components13-313
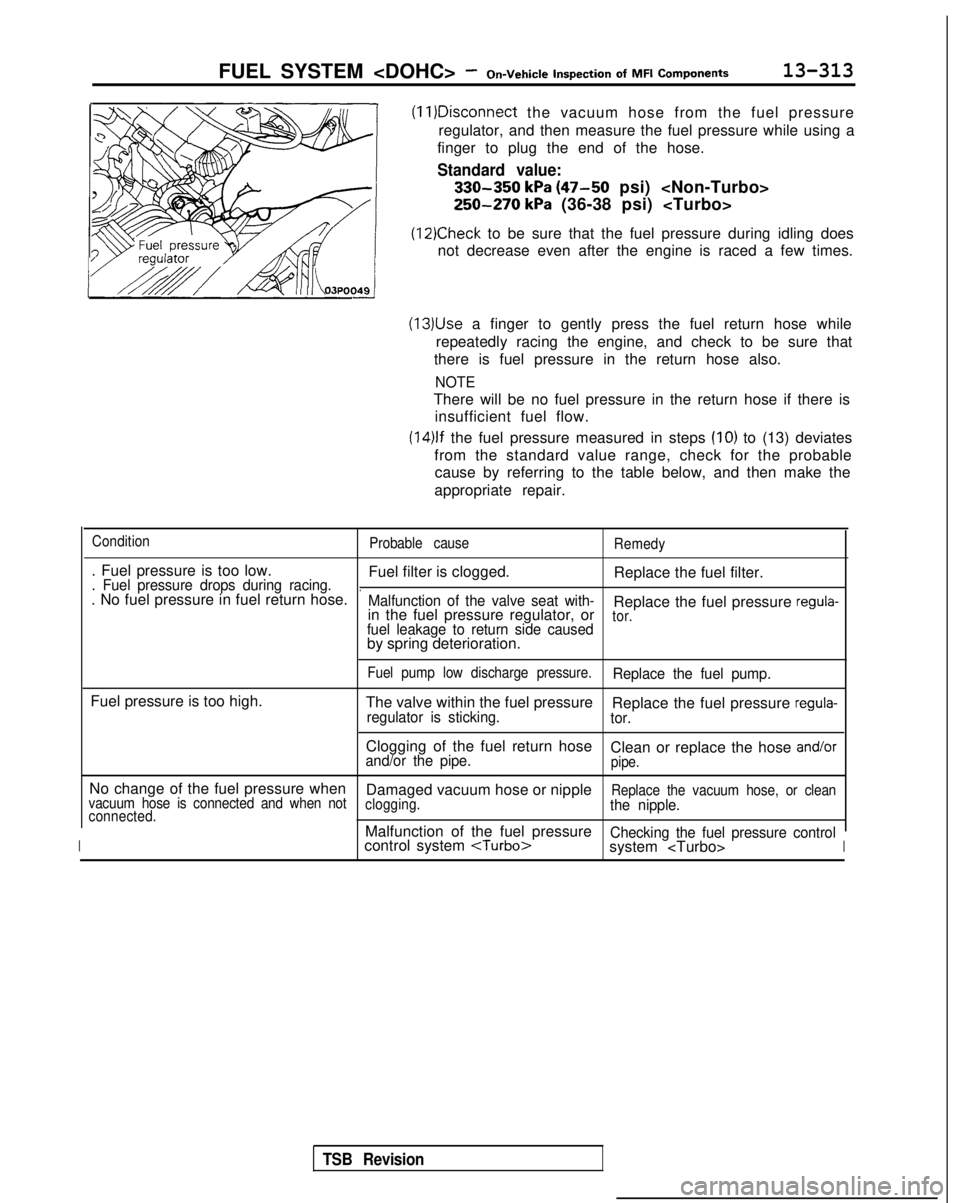
(11)Disconnect
the vacuum hose from the fuel pressure
regulator, and then measure the fuel pressure while using a
finger to plug the end of the hose.
Standard value:
330-350 kPa (47-50 psi)
250-270 kPa (36-38 psi)
(12)Check to be sure that the fuel pressure during idling does
not decrease even after the engine is raced a few times.
(13)Use a finger to gently press the fuel return hose while
repeatedly racing the engine, and check to be sure that
there is fuel pressure in the return hose also.
NOTE
There will be no fuel pressure in the return hose if there is insufficient fuel flow.
(14)lf the fuel pressure measured in steps (IO) to (13) deviates
from the standard value range, check for the probable cause by referring to the table below, and then make the
appropriate repair.
Condition Probable causeRemedy
. Fuel pressure is too low.
Fuel filter is clogged.Replace the fuel filter.. Fuel pressure drops during racing... No fuel pressure in fuel return hose.Malfunction of the valve seat with-Replace the fuel pressure regula-in the fuel pressure regulator, ortor.fuel leakage to return side causedby spring deterioration.
Fuel pump low discharge pressure.Replace the fuel pump.
Fuel pressure is too high.
The valve within the fuel pressureReplace the fuel pressure regula-regulator is sticking. tor.
Clogging of the fuel return hose
Clean or replace the hose and/orand/or the pipe.pipe.
No change of the fuel pressure when Damaged vacuum hose or nippleReplace the vacuum hose, or clean
vacuum hose is connected and when not clogging.the nipple.connected.
IMalfunction of the fuel pressureChecking the fuel pressure controlcontrol system
system
TSB Revision
Page 456 of 1273
13-314FUEL SYSTEM
of
MFI
Components
(15)Stop the engine and check for a change of the value
indicated by the fuel pressure gauge. The condition is
normal if there is no decrease of the indicated value within
two minutes.
If there is a decrease of the indicated value, monitor the
speed of the decrease, and, referring to the table below,
determine the cause of the problem and make the
appropriate repair.
ConditionProbable causeRemedy
After the engine is stopped, the fuel injector leakage pressure drops graudally.Replace the injector.
Leakage at the fuel pressure reg-ulator valve seat Replace the fuel pressure regula-tor.
There is a sudden sharp drop of the fuel
pressure immediately after the engine isThe check valve (within the fuel pump) is not closed.Replace the fuel pump.
stopped.
(16) Reduce the internal pressure of the fuel pipes and hoses.
(Refer to P. 13-l 02.)
(17) Disconnect the fuel pressure gauge and the special tools
from the fuel rail.
Caution
Because there will be a some residual pressure in the
fuel pipe line, use a shop towel to cover so that fuel
doesn’t splatter.
(18)Replace the O-ring at the end of the fuel high-pressure
hose with a new one. (19)After
connecting the fuel high-pressure hose to the fuel
rail, tighten the installation bolt.
(20)Check to be sure that there is no fuel leakage. @ Apply battery voltage to the terminal for activation of
@
the fuel pump so as to activate the fuel pump.
With fuel pressure applied, check for leakage of the fuel
line.
TSB Revision1