1973 DATSUN B110 lock
[x] Cancel search: lockPage 329 of 513
ENGINE
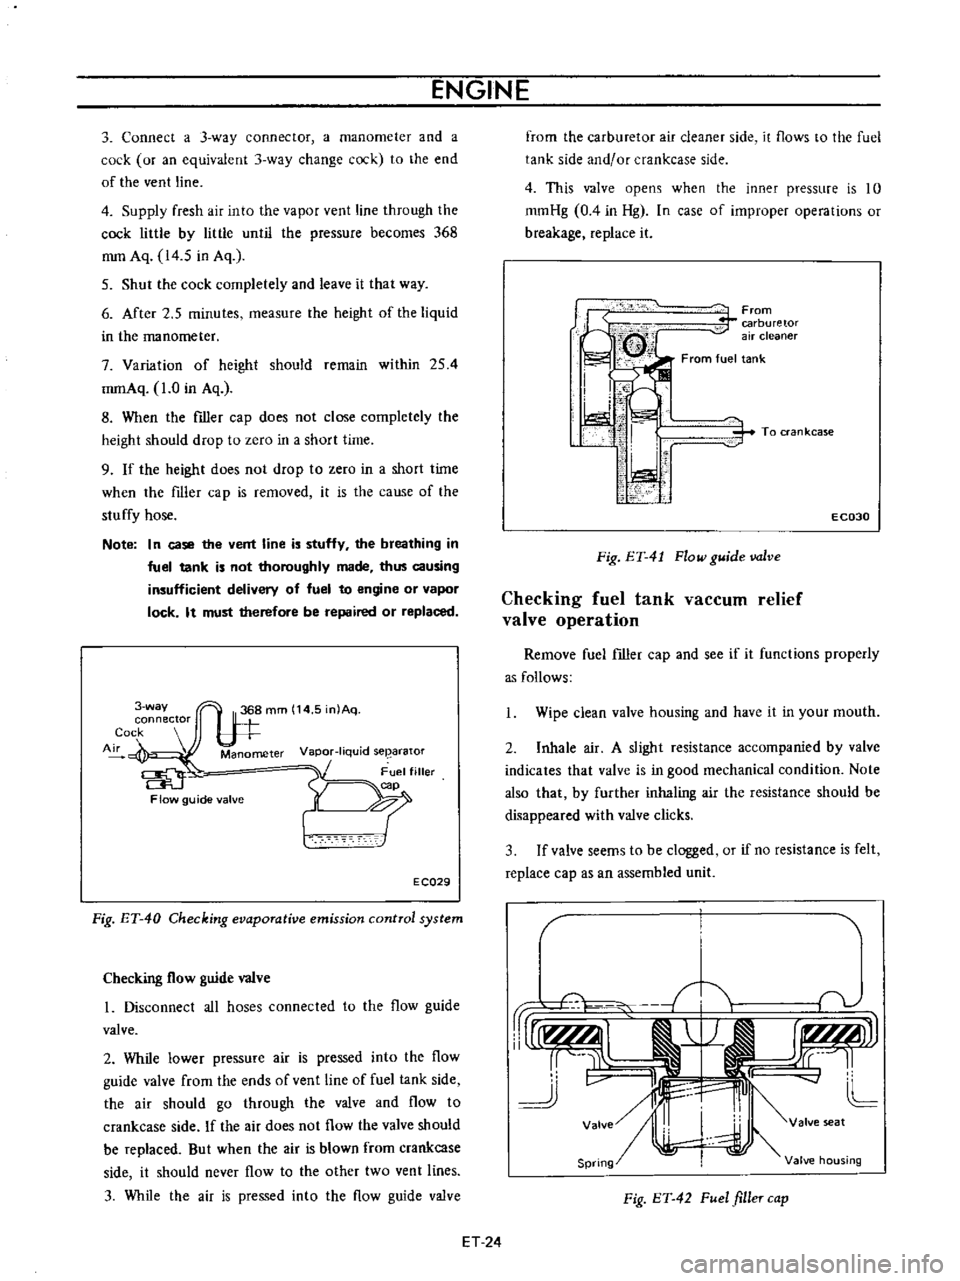
3
Connect
a
3
way
connector
a
manometer
and
a
cock
or
an
equivalent
3
way
change
cock
to
the
end
of
the
vent
line
4
Supply
fresh
air
into
the
vapor
vent
line
through
the
cock
little
by
little
until
the
pressure
becomes
368
mm
Aq
14
5
in
Aq
5
Shut
the
cock
completely
and
leave
it
that
way
6
After
2
5
minutes
measure
the
height
of
the
liquid
in
the
manometer
7
Variation
of
height
should
remain
within
254
mmAq
1
0
in
Aq
8
When
the
filler
cap
does
not
close
completely
the
height
should
drop
to
zero
in
a
short
time
9
If
the
height
does
not
drop
to
zero
in
a
short
time
when
the
filler
cap
is
removed
it
is
the
cause
of
the
stuffy
hose
Note
In
case
the
vent
line
is
stuffy
the
breathing
in
fuel
tank
is
not
thoroughly
made
thus
causing
insufficient
delivery
of
fuel
to
engine
or
vapor
lock
It
must
therefore
be
repaired
or
replaced
3
way
connector
Cock
Air
Manometer
Vapor
liquid
seearator
Flow
guide
valve
E
CQ29
Fig
ET
40
Checking
evaporative
emission
control
system
Checking
flow
guide
valve
I
Disconnect
all
hoses
connected
to
the
flow
guide
valve
2
While
lower
pressure
air
is
pressed
into
the
flow
guide
valve
from
the
ends
of
vent
line
of
fuel
tank
side
the
air
should
go
through
the
valve
and
flow
to
crankcase
side
If
the
air
does
not
flow
the
valve
should
be
replaced
But
when
the
air
is
blown
from
crankcase
side
it
should
never
flow
to
the
other
two
vent
lines
3
While
the
air
is
pressed
into
the
flow
guide
valve
from
the
carburetor
air
cleaner
side
it
flows
to
the
fuel
tank
side
and
or
crankcase
side
4
This
valve
opens
when
the
inner
pressure
is
10
mmHg
0
4
in
Hg
In
case
of
improper
operations
or
breakage
replace
it
From
carburetor
air
cleaner
From
fuel
tank
i
I
I
ti
i
i
1
1
i
To
ran
kcase
E
C030
Fig
ET
41
Flow
guide
valve
Checking
fuel
tank
vaCCUID
relief
valve
operation
Remove
fuel
filler
cap
and
see
if
it
functions
properly
as
follows
Wipe
clean
valve
housing
and
have
it
in
your
mouth
2
Inhale
air
A
slight
resistance
accompanied
by
valve
indicates
that
valve
is
in
good
mechanical
condition
Note
also
that
by
further
inhaling
air
the
resistance
should
be
disappeared
with
valve
clicks
3
If
valve
seems
to
be
clogged
or
if
no
resistance
is
felt
replace
cap
as
an
assembled
unit
T
1i
v
rUr1f
AlI
j
r
I
r
tLMJJl
rr
L
cc
11
J
v
II
4J
L
Valve
I
valve
seat
Spring
Valve
housing
Fig
ET
42
Fuel
filler
cap
ET
24
Page 337 of 513
ABNORMAL
COMBUSTION
backfire
afterflfe
run
on
etc
Improper
ignition
timing
Fuel
system
in
trouble
Defective
cylinder
head
etc
EXCESSIVE
OIL
CONSUMPTION
Oil
leakage
Excessive
oil
consumption
ENGINE
Improper
ignition
timing
Improper
heat
range
of
the
spark
plugs
Damaged
carburetor
or
manifold
gasket
backfire
afterflre
Defective
carburetor
jet
Improper
function
of
the
float
Uneven
idling
Improperly
adjusted
valve
clearance
Excess
carbon
in
the
combustion
chamber
Damaged
valve
spring
backfire
afterure
Loose
oil
drain
plug
Loose
or
damaged
oil
pan
gasket
Loose
or
damaged
chain
cover
gasket
Defective
oil
seals
in
front
and
rear
of
the
crankshaft
Loose
or
damaged
locker
cover
gasket
Improper
tightening
of
oil
filter
Loose
or
damaged
oil
pressure
switch
Worn
cylinder
and
piston
Improper
location
of
the
ring
split
or
reo
versed
assembly
ET
32
Adjust
the
ignition
timing
Use
specified
spark
plugs
Replace
them
with
new
ones
Disassemble
the
carburetor
and
check
it
Adjust
the
level
and
check
the
needle
valve
Adjust
Readjust
Remove
the
cylinder
head
and
remove
carbon
Replace
it
with
a
new
one
Tighten
it
Renew
the
gasket
or
tighten
it
Renew
the
gasket
or
tighten
it
Renew
the
oil
seals
Renew
the
gasket
or
tighten
it
Do
not
tighten
excessively
Renew
the
gasket
and
tighten
it
cor
rectly
Retighten
or
renew
the
oil
pressure
switch
Overhaul
the
cylinder
and
renew
the
piston
Reassemble
the
piston
rings
correctly
Page 338 of 513
EMISSION
CONTROL
AND
TUNE
UP
Othm
POOR
FUEL
CONSUMPTION
See
the
explanation
of
the
power
decrease
Othe
TROUBLE
IN
OTHER
FUNCfIONS
Decreased
oil
pressure
Excessive
wear
on
the
sliding
parts
Damaged
or
seized
piston
rings
Worn
piston
ring
groove
and
rings
Fatigue
ofvalve
oil
seal
lip
Worn
valve
stem
Inadequate
quality
of
engine
oiL
Engine
overheat
Exceeding
idling
revolution
Defective
acceleration
recovery
Fuel
leakage
Inadequa
Ie
oil
quality
Overheat
Defective
function
of
oil
pump
regulator
valve
Functional
deterioration
of
oil
pump
Blocked
oil
ftIter
nerased
clearance
in
various
sliding
parts
Blocked
oil
strainer
Troubles
in
the
oil
gauge
pressure
switch
Oil
pressure
decrease
Defective
quality
or
contamination
of
oil
Defective
air
cleaner
Overheat
or
overcoal
ET
33
Renew
the
rings
Repair
or
renew
the
piston
and
cyl
inder
Renew
the
piston
and
piston
ring
Replace
the
seal
lip
with
a
new
one
Renew
the
valve
or
the
guide
Use
the
designated
oiL
Previously
mentioned
Adjust
it
to
the
designated
rpm
Adjust
it
Repair
or
tighten
the
connection
of
fuel
pipes
Use
the
designated
oil
Previously
mentioned
Disassemble
the
oil
pump
and
repair
or
renew
it
Repair
or
replace
it
with
a
new
one
Renew
it
Disassemble
and
replace
the
worn
parts
with
new
ones
Clean
it
Replace
it
with
a
new
one
Previously
mentioned
Replace
the
oil
with
proper
one
and
change
the
ftIter
elemerit
Replace
the
air
cleaner
element
Previously
mentioned
Page 341 of 513
ENGINE
MECHANICAL
GENERAL
DESCRIPTION
CONTENTS
ENGINE
CYLINDER
BLOCK
CRAN
KSHAFT
PISTON
AND
CONNECTING
ROD
CYLINDER
HEAD
EM
EM
2
EM
2
EM
2
EM
2
CAMSHAFT
VALVE
MECHANISM
CAMSHAFT
DRIVE
MANIFOLD
EM
3
EM
3
EM
3
EM
3
ENGINE
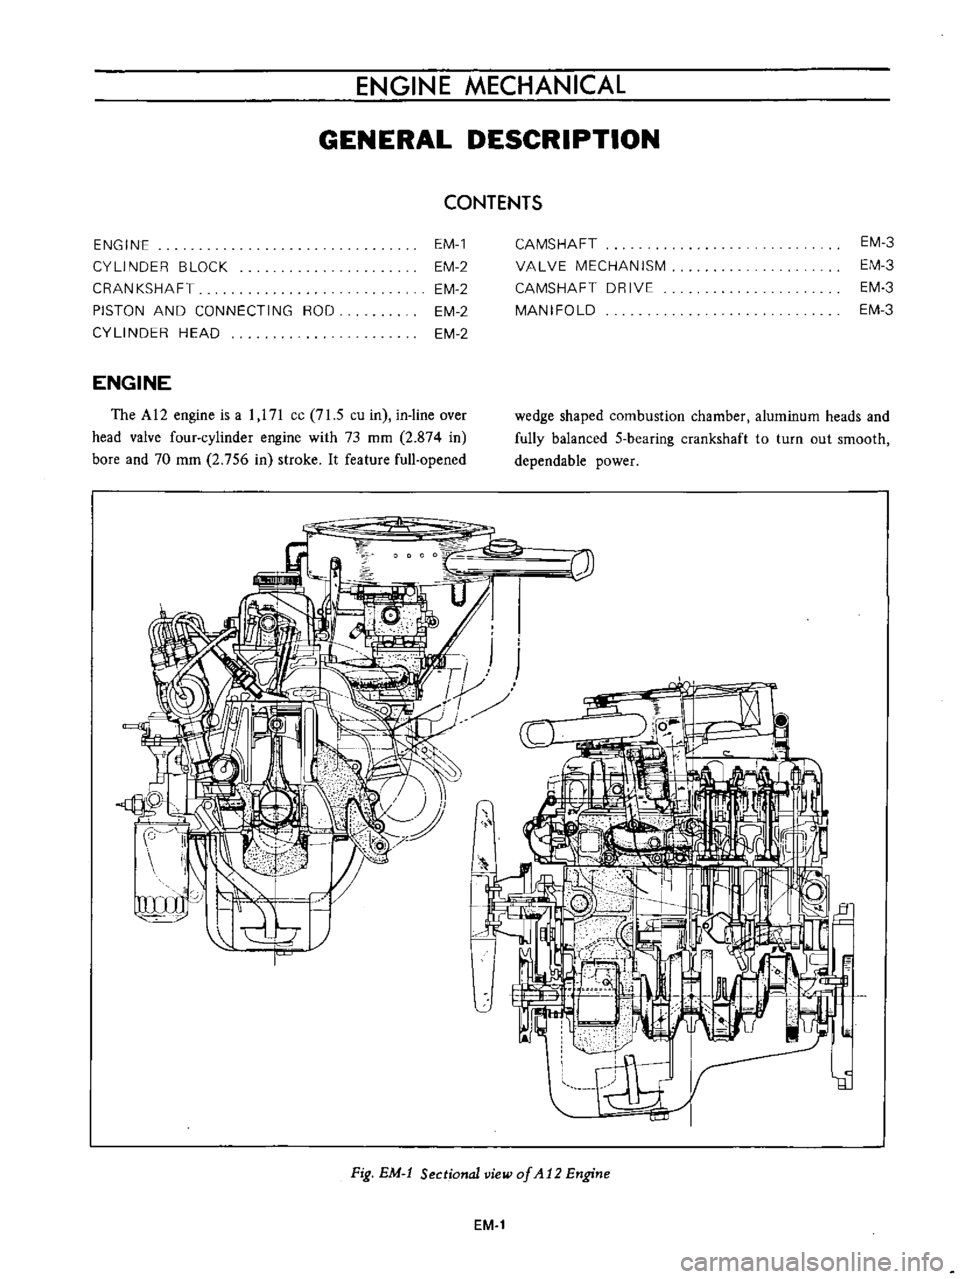
The
AI2
engine
is
a
1
171
cc
71
5
cu
in
in
line
over
head
valve
four
cylinder
engine
with
73
mm
2
874
in
bore
and
70
mm
2
756
in
stroke
It
feature
full
opened
wedge
shaped
combustion
chamber
aluminum
heads
and
fully
balanced
5
bearing
crankshaft
to
turn
out
smooth
dependable
power
c
Ii
I
l
1
nun
y
r
r
Fig
EM
t
Sectional
view
of
At2
Engine
EM
1
Page 342 of 513
ENGINE
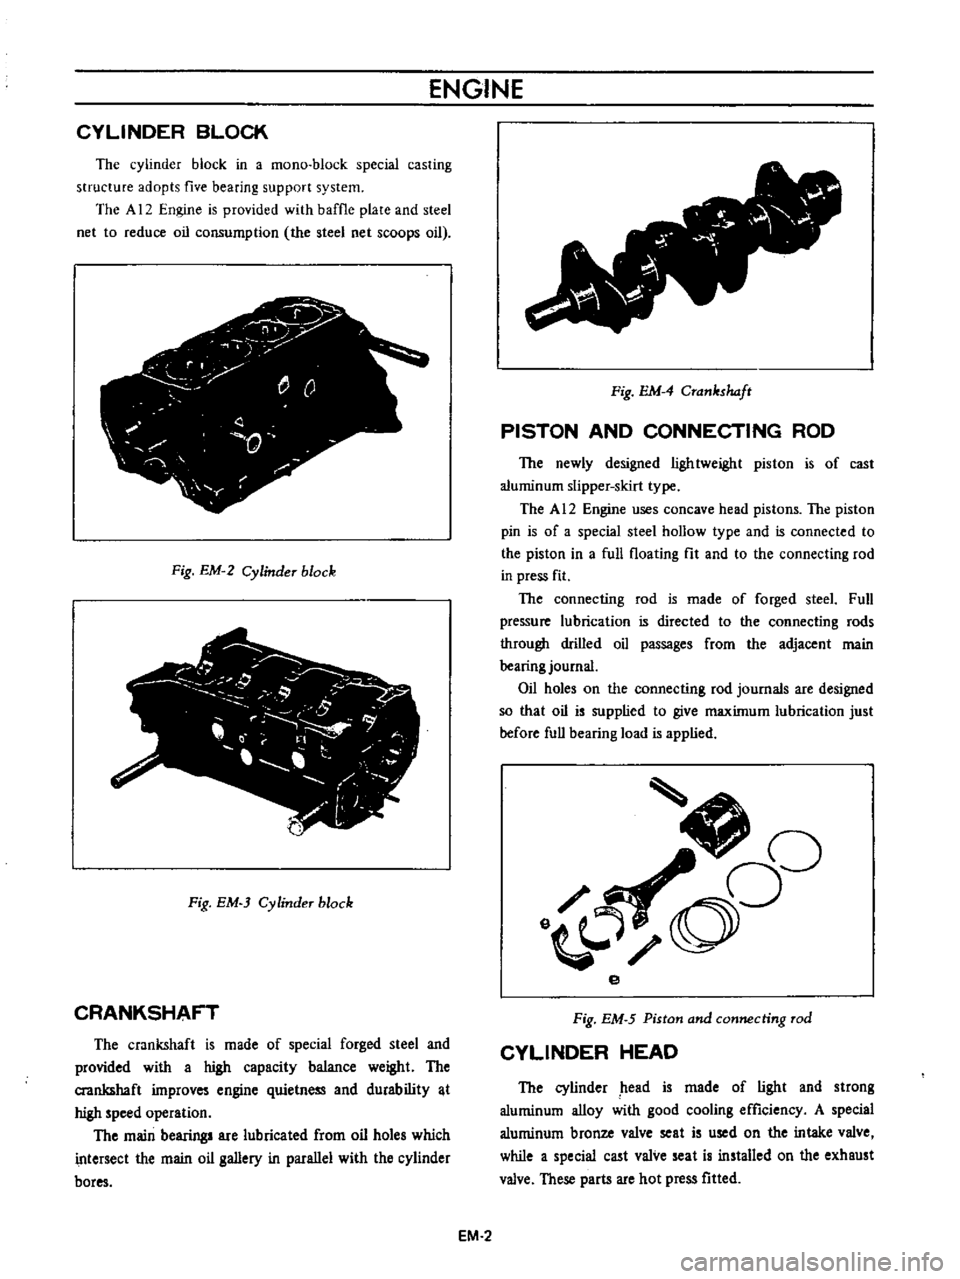
CYLINDER
BLOCK
The
cylinder
block
in
a
mono
block
special
casting
structure
adopts
five
bearing
support
system
The
A
12
Engine
is
provided
with
baffle
plate
and
steel
net
to
reduce
oil
consumption
the
steel
net
scoops
oil
j
y
r
0
Q
0
T
Fig
EM
2
Cylinder
block
Fig
EM
3
Cylinder
block
CRANKSHAFT
The
crankshaft
is
made
of
special
forged
steel
and
provided
with
a
high
capacity
balance
weight
The
crankshaft
improves
engine
quietness
and
durability
t
high
speed
operation
The
main
bearing
are
lubricated
from
oil
holes
which
intersect
the
main
oil
gallery
in
parallel
with
the
cylinder
bores
v
Fig
EM
4
Crankshaft
PISTON
AND
CONNECTING
ROD
The
newly
designed
lightweight
piston
is
of
cast
aluminum
slipper
skirt
type
The
A
12
Engine
uses
concave
head
pistons
The
piston
pin
is
of
a
special
steel
hollow
type
and
is
connected
to
the
piston
in
a
full
floating
fit
and
to
the
connecting
rod
in
press
fit
The
connecting
rod
is
made
of
forged
steeL
Full
pressure
lubrication
is
directed
to
the
connecting
rods
through
drilled
oil
passages
from
the
adjacent
main
bearing
journal
Oil
holes
on
the
connecting
rod
journals
are
designed
so
that
oil
is
supplied
to
give
maximum
lubrication
just
before
full
bearing
load
is
applied
J
oO
o
e
Fig
EM
5
Piston
and
connecting
rod
CYLINDER
HEAD
The
cylinder
head
is
made
of
light
and
strong
aluminum
alloy
with
good
cooling
efficiency
A
special
aluminum
bronze
valve
seat
is
used
on
the
intake
valve
while
a
special
cast
valve
seat
is
installed
on
the
exhaust
valve
These
parts
are
hot
press
fitted
EM
2
Page 343 of 513
ENGINE
MECHANICAL
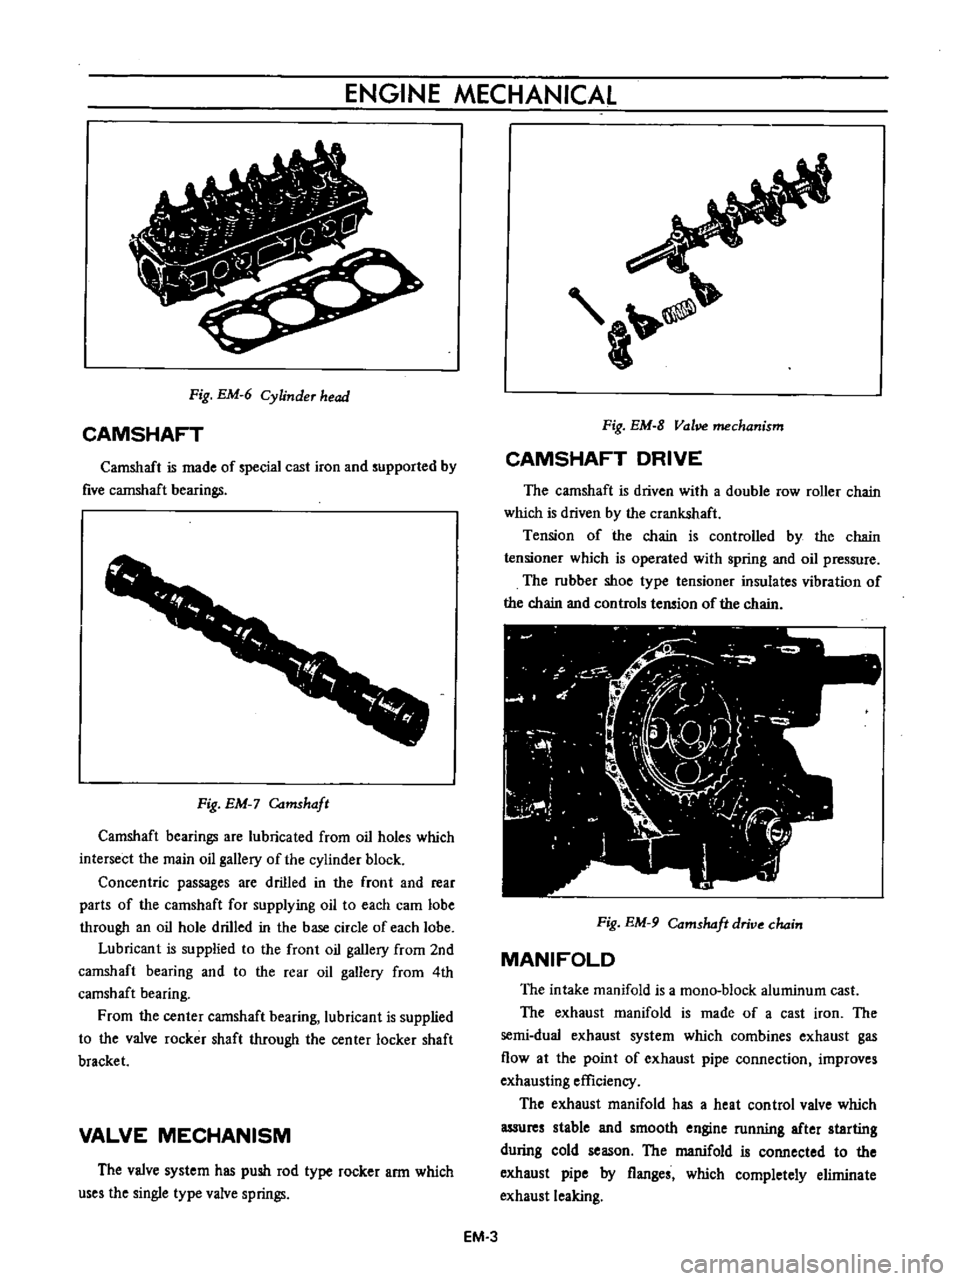
Fig
EM
6
Cylinder
head
CAMSHAFT
Camshaft
is
made
of
special
cast
iron
and
supported
by
five
cannshaft
bearings
1
1
f
r
f
r
I
Fig
EM
Camshaft
Camshaft
bearings
are
lubricated
from
oil
holes
which
intersect
the
main
oil
gallery
of
the
cylinder
block
Concentric
passages
are
drilled
in
the
front
and
rear
parts
of
the
camshaft
for
supplying
oil
to
each
cam
lobe
through
an
oil
hole
drilled
in
the
base
circle
of
each
lobe
Lubricant
is
supplied
to
the
front
oil
gallery
from
2nd
camshaft
bearing
and
to
the
rear
oil
gallery
from
4th
camshaft
bearing
From
the
center
camshaft
bearing
lubricant
is
supplied
to
the
valve
rocker
shaft
through
the
center
locker
shaft
bracket
VALVE
MECHANISM
The
valve
system
has
push
rod
type
rocker
arm
which
uses
the
single
type
valve
springs
a
Fig
EM
8
Vol
mechanism
CAMSHAFT
DRIVE
The
camshaft
is
driven
with
a
double
row
roller
chain
which
is
driven
by
the
crankshaft
Tension
of
the
chain
is
controlled
by
the
chain
tensioner
which
is
operated
with
spring
and
oil
pressure
The
rubber
shoe
type
tensioner
insulates
vibration
of
the
chain
and
controls
tension
of
the
chain
Fig
EM
9
Comshdft
drive
chain
MANIFOLD
The
intake
manifold
is
a
mono
block
aluminum
cast
The
exhaust
manifold
is
made
of
a
cast
iron
The
semi
dual
exhaust
system
which
combines
exhaust
gas
flow
at
the
point
of
exhaust
pipe
connection
improves
exhausting
efficiency
The
exhaust
manifold
has
a
heat
control
valve
which
assures
stable
and
smooth
engine
running
after
starting
during
cold
season
The
manifold
is
connected
to
the
exhaust
pipe
by
flanges
which
completely
eliminate
exhaust
leaking
EM
3
Page 344 of 513
ENGINE
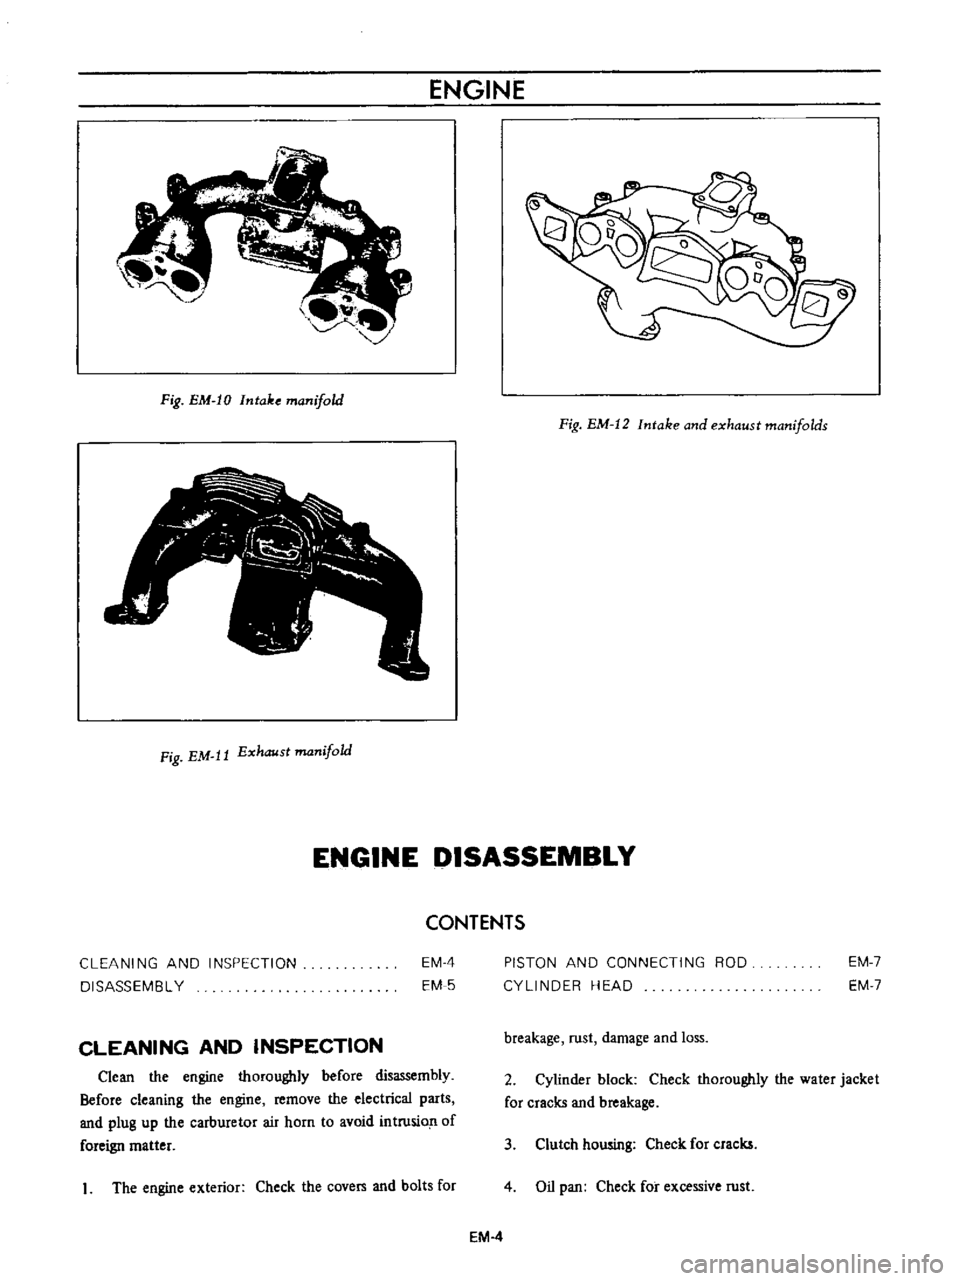
Fig
EM
IO
Intake
manifold
Fig
EM
12
Intake
and
exhaust
manifolds
Fig
EM
It
Exhaust
manifold
ENGINE
DISASSEMBLY
CONTENTS
CLEANING
AND
INSPECTION
DISASSEMBL
Y
EM
4
EM
5
PISTON
AND
CONNECTING
ROD
CYLINDER
HEAD
EM
7
EM
7
CLEANING
AND
INSPECTION
breakage
rust
damage
and
loss
Clean
the
engine
thoroughly
before
disassembly
Before
cleaning
the
engine
remove
the
electrical
parts
and
plug
up
the
carburetor
air
horn
to
avoid
intrusio
n
of
foreign
matter
2
Cylinder
block
Check
thoroughly
the
water
jacket
for
cracks
and
breakage
3
Clutch
howing
Check
for
cracks
1
The
engine
exterior
Check
the
covers
and
bolts
for
4
Oil
pan
Check
for
excessive
rust
EM
4
Page 348 of 513
ENGINE
J
I
r
I
I
J
fj
7
L
j
8
if
d1
I
ilfi
3
c
7
I
t
j
v
1
Ji
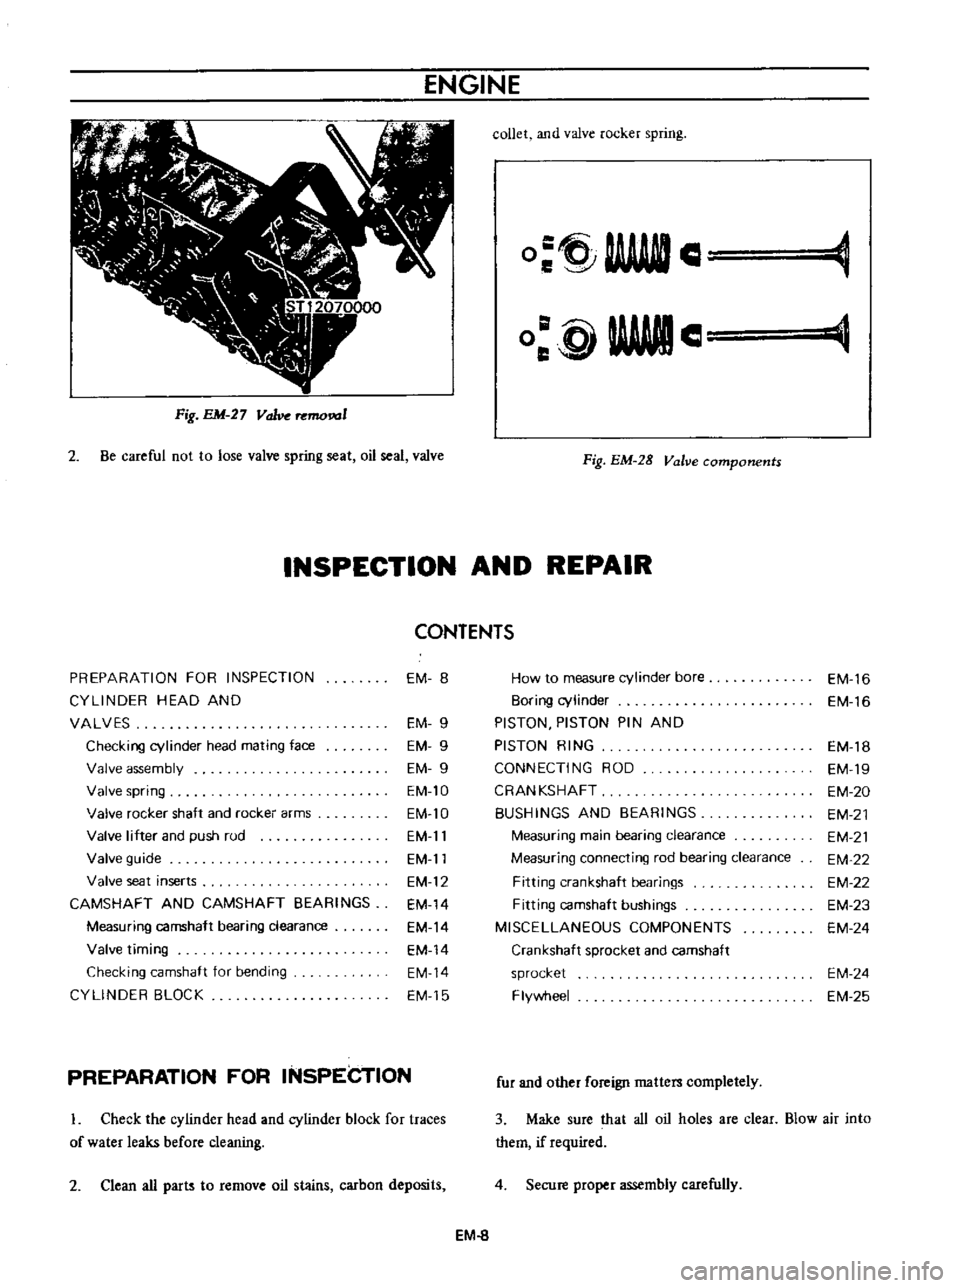
Fig
EM
27
Valve
mo
1
2
Be
careful
not
to
lose
valve
spring
seat
oil
seal
valve
collet
and
valve
rocker
spring
O
tj
AAAftIl
C
e
WWII
o
glAWle
Fig
EM
28
Valve
components
INSPECTION
AND
REPAIR
CONTENTS
PREPARATION
FOR
INSPECTION
EM
8
How
to
measure
cylinder
bore
EM
16
CYLlNOER
HEAD
AND
80ring
cylinder
EM
16
VALVES
EM
9
PISTON
PISTON
PIN
AND
Checking
cylinder
head
mating
face
EM
9
PISTON
RING
EM
18
Valve
assembly
EM
9
CONNECTING
ROD
EM
19
Valve
spring
EM
10
CRANKSHAFT
EM
20
Valve
rocker
shaft
and
rockei
arms
EM
lO
BUSHINGS
AND
BEARINGS
EM
21
Valve
lifter
and
push
rud
EM
11
Measuring
main
bearing
clearance
EM
21
Valve
guide
EM
11
Measuring
connecting
rod
bearing
clearance
EM
22
Valve
seat
inserts
EM
12
Fitting
crankshaft
bearings
EM
22
CAMSHAFT
AND
CAMSHAFT
BEARINGS
EM
14
Fitting
camshaft
bushings
EM
23
Measuring
camshaft
bearing
clearance
EM
14
MISCELLANEOUS
COMPONENTS
EM
24
Valve
timing
EM
14
Crankshaft
sprocket
and
camshaft
Checking
camshaft
for
bending
EM
14
sprocket
EM
24
CYLlNOER
BLOCK
EM
15
Flywheel
EM
25
PREPARATION
FOR
INSPECTION
L
Check
the
cylinder
head
and
cylinder
block
for
traces
of
water
leaks
before
cleaning
2
Clean
all
parts
to
remove
oil
stains
carbon
deposits
fur
and
other
foreign
matters
completely
3
Make
sure
that
all
oil
holes
are
clear
Blow
air
into
them
if
required
4
Secure
proper
assembly
carefully
EM
8