Page 233 of 377

To play from a USB memory device
E00762500210
1. Press the PWR
button (2) to turn on the au-
dio system. The system turns on in the last
mode used.
2. Connect your USB memory device to the USB input terminal. Refer to “How to con-
nect a USB memory device” on page 5-82.
3. Press the CD button (4) several times to switch to the USB mode. The input mode
changes as follows every time the CD button
is pressed.
CD mode → USB mode → Bluetooth ®
mode* → Rear-seat display mode*
NOTE l If your vehicle is equipped with audio/video
input RCA terminals, pressing and holding
the CD button for 2 seconds or more
switches the system to the AUX mode.
4. Once the device is selected, playback starts and “USB” appears on the display.
NOTE l Depending on the condition of your USB de-
vice, it may take a longer time before the play-
back starts.
5. To stop the playback, press the AM/FM but- ton (1) or CD button (4) to switch to a differ-
ent mode. NOTE
l To
adjust the
volume and tone, refer to “To
adjust the volume” on pages 5-13, 5-27 and
“To adjust the tone” on pages 5-13, 5-27.
Supported compressed music files E00758300318
This audio can play MP3, WMA, AAC and WAV
files recorded
in
a USB memory device. This audio
supports up to 65,535 files in 700 folders on 8 levels.
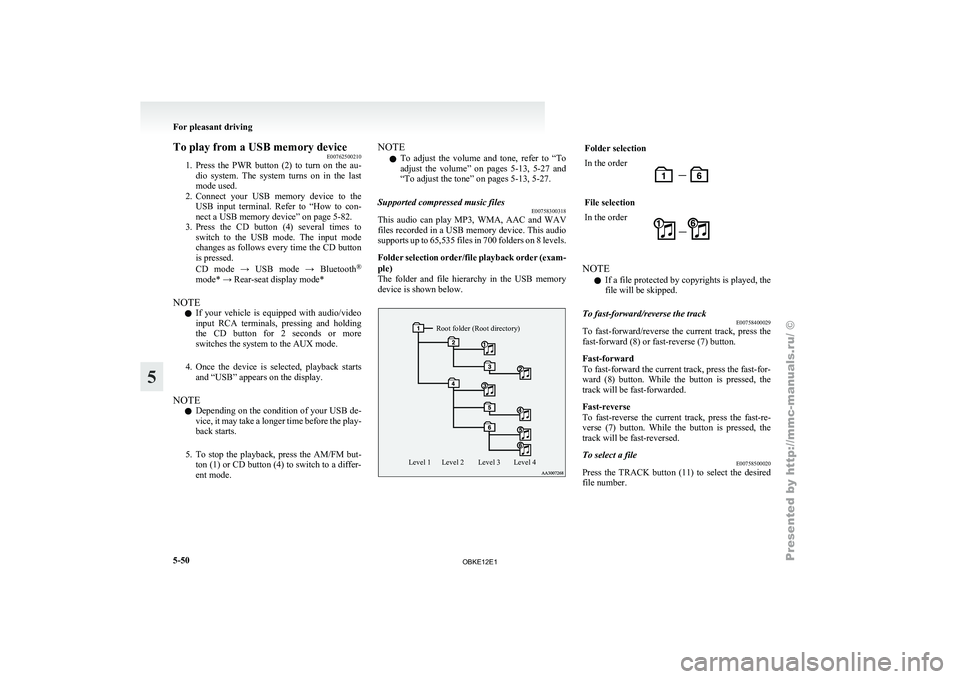
Folder selection order/file playback order (exam-
ple)
The folder and file hierarchy in the USB memory
device is shown below.
Root folder (Root directory)
Level 4
Level 3
Level 2
Level 1 Folder selection
In the order
File selection
In the order
NOTE
l If a file protected by copyrights is played, the
file will be skipped.
To fast-forward/reverse the track E00758400029
To fast-forward/reverse the current track, press the
fast-forward (8) or fast-reverse (7) button.
Fast-forward
To fast-forward the current track, press the fast-for-
ward (8) button.
While the button is pressed, the
track will be fast-forwarded.
Fast-reverse
To fast-reverse the current track, press the fast-re-
verse (7) button. While the button is pressed, the
track will be fast-reversed.
To select a file E00758500020
Press the TRACK button (11) to select the desired
file number. For pleasant driving
5-50
5
OBKE12E1
Page 234 of 377

Press : The track number increases by
one.
Press : The track number decreases by
one.
Press for a
long period
(approx. 2 sec-
onds or more) : The track number increases
continuously while the button
is pressed.
Press for a
long period
(approx. 2 sec-
onds or more) : The track number decreases
continuouslywhile the button
is pressed.
If the side of the button is pressed once after a
few seconds, playback
returns to the start of that
track.
NOTE
l Every time the TRACK button (11) is press-
ed, the file number in the display changes.
To find a track E00758600223
You can select a folder to find a desired track.
1. Press the FOLDER button (12 or 13) to showthe desired folder in the display.
NOTE l If
no
operation is performed for 10 seconds
or more or other button is operated after the
FOLDER button has been pressed, the selec-
ted track becomes unselected and the display
returns to the playback display.
2. Press the MENU button (10) to select the fold- er. NOTE
l When
the DISC
button (15) is pressed, the
track find mode will be cancelled.
3. Press the FOLDER button (12 or 13) to show the desired track in the display.
NOTE l When the DISC button (15) is pressed, the se-
lection is cancelled and returned to the previ-
ous step.
l If no operation is performed for 5 seconds or
more after the FOLDER button (12 or 13) is
pressed, the displayed track is played.
4. Press the MENU button (10) to select the file.
To play the same file repeatedly E00758700022
Press the RPT button (5) to show “RPT” in the dis-
play. To cancel this mode, press the button again.
To play the files in the same folder repeatedly E00758800023
Press and hold the RPT button (5) until you hear a
beep to show “F-RPT” in the display.
All tracks
in
the current folder are played repeatedly.
To exit this mode, press the button again.
To play a folder in random order E00758900024
Press the RDM button (6) to show “RDM” in the
display.
The audio randomly
selects tracks from the current
folder and plays the selected tracks.
To exit this mode, press the button again. To play all folders in random order
E00759000022
Press and hold
the RDM button (6) until you hear a
beep to show “F-RDM” in the display.
The audio randomly selects tracks from all folders
and plays the selected tracks.
To exit this mode, press the button again.
To find the start of each track in a folder for play-
back (vehicles without Bluetooth ®
2.0 interface)
E00759100111
Press the SCAN button (14). “SCAN” is shown in
the display and
the tracks in the current folder are
played for several seconds from the beginning.
The file number will blink while the scan mode is
selected.
To exit this mode, press the button again.
NOTE
l Once all tracks in the folder have been cued
playback will restart from the beginning of
the track that was playing when cueing started.
To find the start of each track in all folders for
playback (vehicles with Bluetooth ®
2.0 interface)
E00765800038
Press the SCAN button (14). “SCAN” is shown in
the display and
all tracks in all folders are played
for several seconds from the beginning.
The file number will blink while the scan mode is
selected.
To exit this mode, press the button again.
To find the start of first tracks in all folders for
playback E00759200112
Press and hold the SCAN button (14) until you
hear a beep to show “F-SCAN” in the display.
The first tracks
in all folders are played for several
seconds from the beginning. For pleasant driving
5-51 5
OBKE12E1
Page 235 of 377

Playback starts from the folder next to the one cur-
rently playing.
The folder number
will blink while the scan mode
is selected.
To exit this mode, press the button again.
NOTE
l Once the cueing playback ends, playback
will start from the track at the beginning of
the folder next to the one that was playing
when the cueing started.
To switch the display E00759300025
You can display titles with tag information.
Folder title
The display changes
as follows every time the
DISP button (3) is pressed during playback.
Folder title → File title → Normal display
Tag information
1. Press and hold the DISP button (3) until youhear a beep to show “TAG” in the display.
2. The display changes as follows every time the DISP button (3) is pressed briefly. Album title → Track title → Artist name →
Genre
(vehicles with
Bluetooth®
2.0 inter-
face) → Normal display
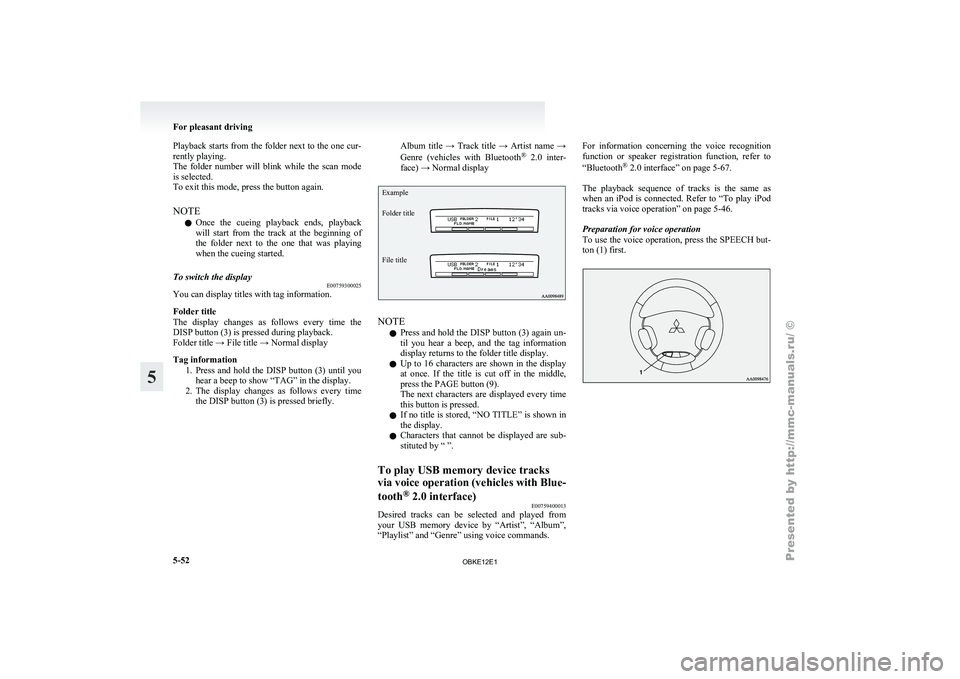
Example
Folder title
File title NOTE
l Press
and hold
the DISP button (3) again un-
til you hear a beep, and the tag information
display returns to the folder title display.
l Up to 16 characters are shown in the display
at once. If the title is cut off in the middle,
press the PAGE button (9).
The next characters are displayed every time
this button is pressed.
l If no title is stored, “NO TITLE” is shown in
the display.
l Characters that cannot be displayed are sub-
stituted by “ ”.
To play USB memory device tracks
via voice operation
(vehicles with Blue-
tooth ®
2.0 interface)
E00759400013
Desired tracks can be selected and played from
your USB memory
device by “Artist”, “Album”,
“Playlist” and “Genre” using voice commands. For information concerning the voice recognition
function or
speaker
registration function, refer to
“Bluetooth ®
2.0 interface” on page 5-67.
The playback sequence of tracks is the same as
when an iPod is connected. Refer to “To play iPod
tracks via voice operation” on page 5-46.
Preparation for voice operation
To use the voice operation, press the SPEECH but-
ton (1) first. For pleasant driving
5-52
5
OBKE12E1
Page 236 of 377
To play tracks from a Bluetooth
®
device (vehicles with Bluetooth ®
2.0 interface) E00759700162
You can wirelessly
connect a digital audio player
or cellular phone supporting Bluetooth ®
to listen to
the tracks on the connected device.
Refer to “Bluetooth ®
2.0 interface” on page 5-67
for the connecting method, etc.
The following explains the basic playback method.
NOTE
l According to the connected device, it is not
to operate correctly or the limitation might
be provided in available function.
l The protected file by copyright might not be
able to start playback.
l It is recommended to adjust the equalizer of
the connected device is flat.
l The voice operation is not available to access
music files on the connected Bluetooth ®
de-
vice. For pleasant driving
5-53 5
OBKE12E1
Page 237 of 377
Bluetooth
®
device control panel and display
E007626000351- PWR (On-Off) button
2- DISP (Title display) button
3-
CD (Mode change) button
4-
RPT (Repeat) button
5- RDM (Random) button
6- PAGE (Title scroll) button
7- TRACK (Track up/down) button 8- SCAN button
9- Play button
10- Pause/Stop button
11- BT-A (Bluetooth ®
) indicator
12-
TRACK indicator
13- RPT/RDM/SCAN indicator For pleasant driving
5-54
5
OBKE12E1
Page 238 of 377

To listen to tracks from a device con-
nected via Bluetooth
®
E00762700195
1. Press the PWR
button (1) to turn on the au-
dio system. The system turns on in the last
mode used.
2. Press the CD button (3) several times to
switch to the BT-A (Bluetooth ®
) mode. The
input mode changes as follows every time
the CD button is pressed.
CD mode → USB (iPod) mode → Blue-
tooth ®
mode → Rear-seat display mode*
NOTE l For vehicles equipped with audio/video input
RCA terminals, pressing and holding the CD
button for 2 seconds or more switches the sys-
tem to the AUX mode.
3. Connect your Bluetooth ®
device. Refer to
“Connecting the Bluetooth® 2.0 interface
and Bluetooth® device” on page 5-71.
4. Playback starts automatically.
NOTE l Depending on the connected device, the play-
back may not start automatically.
In this case, operate the connected device to
start the playback.
To stop the playback (if supported by the device) E00762800011
To stop the playback, press the Stop button (10).
To restart the playback, press the Play button (9).
To pause the playback (if supported by the device) E00762900038
To pause the playback, press the Pause button (10). To restart the playback, press the Play button (9).
To select a track (if supported by the device)
E00763000078
Press the TRACK button (7) to select the desired
track number.
Press : The track number increases by
one.
Press : The track number decreases by
one.
Press for a
long period
(approx. 2 sec-
onds or more) : The track number increases
continuously while the button
is pressed.
Press for a
long period
(approx. 2 sec-
onds or more) : The track number decreases
continuouslywhile the button
is pressed.
If the side of the button is pressed once while a
track is playing,
playback returns to the start of that
track.
NOTE
l Every time the track selection button is press-
ed, the track number in the display changes.
To play the same track repeatedly (if supported by
the device) E00763100011
Press the RPT button (4) during playback to show
“RPT” in the display.
To exit this mode, press the button again. To play tracks in random order (if supported by
the device)
E00763200012
Press the RDM
button (5) to show “RDM” in the
display.
The system randomly selects and plays tracks from
all tracks in the Bluetooth ®
device.
To exit this mode, press the button again.
To find the start of each track for playback (if sup-
ported by the device) E00763300084
Press the SCAN button (8). “SCAN” is shown in
the display and
all tracks in the Bluetooth ®
device
are played for several seconds from the beginning.
To exit this mode, press the button again.
To switch the display (if supported by the device) E00763400014
The system can display tag information.
1. Press and hold
the DISP button (2) until you
hear a beep to show “TAG” in the display.
2. The display changes as follows every time the DISP button (2) is pressed briefly:
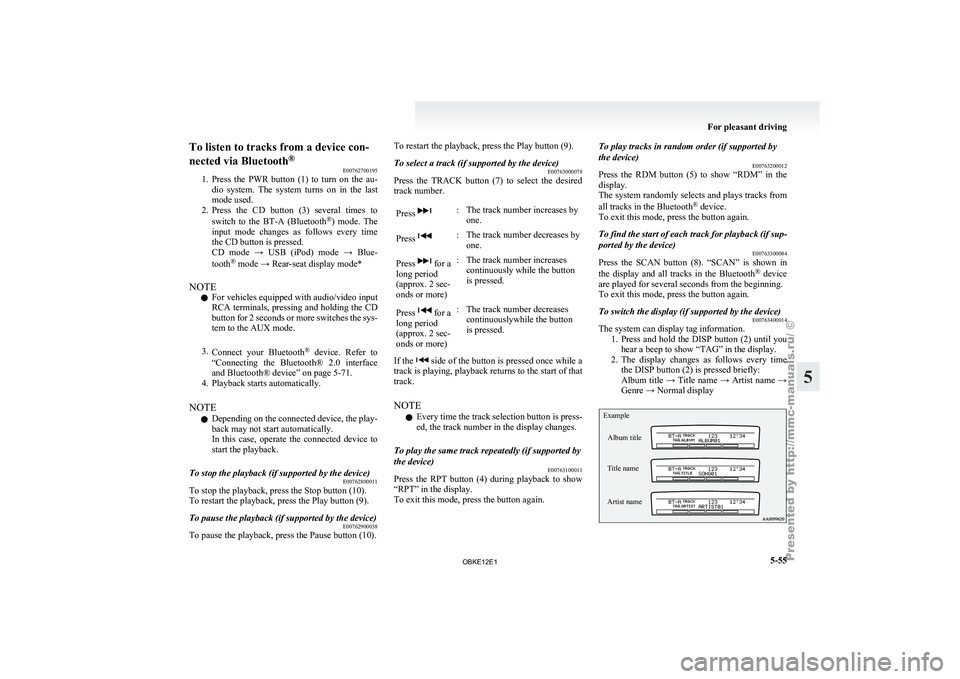
Album title → Title name → Artist name →
Genre → Normal display
Example
Album title
Title name
Artist name For pleasant driving
5-55 5
OBKE12E1
Page 239 of 377

NOTE
l Press
and hold
the DISP button (2) again un-
til you hear a beep, and the tag information
disappears.
l Up to 16 characters are shown in the display
at once. If the title is cut off in the middle,
press the PAGE button (6).
The next characters are displayed every time
this button is pressed.
l If no title is stored, “NO TITLE” is shown in
the display.
l Characters that cannot be displayed are sub-
stituted by “ ”. To use the external audio input
function* E00732200609
Auxiliary Video connector (RCA)
Auxiliary Audio connector (RCA) Auxiliary Audio connector (RCA)
A- Left audio input connector (white)B- Right audio input connector (red)
Auxiliary Video connector (RCA) A-
Left audio input connector (white)
B- Right audio input connector (red)
C- Video input connector (yellow)
You can listen to commercially available audio
equipment, such as a portable audio system, from
your vehicle’s speakers, by connecting the audio
equipment to the audio input connectors, which are
external input connectors (pin jacks).
NOTE l For information on using the Auxiliary Vid-
eo connector (RCA), refer to the separate own-
er’s manual for the rear-seat display or the
MITSUBISHI Multi Communication System. To activate the external audio input
mode
1. Use a commercially available audio cable to
connect the
audio equipment to the internal
audio input connector.
2. [Except for vehicles with a rear-seat display] Press the CD button (D) for more than 2 sec-
onds.
The display (E) will show “AUX” and then
the external audio input mode will be activa-
ted.
[Vehicles with a rear-seat display]
Press the CD button (D) for more than 2 sec-
onds.
The display (E) will show “REAR AUX”
and then the external audio input mode will
be activated.
When the power of the rear-seat display is
on, press the SOURCE button of the rear-
seat display to activate VIDEO mode. (For de-
tails, refer to the separate rear-seat display
owner’s manual.)
3. To deactivate the external audio input mode, press the AM/FM button (F) or the CD but-
ton (D) to switch to another mode. For pleasant driving
5-56
5
OBKE12E1
Page 240 of 377

CAUTION
l
Do not operate the connected audio equip-
ment while driving.
This could distract you and an accident
might occur.
NOTE l The
connected audio
equipment cannot be op-
erated with the vehicle’s audio system.
l Depending on the connected audio equip-
ment, it may produce noise from the speakers.
l Use the connected audio equipment’s own
power source, such as its battery.
Noise may be produced from the speakers if
the connected audio equipment is used while
charging it using the accessory socket of the
vehicle.
l Do not activate the external audio input
mode when no audio equipment is connected.
Otherwise, noise may be produced from the
speakers.
l Connect audio equipment when the external
audio input mode is deactivated or lower the
vehicle’s speaker volume before connecting it.
Noise may be produced from the speakers if
audio equipment is connected after the exter-
nal audio input mode is activated.
l For information on how to connect and oper-
ate the audio equipment, refer to the owner’s
manual for the equipment. To listen to a disc in the rear-seat
display (vehicles with rear-seat display) E00755100096
It is possible
to listen to the audio from the rear-
seat display using the vehicle’s speakers.
Press the CD button to select the rear-seat display
mode. The word “REAR” will appear at the top-
left of the display.
Each push of the CD button changes the mode to
the next one in the following sequence: CD mode
→ Rear-seat display mode → CD mode.
The following operation of the rear-seat display is
possible from the audio system. Source Operation
CD Track selection
MP3/WMA Folder/Track selection Video CD Track/Scene selection
DVD video Title/Chapter selection
DVD audio Group/Track selection To make your desired selection, use the TRACK
button or the FOLDER button on the audio system.Steering wheel remote control
switch* E00710000665
The remote control
switches are located on the left
side of the steering wheel.
These switches can be used when the ignition
switch is in the “ON” or “ACC” position. 1- Volume up button
2- Volume down button
3-
PWR (ON-OFF)/Mode change button
4-
Seek up/Track up/File up/Fast-forward button
5- Seek down/Track down/File down/Fast-re- verse button
NOTE l Do not push two or more of the steering
wheel remote control switches at the same
time.
To turn on the power
PWR (ON-OFF) button - 3
When the power is off, press this button to turn the
power on. To turn the power off, press this button
for 2 seconds or longer. For pleasant driving
5-57 5
OBKE12E1