2006 LAND ROVER FRELANDER 2 engine coolant
[x] Cancel search: engine coolantPage 949 of 3229
1
1
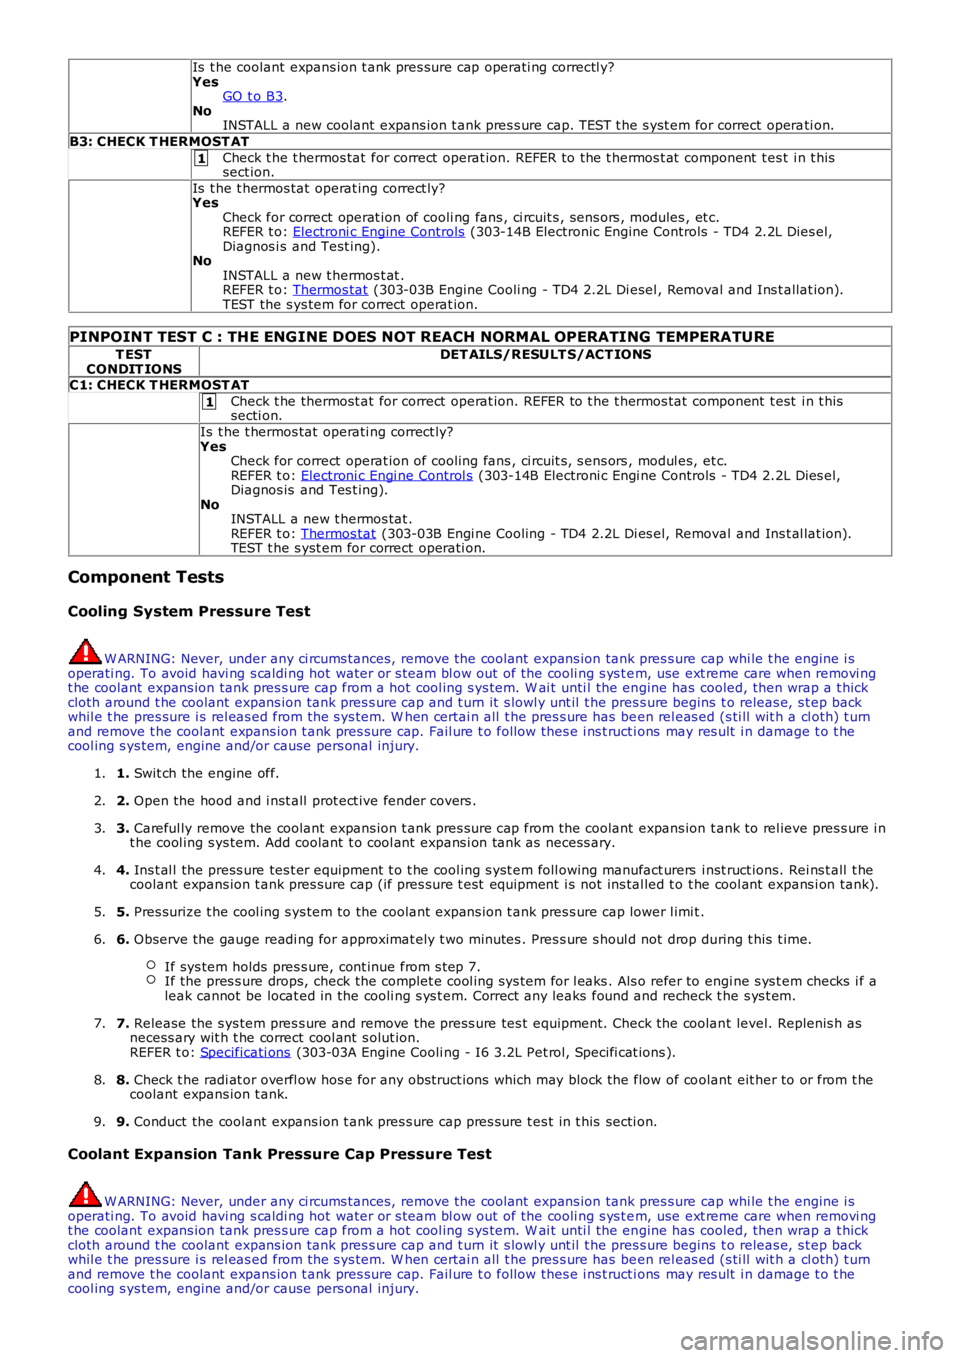
Is t he coolant expans ion t ank pres sure cap operati ng correctl y?
Yes GO t o B3 .
No INSTALL a new coolant expans ion t ank pres s ure cap. TEST t he s yst em for correct opera ti on.
B3: CHECK T HERMOST AT Check t he t hermos tat for correct operat ion. REFER to the t hermos t at component t es t i n t his
sect ion.
Is t he t hermos tat operat ing correct ly?
Yes
Check for correct operat ion of cooli ng fans , ci rcuit s , sens ors , modules , et c.
REFER t o: Electroni c Engine Controls (303-14B Electronic Engine Controls - TD4 2.2L Dies el,
Diagnos i s and Test ing).
No
INSTALL a new t hermos t at .
REFER t o: Thermos tat (303-03B Engine Cooli ng - TD4 2.2L Di esel , Removal and Ins t allat ion).
TEST the s ys tem for correct operat ion.
PINPOINT TEST C : THE ENG INE DOES NOT REACH NORMAL OPERATING TEMPERATURE T EST
CONDIT IONS DET AILS/RESULT S/ACT IONS
C1: CHECK T HERMOST AT Check t he thermost at for correct operat ion. REFER to t he t hermos tat component t est i n t his
secti on.
Is t he t hermos tat operati ng correct ly?
Yes Check for correct operat ion of cooling fans , ci rcuit s, s ens ors , modul es, et c.
REFER t o: Electroni c Engi ne Control s (303-14B Electroni c Engi ne Controls - TD4 2.2L Dies el,
Diagnos is and Tes t ing).
No INSTALL a new t hermos tat .
REFER t o: Thermos tat (303-03B Engi ne Cooling - TD4 2.2L Di es el, Removal and Ins t al lat ion).
TEST t he s yst em for correct operati on.
Component Tests
Cooling System Pressure Test W ARNING: Never, under any ci rcums tances, remove the coolant expans ion tank pres s ure
cap whi le t he engine i s
operati ng. To avoid havi ng s caldi ng hot water or s team bl ow out of the cooli ng s ys t e m, use ext reme care when removi ng
t he coolant expans ion tank pres s ure cap from a hot cool ing s ys tem. W ai t unti l the en gine has cooled, then wrap a t hick
cloth around t he coolant expans ion tank pres s ure cap and t urn it s lowl y unt il t he pr es s ure begins t o releas e, s t ep back
whil e t he pres sure i s rel eas ed from the s ys tem. W hen certai n all t he pres s ure has be en rel eas ed (s ti ll wit h a cl oth) t urn
and remove t he coolant expans ion t ank pres sure cap. Fail ure t o follow thes e i ns t ruct i ons may res ult i n damage t o t he
cool ing s ys tem, engine and/or cause pers onal injury.
1. Swit ch the engine off.
1.
2. Open the hood and i nst all prot ect ive fender covers .
2.
3. Careful ly remove the coolant expans ion t ank pres s ure cap from the coolant expans ion t ank to rel ieve pres s ure i n
t he cool ing s ys tem. Add coolant t o cool ant expans i on tank as necess ary.
3.
4. Ins t al l the press ure tes t er equipment t o t he cool ing s yst em foll owing manufact urers i nst ruct ions. Rei ns t all t he
coolant expans ion t ank pres sure cap (if pres s ure t est equipment i s not ins tal led t o t he cool ant expans i on tank).
4.
5. Pres surize t he cool ing s ys tem to the coolant expans ion t ank pres s ure cap lower l imi t .
5.
6. Observe the gauge readi ng for approximat ely t wo minutes . Pres s ure s houl d not drop du ring t his t ime.
If sys tem holds pres s ure, cont inue from s tep 7. If the pres s ure drops, check the complet e cool ing s ys tem for l eaks . Als o refer to en
gi ne s ys t em checks i f a
leak cannot be locat ed in the cooli ng s ys t em. Correct any leaks found and recheck t h e s ys t em.6.
7. Release the s ys tem pres s ure and remove the press ure tes t equipment. Check the coolan t level. Replenis h as
necess ary wit h t he correct cool ant s olut ion.
REFER t o: Specificati ons (303-03A Engine Cooli ng - I6 3.2L Pet rol, Specifi cat ions ).
7.
8. Check t he radi at or overfl ow hos e for any obs truct ions which may block the flow of co olant eit her to or from t he
coolant expans ion t ank.
8.
9. Conduct the coolant expans ion t ank pres s ure cap pres s ure t es t in t his secti on.
9.
Coolant Expansion Tank Pressure Cap Pressure Test W ARNING: Never, under any ci rcums tances, remove the coolant expans ion tank pres s ure
cap whi le t he engine i s
operati ng. To avoid havi ng s caldi ng hot water or s team bl ow out of the cooli ng s ys t e m, use ext reme care when removi ng
t he coolant expans ion tank pres s ure cap from a hot cool ing s ys tem. W ai t unti l the en gine has cooled, then wrap a t hick
cloth around t he coolant expans ion tank pres s ure cap and t urn it s lowl y unt il t he pr es s ure begins t o releas e, s t ep back
whil e t he pres sure i s rel eas ed from the s ys tem. W hen certai n all t he pres s ure has be en rel eas ed (s ti ll wit h a cl oth) t urn
and remove t he coolant expans ion t ank pres sure cap. Fail ure t o follow thes e i ns t ruct i ons may res ult i n damage t o t he
cool ing s ys tem, engine and/or cause pers onal injury.
Page 951 of 3229
Publi s hed: 11-May-2011
Engine Cooling - TD4 2.2L Diesel - Cooling System Draining, Filling and
Bleeding
General Procedures
Pos it ion t he vehi cl e on a lift .1.
Set the heat er controls t o maxi mum.2.
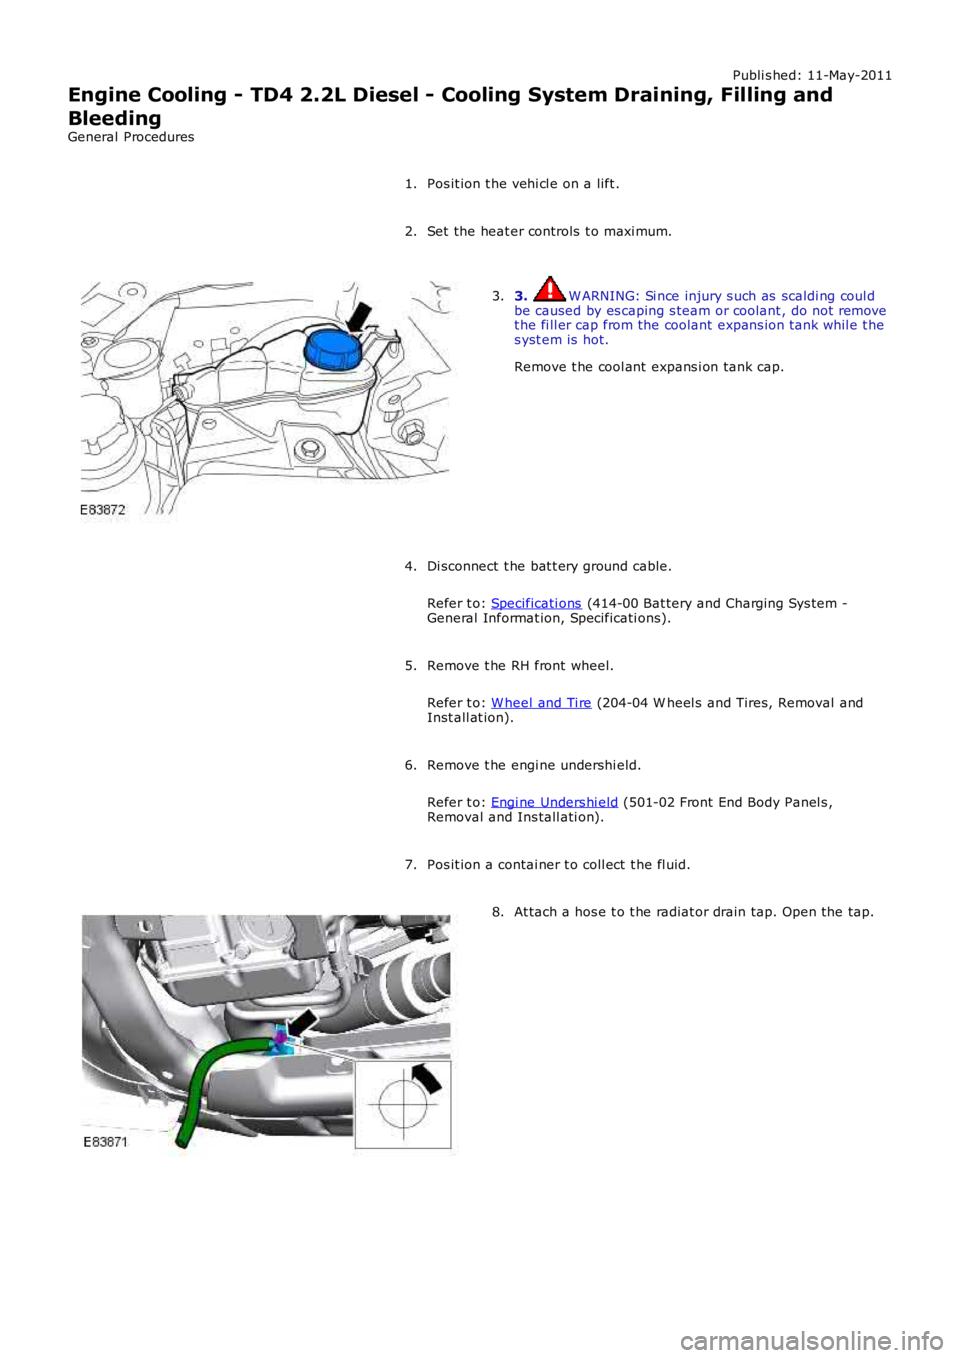
3. W ARNING: Si nce injury s uch as scaldi ng coul dbe caused by es caping s team or coolant , do not removet he fi ll er cap from the coolant expans ion tank whil e t hes yst em is hot.
Remove t he cool ant expans i on tank cap.
3.
Di sconnect t he bat t ery ground cable.
Refer t o: Specificati ons (414-00 Bat tery and Charging Sys tem -General Informat ion, Specificati ons).
4.
Remove t he RH front wheel.
Refer t o: W heel and Ti re (204-04 W heel s and Tires, Removal andInst all at ion).
5.
Remove t he engi ne undershi eld.
Refer t o: Engi ne Unders hi eld (501-02 Front End Body Panel s ,Removal and Ins tall ati on).
6.
Pos it ion a contai ner t o coll ect t he fl uid.7.
At tach a hos e t o t he radiat or drain tap. Open the tap.8.
Page 952 of 3229
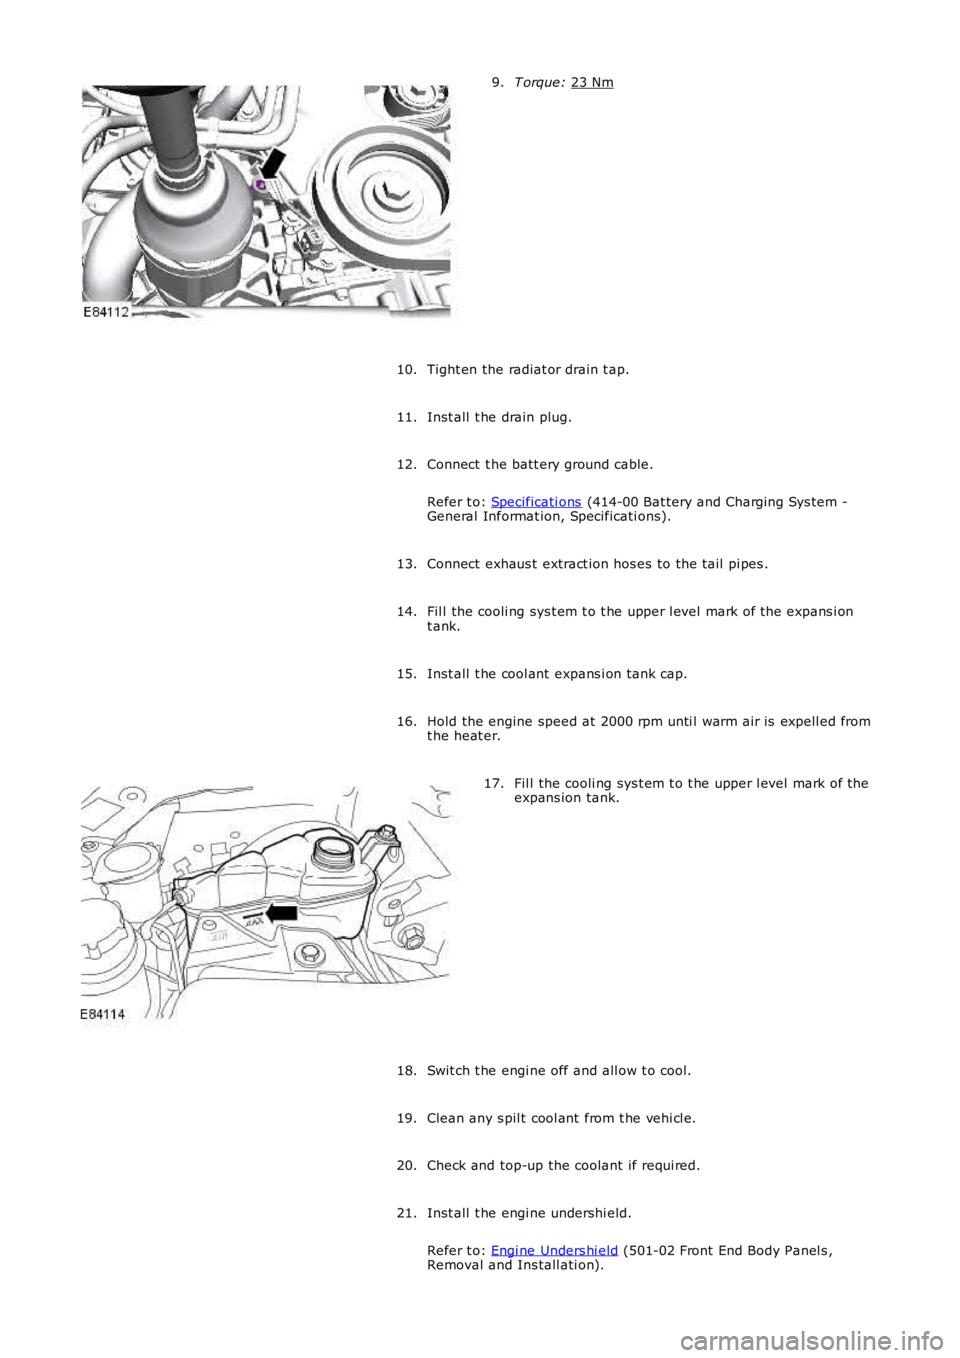
T orque:
23 Nm 9.
Tight en the radiat or drain t ap.
10.
Inst all t he drain plug.
11.
Connect t he batt ery ground cable.
Refer t o: Specificati ons (414-00 Bat tery and Charging Sys tem -
General Informat ion, Specificati ons).
12.
Connect exhaus t extract ion hos es to the tail pi pes .
13.
Fil l the cooli ng sys t em t o t he upper l evel mark of the expans i on
t ank.
14.
Inst all t he cool ant expans i on tank cap.
15.
Hold the engine speed at 2000 rpm unti l warm air is expell ed from
t he heat er.
16. Fil l the cooli ng sys t em t o t he upper l evel mark of the
expans ion tank.
17.
Swit ch t he engi ne off and all ow t o cool.
18.
Clean any s pil t cool ant from t he vehi cl e.
19.
Check and top-up the coolant if requi red.
20.
Inst all t he engi ne undershi eld.
Refer t o: Engi ne Unders hi eld (501-02 Front End Body Panel s ,
Removal and Ins tall ati on).
21.
Page 954 of 3229
Publi s hed: 11-May-2011
Engine Cooling - TD4 2.2L Diesel - Cooling System Draining and Vacuum
Filling
General Procedures
W ARNING: To avoi d havi ng s cal di ng hot cool ant or s team blowing out of t he cool ing s ys tem, us e extreme care whenremovi ng the coolant pres s ure cap from a hot cool ing s yst em. W ai t unt il t he engine has cool ed, then wrap a t hick clotharound t he cool ant press ure cap and turn it s lowl y unti l the press ure begi ns to releas e. St ep back whil e the pres sure isrel eas ed from the sys tem. W hen cert ai n all t he pres s ure has been rel eased (s ti ll wi th a cloth) t urn and remove t he cool antpres s ure cap from the coolant expans ion t ank. Fail ure t o foll ow t hes e i nst ructi ons may res ult in pers onal injury.
• CAUTIO NS:
The engine cooling sys tem mus t be mai nt ained wi th the correct concent rat ion and t ype of ant i-freeze sol ut ion toprevent corros ion and fros t damage. Fail ure t o foll ow t hi s ins t ructi on may res ult in damage t o t he vehi cl e.
Engine coolant wil l damage the paint finis hed s urfaces . If s pil t, i mmediat ely remove the coolant and clean t he areawit h wat er.
Set the heat er controls t o maxi mum HO T.1.
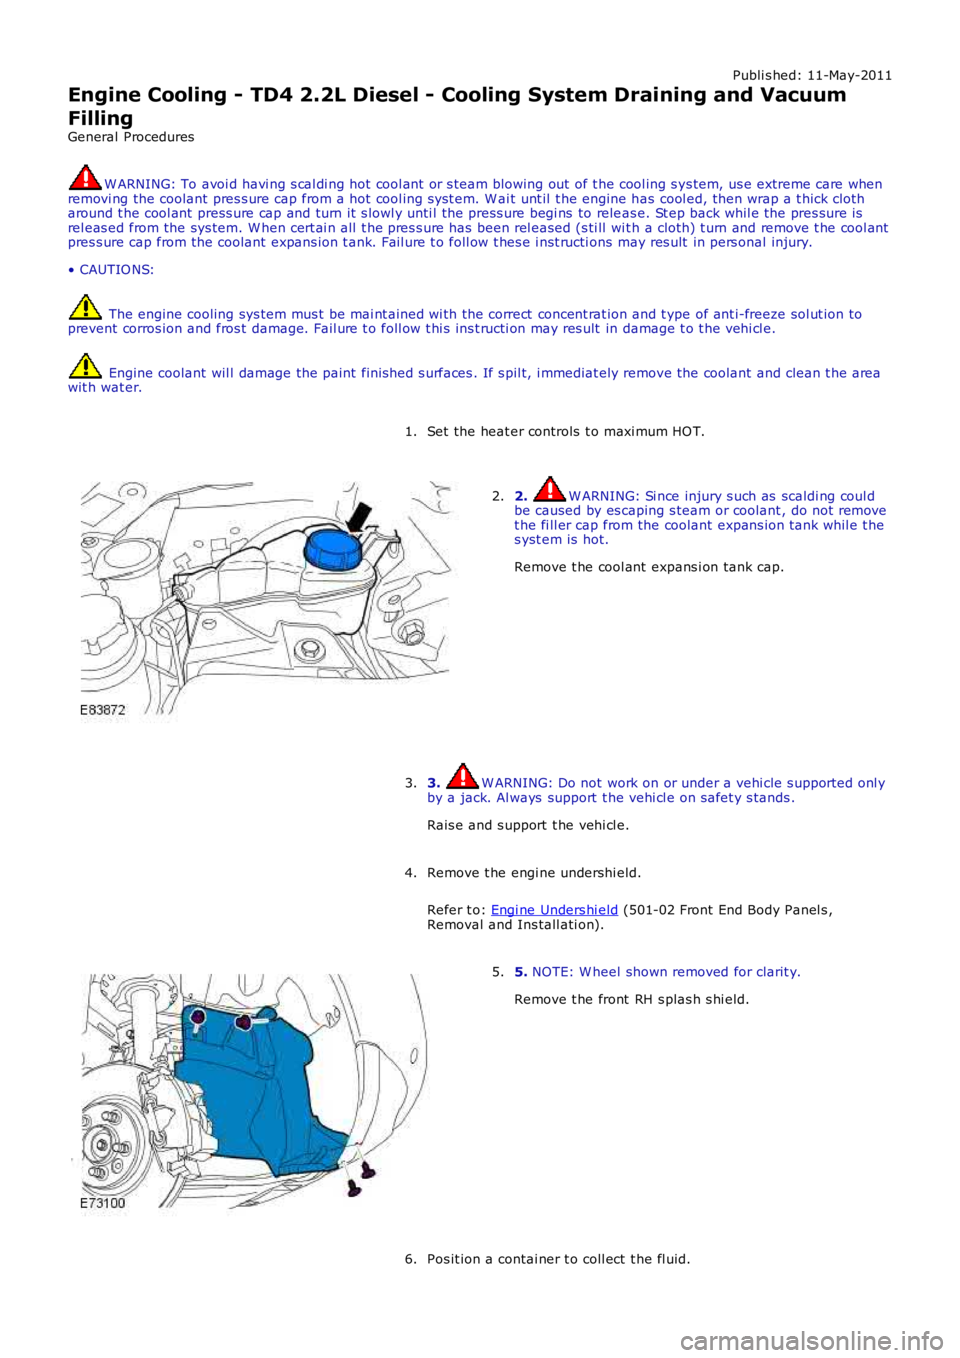
2. W ARNING: Si nce injury s uch as scaldi ng coul dbe caused by es caping s team or coolant , do not removet he fi ll er cap from the coolant expans ion tank whil e t hes yst em is hot.
Remove t he cool ant expans i on tank cap.
2.
3. W ARNING: Do not work on or under a vehi cle s upported onl yby a jack. Al ways support t he vehi cl e on s afet y s tands .
Rais e and s upport t he vehi cl e.
3.
Remove t he engi ne undershi eld.
Refer t o: Engi ne Unders hi eld (501-02 Front End Body Panel s ,Removal and Ins tall ati on).
4.
5. NOTE: W heel shown removed for clarit y.
Remove t he front RH s plas h s hi eld.
5.
Pos it ion a contai ner t o coll ect t he fl uid.6.
Page 958 of 3229
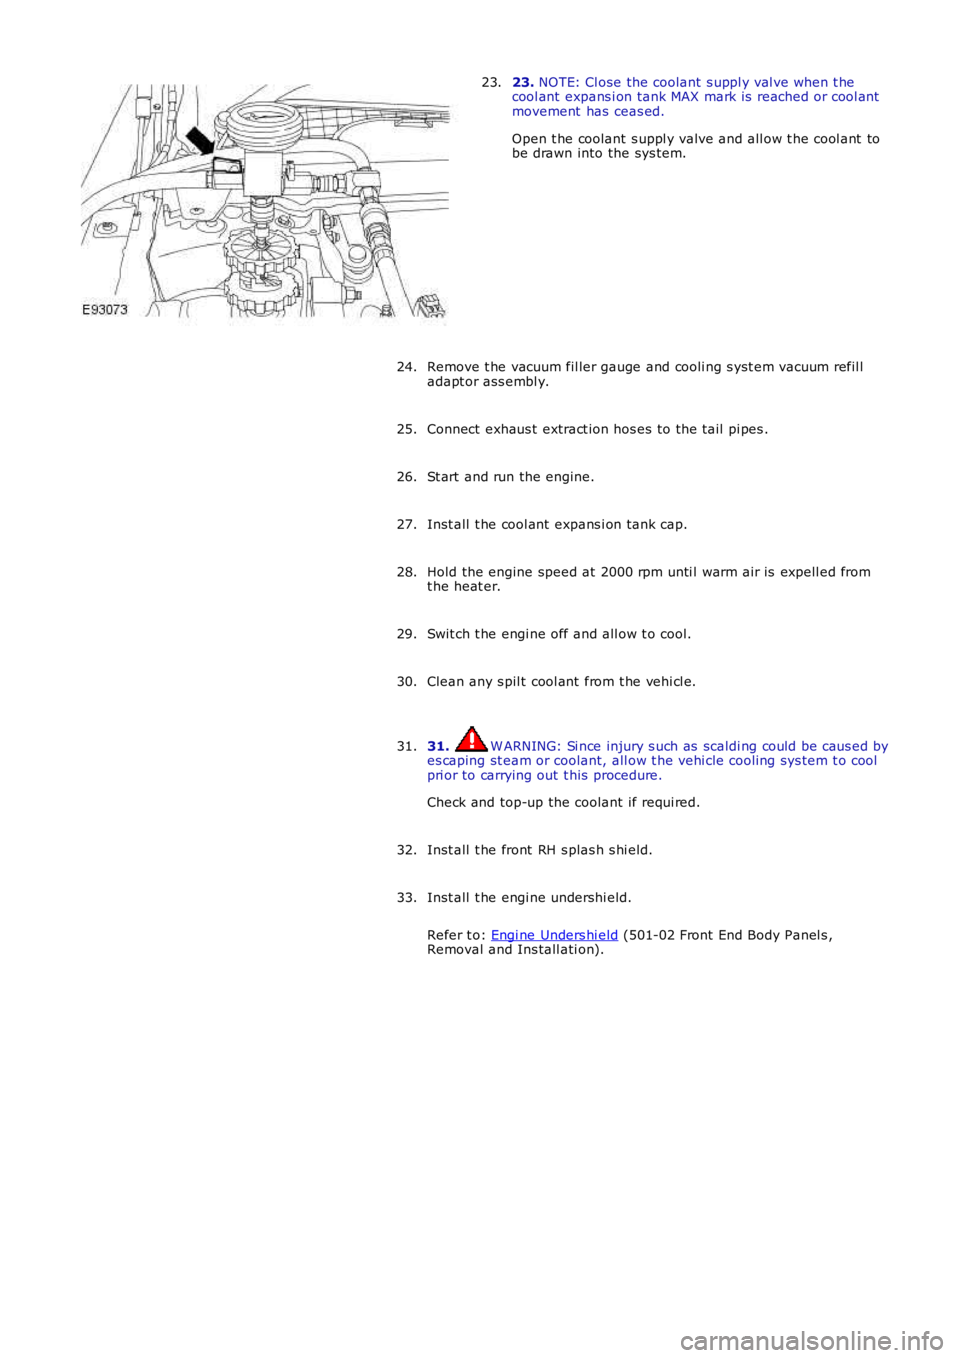
23. NOTE: Cl ose the coolant s uppl y val ve when t hecool ant expans i on tank MAX mark is reached or cool antmovement has ceas ed.
Open t he coolant s uppl y valve and all ow t he cool ant tobe drawn into the sys tem.
23.
Remove t he vacuum fil ler gauge and cooli ng s yst em vacuum refil ladapt or ass embl y.24.
Connect exhaus t extract ion hos es to the tail pi pes .25.
St art and run the engine.26.
Inst all t he cool ant expans i on tank cap.27.
Hold the engine speed at 2000 rpm unti l warm air is expell ed fromt he heat er.28.
Swit ch t he engi ne off and all ow t o cool.29.
Clean any s pil t cool ant from t he vehi cl e.30.
31. W ARNING: Si nce injury s uch as scaldi ng could be caus ed byes caping st eam or coolant, all ow t he vehi cle cooling sys tem t o coolpri or to carrying out t his procedure.
Check and top-up the coolant if requi red.
31.
Inst all t he front RH s plas h s hi eld.32.
Inst all t he engi ne undershi eld.
Refer t o: Engi ne Unders hi eld (501-02 Front End Body Panel s ,Removal and Ins tall ati on).
33.
Page 964 of 3229
Publi s hed: 11-May-2011
Engine Cooling - TD4 2.2L Diesel - Coolant Pump
Removal and Inst all ati on
Removal CAUTION: The crankshaft or cams haft s mus t not be rot ated whi le t he t imi ng belt i s re
moved.
• NOTE: Removal s t eps in t his procedure may cont ain i nst all ati on det ail s.
Remove t he cover and dis connect the bat tery ground cabl e.
Refer t o: Specificati ons (414-00 Bat tery and Charging Sys tem -
General Informat ion, Specificati ons).
1.
2. W ARNING: Make sure t o s upport the vehicle wit h axle
s tands .
Rais e and s upport t he vehi cl e.
2.
Drai n t he cool ant .
Refer t o: Cool ing Sys tem Drai ni ng, Fi lli ng and Bleeding (303-03B
Engine Cooli ng - TD4 2.2L Di esel , General Procedures ).
3.
Remove and dis card t he t imi ng belt .
Refer t o: Timi ng Belt (303-01B Engi ne - TD4 2.2L Dies el , Removal
and Inst all at ion).
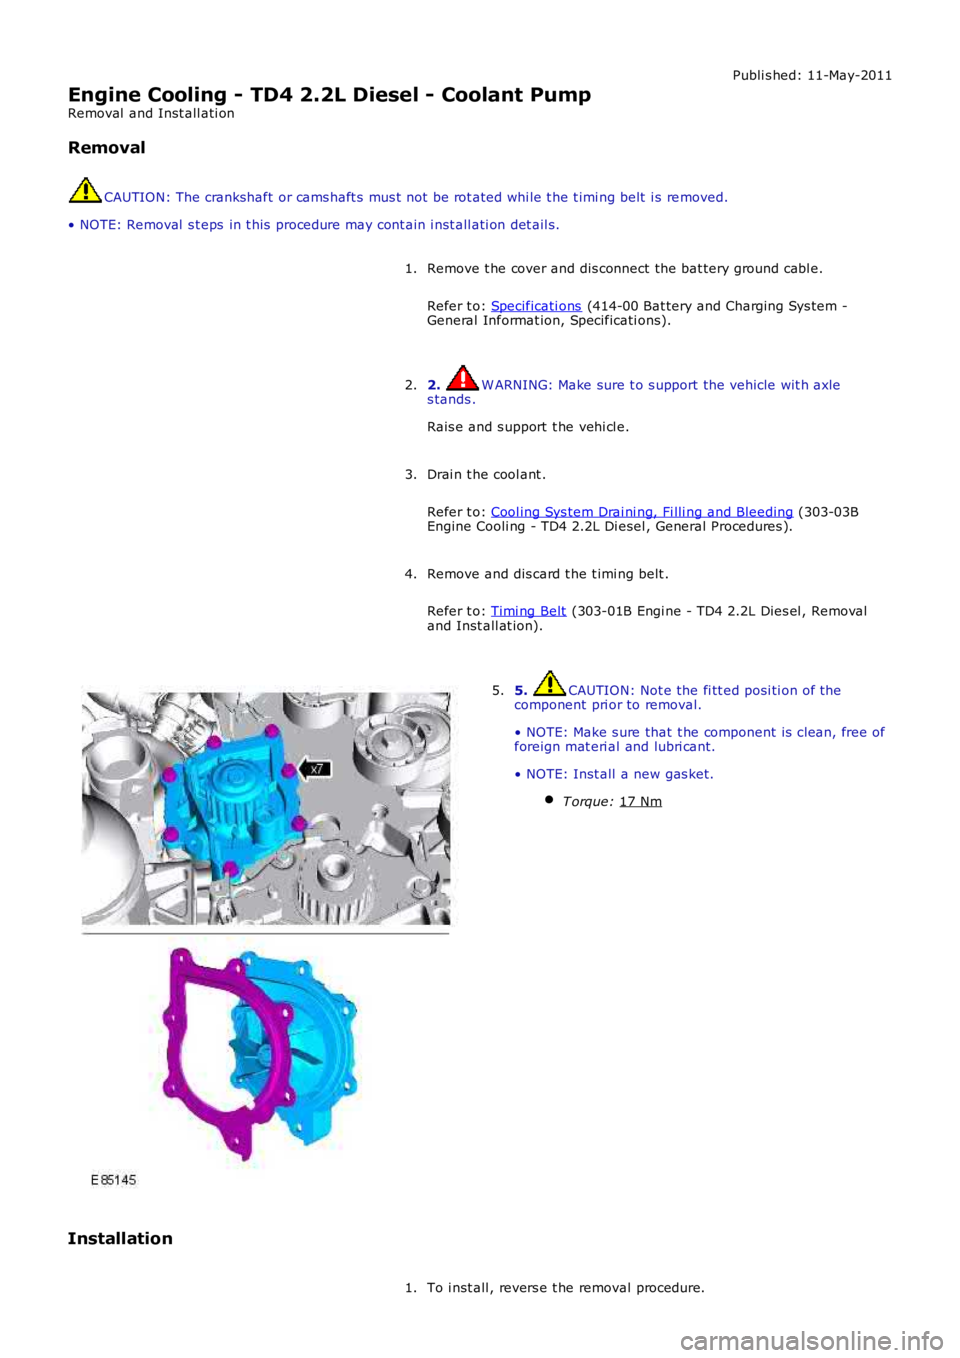
4. 5. CAUTION: Not e the fi tt ed posi ti on of the
component pri or to removal.
• NOTE: Make s ure that t he component is clean, free of
foreign mat eri al and lubri cant.
• NOTE: Inst all a new gas ket. T orque: 17 Nm 5.
Installation To i nst all , revers e t he removal procedure.
1.
Page 972 of 3229
Publi s hed: 11-May-2011
Engine Cooling - TD4 2.2L Diesel - Coolant Expansion Tank
Removal and Inst all ati on
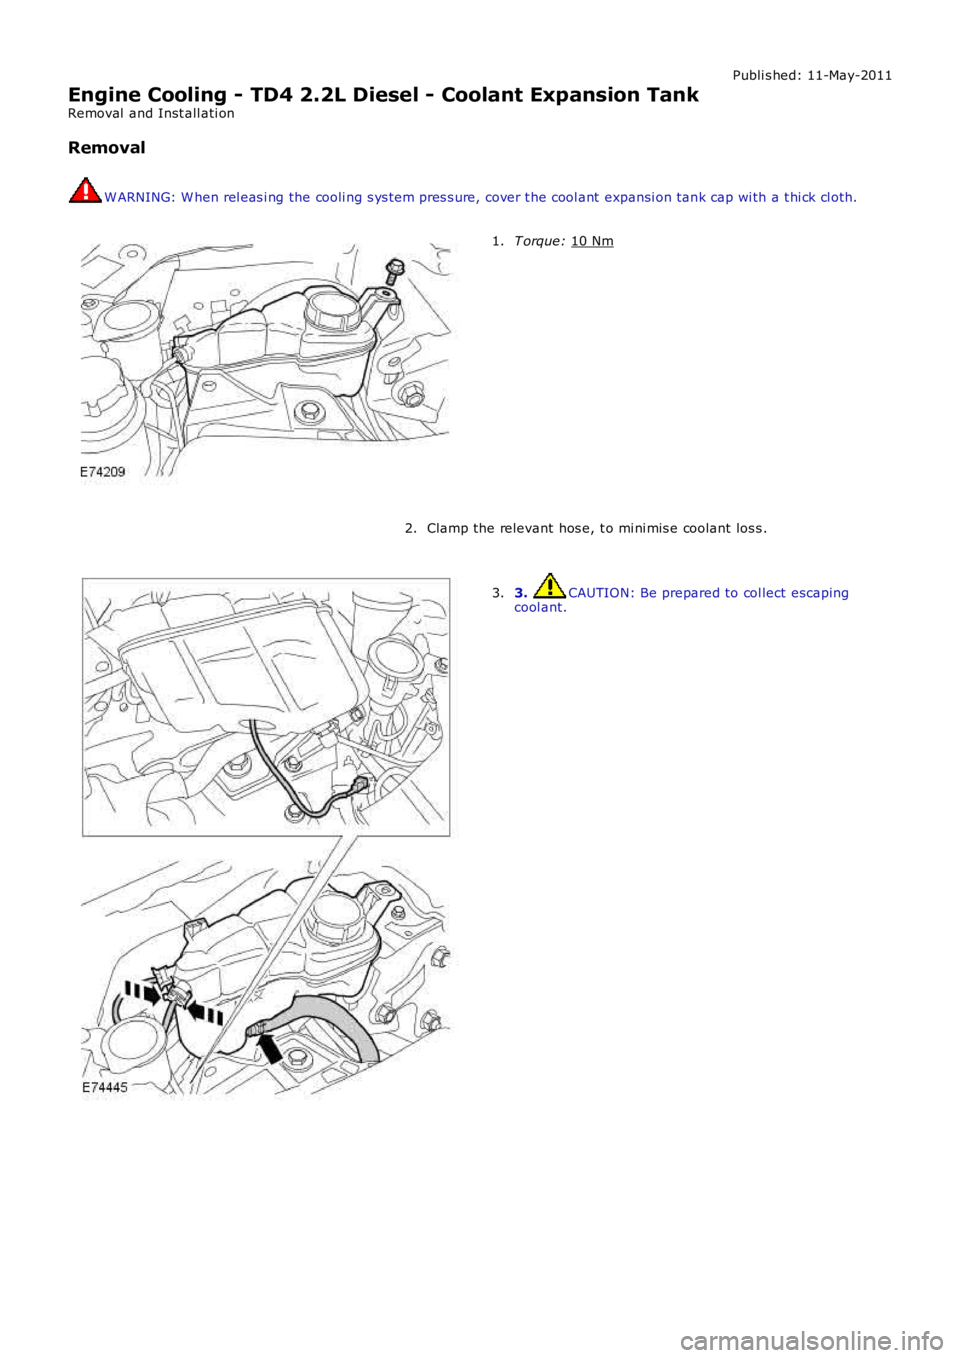
Removal W ARNING: W hen rel eas i ng the cooli ng s ys t em pres s ure, cover t he cool ant expansi on tan
k cap wi th a t hi ck cl oth.T orque:
10 Nm 1.
Clamp the relevant hos e, t o mi ni mis e coolant los s .
2. 3. CAUTION: Be prepared to col lect escaping
cool ant.
3.
Page 974 of 3229
Publi s hed: 11-May-2011
Engine Cooling - TD4 2.2L Diesel - Engine Coolant Level Switch
Removal and Inst all ati on
Removal
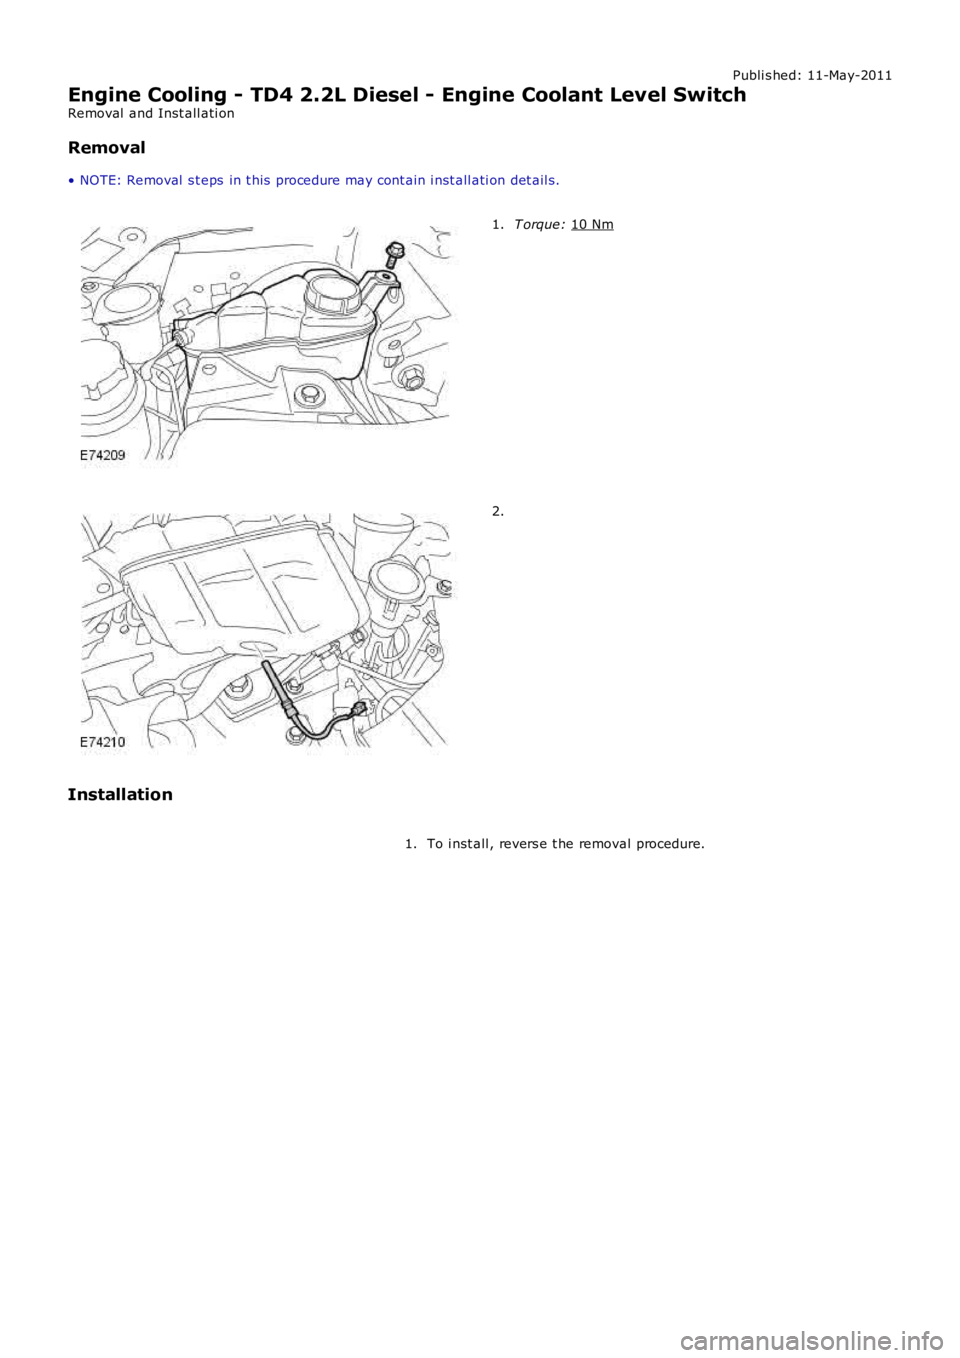
• NOTE: Removal s t eps in t his procedure may cont ain i nst all ati on det ail s. T orque:
10 Nm 1.
2.
Installation To i nst all , revers e t he removal procedure.
1.