2006 LAND ROVER FRELANDER 2 blower
[x] Cancel search: blowerPage 2522 of 3229
Bury St EdmundsSuffol kIP32 7DXTelephone (01284) 760791www.sat a.com
Henkel Loct it e Adhesi ves Li mi ted
Technologies Hous eW ood Lane EndHemel Hempst eadHert fordshi reHP2 4RQTelephone (01442) 278000www.locti te.co.uk
Teros on
Henkel LtdApollo Court2 Bi shops Square Bus ines s ParkHatfiel dHert fordshi reAL10 9EYTelephone (01707) 635000www.henkel.co.uk
Underbody sealer
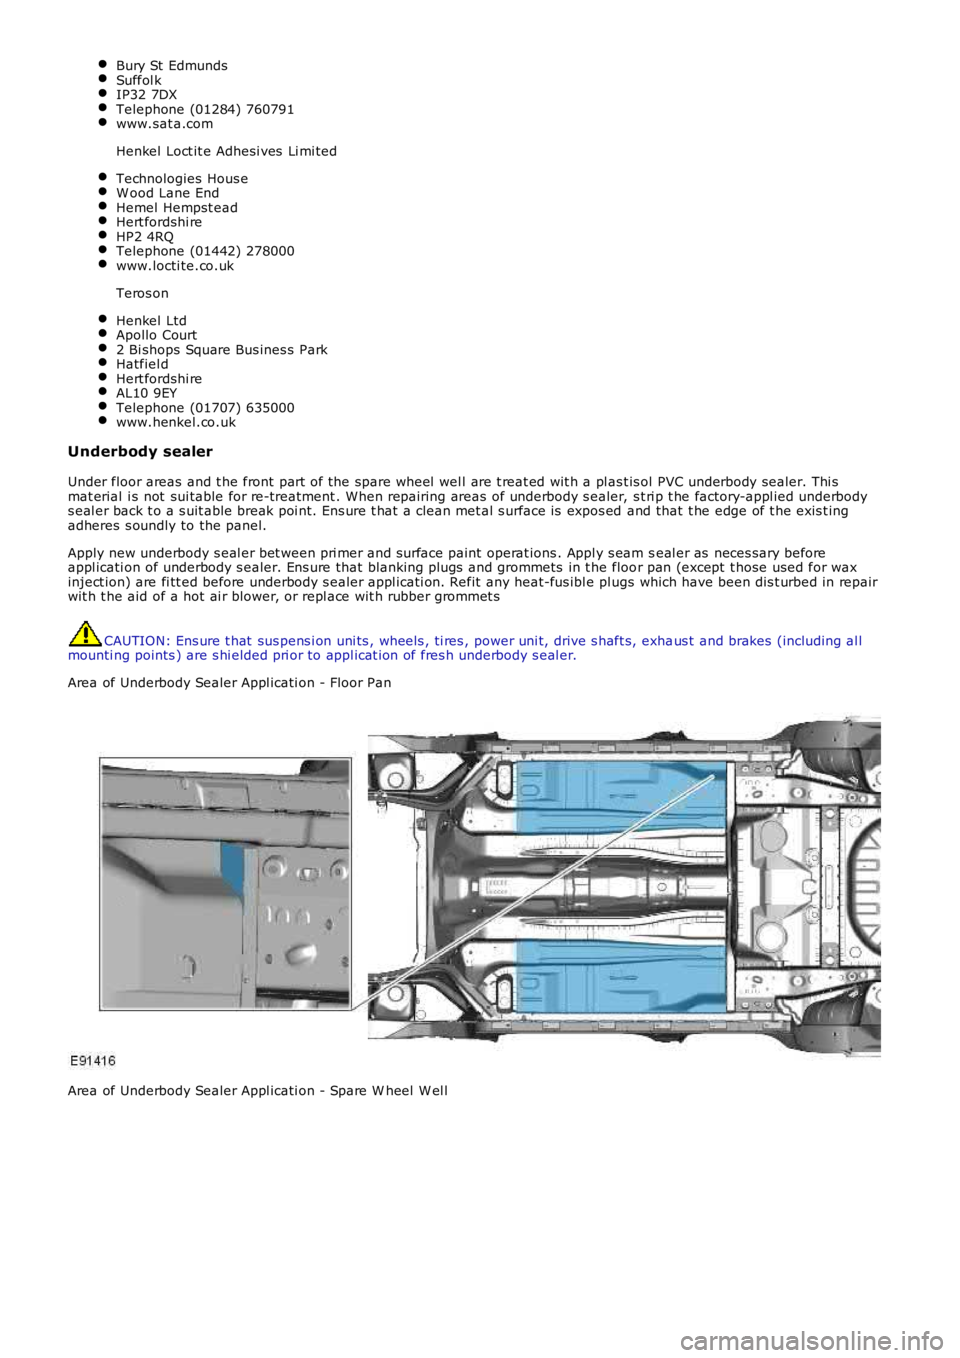
Under floor areas and t he front part of the spare wheel wel l are t reat ed wit h a pl ast is ol PVC underbody sealer. Thi smat erial i s not sui table for re-treatment . W hen repairing areas of underbody s ealer, s t ri p t he factory-appl ied underbodys eal er back t o a s uit able break poi nt. Ens ure t hat a clean met al s urface is expos ed and that t he edge of t he exis t ingadheres s oundly to the panel.
Apply new underbody s eal er bet ween pri mer and s urface paint operat ions . Appl y s eam seal er as neces sary beforeappl icati on of underbody s ealer. Ens ure that blanking plugs and grommets in t he floor pan (except t hose used for waxinject ion) are fi tt ed before underbody s ealer appl icati on. Refit any heat-fus ibl e plugs which have been dis t urbed in repairwit h t he aid of a hot ai r blower, or repl ace wit h rubber grommet s
CAUTION: Ens ure t hat sus pens i on uni ts , wheels , ti res , power uni t, drive s haft s, exhaus t and brakes (including al lmounti ng points ) are s hi elded pri or to appl icat ion of fres h underbody s eal er.
Area of Underbody Sealer Appl icati on - Floor Pan
Area of Underbody Sealer Appl icati on - Spare W heel W el l
Page 2734 of 3229
14
Quick start
L
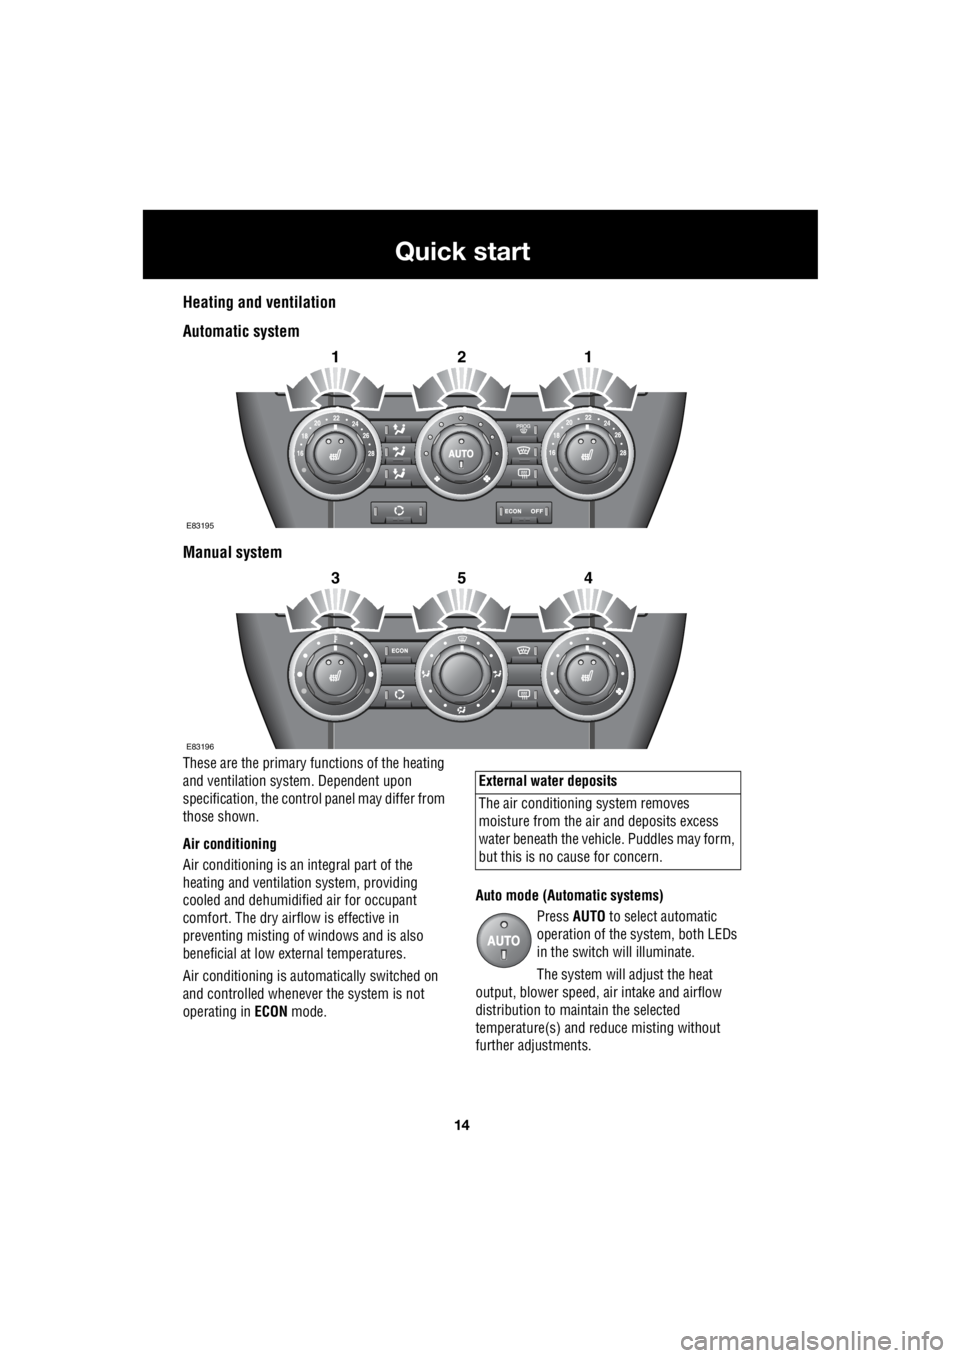
Heating and ventilation
Automatic system
Manual system
These are the primary functions of the heating
and ventilation syst em. Dependent upon
specification, the contro l panel may differ from
those shown.
Air conditioning
Air conditioning is an in tegral part of the
heating and ventilati on system, providing
cooled and dehumidifie d air for occupant
comfort. The dry airflow is effective in
preventing misting of windows and is also
beneficial at low external temperatures.
Air conditioning is automatically switched on
and controlled whenever the system is not
operating in ECON mode. Auto mode (Automatic systems)
Press AUTO to select automatic
operation of the system, both LEDs
in the switch will illuminate.
The system will adjust the heat
output, blower speed, air intake and airflow
distribution to maintain the selected
temperature(s) and re duce misting without
further adjustments.
2121
E83195
2354
E83196
External water deposits
The air conditioning system removes
moisture from the ai r and deposits excess
water beneath the vehicl e. Puddles may form,
but this is no cause for concern.
Page 2735 of 3229
15
Quick start
R
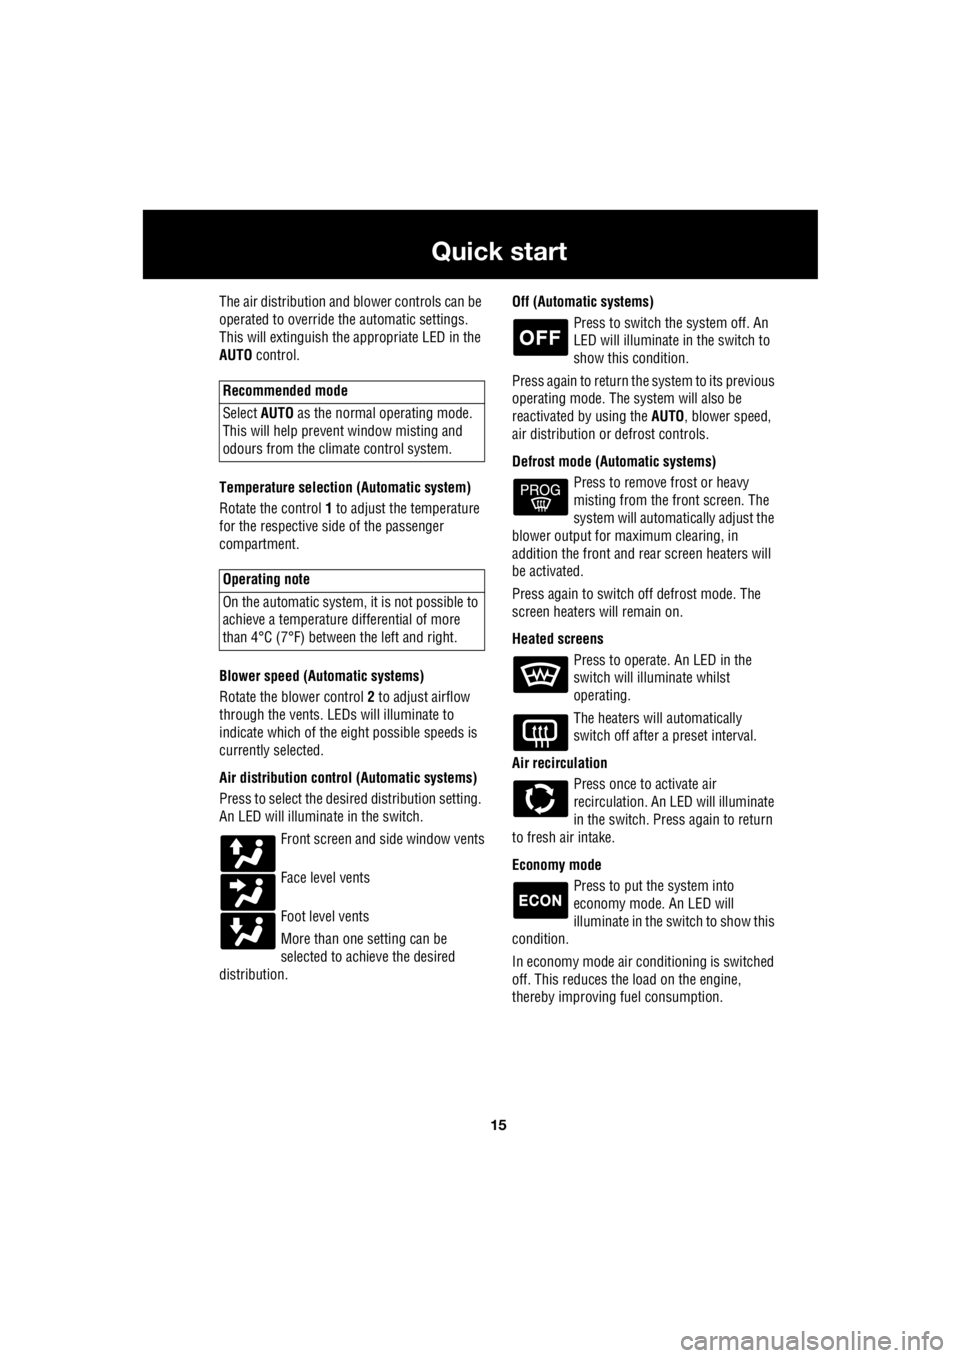
The air distribution and blower controls can be
operated to override the automatic settings.
This will extinguish the appropriate LED in the
AUTO control.
Temperature selection (Automatic system)
Rotate the control 1 to adjust the temperature
for the respective side of the passenger
compartment.
Blower speed (Automatic systems)
Rotate the blower control 2 to adjust airflow
through the vents. LEDs will illuminate to
indicate which of the ei ght possible speeds is
currently selected.
Air distribution contro l (Automatic systems)
Press to select the desi red distribution setting.
An LED will illumina te in the switch.
Front screen and side window vents
Face level vents
Foot level vents
More than one setting can be
selected to achieve the desired
distribution. Off (Automat
ic systems)
Press to switch the system off. An
LED will illuminate in the switch to
show this condition.
Press again to return the system to its previous
operating mode. The system will also be
reactivated by using the AUTO, blower speed,
air distribution or defrost controls.
Defrost mode (Automatic systems) Press to remove frost or heavy
misting from the front screen. The
system will automatically adjust the
blower output for maximum clearing, in
addition the front and rear screen heaters will
be activated.
Press again to switch off defrost mode. The
screen heaters will remain on.
Heated screens Press to operate. An LED in the
switch will illuminate whilst
operating.
The heaters will automatically
switch off after a preset interval.
Air recirculation Press once to activate air
recirculation. An LED will illuminate
in the switch. Press again to return
to fresh air intake.
Economy mode Press to put the system into
economy mode. An LED will
illuminate in the switch to show this
condition.
In economy mode air conditioning is switched
off. This reduces the load on the engine,
thereby improving fuel consumption.
Recommended mode
Select AUTO as the normal operating mode.
This will help prevent window misting and
odours from the climate control system.
Operating note
On the automatic system, it is not possible to
achieve a temperature differential of more
than 4°C (7°F) betwee n the left and right.
Page 2736 of 3229
16
Quick start
L
Seat heaters Press the relevant button to operate
the required seat heater at high
level. Both LEDs will illuminate.
Press a second time to heat the seat
at a lower level. One LED will extinguish.
Press a third time to switch off.
Temperature selection (Manual system)
Rotate the control 3 to adjust the air
temperature entering the passenger
compartment.
Blower speed (Manual system)
Rotate the blower control 4 to adjust airflow
through the vents. As the control is adjusted,
LEDs will illuminate to indicate which of the
eight possible speeds is currently selected.
Air distribution control (Manual system)
Rotate the control 5 to achieve the desired air
distribution setting.
Front screen and side window vents
Face level vents
Foot level vents
Foot and face level vents
Note: It is possible to distribute air
to two areas simultaneously. For
example; to distribute air to both the
windscreen and the foot vents set the rotary
control ( 5) to a point between the windscreen
and foot vent symbols.
Page 2822 of 3229
Climate control
102
L
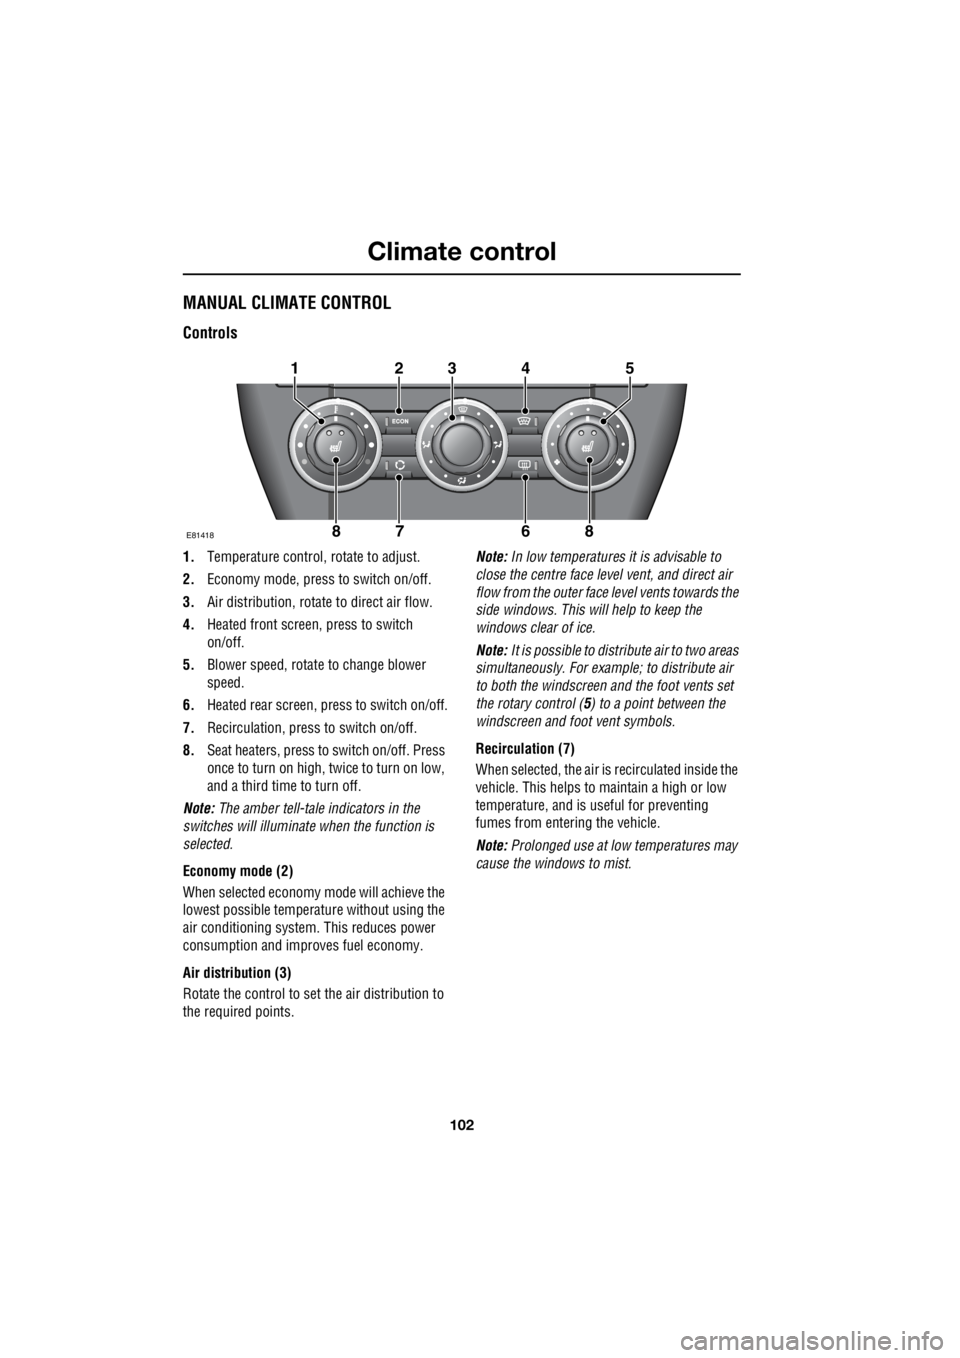
MANUAL CLIMATE CONTROL
Controls
1. Temperature control, rotate to adjust.
2. Economy mode, press to switch on/off.
3. Air distribution, rotate to direct air flow.
4. Heated front screen, press to switch
on/off.
5. Blower speed, rotate to change blower
speed.
6. Heated rear screen, press to switch on/off.
7. Recirculation, pres s to switch on/off.
8. Seat heaters, press to switch on/off. Press
once to turn on high, twice to turn on low,
and a third time to turn off.
Note: The amber tell-tale indicators in the
switches will illuminate when the function is
selected.
Economy mode (2)
When selected economy mo de will achieve the
lowest possible temperature without using the
air conditioning system . This reduces power
consumption and impr oves fuel economy.
Air distribution (3)
Rotate the control to set the air distribution to
the required points. Note:
In low temperatures it is advisable to
close the centre face le vel vent, and direct air
flow from the outer face level vents towards the
side windows. This will help to keep the
windows clear of ice.
Note: It is possible to distribute air to two areas
simultaneously. For example; to distribute air
to both the windscreen a nd the foot vents set
the rotary control ( 5) to a point between the
windscreen and foot vent symbols.
Recirculation (7)
When selected, the air is recirculated inside the
vehicle. This helps to maintain a high or low
temperature, and is useful for preventing
fumes from entering the vehicle.
Note: Prolonged use at low temperatures may
cause the windows to mist.
E81418
12345
8678
Page 2823 of 3229
103
Climate control
R
AUTOMATIC CLIMATE CONTROL
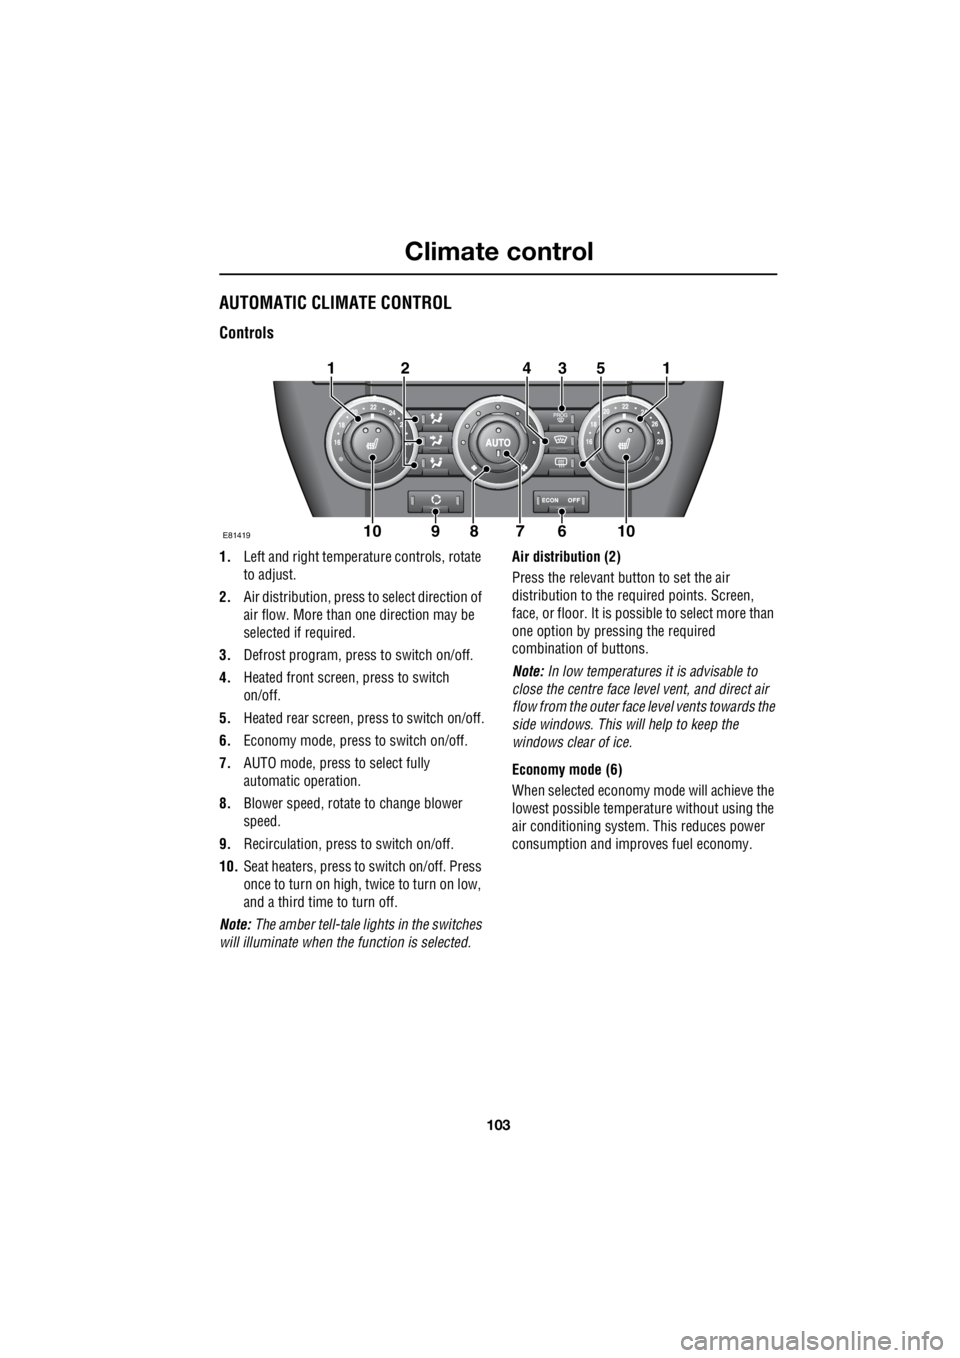
Controls
1. Left and right temperat ure controls, rotate
to adjust.
2. Air distribution, press to select direction of
air flow. More than one direction may be
selected if required.
3. Defrost program, press to switch on/off.
4. Heated front screen, press to switch
on/off.
5. Heated rear screen, press to switch on/off.
6. Economy mode, press to switch on/off.
7. AUTO mode, press to select fully
automatic operation.
8. Blower speed, rotate to change blower
speed.
9. Recirculation, press to switch on/off.
10. Seat heaters, press to switch on/off. Press
once to turn on high, twice to turn on low,
and a third time to turn off.
Note: The amber tell-tale lights in the switches
will illuminate when the function is selected. Air distribution (2)
Press the relevant button to set the air
distribution to the required points. Screen,
face, or floor. It is possible to select more than
one option by pressing the required
combination of buttons.
Note: In low temperatures it is advisable to
close the centre face leve l vent, and direct air
flow from the outer face level vents towards the
side windows. This will help to keep the
windows clear of ice.
Economy mode (6)
When selected economy mode will achieve the
lowest possible temperat ure without using the
air conditioning system . This reduces power
consumption and impr oves fuel economy.
E81419
131
6910
254
1078
Page 2824 of 3229
Climate control
104
L
Auto mode (7)
When the Auto function is selected, you have
the opportunity to select a fully automatic
operation, or manually adjust the fan speed and
the direction of air flow. All other adjustments
which are necessary to maintain the
temperature that you have selected are made
automatically by the climate control system.
There are two tell-tale indicators on the Auto
button. The round indicator represents the
blower control, and th e rectangular indicator
the air distribution control. In fully automatic
mode both indicators illuminate, the round
indicator will extinguish if the blower speed is
changed manually, and the rectangular
indicator extinguishes if the air distribution is
changed manually.
To resume fully automatic operation at any
time, press the Auto button.
Recirculation (9)
When selected, the air is recirculated inside the
vehicle. This helps to ma intain a high or low
temperature, and is useful for preventing
fumes from entering the vehicle.
A single brief press will se lect recirculation for
four minutes. The system will then revert to
fresh air intake to prevent misting.
Pressing and holding the button will select
recirculation until it is switched off. This state
is indicated by three flashes of the tell-tale lamp
in the switch.
Note: Prolonged use at low temperatures may
cause the windows to mist.HEATED WINDOWS AND MIRRORS
The heated windscreen is switched on by
briefly pressing the switch (4).
Note: The operation of the heated mirrors is
fully automatic, and requires no driver
intervention.
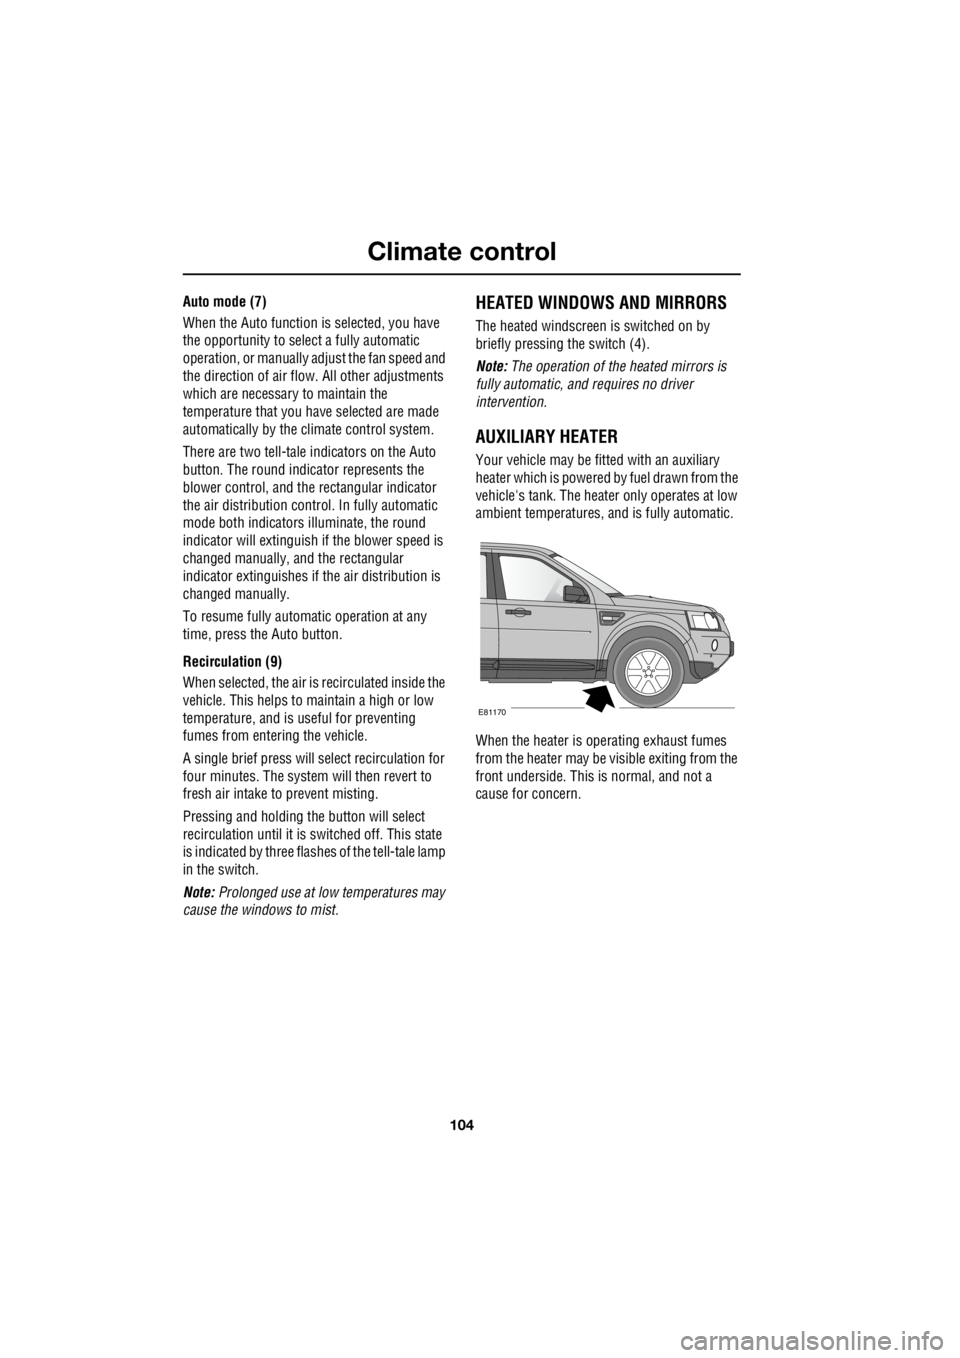
AUXILIARY HEATER
Your vehicle may be fitted with an auxiliary
heater which is powered by fuel drawn from the
vehicle's tank. The heater only operates at low
ambient temperatures, and is fully automatic.
When the heater is operating exhaust fumes
from the heater may be visible exiting from the
front underside. This is normal, and not a
cause for concern.
E81170
Page 2918 of 3229

Fuses
198
L
F24 30 pink Headlamp washers
F25 30 pink ABS
F26 40 green ABS
F27 - - -
F28 40 green Heater blower
F29 - - -
F30 - - -
F31 15 blue Horns
F32 20 yellow Diesel auxiliary heater
F33 5 tan Relays
F34 40 green Heated windscreen(LH)
F35 40 green Heated windscreen (RH)
F36 - - -
F37 10 red Heated washer jets
F38 10 red AFS (RH lamp motors)
F39 10 red Climate control
F40 - - -
F41 20 yellow Passenger compartment fuse box supply
F42 15 blue Engine management
F43 5 tan Headlamp levelling control - AFS
F44 10 red AFS (LH lamp motors)
F45 15 blue Cigar lighter
Fuse number Rating (Amps) Fuse colour Circuits protected