Page 838 of 4500

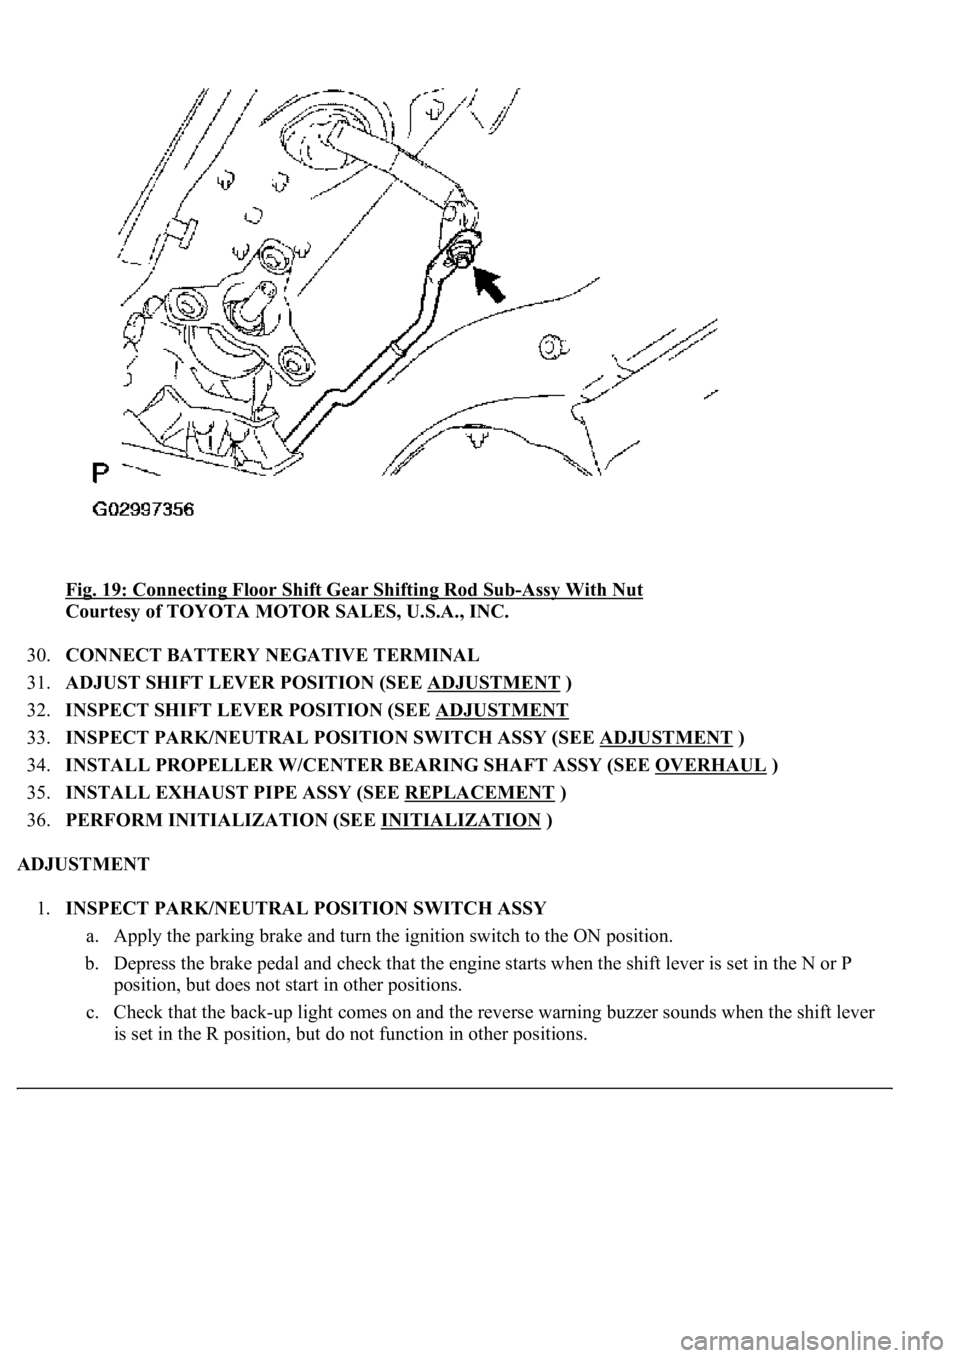
<0029004c004a001100030014001c001d00030026005200510051004800460057004c0051004a00030029004f00520052005500030036004b004c004900570003002a00480044005500030036004b004c00490057004c0051004a0003003500520047000300
3600580045[-Assy With Nut
Courtesy of TOYOTA MOTOR SALES, U.S.A., INC.
30.CONNECT BATTERY NEGATIVE TERMINAL
31.ADJUST SHIFT LEVER POSITION (SEE ADJUSTMENT
)
32.INSPECT SHIFT LEVER POSITION (SEE ADJUSTMENT
33.INSPECT PARK/NEUTRAL POSITION SWITCH ASSY (SEE ADJUSTMENT
)
34.INSTALL PROPELLER W/CENTER BEARING SHAFT ASSY (SEE OVERHAUL
)
35.INSTALL EXHAUST PIPE ASSY (SEE REPLACEMENT
)
36.PERFORM INITIALIZATION (SEE INITIALIZATION
)
ADJUSTMENT
1.INSPECT PARK/NEUTRAL POSITION SWITCH ASSY
a. Apply the parking brake and turn the ignition switch to the ON position.
b. Depress the brake pedal and check that the engine starts when the shift lever is set in the N or P
position, but does not start in other positions.
c. Check that the back-up light comes on and the reverse warning buzzer sounds when the shift lever
is set in the R position, but do not function in other positions.
Page 960 of 4500
Fig. 135: Installing Floor Shift Gear Shifting Rod Sub-Assy With Nut
Courtesy of TOYOTA MOTOR SALES, U.S.A., INC.
51.CONNECT BATTERY NEGATIVE TERMINAL
52.ADJUST SHIFT LEVER POSITION (SEE ADJUSTMENT
)
53.INSPECT SHIFT LEVER POSITION (SEE ADJUSTMENT
)
54.PERFORM INITIALIZATION (SEE INITIALIZATION
)
ADJUSTMENT
1.INSPECT SHIFT LEVER POSITION
a. When shifting from the P to R position with the ignition switch on and brake pedal depressed, make
sure that the shift lever moves smoothly and moves correctly into position.
b. Start the engine and make sure that the vehicle moves forward when shifting from the N to D
position and moves rearward when shifting to the R position.
If operation cannot be done as specified, inspect the park/neutral position switch assy and check the shift
lever assy installation condition.
2.ADJUST SHIFT LEVER POSITION
a. Remove the nut and disconnect the shiftin
g rod from the connecting rod swivel.
Page 984 of 4500
a. Release the parking brake pedal.
b. With the engine running, depress the pedal and measure the pedal reserve distance, as shown in the
illustration.
Pedal reserve distance from asphalt sheet at 490 N (50 kgf, 110.2 lbf): More than 105 mm (4.13 in.)
If incorrect, troubleshoot the brake system.
Fig. 19: Checking Pedal Reserve Distance
Courtesy of TOYOTA MOTOR SALES, U.S.A., INC.
19.INSTALL FLOOR CARPET ASSY FRONT
20.INSTALL FR DOOR SCUFF PLATE LH (SEE REPLACEMENT
)
21.INSTALL INSTRUMENT PANEL UNDER COVER SUB-ASSY NO.2 (SEE REPLACEMENT
)
22.INSTALL INSTRUMENT PANEL UNDER SAFETY PAD SUB-ASSY NO.1 (SEE
REPLACEMENT
)
Page 1005 of 4500

34.CHECK AND ADJUST BRAKE PEDAL HEIGHT (SEE ON-VEHICLE INSPECTION )
35.CHECK PEDAL FREE PLAY (SEE ON
-VEHICLE INSPECTION )
36.CHECK PEDAL RESERVE DISTANCE (SEE ON
-VEHICLE INSPECTION )
37.INSTALL COMBINATION METER ASSY (SEE OVERHAUL
)
38.INSTALL INSTRUMENT CLUSTER FINISH PANEL (SEE REPLACEMENT
)
39.INSTALL INSTRUMENT PANEL UNDER COVER SUB-ASSY NO.2 (SEE REPLACEMENT
)
40.INSTALL INSTRUMENT PANEL AIR BAG ASSY LOWER NO.1 (SEE REPLACEMENT
)
41.INSTALL INSTRUMENT PANEL SAFETY PAD SUB-ASSY NO.1 (SEE REPLACEMENT
)
42.INSTALL OUTER MIRROR SWITCH ASSY
43.INSTALL COIN BOX ASSY
44.INSTALL INSTRUMENT PANEL UNDER COVER SUB-ASSY NO.1 (SEE REPLACEMENT
)
45.INSTALL INSTRUMENT CLUSTER FINISH PANEL CENTER LOWER
46.INSTALL INSTRUMENT CLUSTER FINISH PANEL END
47.INSTALL TURN SIGNAL SWITCH ASSY (SEE REPLACEMENT
)
48.INSTALL SPIRAL CABLE SUB-ASSY (SEE REPLACEMENT
)
49.INSTALL STEERING COLUMN COVER (SEE OVERHAUL
)
50.INSTALL STEERING WHEEL ASSY (SEE OVERHAUL
)
<00360036003700030013001c001c001800130010001800130013001400160003000b0013001c001c00180014001000130018001300140013000f00030013001c001c00180015001000130018001300140013000f00030013001c001c001800160010001300
18001300150013000f00030013001c001c0018001700100013[5021)
51.INSTALL HORN BUTTON ASSY (SEE OVERHAUL
)
52.INSTALL STEERING WHEEL COVER LOWER NO.2
53.INSTALL SWITCH & VOLUME CASE
54.CONNECT BATTERY NEGATIVE TERMINAL
55.INSPECT SRS WARNING LIGHT (SEE DIAGNOSIS SYSTEM
)
56.PERFORM INITIALIZATION (SEE PRECAUTION
)
OVERHAUL
1.REMOVE ENGINE ROOM SIDE COVER
2.SEPARATE ENGINE ROOM NO.3 R/B
a. Remove the bolt and separate the engine room No.3 R/B.
3.DRAIN BRAKE FLUID
a. Draw out fluid with syringe.
4.REMOVE BRAKE MASTER CYLINDER SUB-ASSY
a. Remove the clamp from the 2 brake tubes.
Page 1020 of 4500
Fig. 53: Installing Brake Tube To Brake Master Cylinder Sub-Assy And ABS & TRACTION
Actuator Assy
Courtesy of TOYOTA MOTOR SALES, U.S.A., INC.
14.FILL RESERVOIR WITH BRAKE FLUID
15.BLEED MASTER CYLINDER (SEE BLEEDING
)
16.BLEED BRAKE LINE (SEE BLEEDING
)
17.CHECK FLUID LEVEL IN RESERVOIR
18.CHECK FOR BRAKE FLUID LEAKAGE
If fluid leaks, tighten or replace the leaking part.
19.INSTALL ENGINE ROOM NO.3 R/B
a. Install the engine room No.3 R/B with a bolt.
20.INSTALL ENGINE ROOM SIDE COVER
COMPONENTS
Page 1022 of 4500
pedal reserve distance.
b. Depress the brake pedal and start the engine. If the pedal goes down slightly, operation is normal.
If not, replace the brake booster.
Fig. 55: Identifying Brake Pedal Operation Check
Courtesy of TOYOTA MOTOR SALES, U.S.A., INC.
2.AIR TIGHTNESS CHECK
a. Start the engine and stop it after 1 or 2 minutes. Depress the brake pedal several times slowly.
If the pedal can be depressed to the floor the first time, but on the 2nd or 3rd time cannot be
depressed as far, the booster is airtight.
If not, replace the brake booster.
b. Depress the brake pedal while the engine is running, and stop the engine with the pedal depressed.
If there is no change in the pedal reserve travel after the pedal is held for 30 seconds, the booster is
air tight.
If not, replace the brake booster.
Page 1023 of 4500
Fig. 56: Identifying Air Tightness Check
Courtesy of TOYOTA MOTOR SALES, U.S.A., INC.
3.INSPECT VACUUM CHECK VALVE
a. Check that there is ventilation from the booster to engine, and no ventilation from the engine to the
booster.
b.If any fault is found, replace the vacuum check valve.
Page 1024 of 4500
Fig. 57: Inspecting Vacuum Check Valve
Courtesy of TOYOTA MOTOR SALES, U.S.A., INC.
REPLACEMENT
1.REMOVE ENGINE ROOM SIDE COVER
2.SEPARATE ENGINE ROOM NO.3 R/B
a. Remove the bolt and separate the engine room No.3 R/B.
3.DRAIN BRAKE FLUID
a. Draw out fluid with syringe.
4.REMOVE BRAKE MASTER CYLINDER SUB-ASSY
a. Remove the clamp from the 2 brake tubes.