2003 LEXUS LS430 check oil
[x] Cancel search: check oilPage 818 of 4500
PRECAUTION
1. The automatic transmission is composed of highly precision-finished parts which need careful inspection
before reassembly because even a small nick could cause fluid leakage or affect performance. The
instructions here are organized so that you work on only one component group at a time. This will help
avoid confusion from similar-looking parts of different sub-assemblies being on your workbench at the
same time. The component groups should be inspected and repaired from the converter housing side.
Inspect, repair and reassemble as much as possible before proceeding to the next component group. If a
defect is found in a certain component group during reassembly, inspect and repair this group
immediately. If a component group cannot be assembled because parts are being ordered, be sure to keep
all parts of the group in a separate container while proceeding with disassembly, inspection, repair and
reassembly of other component groups. Recommended ATF: ATF WS
2. All disassembled parts should be washed clean and any fluid passages and holes should be blown through
with compressed air.
3. Dry all parts with compressed air. Never use shop rags.
4. When using compressed air, be careful not to not aim at yourself to prevent accidentally spraying ATF or
kerosene on your face.
5. Only recommended automatic transaxle fluid or kerosene should be used for cleaning.
6. After cleaning, the parts should be arranged in the correct order for efficient inspection, repairs, and
reassembly.
7. When disassembling a valve body, be sure to match each valve together with the corresponding spring.
8. New discs for the brakes and clutches that are to be used for replacement must be soaked in ATF for at
least 15 minutes before reassembly.
9. All oil seal rings, clutch discs, clutch plates, rotating parts, and sliding surfaces should be coated with
ATF prior to reassembly.
10. All gaskets and rubber O-rings should be replaced.
11. Do not apply adhesive cements to gaskets or similar parts.
12. Make sure that the ends of a snap ring are not aligned with one of the cutouts and are installed in the
groove correctly.
13. When replacing a worn bushing, the sub-assembly containing the bushing must also be replaced.
14. Check thrust bearings and races for wear or damage. Replace them as necessary.
15. Use petroleum jelly to keep parts in place.
16. When working with FIPG material, perform the following: Using a razor blade and a gasket scraper,
remove all the old packing (FIPG) material from the gasket surface.
Thoroughly clean all components to remove any loose material.
Page 822 of 4500
HINT:
If you cannot add the listed amount of fluid, do the following:
1. Install the refill plug.
2. Allow the engine to idle with air conditioning OFF.
3. Move the shift lever through entire gear range to circulate fluid.
4. Wait for 30 seconds with the engine idling.
5. Stop the engine.
6. Remove the refill plug and add fluid.
7. Reinstall the refill plug.
4.FLUID CIRCULATION
a. Allow the engine to idle with the air conditioning OFF.
b. Move the shift lever through entire gear range to circulate fluid.
5.FLUID TEMPERATURE CHECK
a. With hand-held tester
1. Connect the han
d-held tester to the DLC3.
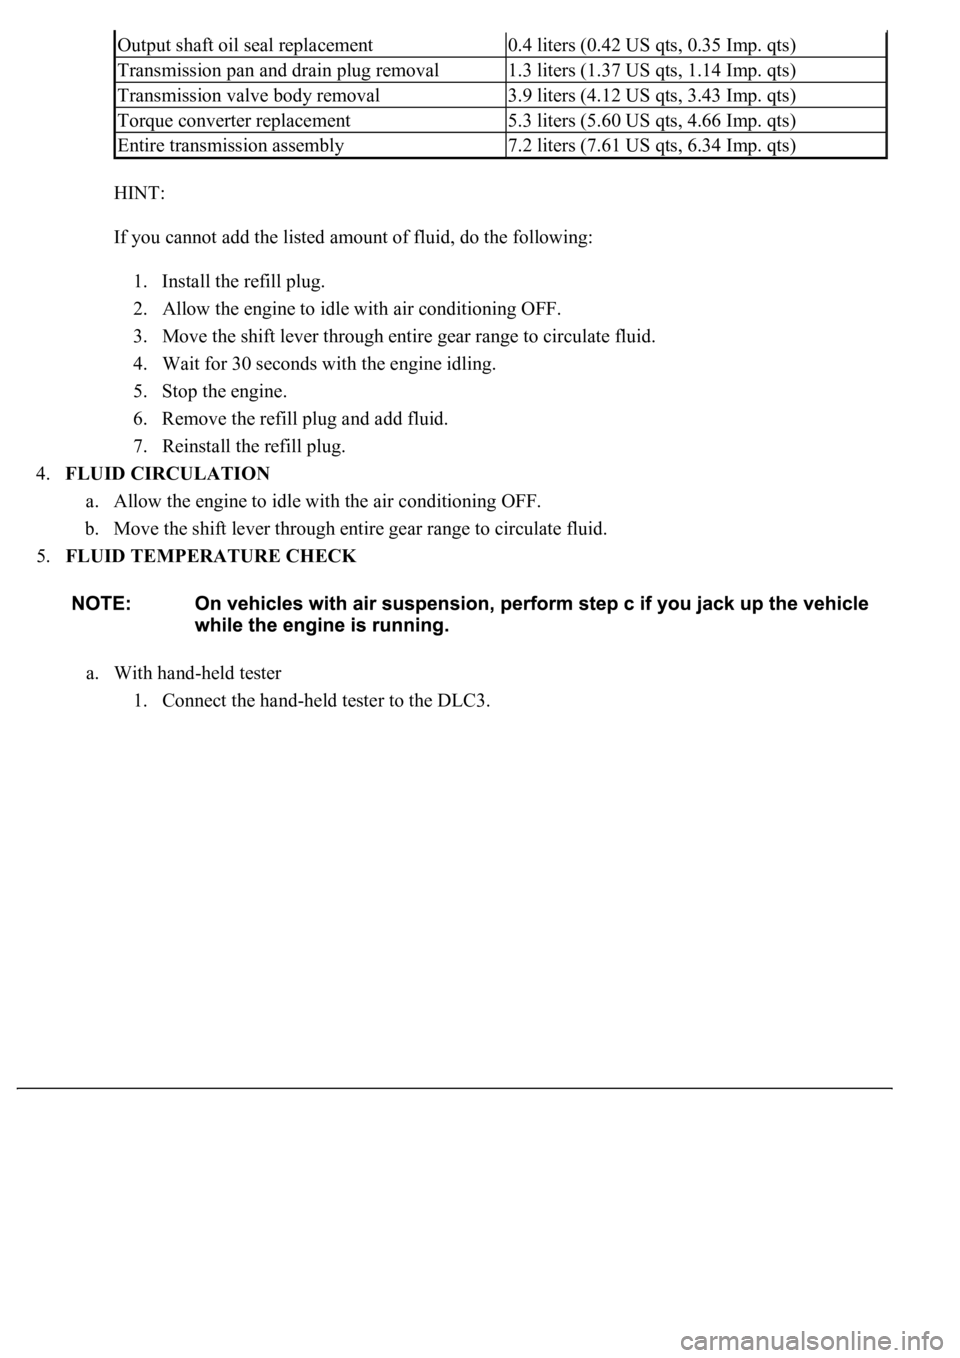
Output shaft oil seal replacement0.4 liters (0.42 US qts, 0.35 Imp. qts)
Transmission pan and drain plug removal1.3 liters (1.37 US qts, 1.14 Imp. qts)
Transmission valve body removal3.9 liters (4.12 US qts, 3.43 Imp. qts)
Torque converter replacement5.3 liters (5.60 US qts, 4.66 Imp. qts)
Entire transmission assembly7.2 liters (7.61 US qts, 6.34 Imp. qts)
Page 823 of 4500
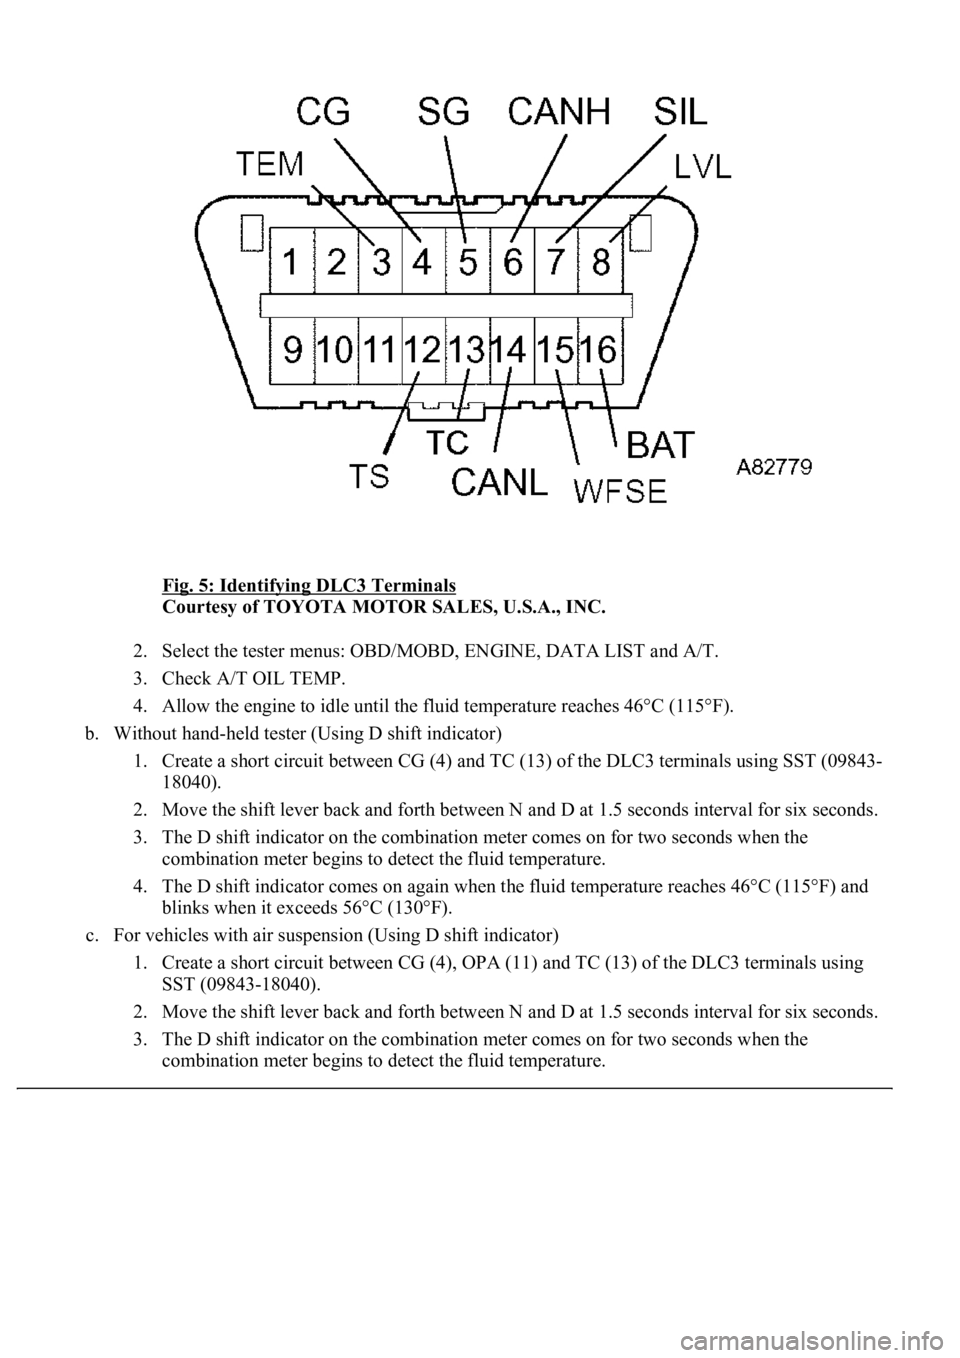
Fig. 5: Identifying DLC3 Terminals
Courtesy of TOYOTA MOTOR SALES, U.S.A., INC.
2. Select the tester menus: OBD/MOBD, ENGINE, DATA LIST and A/T.
3. Check A/T OIL TEMP.
4. Allow the engine to idle until the fluid temperature reaches 46°C (115°F).
b. Without hand-held tester (Using D shift indicator)
1. Create a short circuit between CG (4) and TC (13) of the DLC3 terminals using SST (09843-
18040).
2. Move the shift lever back and forth between N and D at 1.5 seconds interval for six seconds.
3. The D shift indicator on the combination meter comes on for two seconds when the
combination meter begins to detect the fluid temperature.
4. The D shift indicator comes on again when the fluid temperature reaches 46°C (115°F) and
blinks when it exceeds 56°C (130°F).
c. For vehicles with air suspension (Using D shift indicator)
1. Create a short circuit between CG (4), OPA (11) and TC (13) of the DLC3 terminals using
SST (09843-18040).
2. Move the shift lever back and forth between N and D at 1.5 seconds interval for six seconds.
3. The D shift indicator on the combination meter comes on for two seconds when the
combination meter begins to detect the fluid temperature.
Page 1781 of 4500
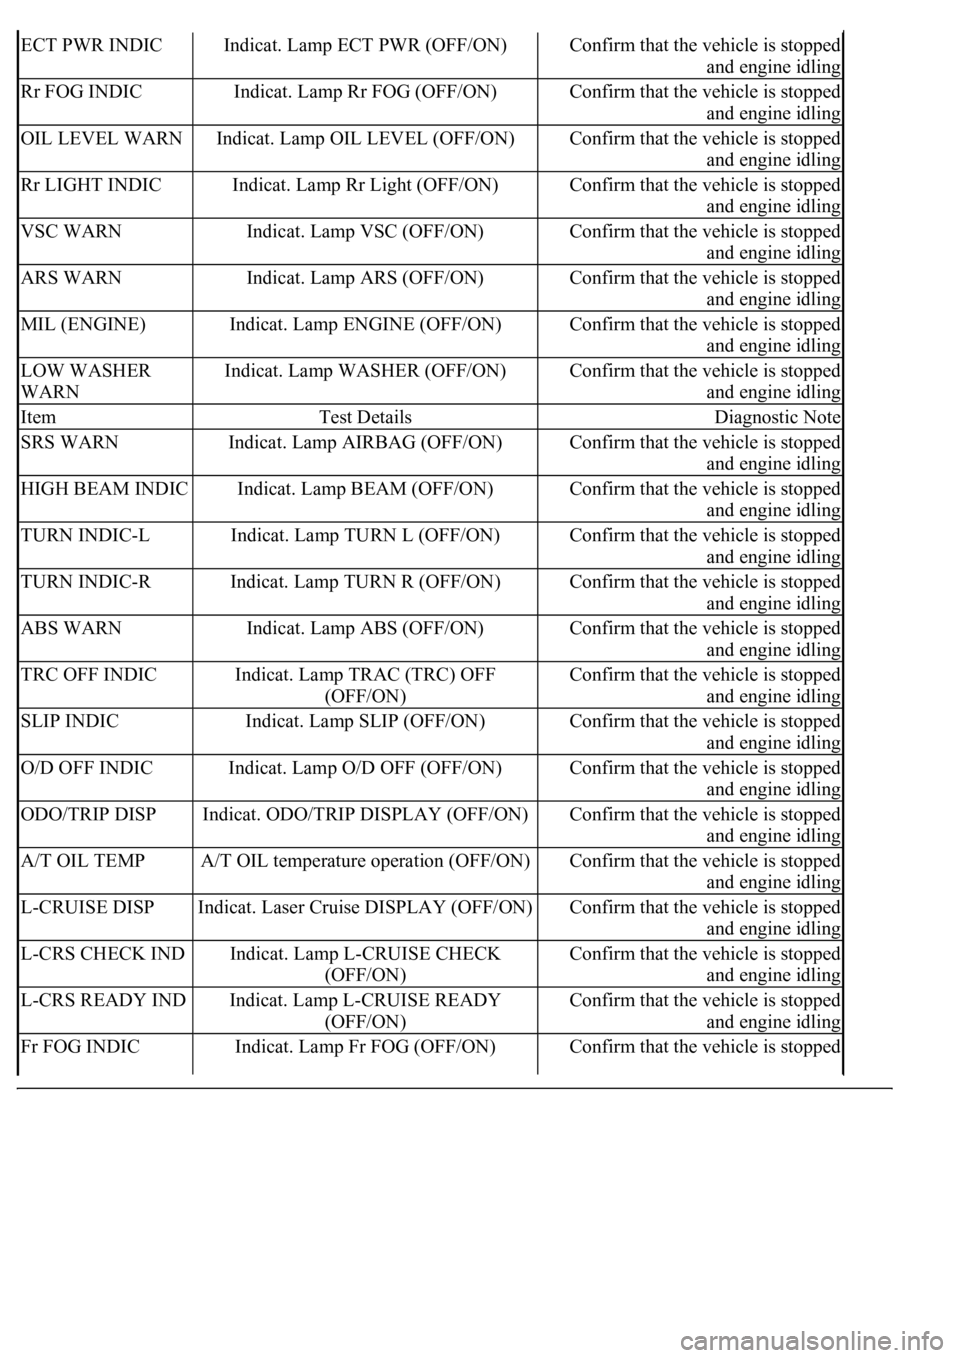
ECT PWR INDICIndicat. Lamp ECT PWR (OFF/ON)Confirm that the vehicle is stopped
and engine idling
Rr FOG INDICIndicat. Lamp Rr FOG (OFF/ON)Confirm that the vehicle is stopped
and engine idling
OIL LEVEL WARNIndicat. Lamp OIL LEVEL (OFF/ON)Confirm that the vehicle is stopped
and engine idling
Rr LIGHT INDICIndicat. Lamp Rr Light (OFF/ON)Confirm that the vehicle is stopped
and engine idling
VSC WARNIndicat. Lamp VSC (OFF/ON)Confirm that the vehicle is stopped
and engine idling
ARS WARNIndicat. Lamp ARS (OFF/ON)Confirm that the vehicle is stopped
and engine idling
MIL (ENGINE)Indicat. Lamp ENGINE (OFF/ON)Confirm that the vehicle is stopped
and engine idling
LOW WASHER
WARNIndicat. Lamp WASHER (OFF/ON)Confirm that the vehicle is stopped
and engine idling
ItemTest DetailsDiagnostic Note
SRS WARNIndicat. Lamp AIRBAG (OFF/ON)Confirm that the vehicle is stopped
and engine idling
HIGH BEAM INDICIndicat. Lamp BEAM (OFF/ON)Confirm that the vehicle is stopped
and engine idling
TURN INDIC-LIndicat. Lamp TURN L (OFF/ON)Confirm that the vehicle is stopped
and engine idling
TURN INDIC-RIndicat. Lamp TURN R (OFF/ON)Confirm that the vehicle is stopped
and engine idling
ABS WARNIndicat. Lamp ABS (OFF/ON)Confirm that the vehicle is stopped
and engine idling
TRC OFF INDICIndicat. Lamp TRAC (TRC) OFF
(OFF/ON)Confirm that the vehicle is stopped
and engine idling
SLIP INDICIndicat. Lamp SLIP (OFF/ON)Confirm that the vehicle is stopped
and engine idling
O/D OFF INDICIndicat. Lamp O/D OFF (OFF/ON)Confirm that the vehicle is stopped
and engine idling
ODO/TRIP DISPIndicat. ODO/TRIP DISPLAY (OFF/ON)Confirm that the vehicle is stopped
and engine idling
A/T OIL TEMPA/T OIL temperature operation (OFF/ON)Confirm that the vehicle is stopped
and engine idling
L-CRUISE DISPIndicat. Laser Cruise DISPLAY (OFF/ON)Confirm that the vehicle is stopped
and engine idling
L-CRS CHECK INDIndicat. Lamp L-CRUISE CHECK
(OFF/ON)Confirm that the vehicle is stopped
and engine idling
L-CRS READY INDIndicat. Lamp L-CRUISE READY
(OFF/ON)Confirm that the vehicle is stopped
and engine idling
Fr FOG INDICIndicat. Lamp Fr FOG (OFF/ON)Confirm that the vehicle is stopped
Page 1847 of 4500
6.INSPECT LOW OIL PRESSURE WARNING LIGHT
a. Disconnect the connector from the low oil pressure switch.
b. Turn the ignition switch to the ON position.
c. Ground the terminal of the wire harness side connector, then check the low oil pressure warning
light.
OK:
Low oil pressure warning light comes on.
7.INSPECT BRAKE WARNING LIGHT
a. Inspect the parking brake warning light.
1. Disconnect the connector from the parking brake switch
2. Turn the ignition switch to the ON position.
3. Ground the terminal of the wire harness side connector, then check the parking brake
warning light.
OK:
Brake warning light comes on.
b. Inspect the brake fluid level warning light.
1. Disconnect the connector from the brake fluid level warning switch.
2. Turn the ignition switch to the ON position.
3. Connect a terminal to the other terminal of the wire harness side connector, then check the
brake fluid level warning switch.
OK:
Brake warning light comes on.
8.INSPECT BRAKE FLUID LEVEL WARNING SWITCH
a. Remove the reservoir tank cap and strainer.
b. Disconnect the connector.
c. Measure the resistance between the terminals.
Standard:
Float up (switch off): 10 kohms or higher
d. Use a syphon, etc. to take fluid out of the reservoir tank.
e. Measure the resistance between the terminals.
Page 1850 of 4500
psi), and check that the pressure does not drop.
If the pressure drops, check the hoses, radiator and water pump for leaks. If no external leaks are found,
check the heater core, cylinder block and head.
2.CHECK ENGINE COOLANT LEVEL AT RESERVOIR
a. Check that the engine coolant level is between the LOW and FULL lines when the engine is cold.
If the engine coolant is low, check for leaks and add "TOYOTA Super Long Life Coolant" to the
FULL line.
If "TOYOTA Super Long Life Coolant" is not available, use a similar high quality ethylene glycol
based non-silicate, non-amino, non-nitrite and non-borate coolant with long-life hybrid organic acid
technology. Do not substitute plain water for engine coolant.
3.CHECK ENGINE COOLANT QUALITY
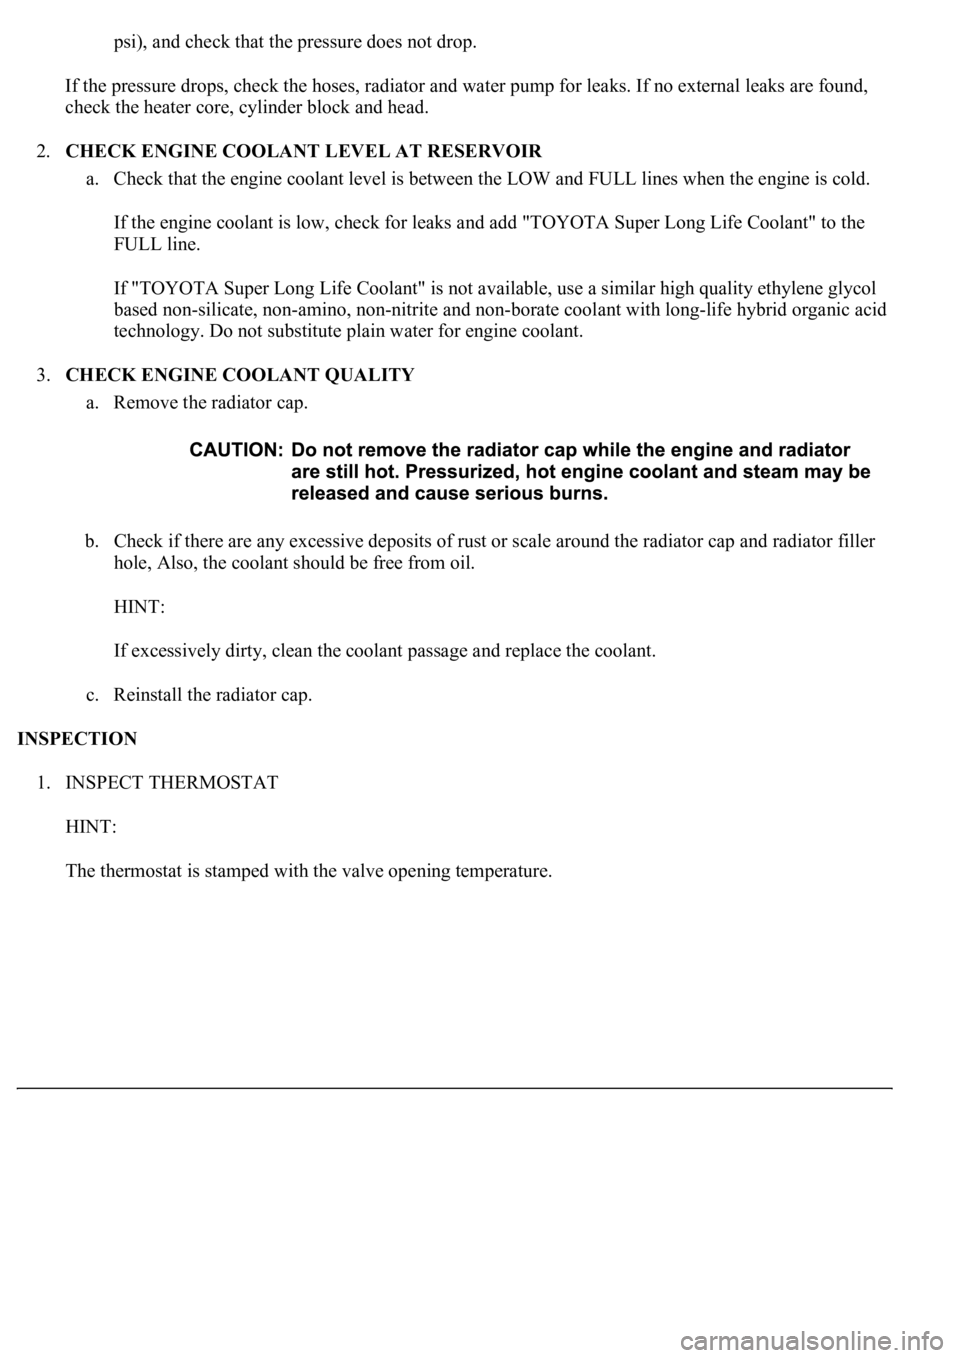
a. Remove the radiator cap.
b. Check if there are any excessive deposits of rust or scale around the radiator cap and radiator filler
hole, Also, the coolant should be free from oil.
HINT:
If excessively dirty, clean the coolant passage and replace the coolant.
c. Reinstall the radiator cap.
INSPECTION
1. INSPECT THERMOSTAT
HINT:
The thermostat is stamped with the valve openin
g temperature.
Page 2026 of 4500
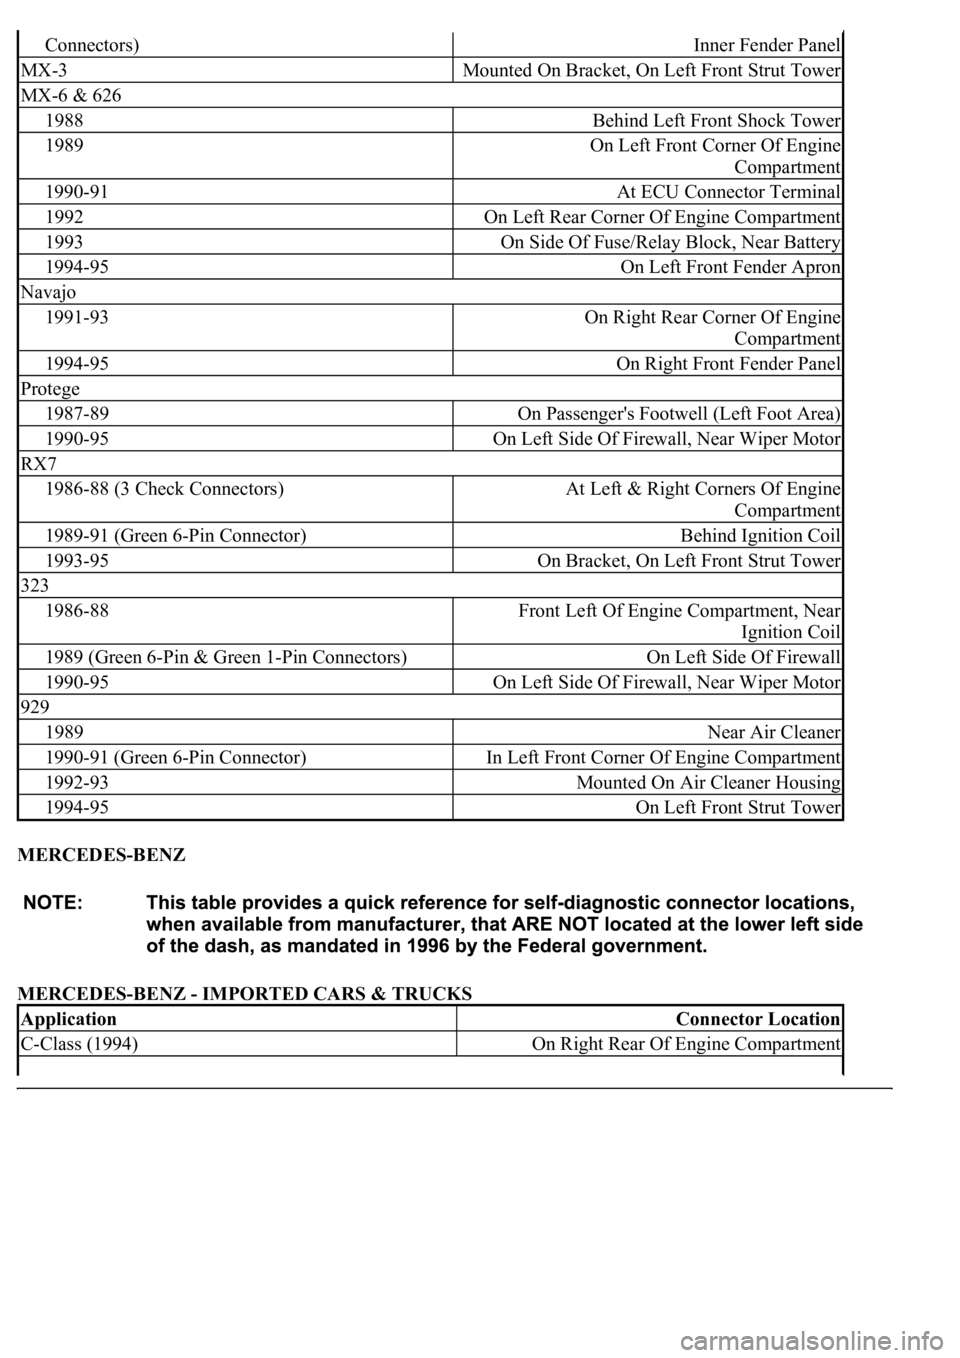
MERCEDES-BENZ
MERCEDES-BENZ - IMPORTED CARS & TRUCKS
Connectors)Inner Fender Panel
MX-3Mounted On Bracket, On Left Front Strut Tower
MX-6 & 626
1988Behind Left Front Shock Tower
1989On Left Front Corner Of Engine
Compartment
1990-91At ECU Connector Terminal
1992On Left Rear Corner Of Engine Compartment
1993On Side Of Fuse/Relay Block, Near Battery
1994-95On Left Front Fender Apron
Navajo
1991-93On Right Rear Corner Of Engine
Compartment
1994-95On Right Front Fender Panel
Protege
1987-89On Passenger's Footwell (Left Foot Area)
1990-95On Left Side Of Firewall, Near Wiper Motor
RX7
1986-88 (3 Check Connectors)At Left & Right Corners Of Engine
Compartment
1989-91 (Green 6-Pin Connector)Behind Ignition Coil
1993-95On Bracket, On Left Front Strut Tower
323
1986-88Front Left Of Engine Compartment, Near
Ignition Coil
1989 (Green 6-Pin & Green 1-Pin Connectors)On Left Side Of Firewall
1990-95On Left Side Of Firewall, Near Wiper Motor
929
1989Near Air Cleaner
1990-91 (Green 6-Pin Connector)In Left Front Corner Of Engine Compartment
1992-93Mounted On Air Cleaner Housing
1994-95On Left Front Strut Tower
ApplicationConnector Location
C-Class (1994)On Right Rear Of Engine Compartment
Page 2042 of 4500
a. Stop the vehicle on a level place.
b. Using a hexagon wrench (10 mm), remove the rear differential filler plug and gasket.
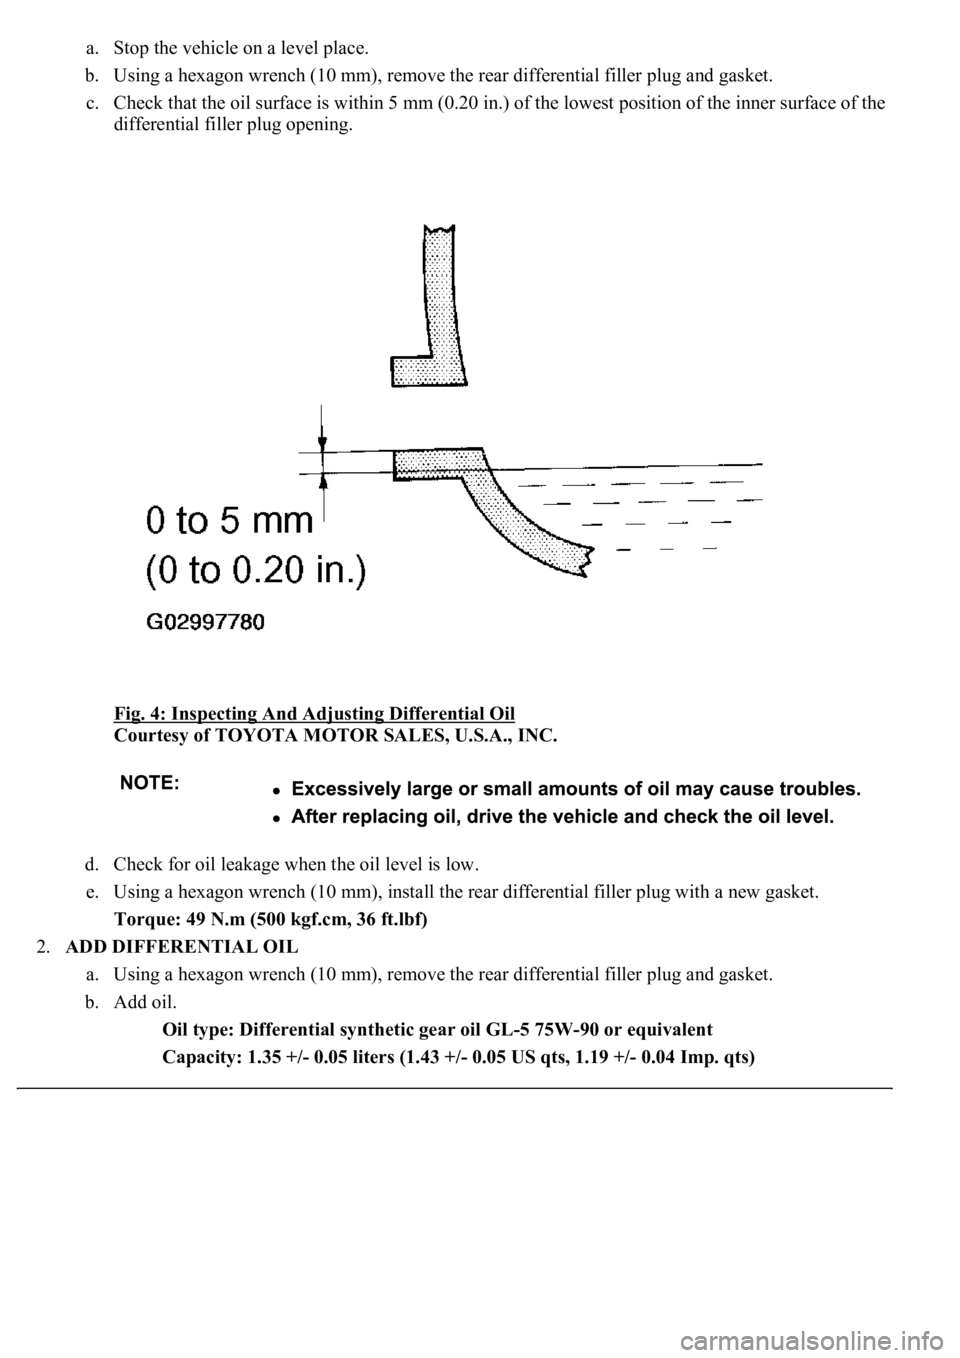
c. Check that the oil surface is within 5 mm (0.20 in.) of the lowest position of the inner surface of the
differential filler plug opening.
Fig. 4: Inspecting And Adjusting Differential Oil
Courtesy of TOYOTA MOTOR SALES, U.S.A., INC.
d. Check for oil leakage when the oil level is low.
e. Using a hexagon wrench (10 mm), install the rear differential filler plug with a new gasket.
Torque: 49 N.m (500 kgf.cm, 36 ft.lbf)
2.ADD DIFFERENTIAL OIL
a. Using a hexagon wrench (10 mm), remove the rear differential filler plug and gasket.
b. Add oil.
Oil type: Differential synthetic gear oil GL-5 75W-90 or equivalent
Capacity: 1.35 +/- 0.05 liters (1.43 +/- 0.05 US qts, 1.19 +/- 0.04 Imp. qts)