Page 25 of 523

CAUTION
•Wrinkles or abrasions which ap‐pear naturally from usage are notcovered by warranty.
•Belts with metallic accessories,zippers or keys inside the backpocket may damage the seat fab‐ric.
•Make sure not to wet the seat. Itmay change the nature of naturalleather.
•Jeans or clothes which couldbleach may contaminate the sur‐face of the seat covering fabric.
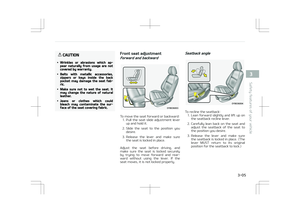
Front seat adjustment
Forward and backward
To move the seat forward or backward:1. Pull the seat slide adjustment lever up and hold it.
2. Slide the seat to the position you desire.
3. Release the lever and make sure the seat is locked in place.
Adjust the seat before driving, and make sure the seat is locked securely
by trying to move forward and rear‐
ward without using the lever. If the seat moves, it is not locked properly.
Seatback angle
To recline the seatback: 1. Lean forward slightly and lift up on the seatback recline lever.
2. Carefully lean back on the seat and adjust the seatback of the seat to
the position you desire.
3. Release the lever and make sure the seatback is locked in place. (The
lever MUST return to its original
position for the seatback to lock.)
3-05
3
Safety features of your vehicle
Page 26 of 523

Seat cushion height (if equipped,
for driver’s seat)
To change the height of the seat cush‐
ion, push the lever that is located on the outside of the seat cushion up‐
wards or downwards. • To lower the seat cushion, push the lever down several times.
• To raise the seat cushion, pull the lev‐ er up several times.
Headrest
The driver's and front passenger's
seats are equipped with a headrest for the occupant's safety and comfort.
The headrest not only provides comfort
for the driver and front passenger, but
also helps to protect the head and neck
in the event of a collision.
WARNING
•For maximum effectiveness incase of an accident, the headrestshould be adjusted so the middleof the headrest is at the sameheight as the center of gravity ofan occupant's head.Generally, the center of gravity ofmost people's head is similar withthe height of the top of their eyes.Also, adjust the headrest as closeto your head as possible. For thisreason, the use of a cushion thatholds the body away from theseatback is not recommended.
•Do not operate the vehicle withthe headrests removed as severeinjury to the occupants may occurin the event of an accident. Headr‐ests may provide protectionagainst neck injuries when proper‐ly adjusted.
•Do not adjust the headrest posi‐tion of the driver's seat while thevehicle is in motion.
Safety features of your vehicle
3-06
Page 27 of 523
CAUTION
When there is no occupant in therear seats, adjust the height of theheadrest to the lowest position. Therear seat headrest can reduce thevisibility of the rear area.
Adjusting the height up and down
To raise the headrest, pull it up to the
desired position (1). To lower the head‐ rest, push and hold the release button
(2) on the headrest support and lower
the headrest to the desired position (3).
CAUTION
If you recline the seatback towardsthe front with the headrest and seatcushion raised, the headrest maycome in contact with the sunvisor orother parts of the vehicle.
Removal and installation
To remove the headrest: 1. Recline the seatback (2) with the recline lever (1).
2. Raise headrest as far as it can go.
3. Press the headrest release button (3) while pulling the headrest up
(4).
WARNING
NEVER allow anyone to ride in a seatwith the headrest removed.
3-07
3
Safety features of your vehicle
Page 28 of 523

To reinstall the headrest:1. Put the headrest poles (2) into the holes while pressing the release
button (1).
2. Recline the seatback (4) with the recline lever (3).
3. Adjust the headrest to the appro‐ priate height.
WARNING
Always make sure the headrestlocks into position after reinstallingand adjusting it properly.
Forward and backward adjustment
(if equipped)
The headrest may be adjusted forward
to 4 different positions by pulling the headrest forward to the desired de‐
tent. To adjust the headrest to it’s fur‐
thest backwards position, pull it fully forward to the farthest position and
release it. Adjust the headrest so that
it properly supports the head and neck.
WARNING
A gap between the seat and theheadrest release button may appearwhen seating on the seat or whenyou push or pull the seat. Be carefulnot to get your finger, etc. caught inthe gap.
Seatback pocket (if equipped)
The seatback pocket is provided on the
back of the front passenger’s seatback.
Safety features of your vehicle
3-08
Page 29 of 523

WARNING
nSeatback pockets
Do not put heavy or sharp objects inthe seatback pockets. In an accidentthey could come loose from thepocket and injure vehicle occupants.
Rear seat adjustment
Headrest (if equipped)
The rear seat is equipped with headr‐
ests for the occupant's safety and comfort. The headrest not only provides comfort
for passengers, but also helps to pro‐
tect the head and neck in the event of
a collision.
WARNING
•For maximum effectiveness incase of an accident, the headrestshould be adjusted so the middleof the headrest is at the sameheight as the center of gravity ofan occupant's head. Generally, thecenter of gravity of most people'shead is similar with the height ofthe top of their eyes. Also adjustthe headrest as close to your headas possible. For this reason, theuse of a cushion that holds thebody away from the seatback isnot recommended.
•Do not operate the vehicle withthe headrests removed. Severe in‐jury to an occupant may occur inthe event of an accident. Headr‐ests may provide protectionagainst severe neck injuries whenproperly adjusted.
Adjusting the height up and down (ifequipped)
To raise the headrest, pull it up to the
desired position (1). To lower the head‐ rest, push and hold the release button
(2) on the headrest support and lower
the headrest to the desired position (3).
3-09
3
Safety features of your vehicle
Page 30 of 523

Removal and installation (if equipped)
To remove the headrest, raise it as far
as it can go then press the release but‐ ton (1) while pulling upward (2).
To reinstall the headrest, put the head‐
rest poles (3) into the holes while
pressing the release button (1). Then adjust it to the appropriate height.
WARNING
Make sure the headrest locks in po‐sition after adjusting it to properlyprotect the occupants.
Folding the rear seat (if equipped)
The rear seatbacks may be folded to
facilitate carrying long items or to in‐
crease the luggage capacity of the ve‐ hicle.
WARNING
The purpose of the fold-down rearseatbacks is to allow you to carrylonger objects than could not other‐wise be accommodated.Never allow passengers to sit on topof the folded down seatback whilethe car is moving as this is not aproper seating position and no seatbelts are available for use. This couldresult in serious injury or death incase of an accident or sudden stop.Objects carried on the folded downseatback should not extend higherthan the top of the front seats. Thiscould allow cargo to slide forwardand cause injury or damage duringsudden stops.
The rear seatbacks may be folded for‐
ward to provide additional cargo space and to provide access to the cargo area. • To raise the seatback, lift and push it firmly until it clicks into place. • When you return the seatback to its
upright position, reposition the rear
safety belts so that they can be used
by rear seat passengers.
WARNING
Do not fold the rear seat, if the driv‐er's position is not properly set ac‐cording to the driver's physical figureafter folding the rear seat. A suddenstop or collision may cause injury.
CAUTION
•When folding or unfolding the rearseat, make sure to move the frontseat fully forward. If there are notenough space to fold the rear seat,never fold it by force. It will causedamage to the headrest or the re‐lated parts of the seat.
•Before using the seat belt, be sureto remove it from the holder. Ifyou pull out the seat belt while it'sin the holder, it may damage theseat belt or holder.
(Continued)
Safety features of your vehicle
3-10
Page 31 of 523

(Continued)
•Use the holder only when there isno passengers in the rear seat orwhen you need to fold the rearseat.
To fold down the rear seatback:1. When folding the seat back, insert the rear seat belt buckle in the
pocket between the rear seatback
and cushion then make sure both
seatbelts do not interfere with
stowed luggage and cargo. Then,
insert the seat belt into the two
holes located on both sides. 2. Set the front seatback to the up‐
right position and if necessary, slide the front seat forward.
3. Lower the rear headrests to lowest position.
4. Pull the lock release lever and foldthe rear seatback forward and
down firmly.
To unfold the rear seat
1. To use the rear seat, lift and pull the seatback backward. Pull the
seatback firmly until it clicks into
place. Make sure the seatback is
locked in place. When you return
the seatback to its upright position, always be sure it has locked into
position by pushing on the top of
the seatback.
If you can not see the red line at
the bottom of folding lever, it
means the seatback is locked com‐
pletely.
2. Return the rear seat belt to the proper position.
3. When the seatback is completely installed, check the seatback fold‐
ing lever again.
WARNING
nUprighting seat
When you return the seatback to itsupright position, hold the seatbackand return it slowly. If the seatbackis returned without holding it, theback of the seat could spring for‐
(Continued)
3-11
3
Safety features of your vehicle
Page 32 of 523

(Continued)
ward resulting in injury caused bybeing struck by the seatback.
WARNING
After folding the rear seat, unlessthe driver’s position is properly setaccording to the driver’s physical fig‐ure, do not fold the rear seat. It mayincrease body injuries in a suddenstop or collision.
WARNING
When you return the rear seatbackto its upright position after beingfolded down:Be careful not to damage the seatbelt webbing or buckle. Do not allowthe seat belt webbing or buckle toget caught or pinched in the rearseat. Ensure that the seatback iscompletely locked into its uprightposition by pushing on the top of theseatback. Otherwise, in an accidentor sudden stop, the seat could fold
(Continued)
(Continued)
down and allow cargo enter the pas‐senger compartment, which couldresult in serious injury or death.
CAUTION
nDamaging rear seat belt buck‐les
When you fold the rear seatback, in‐sert the buckle between the rearseatback and cushion. Doing so canprevent the buckle from being dam‐aged by the rear seatback.
CAUTION
nRear seat belts
When returning the rear seatbacksto the upright position, remember toreturn the rear shoulder belts totheir proper position.
WARNING
nCargo
Cargo should always be secured toprevent it from being thrown aboutthe vehicle in a collision and causinginjury to the vehicle occupants. Donot place objects in the rear seats,since they cannot be properly se‐cured and may hit the front seat oc‐cupants in a collision.
WARNING
nCargo loading
Make sure the engine is off, the au‐tomatic transaxle is in P (Park) orthe manual transaxle is in 1st, andthe parking brake is securely appliedwhenever loading or unloading cargo.Failure to take these steps may al‐low the vehicle to move if the shiftlever is inadvertently moved to an‐other position.
Safety features of your vehicle
3-12