Page 73 of 294

M N <( I.J "". rl I.O
"' N I.O rl
Warm and cold
Four-zone automatic climate control
Operating
Applies to vehicles: with four-zone a utomat ic climate control
Fi g. 76 Four -zone a utomat ic climate con trol: controls
N :g 0
Cl .,. m
Fig . 77 Four -zone automat ic climate con trol: rear contro ls
Press the buttons to t urn the funct ions on or off.
Use the con trols to ad just the temperature, the
b lower speed and the air distribution . The LED in
a button will light up when the function is
switched on. The front settings are shown in the
climate control system display and in the Info
tainment system d isplay for a few seconds. The
d river and front passenger settings can be adjust
ed sepa rately .
The settings can also be adjusted in the rear
¢ fig. 77.
IOFF ! Switching the climate control system
on /off
The IO FFI button switches the climate control
system on or off.
It a lso switches on when you
p ress the control. Airflow from outside is blocked
when the climate control system is switched off . The
I
OF F! button in the rear only switches the A/C
system on/off in the rear of the vehicle.
IA/Cl Switching cooling mod e on /off
T he air is not coo led an d humidity is not remove d
when coo ling mode is switc hed off. This can
ca use fog on the windows . The cooling mode
switches off automatica lly when there are cold
outside temperatures.
l ""'I Switching recirculation mode on /off
In recirc ulation mode, the air inside the vehicle is
c irculated and filtered. Th is prevents the unfil
tered air outside the vehicle from entering the
vehicle interior. We recommend switch ing recir
cu lation mode on when driving through a tunnel
or when sitt ing in traffic
c:> & .
The IAUTO I button orl ~ FRON T I button switches
recirculation mode off .
I AUTO I Switching automatic mode on
Automatic mode main tains a cons tan t tempera
tu re ins ide the veh icle. Air tem perature, airf low
and air distr ib ution are cont ro ll ed automatically.
Adjusting the temperature
Tempera tures betwee n 60 °F (+ 16 °() and 8 4 °F
(+ 28 °() can be set . Ou tside of this range, lo or hi
will appear in the climate control system disp lay .
lliJJ,
71
Page 74 of 294

Warm and cold
At both of these settings, the climate control sys
tem runs continuously at maximum cooling or heating power. There is no temperat ure regula
tion.
Adju st ing th e bl ow er[!]
You can ad just the volume of air generated by the
b lower to yo ur preference. To have the blower
reg ulated automatically, press the
!AUTO I button .
~ Adjusting air d istribution
You ca n manually se lect the vents whe re the air
w ill flow. To have the air distrib ution regu lated
automatically, press the
! AUTO ! button.
~ Adjusting seat heating * /se at vent ilation*
Pressing the button switches the seat heating/
seat ventilat ion on at the highest setting ( leve l
3). The LEDs indicate the tempe ratu re leve l. To
red uce the tempe ratu re, p ress the butto n aga in.
To switch the seat heating/seat venti lation off,
press the button repeatedly until the LED turns
off .
After 10 minutes, the seat heating automat ica lly
switches from leve l 3 to leve l 2 .
I@ FRONT I Switching the defroster on /off
The windsh ield and s ide windows are defrosted
or cleared of condensation as quickly as possible.
The max imum amo unt of air flows ma inly from
t he ven ts below the w indshie ld. Rec irc ulat ion
mode switches off . The temperature shou ld be
set to approximately 22
°C.
The IAUTOI b utton swi tches the defroster off.
IOiil REAR I Switching the rear window defogger
on /off
The rear w indow heater only operates when the
eng ine is running.
It sw itches off automatically
after a few m in utes, depend ing on the outs ide
temperature.
To prevent the rear w indow heater from switc h
ing off a utomat ica lly, press and hold the
!l:iil REAR I
button fo r more t han 2 seconds. This rema ins
stored until the ignition is switched off.
72
I SYNC I Sy nchron izat ion
When synchroni zation is swi tched on, the set
tings for the driver's side a re applied to the front
passenger's side (except for seat heating/ventila
tion*). The settings in the rear are also synchron ized. Synchronization switches off if the settings
are adjusted on the front passenger's side or in
the rear.
You can synchronize the settings in a row by
pressing and holding a control. For example, to
apply the settings for the front passenger's side
to the driver's side, press and ho ld the control on
the front passenger's side. The same applies to
the rear .
Residual he at*
With the ign ition turned off, you can activate the
residual heat function by pressing the
[!:I button
<=> fig . 76 . The residua l heat from the coolant is
u sed to heat the veh icle interior. The residual
heat funct ion switches off automatically after
about 30 minutes.
Air vents
You can open or close the center and rear vents in
the cockpit and the vents in the rear center con
sole and door pillars using the ridged thumb
whee ls . T he levers adjust the direct ion of the air
flow from the vents.
.8, WARNING
- You should no t use the re ci rculation mode
for an extended period since no fresh air is drawn in. With the a ir-conditioning switched
off, the windows can fog up, which increases
the risk of an accident.
- Individ ua ls with red uced sensitivity to pain
or temperat ure could deve lop burns when
using the seat heating f unction. To reduce
the risk of inj ury, these indiv iduals should
not use seat heating .
(D Note
To avoid damage to the heating e lements in
the seats, do not kneel on the seats or place heavy loads on a small area of the seat.
Page 75 of 294

M N <( I.J "". rl I.O
"' N I.O rl
Basic settings
Applies to vehicles: with four-zone automat ic climate control
The climate control syst em basic s ettings are ac
cessed in th e Infotainment system.
... Se lect : th e ICARI function button > (Car )* Sys-
tems
contro l button > AC.
Rear seat settings
W hen t his funct ion is se lected, a ll sett ings for
the rear can be adjusted through the climate con
trol system in the cockpit. The climate contro l
system sett ings cannot be adjusted in the rea r
seat at the same time. This funct io n sw itches off
after a certain period of time or w hen o ne of the
con trols in the cockpit is pressed.
Recirculation mode
The sensit ivity level of the automatic recircula
tion mode can be set at various leve ls from
Off to
Sensitive . Recirculat io n mode is contro lled auto
mat ica lly. If the w indows fog up, press the
I@ F RON T I button.
Footwell temperature
You can adjust the footwe ll temperat ure so that
it is coole r or warmer.
Au xiliary heater*
In vehicles with d iesel en gines*, the auxiliary
heate r helps to warm t he vehicle interior more
qu ickly . The auxiliary heater is controlled auto
mat ica lly in the
A uto setting.
Steering wheel heating
Applies to vehicles: with heated steering w heel
The steering wheel rim can be heated.
F ig . 7 8 Steering w heel : steering w hee l heat butto n
M :g 0
0 .,. ID
Warm and cold
... Press the~ button to switc h steer ing whee l
heati ng on/off. The message
Steering wheel
heating on/Steering wheel heating off
ap
pears in the instrument cluster display.
T he temperat ure is maintained at a constant lev
el when steering wheel heating is switched on .
T he s teer ing wheel hea ting se tt ings a re stored
a utoma tica lly and assigne d to the remote con trol
key that is in use .
73
Page 76 of 294

Driving
Driving
Steering
Manually adjustable steering wheel
Applies to veh icles: w ith manually a dju stable steer ing whee l
The height and reach of the steering wheel can
be adjusted .
Fig. 79 Lever on the steering column
• Pull the lever <=? fig. 79 -arrow- <=?,&. .
• Move the steering wheel to the desired posi
tion.
• Push the lever against the steering column un-
til it locks.
There must be at least 10 inches (25 cm) be tween your chest and the center of the steering
wheel. If you cannot sit more than 10 inches (25
cm) from the steering wheel, see if adaptive
equipment is available to help you reach the ped
als and increase the distance from the steer ing
wheel.
For detailed information on how to adjust the
driver's seat, see <=?
page 53 .
.,&. WARNING
Improper use of steering wheel adjustment
and improper seating position can cause seri
ous personal injury.
- Adjust the steering wheel column on ly when
the vehicle is not moving to prevent loss of
vehicle control.
- Adjust the driver's seat or steering wheel so
that there is a minimum of 10 inches (25
cm) between your chest and the steering
wheel
<=?page 127, fig. 144. If you cannot
74
maintain this minimum distance, the airbag
system cannot protect you properly.
- If physical limitations prevent you from sit
ting 10 inches (25 cm) or more from the
steering wheel, check with your authorized
Audi dealer to see if adaptive equipment is
available.
- If the steering wheel is aligned with your
face, the supplemental driver 's a irbag can
not prov ide as much protection in an acci
dent. Always make sure that the steering
wheel is aligned with your chest.
-Always hold the steering wheel w ith your
hands at the 9 o'clock and 3 o'clock posi
tions to reduce the risk of persona l injury if
the driver's airbag deploys.
- Never hold the steering wheel at the 12
o'clock position or with your hands inside
the steering wheel rim or on the steering
wheel hub. Holding the steering wheel the
wrong way can cause serious injuries to the
hands, arms and head if the driver's airbag
deploys.
Electrically adjustable steering wheel
App lies to vehicles: with electrically adj ustab le stee ring wheel
The steering wheel position can be electrically
adjusted for height and reach.
Fig . 80 Sw itc h fo r steering wheel a djustment
.,. To adjust the height, press the switch up/down.
The steer ing column will continue moving as
long as you are pressing the switch.
• To move the steering wheel forward or back,
press the switch forward/back . The steering
column will continue moving as long as you are
pressing the switch. ..,.
Page 77 of 294
 be
tween your chest and the center of the steering
wheel.
If you cannot sit more than 10 inches (25
cm")
M N <( I.J "". rl I.O
"' N I.O rl
There must be at least 10 inches (25 cm) be
tween your chest and the center of the steering
wheel.
If you cannot sit more than 10 inches (25
cm) from the steering wheel, see if adaptive
equipment is available to help you reach the ped
als and increase the distance from the steering
wheel.
For detailed information on how to adjust the
driver's seat, see
r:::>page 53.
In vehicles with the memory function*, the steer
ing column settings are stored together with the
seat position.
A WARNING
Improper use of steering wheel adjustment
and improper seating position can cause seri
ous personal injury.
- Adjust the steer ing wheel column only when
the vehicle is not mov ing to prevent loss of
vehicle control.
- Adjust the driver's seat or steering wheel so
that there is a minimum of 10 inches (25
cm) between yo ur chest and the steering
wheel
r:::>page 127, fig. 144. If you cannot
mainta in this min imum d istance, the a irbag
system cannot protect you properly .
- If phys ica l limitations prevent you from sit
ti ng 10 inches (25 cm) or more from the
steering wheel, check with your authorized
Audi dealer to see if adaptive eq uipment is
available.
- If the steering wheel is aligned wi th your
face, the supp lemental driver's airbag can
not provide as much protection in an acci
dent. Always make sure that the steering
wheel is aligned w ith your chest.
- Always hold the steering wheel with your hands at the 9 o'clock and 3 o'clock posi
t ions to reduce the r isk of personal injury if
the driver 's airbag deploys.
- Never hold the steer ing wheel at the 12
o'clock posit ion or w ith your hands inside
the steering wheel rim or on the steering
wheel hub. Holding th e steering wheel the
wrong way can cause se rious injuries to the
hands, arms and head if the driver's a irbag
dep loys .
Drivi ng
Easy seat entry
Applies to vehicles: with power steering wheel adjustment
Easy seat entry makes it easier to enter and exit
the vehicle by adjusting the steering column au
tomatically.
.. In the Infotainment system, select: the ICARI
function button > ( Car) * Systems control but
ton
> V ehicle sett ings > Se ats> Driver 's se at>
Ea sy se at entry > On .
When easy seat entry is sw itched on, the steering
column goes back up into the park pos ition when
the ignit ion is switched off . After entering the ve
hicle, the steeri ng column returns to the stored
pos ition once the ig nit ion is switched on.
Starting and stopping
the engine
Starting the engine
The I STAR T ENGIN E ST OPI button switches the
ignition on and starts the engine .
Fig . 8 1 Center console: START ENGINE STOP button
Sta rting the engine
.. Press the brake pedal a nd move the selector
lever to the P o r
N position.
.. Press the
I START ENGINE STOP j button . The
eng ine will start .
.. It is possib le that there will be a slight delay
when starting the engine in diesel vehicles in
colder temperatu res. Therefore, you must hold
the brake pedal down unt il the engi ne starts .
The indicator light turns on whi le the engine is
preheating
m . ...
75
Page 78 of 294

Driving
Sw it c h ing th e ig nit ion on /off
If you wou ld like to switch the ignition on with
out starting the engine, fo llow these steps :
"' Press the
!START E NGIN E STOPI button with-
out pressing the brake pedal.
"'T o sw itch the ignition off, press the button
again. The needle in the tachomete r moves into
the
O FF pos ition.
The prewarm ing runs automati cally in diese l
vehicles when the ignition is switched on .
Equipment that uses a lot of electricity is switch
ed off temporar ily when you start the engine.
If the engine should not start immediately, the
starting process is automat ically stopped after a
short time . Repeat starting procedure .
Start-Stop-System *
Note the information inc:> page 80, S tar t-S top
Sys tem.
A WARNING
- Never allow the engine to ru n in confined
spaces, because this inc reases the r isk of as
phyx iat ion.
- Never t urn off the engine before the veh icle
has come to a comp lete stop .
- The brake booster and power steer ing no
longer function whe n you stop the engine.
You must use more fo rce when bra king or
stee ring. Be cause you cannot b rake and
steer as you us ually wou ld, this could lead
to accidents and se rious i njuries. These
functions are still active if the Start-Stop
System* has stopped the engine.
([) Note
Avoid high engine speed, fu ll th rottle , and
heavy eng ine load as lon g as the engine has
not reached operating temperature yet. You
co uld damage the engi ne .
@ For the sake of the environment
Do not let the engine r un while parked to
warm up. Beg in driving immed iately . This re
duces u nnecessary emissions .
76
-
(D Tips
-After starting a cold engine, there may be a
br ief per iod of increased noise because the
oil pressure must first bui ld up in the hy
draulic valve adjusters. This is normal and
not a cause for concern .
- If you leave the veh icle with the ignition
switched on, the ign ition w ill switch off af
ter a certain amount of time . Make sure that
electrical equipment such as the exterior
l ights a re switched off.
Stopping the engine
"' Br ing your vehi cle to a complete stop.
"' Move the se lector lever to the P o r N posit ion .
"' Press the
I STA RT ENGINE STOP ! button
c:> page 75, fig . 81 .
Steering lock
The steering locks when yo u tur n the eng ine off
us ing the
I S TAR T ENGINE ST OP I button and open
the driver's doo r. The locked steering helps pre
vent vehicle theft.
Emergency off
If necessary, the engine can be switc hed off with
the se lecto r lever in the R or D/S posit ion. The en
gine stops if yo u press and hold the
I S TAR T ENGINE ST OP I button at speeds below
6 mph (10 km/h) and press the brake peda l.
A WARNING
-Never turn off the engine until the vehicle
has come to a complete stop.
- The brake booster and power steering only
work when the engine is running . If the en
gine is off , you have to use more force when
steering or braking. Because you cannot
steer and brake as you usually wou ld, this
could lead to crashes and serio us in ju ries.
- For safety reasons, you should always pa rk
your veh icle with the selector lever in P. Oth
erw ise, the vehicle could inadve rtently ro ll
away.
Page 79 of 294

M N <( I.J "". rl I.O
"' N I.O rl
-After the engine has been switched off , the
radiator fan can cont in ue to run for up to 10
minutes - even with the ign ition sw itched
off . It can a lso switch on again after some
t i me if t he coolant tern pera ture rises as the
result of a heat bu ildup or if the engine is
ho t and the engi ne compa rtmen t is addi
ti onal ly he ate d by the su n's ra ys.
(D Note
Do not stop the engine imme diate ly afte r
ha rd or extend ed dr iving . K eep the engi ne
r u nning for app roximately two m inutes to
p reven t exces sive heat build-up.
Messages
Turn off ignition before leaving car
This message appea rs and a war ning tone sounds
if you open the d river's doo r whe n the ignition is
switche d on .
Press brake ped al to start engine
This message appears if you do not press the
brake peda l when starting the engine.
Ill Is key in the vehicle?
This indi ca tor light tur ns on and t his message ap
pears i f the ignit ion key was removed from the
ve hicl e when the e ngine was ru nning . If the igni
tion key is no longer in the vehicle, you cannot
switch on the ignit ion or start the engine once
you stop it. You also cannot lock the veh icle from
the outside.
Shift to P , otherwise vehicle can roll away.
Doors do not lock if lev er is not in P.
This message appears for sa fe ty reasons if the
tra nsmission is not i n the P position when you
switch the ignition off . Move the selector lever to
the P pos ition . Otherwise the vehicle is not pro
tected from roll ing and it cannot be locked.
DJ Key is not recognized . Hold back of key
again st ma rked a rea. See owner's manual
If the i ndic ator lig ht turns on and th is mess age
appears, there is a malfunction ~
page 77.
Driv ing
Turn off ignition before leaving car. Battery is
di scha rging
T his dr iver message appears if the drive r's door is
o pened wh ile the ign ition is switched on. Always
switch off the ignition if you are leav ing t he veh i
cle . Refer to
¢ page 81.
Shift to P and turn off ignition b efore leaving
car , otherwise vehicle can roll away
This message appears if the drive r's door is
opened wh ile the ign ition is switched on and the
sele ctor lever is not in the P position . Move the
se lector lever in to the P posi tion a nd switch the
i gnition off when you exit the vehicle . Otherwise
t h e vehicle co uld ro ll. Refer to ¢
page 81.
Starting the engine when there is a
malfunction
It may not be possible to start the engine under
certain circumstances, for example if the battery
in the vehicle key is drained , if interference is af
fected the key or if there
is a system malfunc
tion .
Fig . 8 2 Ce nte r c onsol e/master key : s tar ting t he e ngin e
w hen t here is a ma lf un ctio n
Requirement: The message Key is not recog
nized. Hold back of key against marked are a.
Se e owner 's manual
is displayed and the DJ indi
c ator lig ht tu rns on.
.. Hold the master key i n the location indicated as
shown in the illustration
f>l) ¢ fig . 82 .
.. Press the brake pedal ¢ A. in Starting the en
gine on page
76.
.. Press the
~ IS_ T_A_ R_T _E_N_G-IN_E_S_ T_O_P ~I bu tton. The
eng ine will start .
77
Page 80 of 294

Driving
"' Drive to an authorized Audi dealer or author
i z ed Audi Service Facility immediately to have
the malfunction corrected .
@ Tips
You can view the message again by pressing
the
I START ENGINE ST OPI button .
Electromechanical
parking brake
Operation
The electromechanical parking brake replaces
the hand brake.
Fig. 83 Ce nter co nso le : Park ing brake
• Pull on the switch{®) ¢ fig. 83 to apply the
parking brake. The indica tor lights in the swi tch
and - (USA mode ls)/ . (Canada models) i n
the instr ument cluster illum inate .
• With the ig nition switched on, step on the
brake pedal or the ac celera to r pedal and press
the switch {®) at the same time to re lease the
parking b rake . The indicator ligh ts in the switch
and - (USA mode ls)/ . (Canada models) i n
the inst rument cluster go o ut.
Your veh icle is eq uipped w ith an elec tromechan i
cal parking b rake. The parking b rake is designed
to prevent the veh icle from rolling unintentional
ly and replaces the hand brake.
I n addition to t he normal func tions of a tradi tion
al hand brake, the e lectromechanica l parking
b rake provides var ious convenience and safety
functions.
78
When starting from rest
- The integral star ting ass ist helps you when
dr iving by automa tica lly releasing the park ing
brake ¢
page 79, Starting from a stop .
-When st art ing on inclines, the s tart ing assist
prevents the vehicle from unintentionally ro ll
i ng back. The braking force of the parking brake
is not released until sufficient dr iving force has
been bu ilt up at the whee ls .
Emergency brake function
An emergency b rake ensures tha t the vehicle can
be s lowed down even if the
normal brakes fail
¢ page 79, Emergency braking function .
_&. WARNING
-
Do not press the accelerator pedal inadver
tently if the veh icle is stationary but the en
g in e is running and a gear is selected. Other
wise the ve hicle w ill sta rt to move immediate
ly and could result i n a crash .
@ Tips
-If the park ing brake is applied with the ign i
t ion switched off, the ind icator lights in the
switch and -(USA mode ls)/ . (Cana
da models) in the instrument cluster will go
o ut afte r a ce rtain per iod of t ime.
- Occasional noises when the pa rking brake- is
applied a nd re leased a re norma l and are not
a ca use for concer n.
- Whe n the v ehicle is pa rked, the par king
brake goes through a self -test cycle at r egu
lar i nterval s. Any asso ciated noises are nor
m al.
Parking
• Press the brake peda l to stop the ve hicle.
"' Pull the switch ~ to set the pa rking brake.
• Move the se lector lever to P.
• Turn the engine off¢&_ .
• Turn the steering wheel when parking on in
clines so that the wheels w ill roll into the curb
if the vehicle starts movi ng .
 1
1 2
2 3
3 4
4 5
5 6
6 7
7 8
8 9
9 10
10 11
11 12
12 13
13 14
14 15
15 16
16 17
17 18
18 19
19 20
20 21
21 22
22 23
23 24
24 25
25 26
26 27
27 28
28 29
29 30
30 31
31 32
32 33
33 34
34 35
35 36
36 37
37 38
38 39
39 40
40 41
41 42
42 43
43 44
44 45
45 46
46 47
47 48
48 49
49 50
50 51
51 52
52 53
53 54
54 55
55 56
56 57
57 58
58 59
59 60
60 61
61 62
62 63
63 64
64 65
65 66
66 67
67 68
68 69
69 70
70 71
71 72
72 73
73 74
74 75
75 76
76 77
77 78
78 79
79 80
80 81
81 82
82 83
83 84
84 85
85 86
86 87
87 88
88 89
89 90
90 91
91 92
92 93
93 94
94 95
95 96
96 97
97 98
98 99
99 100
100 101
101 102
102 103
103 104
104 105
105 106
106 107
107 108
108 109
109 110
110 111
111 112
112 113
113 114
114 115
115 116
116 117
117 118
118 119
119 120
120 121
121 122
122 123
123 124
124 125
125 126
126 127
127 128
128 129
129 130
130 131
131 132
132 133
133 134
134 135
135 136
136 137
137 138
138 139
139 140
140 141
141 142
142 143
143 144
144 145
145 146
146 147
147 148
148 149
149 150
150 151
151 152
152 153
153 154
154 155
155 156
156 157
157 158
158 159
159 160
160 161
161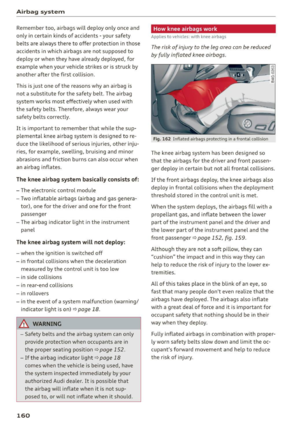 162
162 163
163 164
164 165
165 166
166 167
167 168
168 169
169 170
170 171
171 172
172 173
173 174
174 175
175 176
176 177
177 178
178 179
179 180
180 181
181 182
182 183
183 184
184 185
185 186
186 187
187 188
188 189
189 190
190 191
191 192
192 193
193 194
194 195
195 196
196 197
197 198
198 199
199 200
200 201
201 202
202 203
203 204
204 205
205 206
206 207
207 208
208 209
209 210
210 211
211 212
212 213
213 214
214 215
215 216
216 217
217 218
218 219
219 220
220 221
221 222
222 223
223 224
224 225
225 226
226 227
227 228
228 229
229 230
230 231
231 232
232 233
233 234
234 235
235 236
236 237
237 238
238 239
239 240
240 241
241 242
242 243
243 244
244 245
245 246
246 247
247 248
248 249
249 250
250 251
251 252
252 253
253 254
254 255
255 256
256 257
257 258
258 259
259 260
260 261
261 262
262 263
263 264
264 265
265 266
266 267
267 268
268 269
269 270
270 271
271 272
272 273
273 274
274 275
275 276
276 277
277 278
278 279
279 280
280 281
281 282
282 283
283 284
284 285
285 286
286 287
287 288
288 289
289 290
290 291
291 292
292 293
293