Page 41 of 294

M N <( I.J "". rl I.O
"' N I.O rl
Child safety lock
The child safety lock prevents the rear door from
being opened from the inside and the rear win
dows from be operated.
Fi g. 30 Section of the driver 's door: Child safety lock but
tons
"' 0
0
0
0 ,,. !II
• To activate the child safety lock for the respec
tive rear door, press the left/right button
[!l in
the driver's door¢
fig. 30 . The LED in the but
ton turns on.
• To deactivate the ch ild safety lock for the re
spect ive rear doo r, press the left/r ight button
[!] in the driver's door. The L ED in the but ton
turns off.
The fo llow ing features are switched off:
- Interior door handle in the respective rear door,
- Power w indow switch in the respective rear
door.
To activate the child safety lock on both sides,
you must press the
[!l buttons one after the oth
er.
A WARNING
Always take the vehicle key with you when leaving the vehicle, even for a short period of
time . This applies particularly when ch ildren
remain in the veh icle. Otherw ise they cou ld
start the engine or operate ele ctrical equ ip
ment such as power windows.
Open ing and clo sing
Power Windows
Controls
The driver can control all power windows.
Fig. 31 Sect ion of the driver's door: controls
All power window swi tches a re eq uipped w ith a
two- stage function :
Opening the windows
U') N
0
0
<.!, ., m
• Press the switch to the fir st stop and hold it un
til the w indow reaches the desi red posit ion.
• To open the window comp letely, press the
sw itch down to the
s econd level brief ly.
Closing the windows
.,. Pull the sw itch to the fi rst stop and hold it until
the window reaches the des ired pos ition.
• To close the window comp letely, pull the switch
up to the
sec ond lev el b riefly.
Power window switches
@ Driver's door
® Passenger's door
© Left rear door
@ Right rear door
A WARNING
-- Always take the vehicle key with you when
leaving the vehicle, even for a shor t period
of t ime. This applies particularly when ch il
dren remain in the vehicle. Otherwise they
could start the engine or operate electrical
equipment such as power windows . The
power windows continue to f unction until
the dr iver's door or front passenger's door
has been opened.
-
39
Page 42 of 294

Opening and closing
- Pay carefu l attent ion when closing the win
dows. It could cause injury by pinching.
- When locking the vehicle from outside, the
vehicle must be unoccupied since the win
dows can no longer be opened in an emer
gency.
(D Tips
- When you open the doors, the w indows au
tomatically lower about
0.4 inches
(10 mm).
- When the window in the driver's or passeng
er's door is completely open, it will raise ap
proximately 1 inch (25 mm) when the door
is opened . The window wi ll lower again
when you close the door.
- After the ignition has been switched off, the
windows can st ill be opened or closed for
about
10 m inutes. The power windows are
not switched off until the driver's door or
passenger's door has been opened.
Convenience opening
All of the windows and the sunroof* can be
opened at once.
The settings in the Infotainment system specify
which windows will open.
Convenience opening
.,. Press and hold the li button on the remote
control key until the windows reach their de
sired position and the sunroof* is tilted open.
Setting convenience opening in the
Infotainment system
.,. Select: the ICARI function button > (Car)* Sys
tems control button > Vehicle settings > Cen
tral locking > Long-press to open windows .
To enable convenience opening of the windows
and the roof*, the
Front windows , Rear windows
and Roof funct ions must be switched On.
A WARNING
For security reasons, the windows and the
sunroof* can only be opened with the remote
40
control key at a maximum d istance of approxi
mately 6 feet (2 meters) from the vehicle.
Correcting power window malfunctions
After disconnecting the vehicle battery, the one
touch up and down feature must be activated
again.
.,. Pull the power window switch until the window
is completely raised.
.,. Release the switch and pull it again for at least
one second.
Sunroof
Description
Fig. 32 Sect ion from headli ner: sunroof b utton
@ Tilting/sliding
.,. To tilt the sunroof completely, press the switch
briefly to the second level.
.,. To open the sunroof completely, pull the switch
briefly to the second level~.&_ .
.,. To select an intermediate position, press/pull
the switch to the first level until the desired po
sition is reached .
@ Opening/sliding (version 1)
.,. To move the roof into the reduced w ind no ise
position, press the button back briefly to the
second level. The roof will open all the way if
you press the button back to the second level
aga in.
.,. To close the sunroof completely, press the
sw itch forward briefly to the second level~.&_ .
.,. To select an intermedi ate position, press/pull
the switch forward/back to the first level until
the desired position is reached. ..,.
Page 43 of 294

• To ope n the sunroof complete ly, press the
switch back to just before the second level.
• To close the sunr")
M N <( I.J "". rl I.O
"' N I.O rl
@ Ope ning /sliding ( versi on 2)
• To ope n the sunroof complete ly, press the
switch back to just before the second level.
• To close the sunroof completely, press the
switch forward briefly to the second level¢&, .
• To select an intermediate position, press/pull
the switch forward/back to the first level until
the desired position is reached .
The sun shade can be opened and closed by hand
when the roof is closed . The sun shade opens au
tomatically when the roof is opened.
You can still operate the s liding/ti lting sunroof
for about 10 minutes after the ignition is switch
ed off. The switch is deactivated once the driver's
or front passenger's door is opened .
A WARNING
Pay careful attention when closing the slid
ing/tilting sunroof -otherw ise ser ious injury
cou ld resu lt! Always take the ignition key with
you when leaving the vehicle.
0 Note
Always close your sliding/t ilting sunroof when
leaving your veh icle. Sudden rain can ca use
damage to the interior eq uipment o f your ve
hicle, part icularly the elect ron ic equipment.
a) Tips
- Fo r information on convenie nce opening, re
fer to¢
page 40.
- The sunroof will only open down to -20 °C
(-4 °F).
Sunroof power emergency closing
If the sun roof detec ts an object in its path when
it is clos ing, it w il l open again automatically. In
this case, you can close the roo f with the power
emergency closing fu nct io n.
• Wi thin five se cond s after the sunroof opens au
tomat ica lly, pull the switch unt il the roof
closes .
I f you le t go of the sw itch early, the s unroof will
ope n again.
Open ing and clo sing
Garage door opener
(Homelink)
Description
Applies to veh icles: w ith garage door opener (Homelink)
Fig. 33 Garage door opener: examples of using wit h differ·
ent systems
You can activate various systems such as garage
doors, security systems and home lighting from
inside your vehicle using the garage door opener
(Homeli nk). There are three buttons fo r th is in
the vehicle headliner that can be in used in place
of up to three hand-held transmitters .
To operate systems using the garage door open
er, the three buttons in the roof headliner must
be programmed first .
A WARNING
-Make sure no people or objects a re in the im-
mediate vicinity of the equipment when using
or p rog ramming the garage door opener. Peo
p le can be injured and objects can be dam
aged if they are caught in the eq uipment .
(¼} Tips
-For security reasons, we recomme nd that
yo u cle ar the programmed buttons before
selling t he vehi cle.
- For add itiona l information about Homelink,
visi t www .home link.com.
- For Declaration of Comp liance to United
States FC C and In dustry Canada reg ulations
¢page 277.
41
Page 44 of 294

Fig . 34 Hea dlin er: Control panel
You can program both fixed code and rolling code")
Opening and closing
Programming buttons
Applies to vehicles: with garage door opener (Homelink)
Fig . 34 Hea dlin er: Control panel
You can program both fixed code and rolling code
systems us ing this procedu re .
P rogramming /rep rogramming butt ons
• Switc h the ignition on.
• Press and ho ld the button in the headliner that
you wou ld like to program for at least 10 sec
onds. Or
• Select :
~ IC~A~ R~ I funct io n button> (Car )* systems
control button > Vehicle setting s> garage door
opener > Program garage door op ener .
• Fo llow the in struc tions in the Infota inment sys-
t em.
Deleting button programming
The programmed buttons cannot be deleted indi
vidua lly, they must be de leted all at once . Rep ro
g ram the b uttons if necessa ry .
• Se lect : the
ICA RI function button > (Car }* sys
tems
control button > Vehicle sett ings > Ga
rage door op ener > Clear program s etting s>
Yes .
Displaying the version /status /country code
• Se lect : ICAR I funct ion button> (Car )* systems
control butt on > Vehicle sett ings > Garage
door opener > Ver sion information .
(D Tips
The ga rage doo r opener may need to be
synchronized with the system motor aft er the
programm ing . Fo llow th e manufacture rs in
struc tio ns for do in g th is.
42
Operation
Applies to vehicles: with garage door opener (Homelink)
Req uirements The bu tton in the roof hea dliner
mu st be p rog rammed
~page 42 a nd t he ve hicle
mus t be w ithin range of the sys tem, such as the
garage door .
• Press the b utton to open the g arage doo r. T he
L E D @ ¢
page 4 2, fig. 3 4 blinks or tur ns on .
• Press t he b utton ag ain to open the garage door.
(1) Tips
T o open or close the gar age door, do not p ress
the bu tton l onge r ten seconds o r th e g arage
d oor opener wi ll swi tch to programming
mode.
Page 45 of 294

Lights and Vision
Exterior Lighting
Switching the lights on and off
Fig. 35 Instrument panel: l ig ht switc h with all weat her
l ig hts
Light switch -f/
Turn the switch to the co rresponding posit ion.
When the lights are switched on, the
:oo: symbol
turns on .
O -The lights are off or the dayt ime running
lights are on:
-USA models: The daytime running lights will
come on automatically when the ignition is on
and the light switch <=.>
fig. 35 is in the O posi
t ion or the
AUTO position (only in daylight con
di tions) . The
Daytime running light s function
can be turned on and off in the MMI
<=.> page 45, 9 ,&. .
-Canada models: The daytime running lights
will come on automatically when the ignit ion is
on and the light switch
<=.> fig. 35 is in the O po
sition, the
: oo: position or the AUTO position
(only in daylight conditions)<=.>,&. .
AUTO -Automatic headlights switch on and off
depending on brightness, for examp le in twilight,
during rain or in tunnels .
:,oo : -Parking light
fD • Low beam headlight
~ -All weather lights
~ @II -Rear fog lights
<( I.J "". rl I.O
"' N I.O rl
Lights and Vision
All-weather lights
The front lights are adjusted automatically so
that there is less glare for the driver from his or
her own lights, for example when roads are wet.
Automatic dynamic headlight range control
system
Your vehicle is equipped with a headlight range
control system so that the headlights do not
blind oncoming traffic if the vehicle load
changes. The headlight range also adjusts auto
matically when braking and accelerating.
Static cornering light*
The static cornering light depends on equipment
and only works when the light switch is in the AU·
TO position. The cornering light switches on au
tomatically at speeds up to approximately
44 mph (70 km) when the steering wheel is at a
certain angle . The area to the side of the vehicle
is illum inated better when turning.
A WARNING
-Automatic headlights are only intended to
assist the driver. They do not relieve the
driver of responsibility to check the head
lights and to turn them on manually accord
ing to the current light and visibility condi
tions . For example, fog cannot be detected
by the light sensors. So always switch on the
low beam under these weather conditions
and when driving in the dark fD.
- The rear fog lights should only be turned on
in accordance with traffic regulations, to
prevent g lare for traffic behind your vehicle.
- Please observe legal regulations when using
the lighting systems described.
(D Tips
- The light sensor for the automatic head
lights is in the rearview mirror mount.
Therefore, do not place any stickers in this
area on the windshield.
- Some functions of the exterior lighting can
be adjusted
<=.> page 45 .
-If you turn off the ignition while the exterior
lights are on and open the door, you will
hear a warning tone. .,.
43
Page 46 of 294

Lights and Vi sion
- In cool or damp weather, the ins ide of the
headlights, turn signals and tail lights can
fog over due to the temperat ure difference
between the inside and outs ide. They w ill
clear shortly after switching them on. This
does not affect the service li fe of the light
i ng.
Turn signals and high beam lev er
The lever on the left side of the steering column
is used to operate the turn signals and the high
beam as well as the headlight flasher.
F ig . 36 Tu rn signa l and hig h beam lever
The turn s ignal and high beam leve r has the fol
lowing f unctions:
Turn signals ¢¢@@
N
0 ,.._ 0 ±
~
• Pu sh the lever up as far as it can go t o turn on
t he righ t turn s ignal or down to tu rn on the left
tu rn s ignal
c:> fig. 36 .
• Move the lever brief ly until you meet resistance
and release it to flas h three times.
• Move the lever (up or down) unti l you meet re
s istance and hold it there to determine the
flashing time for the tu rn s ignals.
High beam ~D @
• Push the lever forward to switch on the high
beam (vehicles with h igh beam assist *
c:>page44).
• Pull the lever back towards you to switch off
the h igh beam.
Headlight flasher ~D ©
• Pull the lever toward the steering wheel to use
the headlight f lasher.
44
Notes on these features
- The turn signals on ly work w it h the ignition
sw itche d on. The indicato r lights
II or Bin
the instrument cl uster c:> page 11 also blink.
- After you have tu rned a corner, the turn s ignal
sw itches off automatically .
- Th e
high beam works on ly when the he ad ligh ts
are on. The indi cator light
II in the instr ume nt
cl uste r ill uminates when the high beams a re
on.
- The
headligh t flasher works o nly as long as yo u
hold t he leve r - even if there are no lig hts
turned on. The indicator light
II in the instru
ment cluster i lluminates when you use the
headlight f lasher .
A WARNING
Do not use the high beam or head light flasher
if you know that th ese could blind oncoming
traffic .
High beam assist
Applies to veh icles: with high beam assist
Fig . 3 7 Turn signal and high beam lever: sw itc hing high
bea m ass ist o n/off
A camer a on the rea rview mirror moun t ca n de
tec t light sources from other road users . The high
beams switch on or off a utomat ica lly depen ding
o n the position of vehicles driving ahead and on
coming vehicles, the vehicle speed and othe r en
vironme nta l and traffic conditions.
Activating high beam assist
Req uirement: The AU TO light sw itch posit ion
must be selected and t he h igh beam assist m ust
be switched o n in the I nfotai nment system
c:> page45.
Page 47 of 294
 ..,.,
N \!) ,....,
~ To activate the h igh beam assist, tap the lever
forward
(D . The ID indicator light appears in
the instrument cluster disp lay and the")
M N <( (.J
'SI: ,...., \!) ..,.,
N \!) ,....,
~ To activate the h igh beam assist, tap the lever
forward
(D . The ID indicator light appears in
the instrument cluster disp lay and the high
beam assist is switched on/off automatically.
The
El indicator ligh t also turns on if the high
beams are switched on .
Switching the high beam s on/off manually
If the high beams did not switch on/off automat
ically as expected, you may switch them on or off
manually instead:
~ T o switch the high beams on man ually, tap the
lever forward
(D. The El indica tor light turns
on.
~ To switch the high beams off manua lly, pull the
lever back@. The high beam assist is deacti
vated.
Operating the headlight flasher
~ To operate the headlight flasher when the high
beam assist is activated and high beams are
switched off, pull the lever back@. The high
beam assist remains act ive.
Messages in the instrument cluster display
r!IJ Audi adaptive light: system fault!
High beam assist: System fault
Drive to an authorized Aud i dealer or authorized
Aud i Service Fac ility immediately to have the
malfunct ion corrected. You can still switch the
hi gh beams on or off manually.
High beam assist : Unavailable No camera view
The camera view is blocked, for example by a
sticker or debr is.
The sensor is located between the interior rear
view mirror and the windshie ld. Therefore, do not
p lace any st ickers in this area on the windshield.
A WARNING
-
High beam assist is only intended to assist
the driver. The driver is still responsible for
controlling the headlights and switching
them manually depending on light and visibil
i t y cond itions. It may be necessary to operate
them manually in situations such as:
Lights and Vision
-In adverse weather conditions such as fog,
heavy ra in, blow ing snow or spray ing water.
- On roads where oncoming traffic may be
partially obscured, such as expressways.
- When there a re road users that do not have
sufficient lighting, such as bicyclers or
veh icles with dirty tail lamps.
- In tight curves and on steep slopes.
- I n poorly lit areas.
- With strong reflectors, such as signs.
-If the area of the windsh ield near the sensor
is fogged over, dirty, icy or covered with a
sticker.
Adjusting the exterior lighting
The settings are adjusted in the MMI.
~ Select: !CARI function button> (Car)* systems
control button > Vehicle settings > Exterior
lighting .
Automatic headlights
You can adjust the following sett ings in the Auto
matic headlights
menu:
Headlights activation time -You can adjust if the
headlights switch on
Early , Med. or Late accord
ing to the sensit ivity of the light sensor.
Audi adaptive light* -You can switch adaptive
light
On and Off.
Automatic high beams*
You can switch the high beam assist on and off.
Daytime running lights
USA models:
You can switch the daytime running
lights
on and off .
Canada models:
The function cannot be turned
off. It is activated automat ica lly each t ime the ig
nition is switched on. Th is menu item is show n
"greyed out".
Coming home, Leaving home
The coming home function illuminates the area
outside the vehicle when you switch the ignition off and open the driver's door. To turn the func-
t ion on, select
Lights when leaving car > On . ..,.
45
Page 48 of 294

Lights and Vision
The leaving home function illuminates the area
outside the vehicle when you un lock the vehicle.
To turn the function on, select
Lights when un
locking car> On .
The coming home and leaving home functions
only operate when it is dark and the light switch
is in the
AUTO posit ion .
Emergency flasher
The emergency flasher makes other motorists
aware that you or your vehicle are in an emer
gency situation.
F ig. 38 Cente r co nsole: e mergen cy flasher sw itc h
~ Press the switch &, Q fig. 38 to turn the emer-
gency flashers on or off.
When the emergency flasher is on, all four turn
signals blink at the same time . The turn s ignal in
d icator lights
111!1 in the instrument cluster, as
well as the light in the emergen cy flashe r swit ch
&, blink likewise . T he emergency flashers also
wo rk when the ignition is turned off.
The emergency flashers will turn on automatical
ly if you are in an acc ident where the airbag has
deployed.
(j) Tips
You should turn on the emergency flashers
when:
- you are the last vehicle standing in a traffic
jam so that any other vehicl es coming can
see you, or when
- your vehicle has broken down or you are in
an emergency situation, or when
46
-your vehicle is being towed by a tow truck or
if you are towing another vehicle behind
yo u.
Interior Lighting
Front and rear interior lighting
Fig. 39 Front head liner: interio r light ing controls
Fig . 40 Rea r head lin er: read ing light
Press the corresponding button ¢ fig. 39:
5:1-Interior lighting on/off
rn-Door contact switch on/off. The interior light
ing is controlled automatically.
~- Reading lights on/off
~* -Switching the rear reading lights on/off
from the cockpit.
Ambient lighting
Applies to vehicles: wit h ambient lig hting
You can adjust the br ightness of the interior
li ght ing .
~ In the Infotainment system, select : the ICA RI
function button > (Car)* Systems control but
ton
> Vehicle settings > Interior lighting >
Brightne ss.
 1
1 2
2 3
3 4
4 5
5 6
6 7
7 8
8 9
9 10
10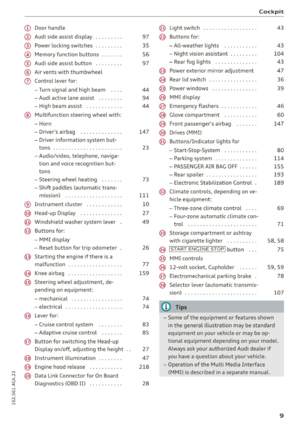 11
11 12
12 13
13 14
14 15
15 16
16 17
17 18
18 19
19 20
20 21
21 22
22 23
23 24
24 25
25 26
26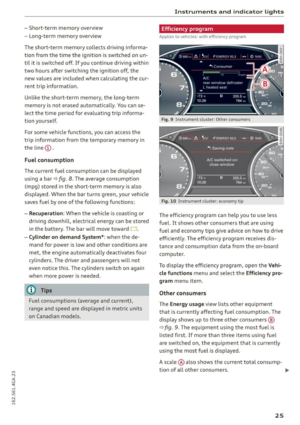 27
27 28
28 29
29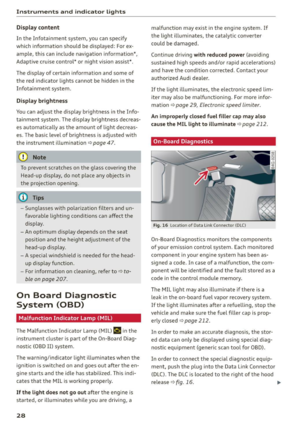 30
30 31
31 32
32 33
33 34
34 35
35 36
36 37
37 38
38 39
39 40
40 41
41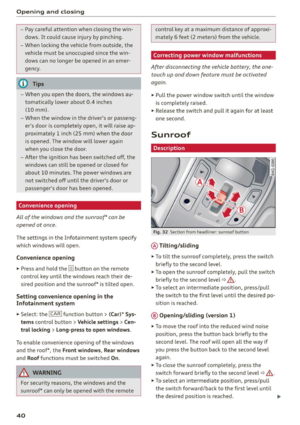 42
42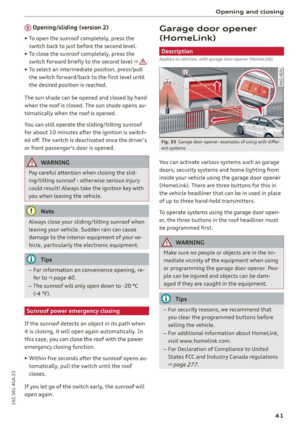 43
43 44
44 45
45 46
46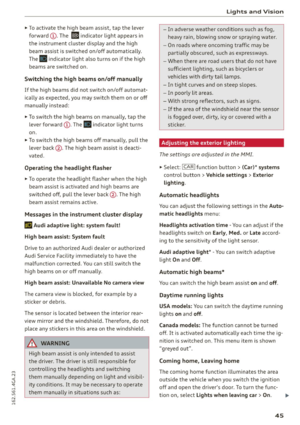 47
47 48
48 49
49 50
50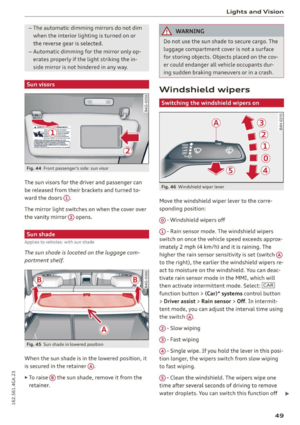 51
51 52
52 53
53 54
54 55
55 56
56 57
57 58
58 59
59 60
60 61
61 62
62 63
63 64
64 65
65 66
66 67
67 68
68 69
69 70
70 71
71 72
72 73
73 74
74 75
75 76
76 77
77 78
78 79
79 80
80 81
81 82
82 83
83 84
84 85
85 86
86 87
87 88
88 89
89 90
90 91
91 92
92 93
93 94
94 95
95 96
96 97
97 98
98 99
99 100
100 101
101 102
102 103
103 104
104 105
105 106
106 107
107 108
108 109
109 110
110 111
111 112
112 113
113 114
114 115
115 116
116 117
117 118
118 119
119 120
120 121
121 122
122 123
123 124
124 125
125 126
126 127
127 128
128 129
129 130
130 131
131 132
132 133
133 134
134 135
135 136
136 137
137 138
138 139
139 140
140 141
141 142
142 143
143 144
144 145
145 146
146 147
147 148
148 149
149 150
150 151
151 152
152 153
153 154
154 155
155 156
156 157
157 158
158 159
159 160
160 161
161 162
162 163
163 164
164 165
165 166
166 167
167 168
168 169
169 170
170 171
171 172
172 173
173 174
174 175
175 176
176 177
177 178
178 179
179 180
180 181
181 182
182 183
183 184
184 185
185 186
186 187
187 188
188 189
189 190
190 191
191 192
192 193
193 194
194 195
195 196
196 197
197 198
198 199
199 200
200 201
201 202
202 203
203 204
204 205
205 206
206 207
207 208
208 209
209 210
210 211
211 212
212 213
213 214
214 215
215 216
216 217
217 218
218 219
219 220
220 221
221 222
222 223
223 224
224 225
225 226
226 227
227 228
228 229
229 230
230 231
231 232
232 233
233 234
234 235
235 236
236 237
237 238
238 239
239 240
240 241
241 242
242 243
243 244
244 245
245 246
246 247
247 248
248 249
249 250
250 251
251 252
252 253
253 254
254 255
255 256
256 257
257 258
258 259
259 260
260 261
261 262
262 263
263 264
264 265
265 266
266 267
267 268
268 269
269 270
270 271
271 272
272 273
273 274
274 275
275 276
276 277
277 278
278 279
279 280
280 281
281 282
282 283
283 284
284 285
285 286
286 287
287 288
288 289
289 290
290 291
291 292
292 293
293