Page 1702 of 3229
Publi s hed: 11-May-2011
Climate Control - Evaporator Temperature Sensor
Removal and Inst all ati on
Removal 1.
2.
Installation To i nst all , revers e t he removal procedure.
1.
Page 1703 of 3229
Publi s hed: 11-May-2011
Climate Control - Heater Core
Removal and Inst all ati on
Removal
Di sconnect t he bat t ery ground cable.
Refer t o: Specificati ons (414-00 Bat tery and Charging Sys tem -General Informat ion, Specificati ons).
1.
Drai n t he cool ing s ys tem.
Refer t o: Cool ing Sys tem Drai ni ng, Fi lli ng and Bleeding (303-03AEngine Cooli ng - I6 3.2L Petrol, General Procedures).
2.
Remove t he s el ect or lever.
Refer t o: Sel ect or Lever As sembl y (307-05 Aut omat icTrans mi ss ion/Transaxle Ext ernal Cont rol s , Removal andInst all at ion).
3.
4.
Remove t he cowl s ide trim panel .
Refer t o: Cowl Si de Tri m Panel (501-05 Interior Tri m andOrnament ati on, Removal and Ins tal lat ion).
5.
Page 1706 of 3229
Publi s hed: 11-May-2011
Climate Control - CondenserI6 3.2L Petrol
Removal and Inst all ati on
Removal
Remove t he cover and dis connect the bat tery ground cabl e.
Refer t o: Specificati ons (414-00 Bat tery and Charging Sys tem -
General Informat ion, Specificati ons).
1.
2. W ARNING: Make sure t o s upport the vehicle wit h axle
s tands .
Rais e and s upport t he vehi cl e.
2.
Recover t he A/C refrigerant .
Refer t o: Air Condi ti oning (A/C) Sys tem Recovery, Evacuati on and Charging (412-00 Cl imat e Control Sys t em - General Informat ion,
General Procedures).
3.
Remove t he front bumper.
Refer t o: Front Bumper (501-19 Bumpers , Removal and Ins tall ati on).
4. Remove t he radiat or ai r deflect or.
5. Releas e power st eeri ng cooler and s ecure as ide.
6.
Page 1709 of 3229
Publi s hed: 11-May-2011
Climate Control - CondenserTD4 2.2L Diesel
Removal and Inst all ati on
Removal
Remove t he cover and dis connect the bat tery ground cabl e.
Refer t o: Specificati ons (414-00 Bat tery and Charging Sys tem -General Informat ion, Specificati ons).
1.
2. W ARNING: Make sure t o s upport the vehicle wit h axles tands .
Rais e and s upport t he vehi cl e.
2.
Remove t he charge air cool er.
Refer t o: Charge Air Cooler (303-12B Int ake Air Di st ri but ion andFil tering - TD4 2.2L Dies el, Removal and Ins tall ati on).
3.
Recover t he A/C refrigerant .
Refer t o: Air Condi ti oning (A/C) Sys tem Recovery, Evacuati on andCharging (412-00 Cl imat e Control Sys t em - General Informat ion,General Procedures).
4.
5. CAUTION: Make s ure that all openi ngs ares ealed.
• NOTE: Remove and dis card t he O-ri ng s eal s .
Di sconnect t he A/C condenser refri gerant li nes .
5.
Page 1711 of 3229
Publi s hed: 11-May-2011
Climate Control - Ambient Air Temperature Sensor
Removal and Inst all ati on
Removal 1.
2.
Installation To i nst all , revers e t he removal procedure.
1.
Page 1712 of 3229

Publi s hed: 11-May-2011
Climate Control - Air Conditioning (A/C) CompressorI6 3.2L Petrol
Removal and Inst all ati on
Removal
CAUTION: Make s ure that the specified amount of refrigerant oi l is added.
Remove t he cover and dis connect the bat tery ground cabl e.
Refer t o: Specificati ons (414-00 Bat tery and Charging Sys tem -General Informat ion, Specificati ons).
1.
Recover t he air condi ti oni ng (A/C) refri gerant .
Refer t o: Air Condi ti oning (A/C) Sys tem Recovery, Evacuati on andCharging (412-00 Cl imat e Control Sys t em - General Informat ion,General Procedures).
2.
Remove t he engi ne cover.
Refer t o: Engi ne Cover - I6 3.2L Pet rol (501-05 Int eri or Trim andOrnament ati on, Removal and Ins tal lat ion).
3.
Remove t he bat t ery t ray.
Refer t o: Bat t ery Tray (414-01 Bat tery, Mount ing and Cables ,Removal and Ins tall ati on).
4.
Remove t he air cleaner as s embly.
Refer t o: Air Cleaner (303-12A Intake Ai r Dis tribut ion and Fil tering -I6 3.2L Pet rol, Removal and Ins t al lat ion).
5.
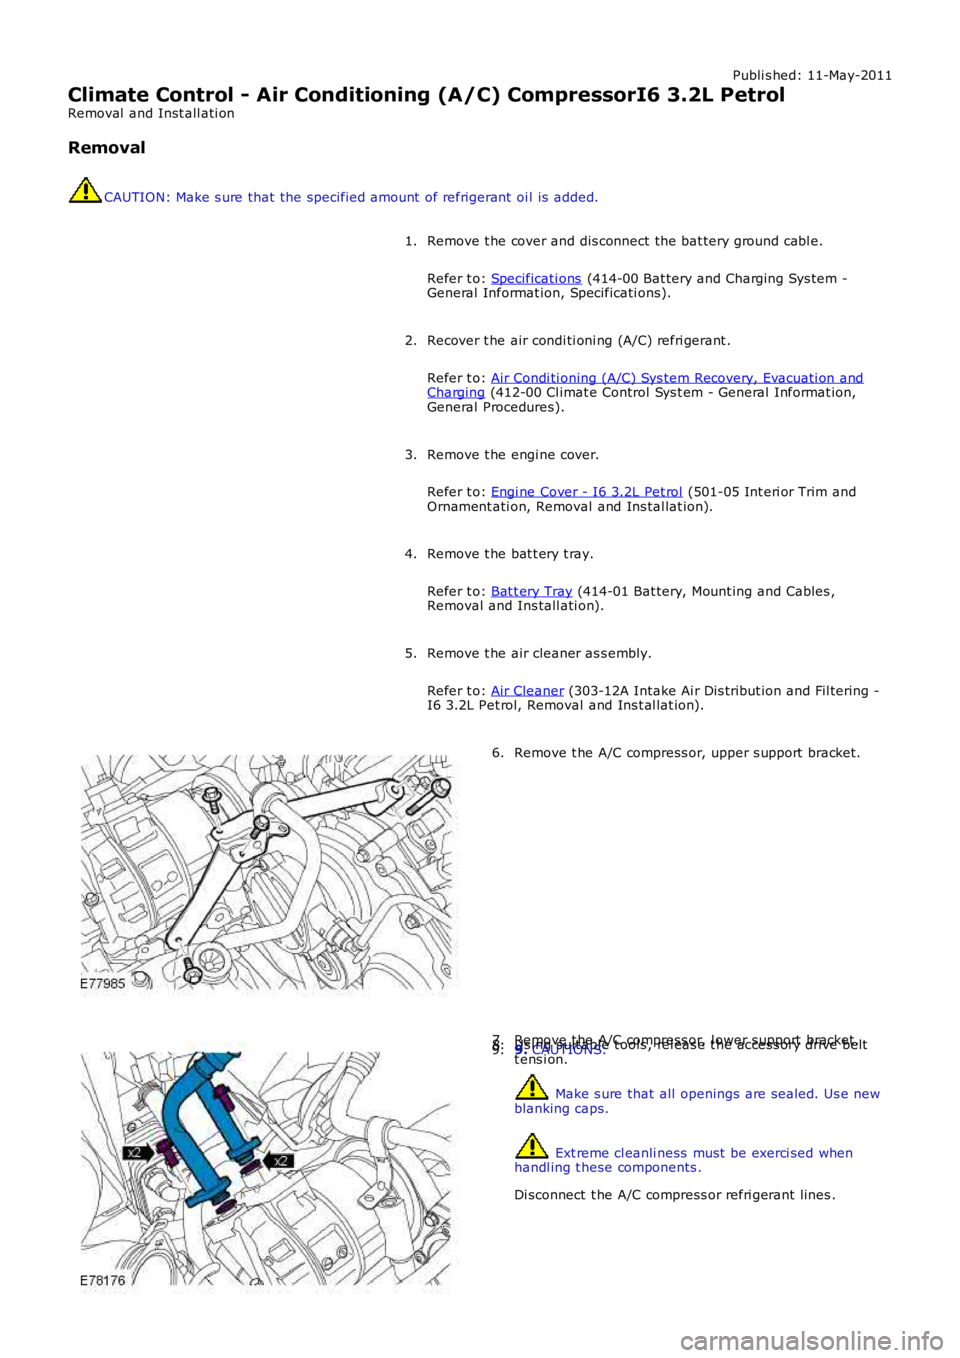
Remove t he A/C compress or, upper s upport bracket.6.
Remove t he A/C compress or, l ower support bracket.7.Us ing s uit able t ools , rel eas e t he acces s ory drive beltt ens i on.8.9. CAUTIONS:
Make s ure that all openings are sealed. Us e newblanking caps.
Ext reme cl eanli ness must be exerci sed whenhandl ing t hese components .
Di sconnect t he A/C compress or refri gerant lines .
9.
Page 1715 of 3229

Publi s hed: 11-May-2011
Climate Control - Air Conditioning (A/C) CompressorTD4 2.2L Diesel
Removal and Inst all ati on
Removal CAUTION: Make s ure that the specified amount of refrigerant oi l is added.
• NOTE: Removal s t eps in t his procedure may cont ain i nst all ati on det ail s.
Di sconnect t he bat t ery ground cable.
Refer t o: Specificati ons (414-00 Bat tery and Charging Sys tem -
General Informat ion, Specificati ons).
1.
Recover t he A/C refrigerant .
Refer t o: Air Condi ti oning (A/C) Sys tem Recovery, Evacuati on and Charging (412-00 Cl imat e Control Sys t em - General Informat ion,
General Procedures).
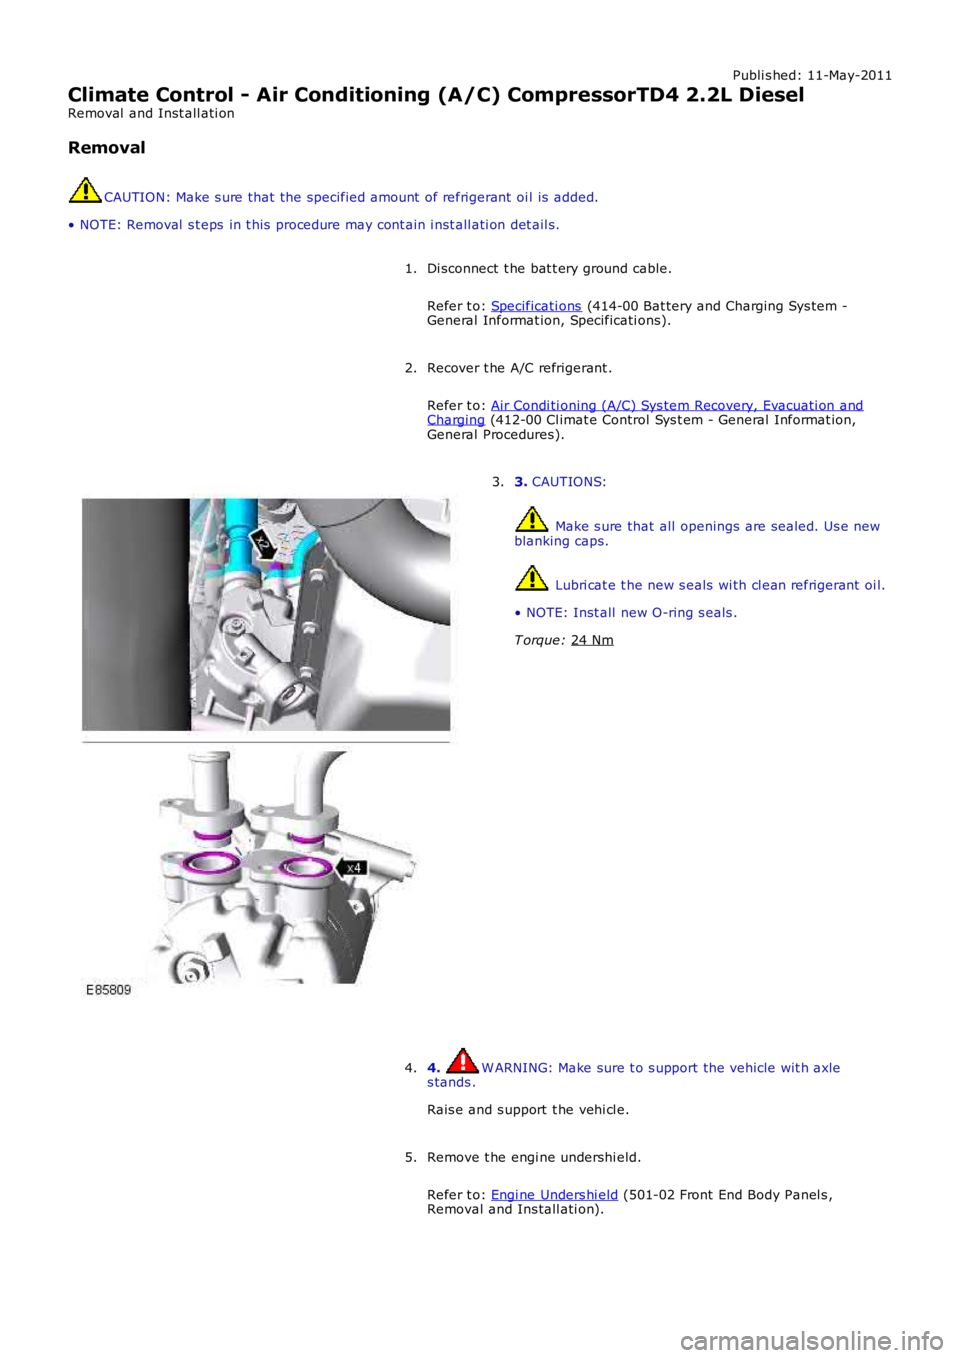
2. 3.
CAUTIONS: Make s ure that all openings are sealed. Us e new
blanking caps. Lubri cat e t he new s eals wi th cl ean refrigerant oi l.
• NOTE: Inst all new O-ring s eals .
T orque: 24 Nm 3.
4. W ARNING: Make sure t o s upport the vehicle wit h axle
s tands .
Rais e and s upport t he vehi cl e.
4.
Remove t he engi ne undershi eld.
Refer t o: Engi ne Unders hi eld (501-02 Front End Body Panel s ,
Removal and Ins tall ati on).
5.
Page 1718 of 3229
Publi s hed: 11-May-2011
Climate Control - Heater Core and Evaporator Core Housing
Removal and Inst all ati on
Removal
Make t he SRS s ys t em s afe.1.
Remove t he ins trument panel.
Refer t o: Ins trument Panel - TD4 2.2L Dies el (501-12 Inst rumentPanel and Cons ole, Removal and Inst all at ion).Refer t o: Ins trument Panel - I6 3.2L Pet rol (501-12 Ins t rument Paneland Consol e, Removal and Ins t al lat ion).
2.
Remove t he cl ocks pri ng.
Refer t o: Clocks pri ng (501-20B Supplement al Res t raint Sys tem,Removal and Ins tall ati on).
3.
Remove t he ins trument cl ust er.
Refer t o: Ins trument Clus ter (413-01 Ins t rument Clus t er, Removaland Inst all at ion).
4.
5.
Di sconnect t he keyl es s s t art module el ect ri calconnector.6.