1999 SUBARU LEGACY engine
[x] Cancel search: enginePage 929 of 1456

14. ABS Sensor
A: REMOVAL
1. FRONT ABS SENSOR
1) Disconnect front ABS sensor connector located
in engine compartment.
2) Remove bolts which secure sensor harness to
strut.
B4M0079A
3) Remove bolts which secure sensor harness to
body.
B4M1181A
4) Remove bolts which secure front ABS sensor to
housing, and remove front ABS sensor.
CAUTION:
IBe careful not to damage pole piece located
at tip of the sensor and teeth faces during
removal.
IDo not pull sensor harness during removal.
B4M1183A
5) Remove front disc brake caliper and disc rotor
from housing after removing front tire.6) Remove front drive shaft and housing and hub
assembly.
7) Remove tone wheel while removing hub from
housing and hub assembly.
CAUTION:
Be careful not to damage teeth faces of tone
wheel during removal.
G4M0444
2. REAR ABS SENSOR
1) Remove rear seat and disconnect rear ABS
sensor connector.
2) Remove rear sensor harness bracket from rear
trailing link and bracket.
3) Remove rear ABS sensor from rear back plate.
B4M1182A
4) Remove rear tone wheel while removing hub
from housing and hub assembly.
CAUTION:
IBe careful not to damage pole piece located
at tip of the sensor and teeth faces during
removal.
IDo not pull sensor harness during removal.
B: INSPECTION
1. ABS SENSOR
1) Check pole piece of ABS sensor for foreign par-
ticles or damage. If necessary, clean pole piece or
replace ABS sensor.
52
4-4[W14A1]SERVICE PROCEDURE
14. ABS Sensor
Page 932 of 1456
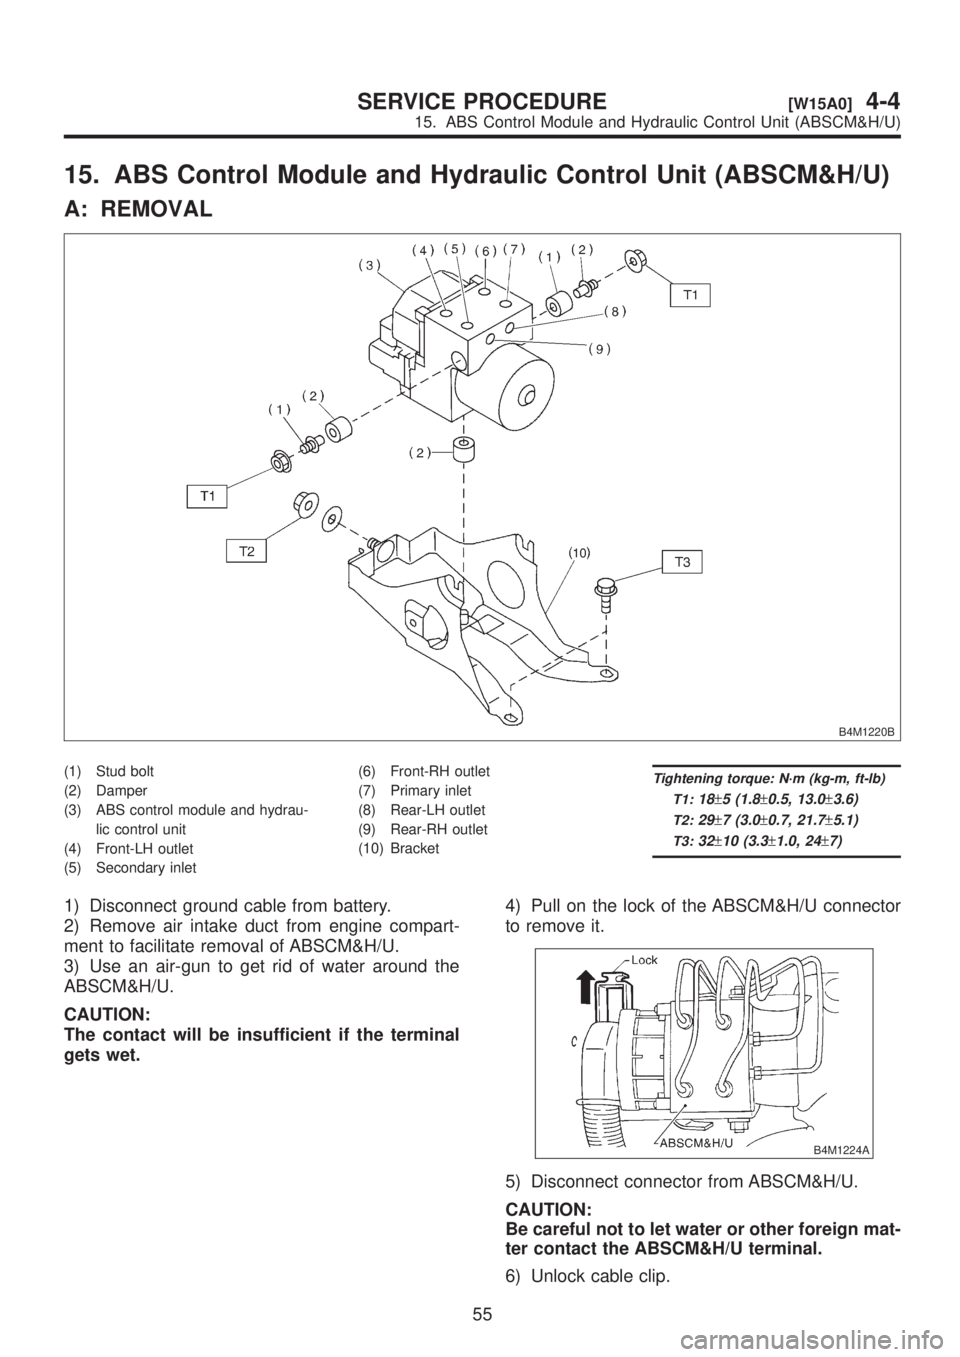
15. ABS Control Module and Hydraulic Control Unit (ABSCM&H/U)
A: REMOVAL
B4M1220B
(1) Stud bolt
(2) Damper
(3) ABS control module and hydrau-
lic control unit
(4) Front-LH outlet
(5) Secondary inlet(6) Front-RH outlet
(7) Primary inlet
(8) Rear-LH outlet
(9) Rear-RH outlet
(10) BracketTightening torque: N´m (kg-m, ft-lb)
T1:
18±5 (1.8±0.5, 13.0±3.6)
T2:29±7 (3.0±0.7, 21.7±5.1)
T3:32±10 (3.3±1.0, 24±7)
1) Disconnect ground cable from battery.
2) Remove air intake duct from engine compart-
ment to facilitate removal of ABSCM&H/U.
3) Use an air-gun to get rid of water around the
ABSCM&H/U.
CAUTION:
The contact will be insufficient if the terminal
gets wet.4) Pull on the lock of the ABSCM&H/U connector
to remove it.
B4M1224A
5) Disconnect connector from ABSCM&H/U.
CAUTION:
Be careful not to let water or other foreign mat-
ter contact the ABSCM&H/U terminal.
6) Unlock cable clip.
55
[W15A0]4-4SERVICE PROCEDURE
15. ABS Control Module and Hydraulic Control Unit (ABSCM&H/U)
Page 933 of 1456
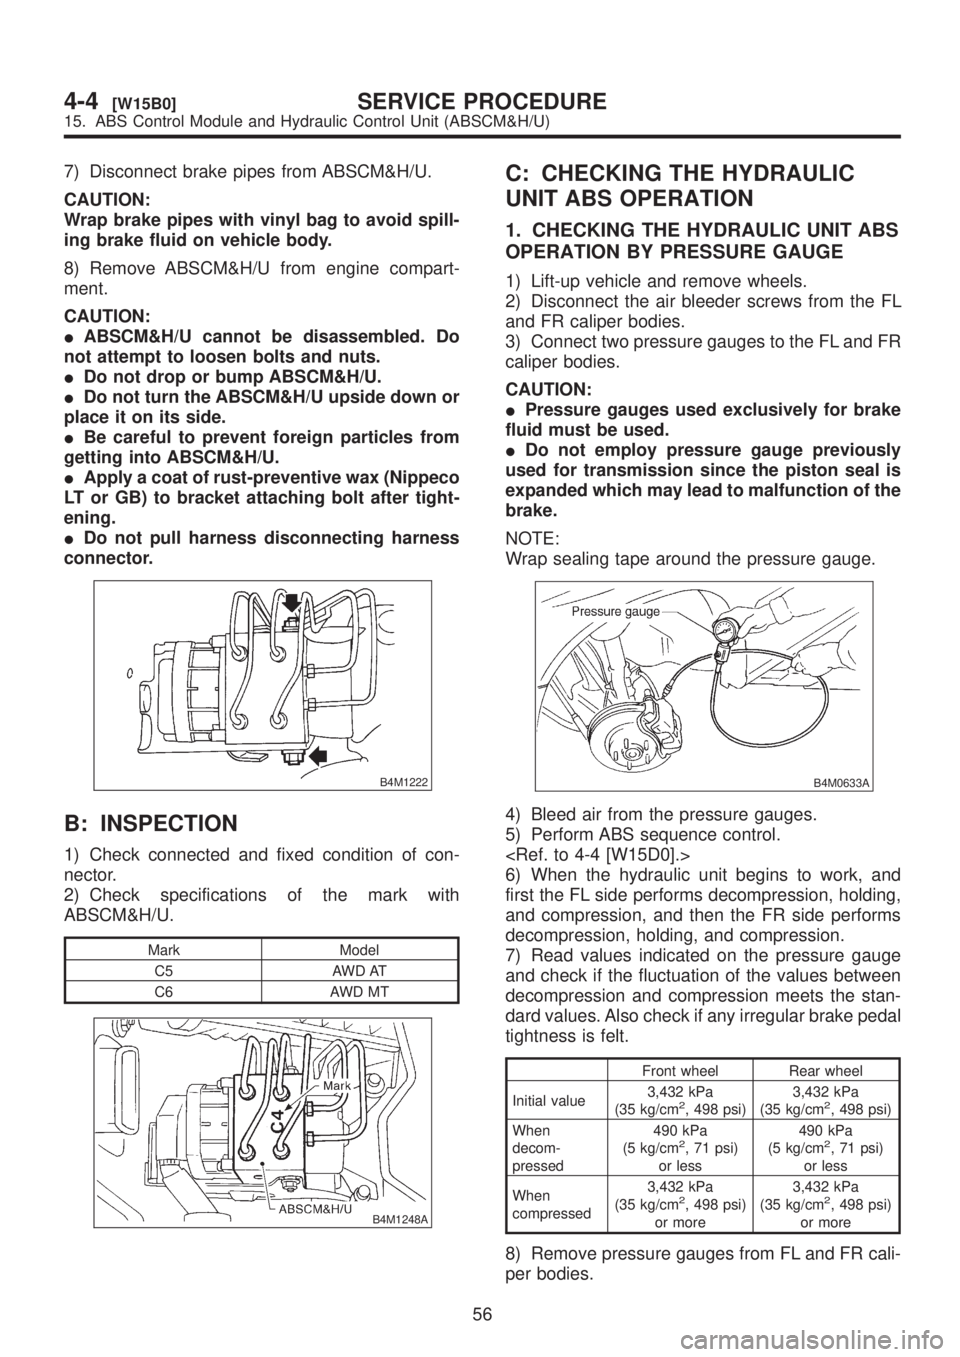
7) Disconnect brake pipes from ABSCM&H/U.
CAUTION:
Wrap brake pipes with vinyl bag to avoid spill-
ing brake fluid on vehicle body.
8) Remove ABSCM&H/U from engine compart-
ment.
CAUTION:
IABSCM&H/U cannot be disassembled. Do
not attempt to loosen bolts and nuts.
IDo not drop or bump ABSCM&H/U.
IDo not turn the ABSCM&H/U upside down or
place it on its side.
IBe careful to prevent foreign particles from
getting into ABSCM&H/U.
IApply a coat of rust-preventive wax (Nippeco
LT or GB) to bracket attaching bolt after tight-
ening.
IDo not pull harness disconnecting harness
connector.
B4M1222
B: INSPECTION
1) Check connected and fixed condition of con-
nector.
2) Check specifications of the mark with
ABSCM&H/U.
Mark Model
C5 AWD AT
C6 AWD MT
B4M1248A
C: CHECKING THE HYDRAULIC
UNIT ABS OPERATION
1. CHECKING THE HYDRAULIC UNIT ABS
OPERATION BY PRESSURE GAUGE
1) Lift-up vehicle and remove wheels.
2) Disconnect the air bleeder screws from the FL
and FR caliper bodies.
3) Connect two pressure gauges to the FL and FR
caliper bodies.
CAUTION:
IPressure gauges used exclusively for brake
fluid must be used.
IDo not employ pressure gauge previously
used for transmission since the piston seal is
expanded which may lead to malfunction of the
brake.
NOTE:
Wrap sealing tape around the pressure gauge.
B4M0633A
4) Bleed air from the pressure gauges.
5) Perform ABS sequence control.
6) When the hydraulic unit begins to work, and
first the FL side performs decompression, holding,
and compression, and then the FR side performs
decompression, holding, and compression.
7) Read values indicated on the pressure gauge
and check if the fluctuation of the values between
decompression and compression meets the stan-
dard values. Also check if any irregular brake pedal
tightness is felt.
Front wheel Rear wheel
Initial value3,432 kPa
(35 kg/cm
2, 498 psi)3,432 kPa
(35 kg/cm2, 498 psi)
When
decom-
pressed490 kPa
(5 kg/cm
2, 71 psi)
or less490 kPa
(5 kg/cm2, 71 psi)
or less
When
compressed3,432 kPa
(35 kg/cm
2, 498 psi)
or more3,432 kPa
(35 kg/cm2, 498 psi)
or more
8) Remove pressure gauges from FL and FR cali-
per bodies.
56
4-4[W15B0]SERVICE PROCEDURE
15. ABS Control Module and Hydraulic Control Unit (ABSCM&H/U)
Page 934 of 1456
9) Remove air bleeder screws from the RL and RR
caliper bodies.
10) Connect the air bleeder screws to the FL and
FR caliper bodies.
11) Connect two pressure gauges to the RL and
RR caliper bodies.
12) Bleed air from the pressure gauges and the FL
and FR caliper bodies.
13) Perform ABS sequence control.
14) When the hydraulic unit begins to work, at first
the RR side performs decompression, holding, and
compression, and then the RL side performs
decompression, holding, and compression.
15) Read values indicated on the pressure
gauges and check if they meet the standard value.
16) After checking, remove the pressure gauges
from caliper bodies.
17) Connect the air bleeder screws to RL and RR
caliper bodies.
18) Bleed air from brake line.
2. CHECKING THE HYDRAULIC UNIT ABS
OPERATION WITH BRAKE TESTER
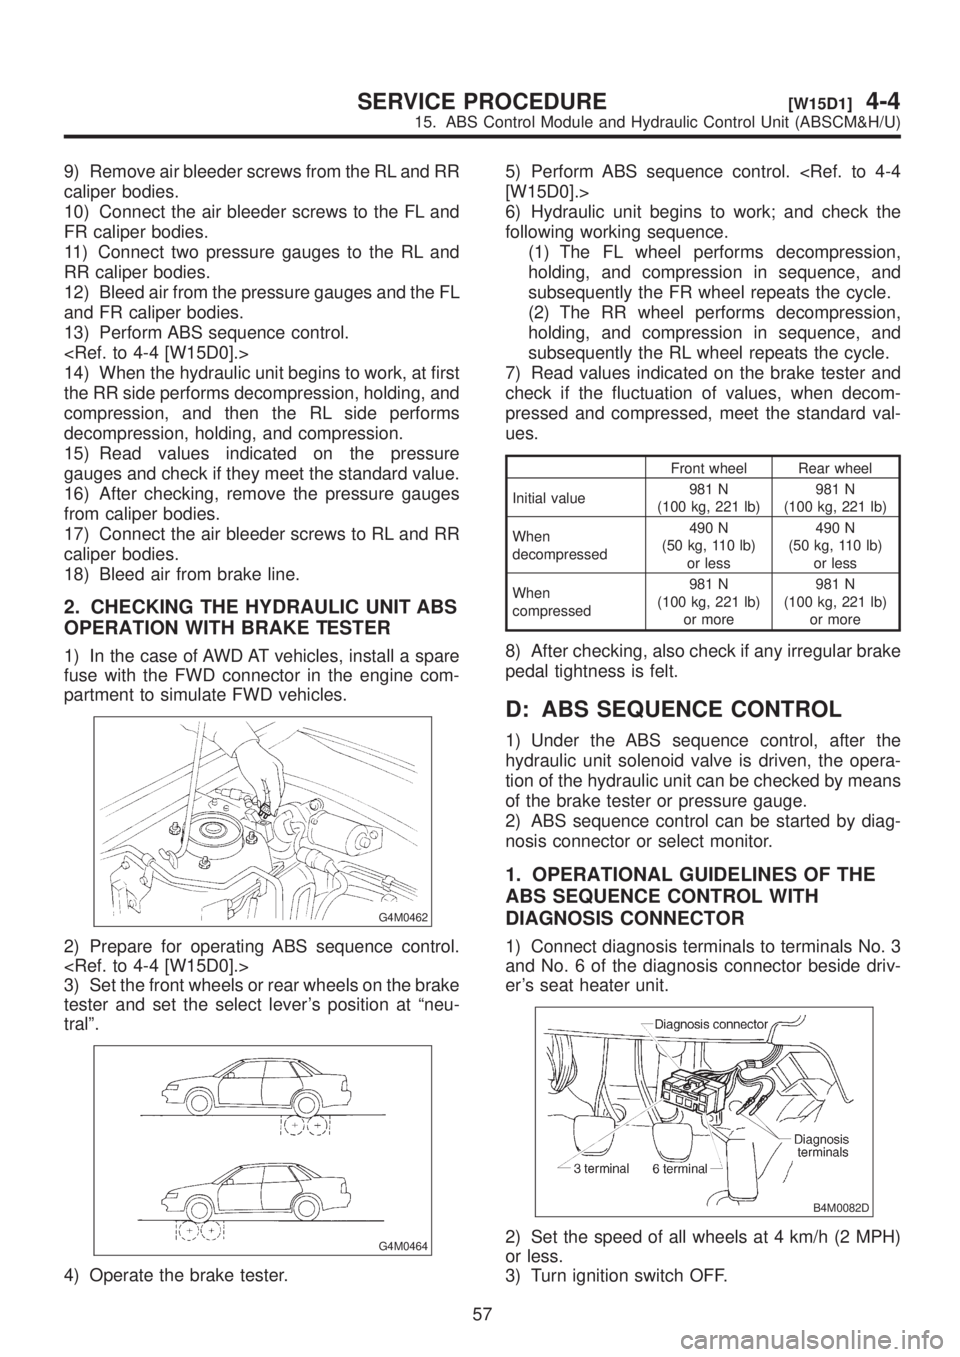
1) In the case of AWD AT vehicles, install a spare
fuse with the FWD connector in the engine com-
partment to simulate FWD vehicles.
G4M0462
2) Prepare for operating ABS sequence control.
3) Set the front wheels or rear wheels on the brake
tester and set the select lever's position at ªneu-
tralº.
G4M0464
4) Operate the brake tester.5) Perform ABS sequence control.
6) Hydraulic unit begins to work; and check the
following working sequence.
(1) The FL wheel performs decompression,
holding, and compression in sequence, and
subsequently the FR wheel repeats the cycle.
(2) The RR wheel performs decompression,
holding, and compression in sequence, and
subsequently the RL wheel repeats the cycle.
7) Read values indicated on the brake tester and
check if the fluctuation of values, when decom-
pressed and compressed, meet the standard val-
ues.
Front wheel Rear wheel
Initial value981 N
(100 kg, 221 lb)981 N
(100 kg, 221 lb)
When
decompressed490 N
(50 kg, 110 lb)
or less490 N
(50 kg, 110 lb)
or less
When
compressed981 N
(100 kg, 221 lb)
or more981 N
(100 kg, 221 lb)
or more
8) After checking, also check if any irregular brake
pedal tightness is felt.
D: ABS SEQUENCE CONTROL
1) Under the ABS sequence control, after the
hydraulic unit solenoid valve is driven, the opera-
tion of the hydraulic unit can be checked by means
of the brake tester or pressure gauge.
2) ABS sequence control can be started by diag-
nosis connector or select monitor.
1. OPERATIONAL GUIDELINES OF THE
ABS SEQUENCE CONTROL WITH
DIAGNOSIS CONNECTOR
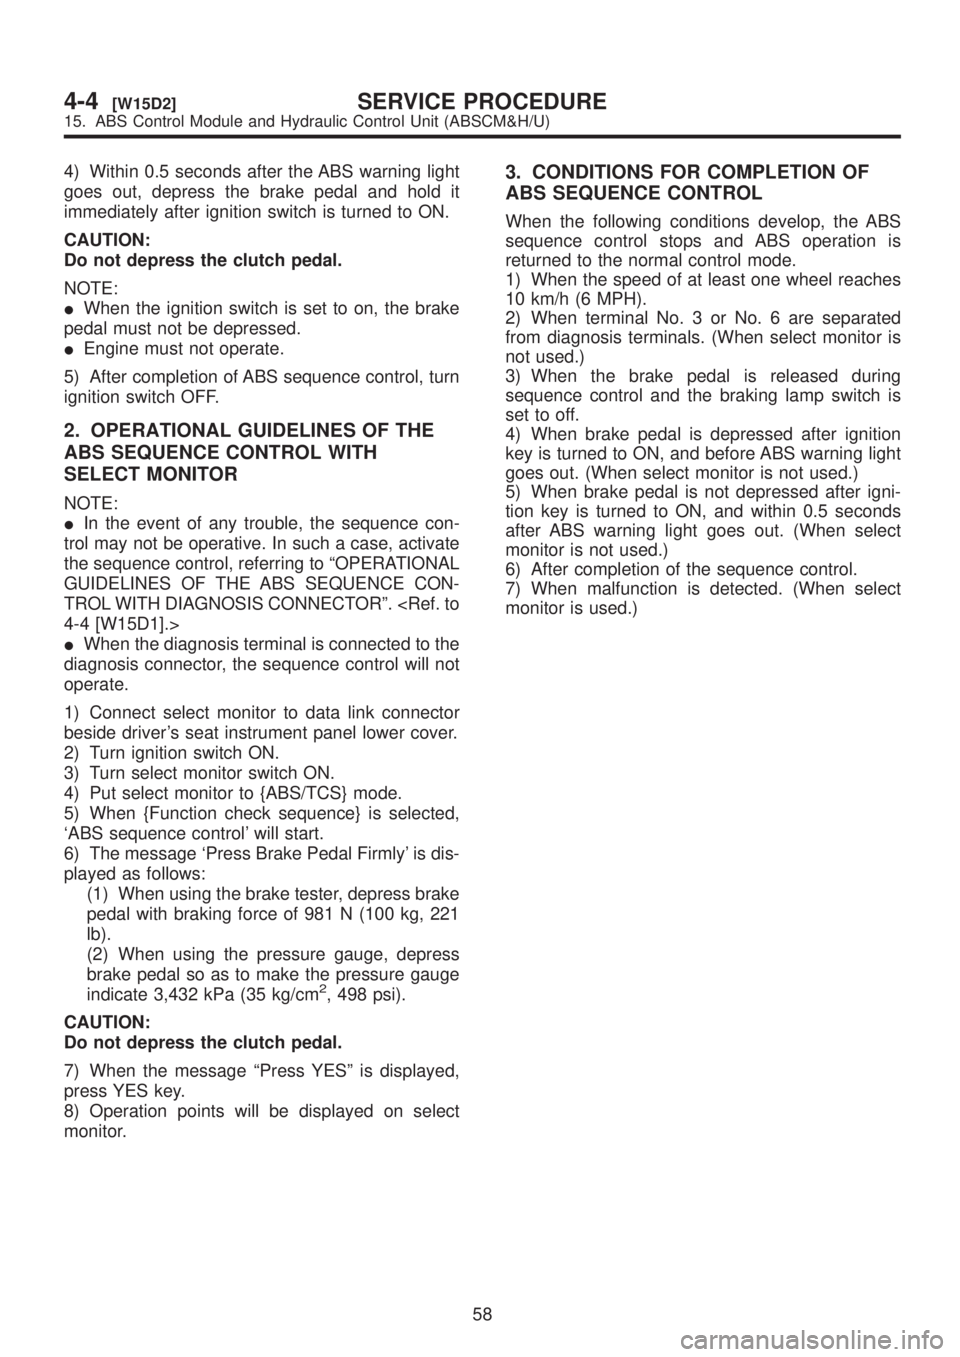
1) Connect diagnosis terminals to terminals No. 3
and No. 6 of the diagnosis connector beside driv-
er's seat heater unit.
B4M0082D
2) Set the speed of all wheels at 4 km/h (2 MPH)
or less.
3) Turn ignition switch OFF.
57
[W15D1]4-4SERVICE PROCEDURE
15. ABS Control Module and Hydraulic Control Unit (ABSCM&H/U)
Page 935 of 1456
4) Within 0.5 seconds after the ABS warning light
goes out, depress the brake pedal and hold it
immediately after ignition switch is turned to ON.
CAUTION:
Do not depress the clutch pedal.
NOTE:
IWhen the ignition switch is set to on, the brake
pedal must not be depressed.
IEngine must not operate.
5) After completion of ABS sequence control, turn
ignition switch OFF.
2. OPERATIONAL GUIDELINES OF THE
ABS SEQUENCE CONTROL WITH
SELECT MONITOR
NOTE:
IIn the event of any trouble, the sequence con-
trol may not be operative. In such a case, activate
the sequence control, referring to ªOPERATIONAL
GUIDELINES OF THE ABS SEQUENCE CON-
TROL WITH DIAGNOSIS CONNECTORº.
IWhen the diagnosis terminal is connected to the
diagnosis connector, the sequence control will not
operate.
1) Connect select monitor to data link connector
beside driver's seat instrument panel lower cover.
2) Turn ignition switch ON.
3) Turn select monitor switch ON.
4) Put select monitor to {ABS/TCS} mode.
5) When {Function check sequence} is selected,
`ABS sequence control' will start.
6) The message `Press Brake Pedal Firmly' is dis-
played as follows:
(1) When using the brake tester, depress brake
pedal with braking force of 981 N (100 kg, 221
lb).
(2) When using the pressure gauge, depress
brake pedal so as to make the pressure gauge
indicate 3,432 kPa (35 kg/cm
2, 498 psi).
CAUTION:
Do not depress the clutch pedal.
7) When the message ªPress YESº is displayed,
press YES key.
8) Operation points will be displayed on select
monitor.
3. CONDITIONS FOR COMPLETION OF
ABS SEQUENCE CONTROL
When the following conditions develop, the ABS
sequence control stops and ABS operation is
returned to the normal control mode.
1) When the speed of at least one wheel reaches
10 km/h (6 MPH).
2) When terminal No. 3 or No. 6 are separated
from diagnosis terminals. (When select monitor is
not used.)
3) When the brake pedal is released during
sequence control and the braking lamp switch is
set to off.
4) When brake pedal is depressed after ignition
key is turned to ON, and before ABS warning light
goes out. (When select monitor is not used.)
5) When brake pedal is not depressed after igni-
tion key is turned to ON, and within 0.5 seconds
after ABS warning light goes out. (When select
monitor is not used.)
6) After completion of the sequence control.
7) When malfunction is detected. (When select
monitor is used.)
58
4-4[W15D2]SERVICE PROCEDURE
15. ABS Control Module and Hydraulic Control Unit (ABSCM&H/U)
Page 937 of 1456

E: INSTALLATION
1) Install ABSCM&H/U.
CAUTION:
Confirm that the specifications of the
ABSCM&H/U conforms to the vehicle specifica-
tions.
Tightening torque:
18
±5 N´m (1.8±0.5 kg-m, 13.0±3.6 ft-lb)
B4M1222
2) Connect brake pipes to their correct
ABSCM&H/U connections.
Brake pipe tightening torque:
15+3/þ2N´m (1.5+0.3/þ0.2kg-m, 10.8+2.2/þ1.4ft-lb)
3) Using cable clip, secure ABSCM&H/U harness
to bracket.
4) Connect connector to ABSCM&H/U.
CAUTION:
IBe sure to remove all foreign matter from
inside the connector before connecting.
IEnsure that the ABSCM&H/U connetor is
securely locked.
5) Install air intake duct.
6) Connect ground cable to battery.
7) Bleed air from the brake system.
16. G Sensor
A: REMOVAL
1. FRONT ABS SENSOR
1) Disconnect front ABS sensor connector located
in engine compartment.
2) Remove bolts which secure sensor harness to
strut.
B4M1442A
3) Remove bolts which secure sensor harness to
body.
B4M1181A
4) Remove bolts which secure front ABS sensor to
housing, and remove front ABS sensor.
CAUTION:
IBe careful not to damage pole piece located
at tip of the sensor and teeth faces during
removal.
IDo not pull sensor harness during removal.
B4M1183A
5) Remove front disc brake caliper and disc rotor
from housing after removing front tire.
60
4-4[W15E0]SERVICE PROCEDURE
16. G Sensor
Page 938 of 1456

E: INSTALLATION
1) Install ABSCM&H/U.
CAUTION:
Confirm that the specifications of the
ABSCM&H/U conforms to the vehicle specifica-
tions.
Tightening torque:
18
±5 N´m (1.8±0.5 kg-m, 13.0±3.6 ft-lb)
B4M1222
2) Connect brake pipes to their correct
ABSCM&H/U connections.
Brake pipe tightening torque:
15+3/þ2N´m (1.5+0.3/þ0.2kg-m, 10.8+2.2/þ1.4ft-lb)
3) Using cable clip, secure ABSCM&H/U harness
to bracket.
4) Connect connector to ABSCM&H/U.
CAUTION:
IBe sure to remove all foreign matter from
inside the connector before connecting.
IEnsure that the ABSCM&H/U connetor is
securely locked.
5) Install air intake duct.
6) Connect ground cable to battery.
7) Bleed air from the brake system.
16. G Sensor
A: REMOVAL
1. FRONT ABS SENSOR
1) Disconnect front ABS sensor connector located
in engine compartment.
2) Remove bolts which secure sensor harness to
strut.
B4M1442A
3) Remove bolts which secure sensor harness to
body.
B4M1181A
4) Remove bolts which secure front ABS sensor to
housing, and remove front ABS sensor.
CAUTION:
IBe careful not to damage pole piece located
at tip of the sensor and teeth faces during
removal.
IDo not pull sensor harness during removal.
B4M1183A
5) Remove front disc brake caliper and disc rotor
from housing after removing front tire.
60
4-4[W15E0]SERVICE PROCEDURE
16. G Sensor
Page 952 of 1456
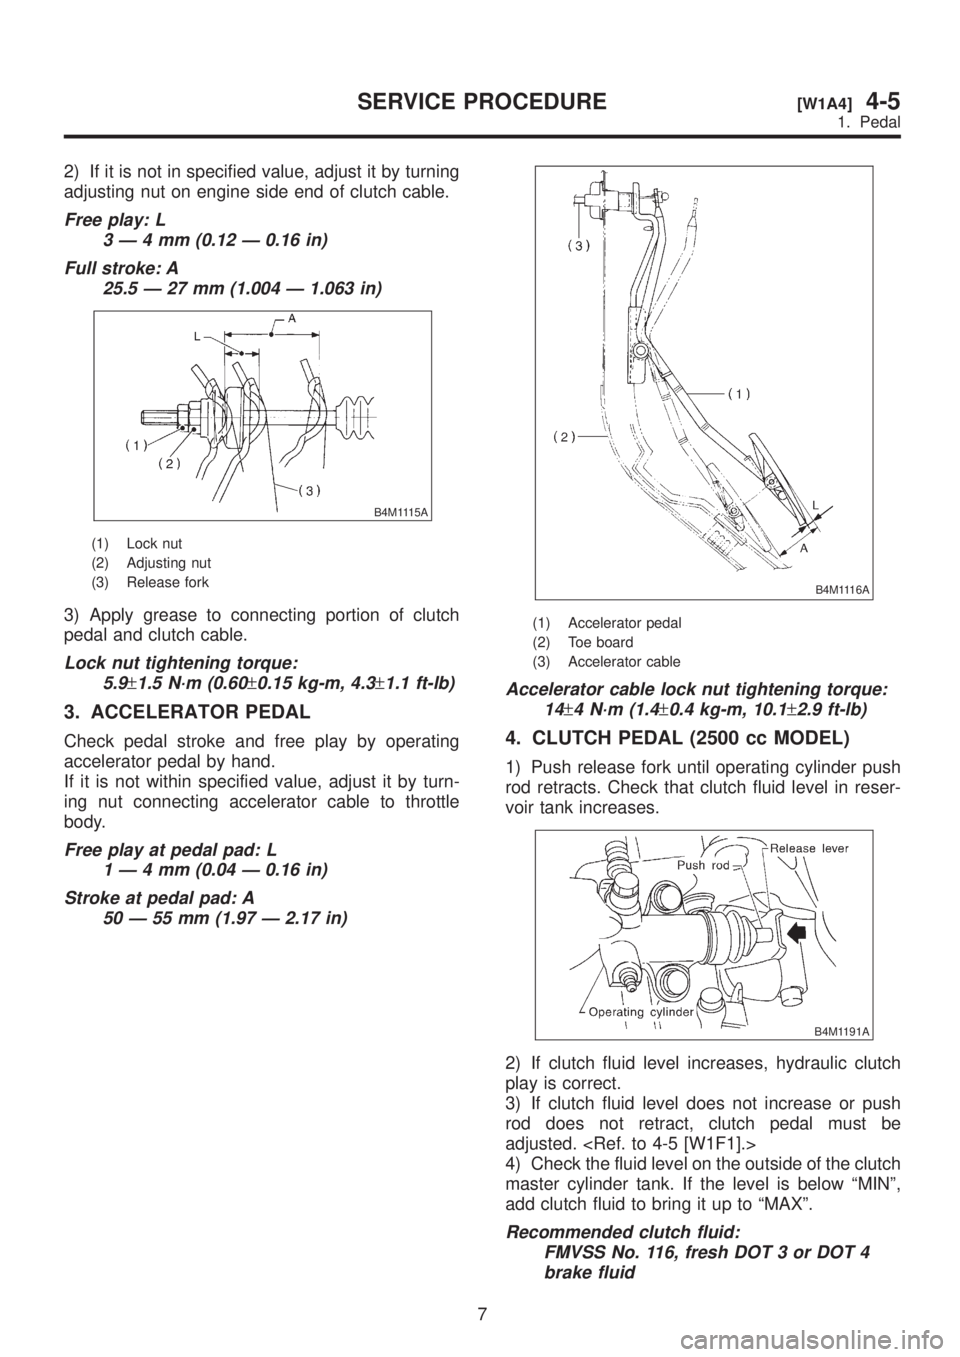
2) If it is not in specified value, adjust it by turning
adjusting nut on engine side end of clutch cable.
Free play: L
3Ð4mm(0.12 Ð 0.16 in)
Full stroke: A
25.5 Ð 27 mm (1.004 Ð 1.063 in)
B4M1115A
(1) Lock nut
(2) Adjusting nut
(3) Release fork
3) Apply grease to connecting portion of clutch
pedal and clutch cable.
Lock nut tightening torque:
5.9
±1.5 N´m (0.60±0.15 kg-m, 4.3±1.1 ft-lb)
3. ACCELERATOR PEDAL
Check pedal stroke and free play by operating
accelerator pedal by hand.
If it is not within specified value, adjust it by turn-
ing nut connecting accelerator cable to throttle
body.
Free play at pedal pad: L
1Ð4mm(0.04 Ð 0.16 in)
Stroke at pedal pad: A
50 Ð 55 mm (1.97 Ð 2.17 in)
B4M1116A
(1) Accelerator pedal
(2) Toe board
(3) Accelerator cable
Accelerator cable lock nut tightening torque:
14
±4 N´m (1.4±0.4 kg-m, 10.1±2.9 ft-lb)
4. CLUTCH PEDAL (2500 cc MODEL)
1) Push release fork until operating cylinder push
rod retracts. Check that clutch fluid level in reser-
voir tank increases.
B4M1191A
2) If clutch fluid level increases, hydraulic clutch
play is correct.
3) If clutch fluid level does not increase or push
rod does not retract, clutch pedal must be
adjusted.
4) Check the fluid level on the outside of the clutch
master cylinder tank. If the level is below ªMINº,
add clutch fluid to bring it up to ªMAXº.
Recommended clutch fluid:
FMVSS No. 116, fresh DOT 3 or DOT 4
brake fluid
7
[W1A4]4-5SERVICE PROCEDURE
1. Pedal