1993 DODGE TRUCK fuel cap
[x] Cancel search: fuel capPage 1480 of 1502
EMISSION
CONTROL SYSTEMS
25 - :
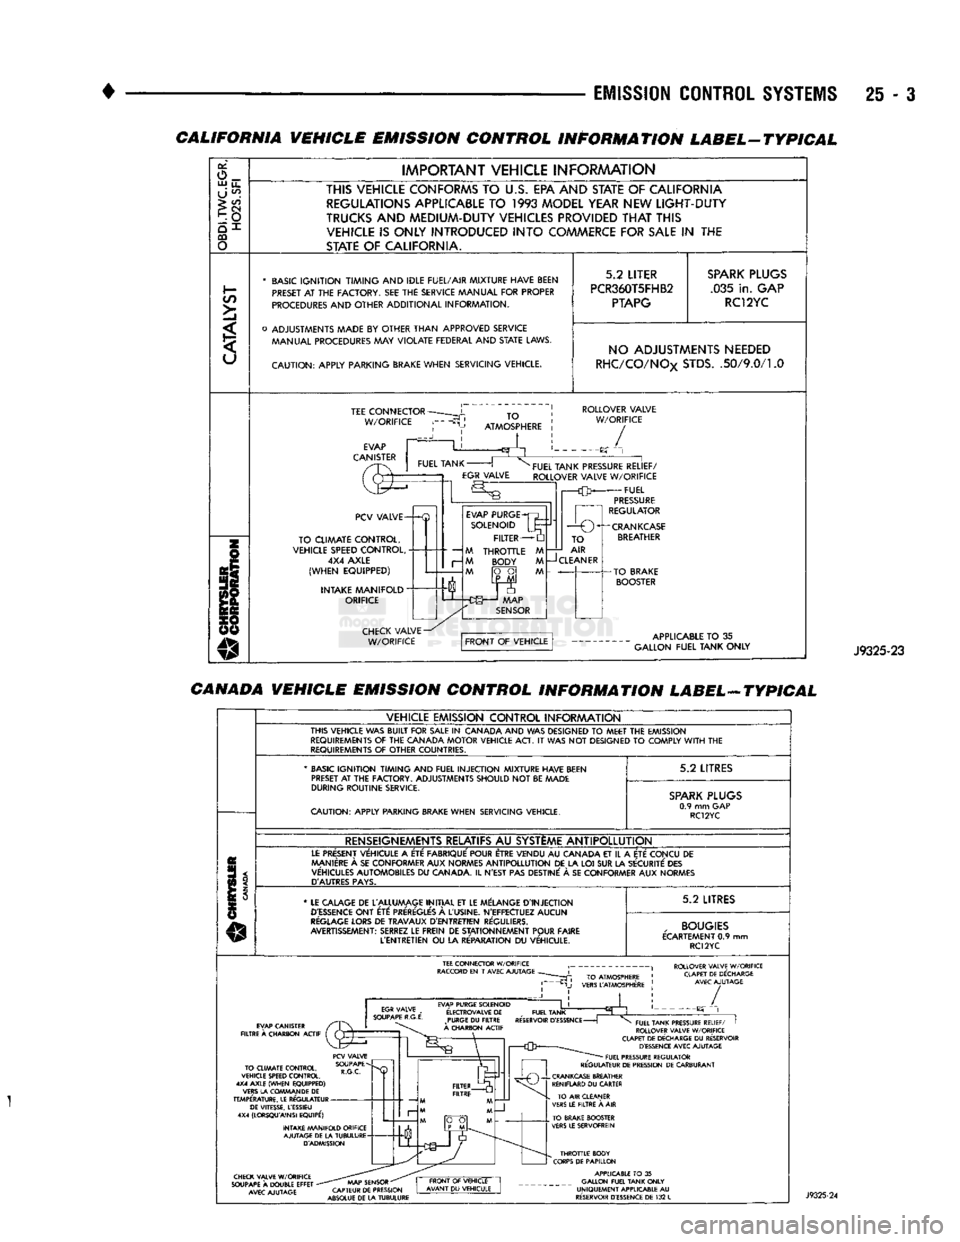
CALIFORNIA VEHICLE EMISSION CONTROL INFORMATION LABEL-TYPICAL
or,
o_ UJ
u_
U
^
>
CO
CQ
o
IMPORTANT
VEHICLE
INFORAAATION
THIS VEHICLE CONFORMS
TO
U.S.
EPA AND STATE
OF
CALIFORNIA REGULATIONS APPLICABLE
TO 1993
MODEL YEAR NEW
LIGHT-DUTY
TRUCKS
AND
MEDIUM-DUTY VEHICLES PROVIDED
THAT
THIS VEHICLE
IS
ONLY INTRODUCED
INTO
COMMERCE FOR
SALE
IN THE
STATE
OF
CALIFORNIA.
*
BASIC
IGNITION TIMING
AND
IDLE FUEL/AIR
MIXTURE HAVE BEEN
PRESET
AT THE
FACTORY.
SEE THE
SERVICE MANUAL
FOR
PROPER
PROCEDURES
AND
OTHER
ADDITIONAL
INFORMATION.
o
ADJUSTMENTS MADE
BY
OTHER
THAN
APPROVED
SERVICE MANUAL PROCEDURES
MAY
VIOLATE
FEDERAL
AND
STATE
LAWS.
CAUTION:
APPLY
PARKING BRAKE
WHEN
SERVICING
VEHICLE.
5.2
LITER
PCR360T5FHB2
PTAPG
SPARK
PLUGS
.035
in.
GAP RC12YC NO ADJUSTMENTS NEEDED
RHC/CO/NOx
STDS.
.50/9.0/1.0
TEE
CONNECTOR
W/ORIFICE
TO
ATMOSPHERE
ROLLOVER
VALVE
W/ORIFICE
/
PCV
VALVE-
TO
CLIMATE
CONTROL,
VEHICLE SPEED
CONTROL,
4X4
AXLE
(WHEN
EQUIPPED)
INTAKE
MANIFOLD"
ORIFICE
—
M
r-
M
EVAP
PURGE
SOLENOID
FILTER
THROTTLE
BODY
FUEL
TANK PRESSURE
RELIEF/
ROLLOVER
VALVE
W/ORIFICE
FUEL
PRESSURE
REGULATOR
1
r—O
O^-CRANKCASE
TO
AIR
CLEANER
APPLICABLE
TO
35
GALLON
FUEL
TANK
ONLY
J9325-23
CANADA VEHICLE EMISSION CONTROL INFORMATION LABEL-ATYPICAL
VEHICLE
EMISSION
CONTROL
INFORAAATION
THIS
VEHICLE
WAS
BUILT
FOR
SALE
IN
CANADA
AND WAS
DESIGNED
TO
MEET
THE
EMISSION
REQUIREMENTS
OF THE
CANADA
MOTOR
VEHICLE
ACT.
IT
WAS NOT
DESIGNED
TO
COMPLY
WITH
THE
REQUIREMENTS
OF
OTHER
COUNTRIES.
'
BASIC
IGNITION TIMING
AND
FUEL
INJECTION
MIXTURE HAVE BEEN
PRESET
AT
THE
FACTORY.
ADJUSTMENTS
SHOULD
NOT
BE
MADE
DURING
ROUTINE
SERVICE.
CAUTION:
APPLY
PARKING BRAKE
WHEN
SERVICING
VEHICLE.
5.2
LITRES
SPARK
PLUGS
0.9
mm GAP
RC12YC
RENSEIGNEMENTS RELATIFS
AU
SYSTEME
ANTIPOLLUTION
LE
PRESENT
VEHICULE
A
ETE
FABRIQUE'
POUR ETRE
VENDU
AU
CANADA
ET
IL
A
ETE
CONCU
DE
MANIERE
A
SE
CON
FORMER
AUX
NORMES
ANTIPOLLUTION
DE LA LOI SUR LA
SECURITE
DES
VEHICULES
AUTOMOBILES
DU
CANADA.
IL
N'EST
PAS
DESTINE'
A SE
CON
FORMER
AUX
NORMES
D'AUTRES
PAYS.
*
LE
CALAGE
DE
L'ALLUMAGE
INITIAL
ET LE
MELANGE
D'INJECTION
D'ESSENCE
ONT
ETC:
PREREGLE'S
A
L'USINE.
N'EFFECTUEZ
AUCUN
REGLAGE
LORS
DE
TRAVAUX
D'ENTRETIEN
REGULIERS.
AVERTISSEMENT:
SERREZ
LE
FREIN
DE
STATIONNEMENT
POUR
FAIRE
L'ENTRETIEN
OU
LA
RE'PARATION
DU
VEHICULE.
5.2
LITRES
,
BOUGIES
ECARTEMENT
0.9 mm
RC12YC
ROLLOVER VALVE W/ORIFICE CLAPET DE DECHARGE AVEC AJUTAGE EVAP PURGE SOLENOID
E'LECTROVALVE
DE
_
FUEL TANK PURGE
DU
FILTRE RESERVOIR
D'ESSENCE
-
A CHARBON ACTIF /
TO CLIMATE CONTROL,
VEHICLE SPEED CONTROL.
4X4 AXLE (WHEN EQUIPPED)
VERS LA COWMAN DE
DE
TEMPERATURE. LE REGULATEUR DE VITESSE, LESSIEU
4X4 (LORSQU'AINSI EQUIPE')
INTAKE MANIFOLD ORIFICE AJUTAGE DE LA TUBULURE D'ADMISSION FUEL TANK PRESSURE RELIEF/
I
ROLLOVER VALVE W/ORIFICE
CLAPET DE DECHARGE
DU
RESERVOIR D'ESSENCE AVEC AJUTAGE FUEL PRESSURE REGULATOR
REGULATEUR DE PRESSION DE CARBURANT CHECK VALVE W/ORIFICE
SOUPAPE
A
DOUBLE EFFET
-
AVEC AJUTAGE AAAP SENSOR
"
CAPTEUR DE PRESSION
ABSOLUE DE LA TUBULURE THROTTLE BODY
CORPS DE PAPILLON APPLICABLE
TO
35
GALLON FUEL TANK ONLY
UNIQUEMENT APPLICABLE
AU
RESERVOIR D'ESSENCE DE
132
L
Page 1483 of 1502
25
- 6
EMISSION CONTROL
SYSTEMS
•
EWAPORATIWE EMISSION CONTROLS
INDEX
page
Crankcase
Breather/Filter—Gas Powered
Engines
. . . 9
EVAP
(Evaporation)
Control
System
. 6
EVAP
Canister
. . 6
page
Evap
Canister
Purge
Solenoid
6
Fuel Tank
Filler
Tube
Cap . 7
Positive
Crankcase
Ventilation
(PCV)
System
.... 7
Pressure
Relief/Rollover Valve
6
EVAP (EVAPORATION) CONTROL SYSTEM GENERAL
INFORMATION
The function
of the
EVAP control system
is to
pre
vent
the
emissions
of
gasoline vapors from
the
fuel
tank into
the
atmosphere. When fuel evaporates
in
the fuel tank,
the
vapors pass through vent hoses
or
tubes
to a
carbon filled EVAP canister. They
are
temporarily held
in the
canister until they
can be
drawn into
the
intake manifold when
the
engine
is
running.
The vapors
are
drawn into
the
engine
at
idle
as
well
as off
idle. This system
is
called
a
Bi-level Purge
System where there
is a
dual source
of
vacuum
to re
move fuel vapor from
the
EVAP canister. The EVAP canister
is a
feature
on all
models
for
the storage
of
fuel vapors from
the
fuel tank.
The hoses used
in
this system
are
specially
manufactured.
If
replacement becomes neces sary,
it is
important
to use
only fuel resistant
hose.
PRESSURE
RELIEF/ROLLOVER VALVE
These vehicles
are
equipped with
a
combination
pressure relief
and
rollover valve. This dual function valve will relieve fuel tank pressure
and
also prevent
fuel flow through
the
fuel tank vent hoses
in the
event
of an
accidental vehicle rollover. The valve incorporates
a
pressure relief mechanism
that releases fuel tank pressure when
the
pressure increases above
the
calibrated sealing value. Refer
to
the Fuel Tank section
of
Group
14,
Fuel Systems
for
removal
and
installation procedures.
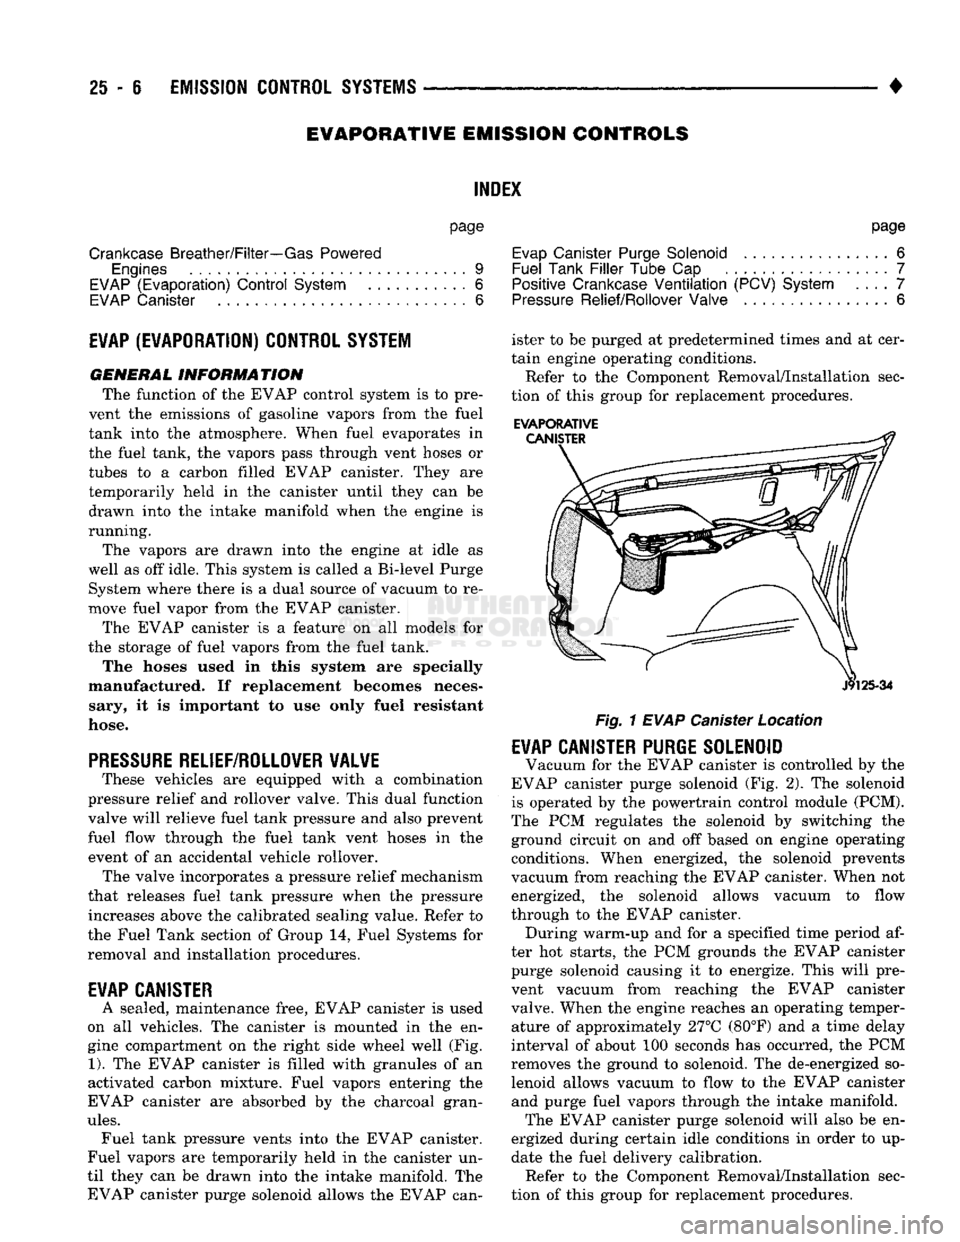
EVAP CANISTER
A sealed, maintenance free, EVAP canister
is
used
on
all
vehicles.
The
canister
is
mounted
in the en
gine compartment
on the
right side wheel well
(Fig.
1).
The
EVAP canister
is
filled with granules
of an
activated carbon mixture. Fuel vapors entering
the
EVAP canister
are
absorbed
by the
charcoal gran
ules.
Fuel tank pressure vents into
the
EVAP canister.
Fuel vapors
are
temporarily held
in the
canister
un
til they
can be
drawn into
the
intake manifold.
The
EVAP canister purge solenoid allows
the
EVAP can ister
to be
purged
at
predetermined times
and at
cer
tain engine operating conditions.
Refer
to the
Component Removal/Installation sec
tion
of
this group
for
replacement procedures.
EVAPORATIVE
Fig.
1
EVAP
Canister Location
EVAP CANISTER PURGE SOLENOID
Vacuum
for the
EVAP canister
is
controlled
by the
EVAP canister purge solenoid
(Fig. 2). The
solenoid
is operated
by the
powertrain control module (PCM).
The
PCM
regulates
the
solenoid
by
switching
the
ground circuit
on and off
based
on
engine operating conditions. When energized,
the
solenoid prevents
vacuum from reaching
the
EVAP canister. When
not
energized,
the
solenoid allows vacuum
to
flow
through
to the
EVAP canister. During warm-up
and for a
specified time period
af
ter
hot
starts,
the PCM
grounds
the
EVAP canister purge solenoid causing
it to
energize. This will pre
vent vacuum from reaching
the
EVAP canister
valve. When
the
engine reaches
an
operating temper ature
of
approximately 27°C (80°F)
and a
time delay
interval
of
about
100
seconds
has
occurred,
the PCM
removes
the
ground
to
solenoid.
The
de-energized
so
lenoid allows vacuum
to
flow
to the
EVAP canister and purge fuel vapors through
the
intake manifold. The EVAP canister purge solenoid will also
be en
ergized during certain idle conditions
in
order
to up
date
the
fuel delivery calibration. Refer
to the
Component Removal/Installation sec
tion
of
this group
for
replacement procedures.
Page 1484 of 1502
•
Fig.
2
EVAP
Canister
Purge
Solenoid—Typical
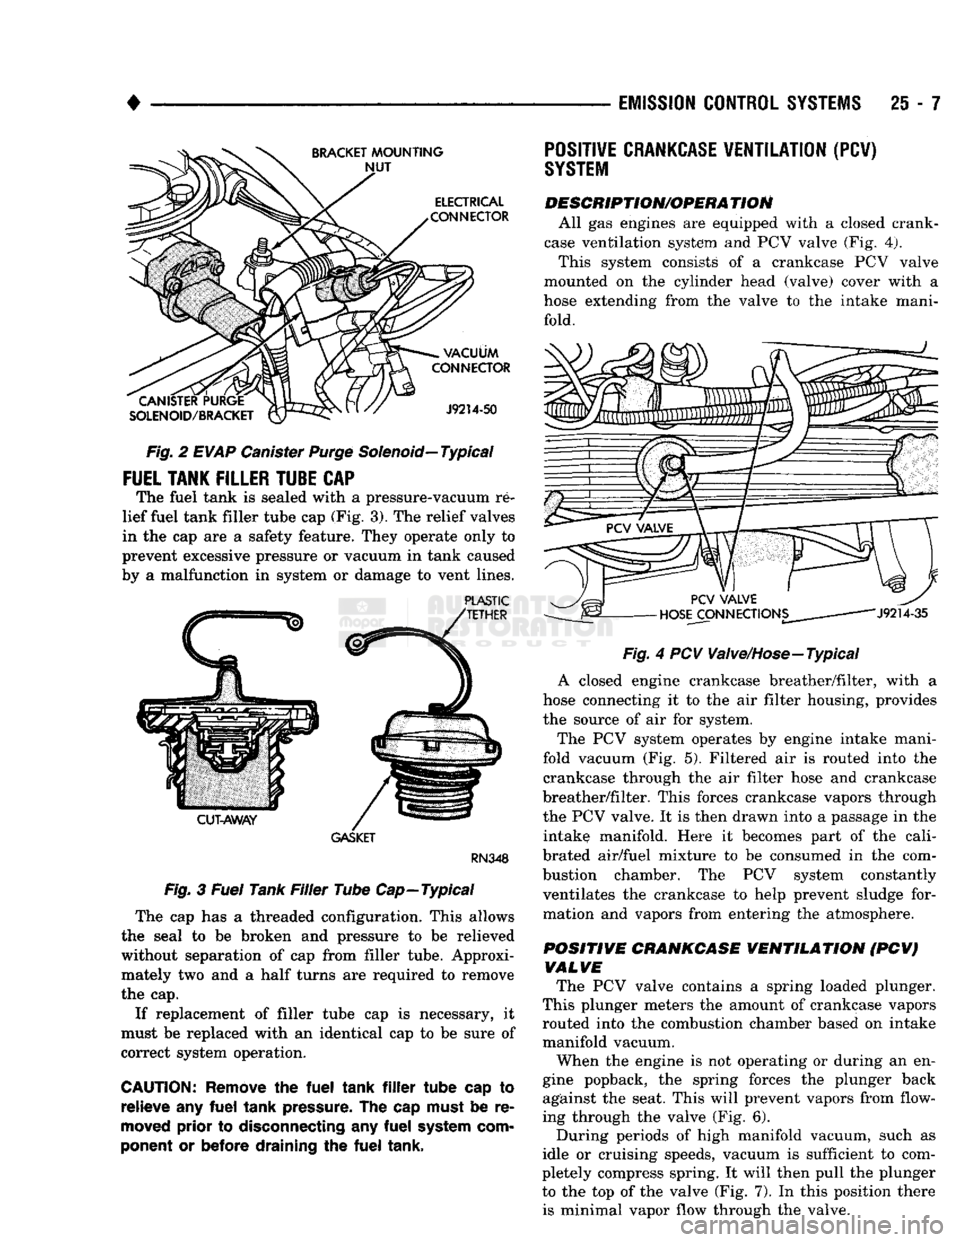
FUEL
TANK
FILLER
TUBE
CAP
The fuel tank is sealed with a pressure-vacuum re
lief fuel tank filler tube cap (Fig. 3). The relief valves
in the cap are a safety feature. They operate only to
prevent excessive pressure or vacuum in tank caused
by a malfunction in system or damage to vent lines.
PLASTIC
GASKET
RN348
Fig.
3
Fuel
Tank
Filler
Tube Cap—Typical
The cap has a threaded configuration. This allows
the seal to be broken and pressure to be relieved without separation of cap from filler tube. Approxi
mately two and a half turns are required to remove
the cap.
If replacement of filler tube cap is necessary, it
must be replaced with an identical cap to be sure of
correct system operation.
CAUTION:
Remove
the
fuel
tank
filler
tube cap to
relieve
any
fuel
tank
pressure.
The cap
must
be re
moved
prior to
disconnecting
any
fuel
system
com
ponent or before draining the
fuel
tank, •—-
EMISSION
CONTROL
SYSTEMS
25 - 7
Fig.
4 PCV Valve/Hose—Typical
A closed engine crankcase breather/filter, with a
hose connecting it to the air filter housing, provides
the source of air for system.
The PCV system operates by engine intake mani
fold vacuum (Fig. 5). Filtered air is routed into the
crankcase through the air filter hose and crankcase
breather/filter. This forces crankcase vapors through
the PCV valve. It is then drawn into a passage in the intake manifold. Here it becomes part of the cali
brated air/fuel mixture to be consumed in the com bustion chamber. The PCV system constantly ventilates the crankcase to help prevent sludge for
mation and vapors from entering the atmosphere.
POSITIVE CRANKCASE VENTILATION (PCV) VALVE The PCV valve contains a spring loaded plunger.
This plunger meters the amount of crankcase vapors
routed into the combustion chamber based on intake
manifold vacuum.
When the engine is not operating or during an en
gine popback, the spring forces the plunger back
against the seat. This will prevent vapors from flow
ing through the valve (Fig. 6).
During periods of high manifold vacuum, such as
idle or cruising speeds, vacuum is sufficient to com
pletely compress spring. It will then pull the plunger
to the top of the valve (Fig. 7). In this position there is minimal vapor flow through the valve.
POSITIVE
CRANKCASE
VENTILATION
(PCV)
SYSTEM
DESCRIPTION/OPERA
TION
All gas engines are equipped with a closed crank
case ventilation system and PCV valve (Fig. 4).
This system consists of a crankcase PCV valve
mounted on the cylinder head (valve) cover with a
hose extending from the valve to the intake mani fold.
Page 1494 of 1502
•
EMISSION
CONTROL SYSTEMS
25 - 17
COMPONENT REMOVAL/INSTALLATION
INDEI
page
Air
Filter/Filter
Housing—Diesel Engines
17
Air
Filter/Filter
Housing—Gas Engines
17
Air
Injection
Pump
17
Air
Injection
Pump Relief Valve
18
Check
Valve—Air
Injection
Tube
18
Coolant Temperature
Sensor
. 18
EGR
Tube—Gas Powered Engines
19
EGR
Valve
19
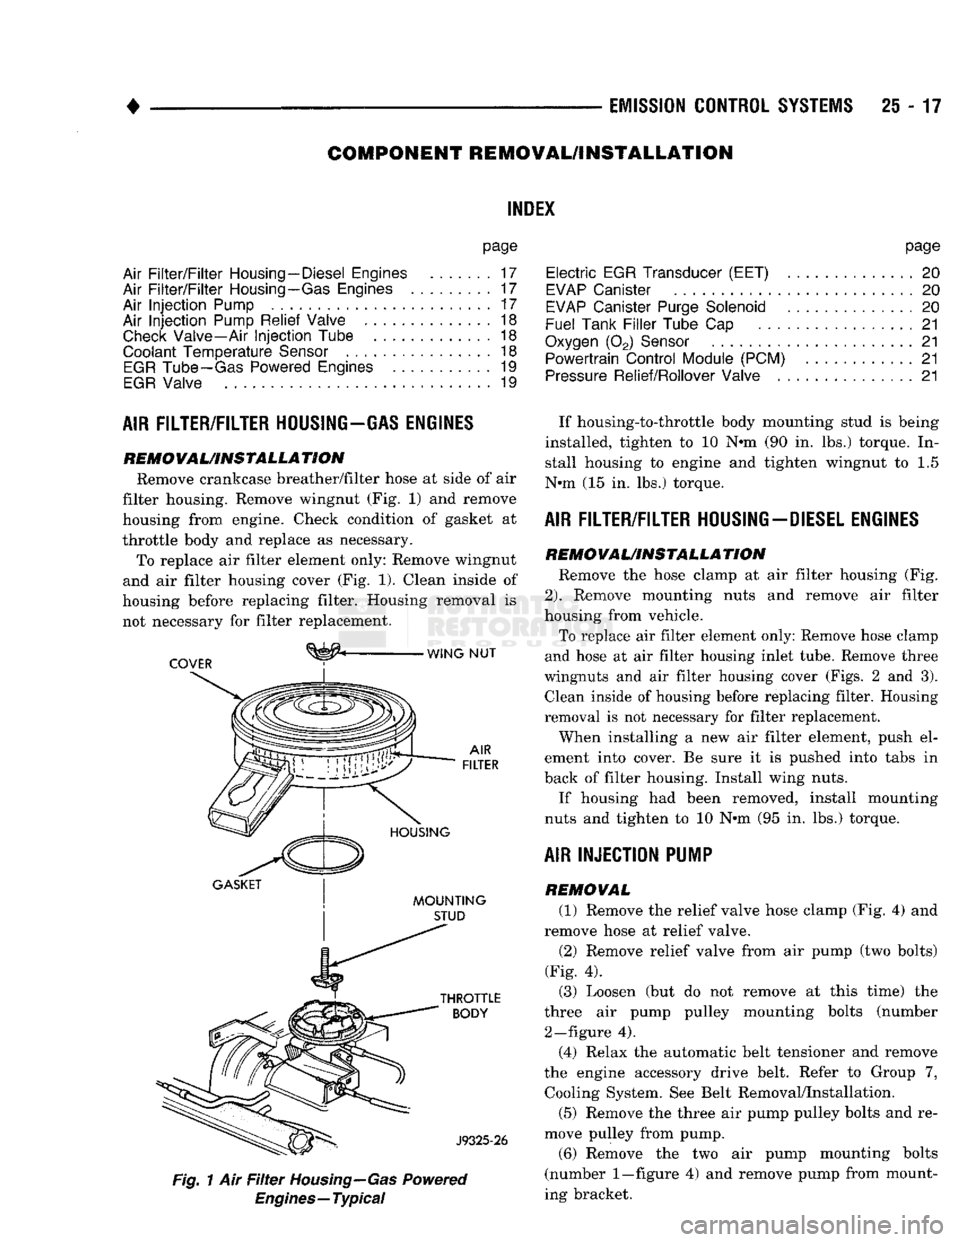
AIR FILTER/FILTER HOUSING-GAS ENGINES
REMOVAL/INSTALLATION Remove crankcase breather/filter hose at side of air
filter housing. Remove wingnut (Fig. 1) and remove
housing from engine. Check condition of gasket at
throttle body and replace as necessary. To replace air filter element only: Remove wingnut
and air filter housing cover (Fig. 1). Clean inside of
housing before replacing filter. Housing removal is not necessary for filter replacement.
^
WING NUT
COVER
:
GASKET
| I
MOUNTING
STUD
Fig.
1 Air
Filter
Housing—Gas
Powered
Engines—Typical
page
Electric
EGR Transducer (EET)
20
EVAP
Canister
20
EVAP
Canister Purge Solenoid
20
Fuel Tank
Filler
Tube
Cap . 21
Oxygen
(02)
Sensor
21
Powertrain Control Module (PCM)
21
Pressure
Relief/Rollover Valve
21
If housing-to-throttle body mounting stud is being
installed, tighten to 10 N»m (90 in. lbs.) torque. In stall housing to engine and tighten wingnut to 1.5
N»m (15 in. lbs.) torque.
AIR FILTER/FILTER HOUSING-DIESEL ENGINES
REMO
VAL/INSTALLA
TION Remove the hose clamp at air filter housing (Fig.
2).
Remove mounting nuts and remove air filter
housing from vehicle.
To replace air filter element only: Remove hose clamp
and hose at air filter housing inlet tube. Remove three
wingnuts and air filter housing cover (Figs. 2 and 3). Clean inside of housing before replacing filter. Housing
removal is not necessary for filter replacement.
When installing a new air filter element, push el
ement into cover. Be sure it is pushed into tabs in
back of filter housing. Install wing nuts.
If housing had been removed, install mounting
nuts and tighten to 10 N»m (95 in. lbs.) torque.
AIR INJECTION PUMP
REMOVAL (1) Remove the relief valve hose clamp (Fig. 4) and
remove hose at relief valve.
(2) Remove relief valve from air pump (two bolts)
(Fig. 4). (3) Loosen (but do not remove at this time) the
three air pump pulley mounting bolts (number 2—figure 4).
(4) Relax the automatic belt tensioner and remove
the engine accessory drive belt. Refer to Group 7, Cooling System. See Belt Removal/Installation.
(5) Remove the three air pump pulley bolts and re
move pulley from pump.
(6) Remove the two air pump mounting bolts
(number
1—figure
4) and remove pump from mount
ing bracket.
Page 1498 of 1502
•
EMISSION CONTROL SYSTEMS 25 - 21 (4) Remove solenoid and its support bracket from
intake manifold (one bolt—5.2L/5.9L engine, one
nut—3.9L engine). (5) Remove EVAP canister purge solenoid from en
gine.
INSTALLATION
(1) Install EVAP canister purge solenoid and its
mounting bracket to intake manifold.
(2) Connect vacuum harness and wiring connector.
(3) Install air filter housing.
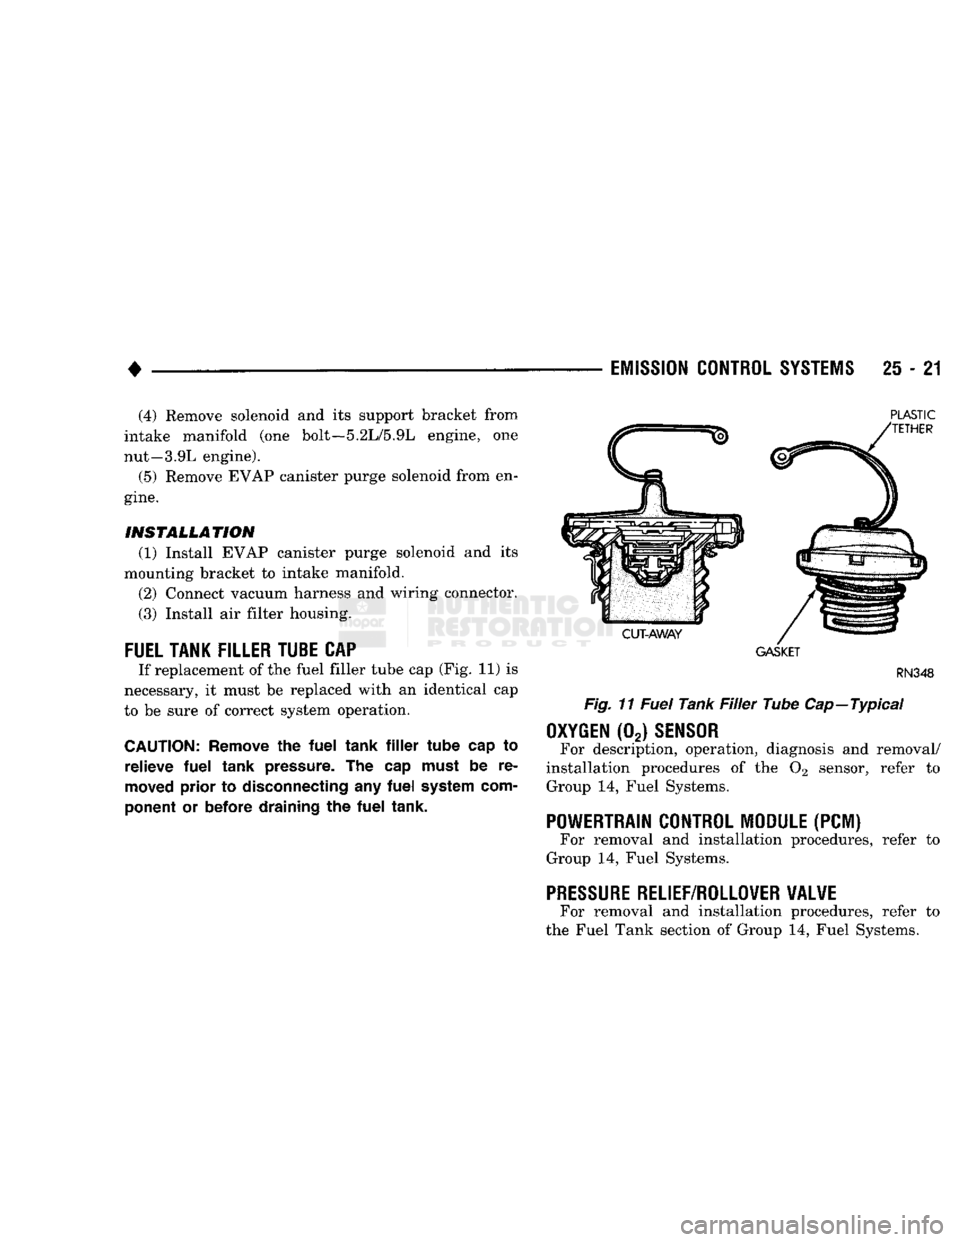
FUEL TANK FILLER TUBE CAP If replacement of the fuel filler tube cap (Fig. 11) is
necessary, it must be replaced with an identical cap
to be sure of correct system operation.
CAUTION:
Remove
the
fuel
tank
filler
tube
cap to
relieve
fuel
tank
pressure.
The cap
must
be re
moved
prior
to
disconnecting
any
fuel
system
com
ponent
or
before
draining
the
fuel
tank.
PLASTIC
GASKET
RN348
Fig.
11
Fuel
Tank
Filler
Tube Cap—Typical
OXYGEN (02) SENSOR For description, operation, diagnosis and removal/
installation procedures of the 02 sensor, refer to Group 14, Fuel Systems. POWERTRAIN CONTROL MODULE (PCM)
For removal and installation procedures, refer to
Group 14, Fuel Systems.
PRESSURE RELIEF/ROLLOWER WALWE For removal and installation procedures, refer to
the Fuel Tank section of Group 14, Fuel Systems.