Page 1091 of 2103
AUTOMATIC TRANSAXLE ENGINE (TURBO) AND ENGINE> On-vehicle
R e v e r s e
ToTo
25
Line pressure
Torque and
Oil pump suction pressure press
control solenoid pressure
1.Torque converter
2. Front clutch
3. Rear clutch
4. Low-reverse brake
5. End clutch
6.
7. Transaxle control module
8. Torque converter clutch control
valve
9. Rear clutch exhaust valve
v a l v e Torque converter clutch control Valve valve
R e v i s i o n
End clutch valve
16. Torque converter valve 7. Shift control 18. control valve
19. N-D control valve
20. Regurator valve
21. Manual valve
22. Pressure control valve
23. N-R control
24. Oil filter
25. Oil pan
26. Oil pump
2 7 .
Page 1096 of 2103
AUTOMATIC TRANSAXLE
ENGINE (TURBO) AND ENGINE> On-vehicle Service
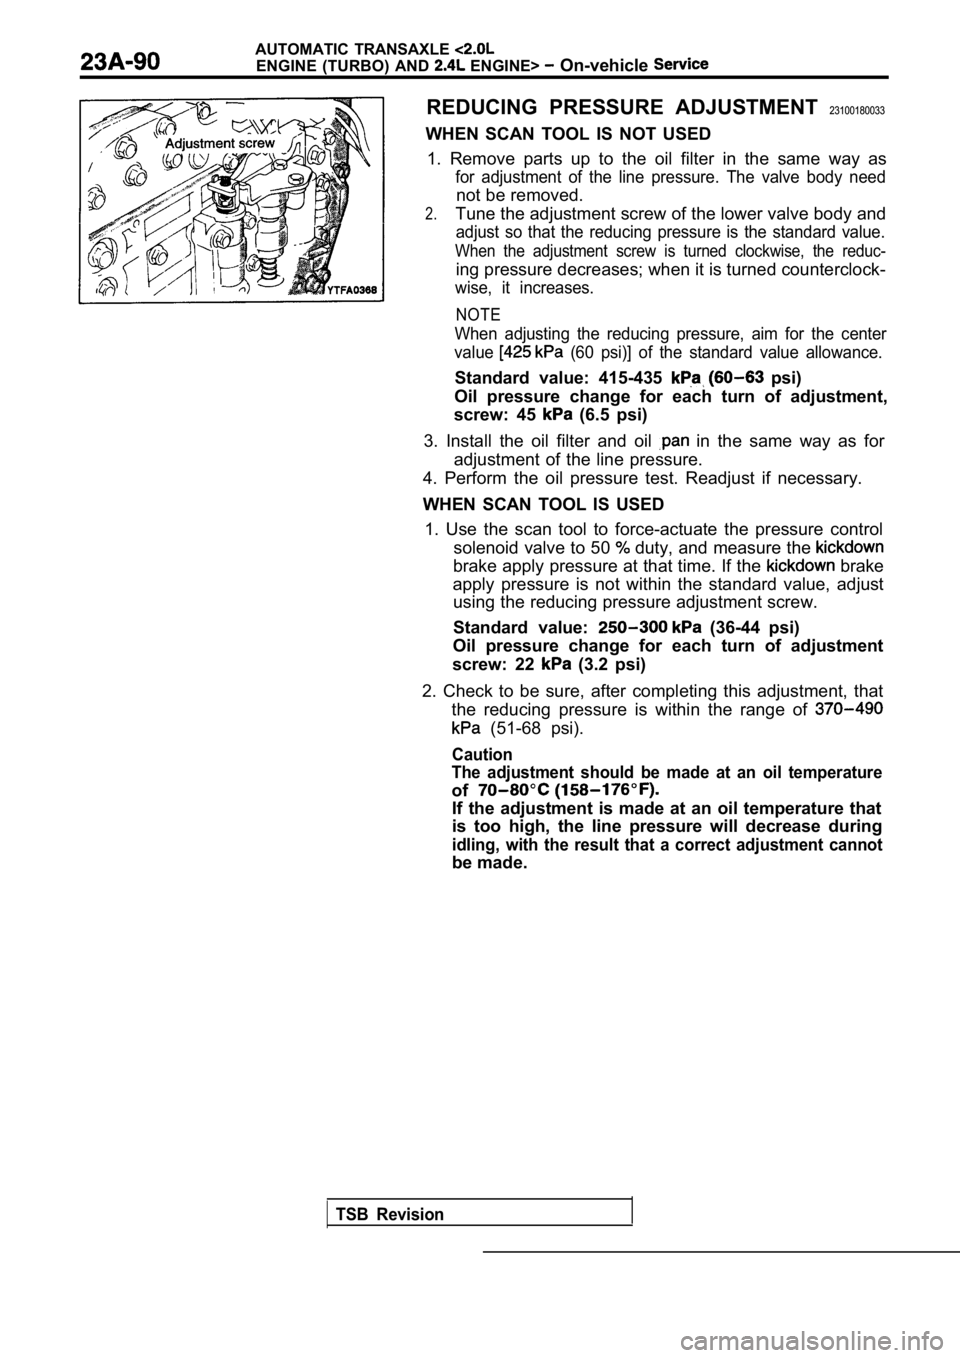
Adjustment screw
I
8. Turn the adjustment screw of the regulator valve and
adjust so that the line pressure (kickdown brake pressure)
becomes the standard value.
When the adjustment screw is turned clockwise, the line
pressure decreases; when it is turned to counterclockwise,
it increases.
Standard value: psi)
Oil pressure change for each turn of adjustment
screw: 38
(5.5 psi)
9. Check that the O-ring is installed on the upper surface
of the valve body at the place shown in the figure.
10. Replace the O-ring of the solenoid valve harnes s grommet
with a new one.
11. Pass the solenoid valve connector through the i nside
of the hole in the case.
T S B R e v i s i o n
Page 1098 of 2103

AUTOMATIC TRANSAXLE
ENGINE (TURBO) AND ENGINE> On-vehicle
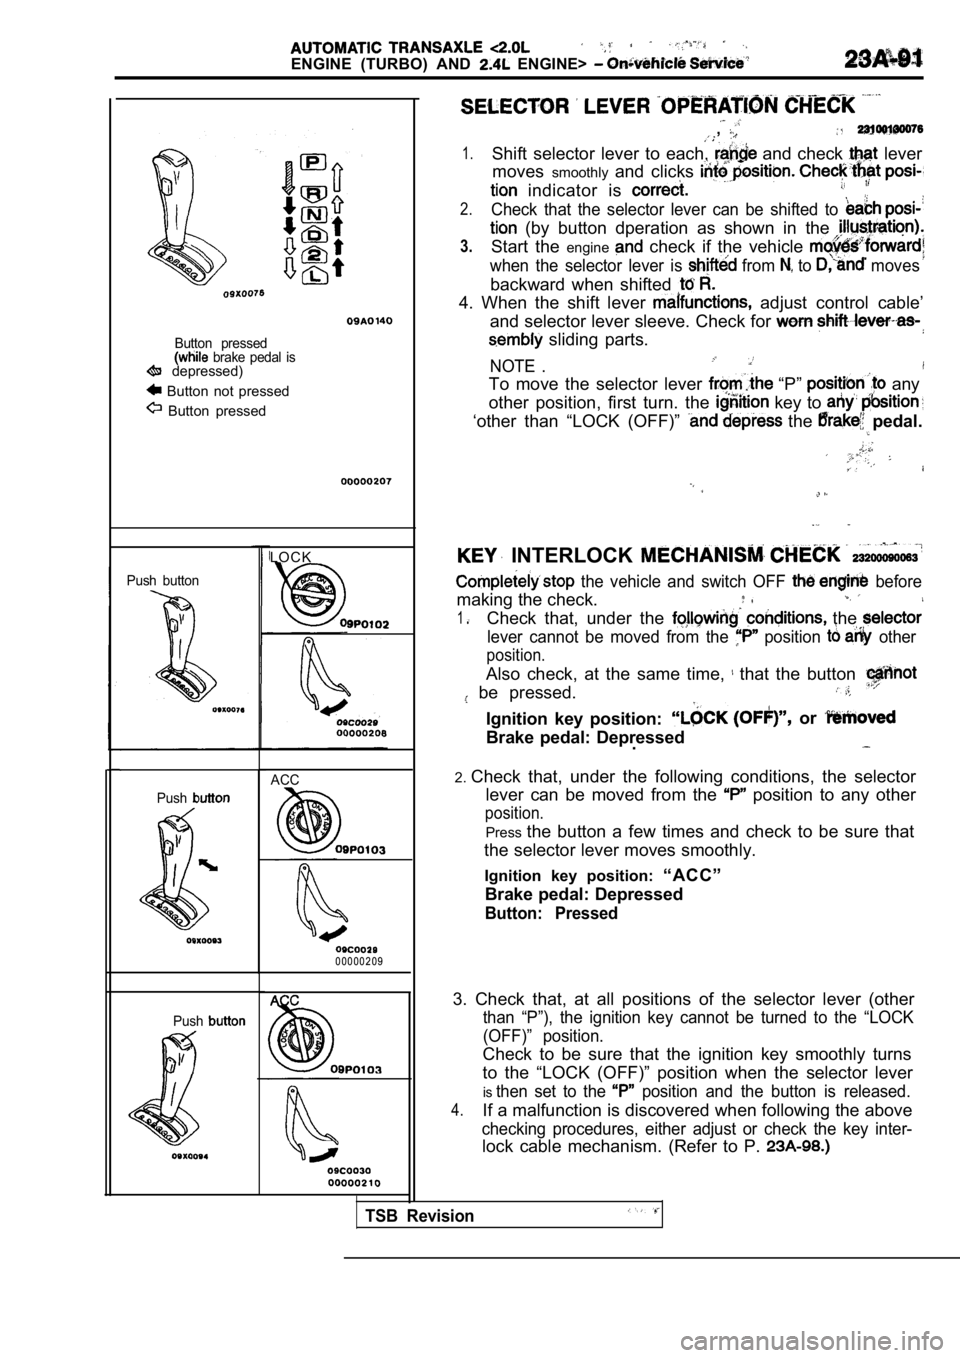
REDUCING PRESSURE ADJUSTMENT 23100180033
WHEN SCAN TOOL IS NOT USED 1. Remove parts up to the oil filter in the same wa y as
for adjustment of the line pressure. The valve body need
not be removed.
2.Tune the adjustment screw of the lower valve body a nd
adjust so that the reducing pressure is the standard value.
When the adjustment screw is turned clockwise, the reduc-
ing pressure decreases; when it is turned counterclock-
wise, it increases.
NOTE
When adjusting the reducing pressure, aim for the c enter
value
(60 psi)] of the standard value allowance.
Standard value: 415-435 psi)
Oil pressure change for each turn of adjustment,
screw: 45
(6.5 psi)
3. Install the oil filter and oil
in the same way as for
adjustment of the line pressure.
4. Perform the oil pressure test. Readjust if neces sary.
WHEN SCAN TOOL IS USED 1. Use the scan tool to force-actuate the pressure control
solenoid valve to 50
duty, and measure the
brake apply pressure at that time. If the brake
apply pressure is not within the standard value, ad just
using the reducing pressure adjustment screw.
Standard value:
(36-44 psi)
Oil pressure change for each turn of adjustment
screw: 22
(3.2 psi)
2. Check to be sure, after completing this adjustme nt, that
the reducing pressure is within the range of
(51-68 psi).
Caution
The adjustment should be made at an oil temperature
of
If the adjustment is made at an oil temperature tha t
is too high, the line pressure will decrease during
idling, with the result that a correct adjustment c annot
be made.
TSB Revision
Page 1099 of 2103

ENGINE (TURBO) AND ENGINE>
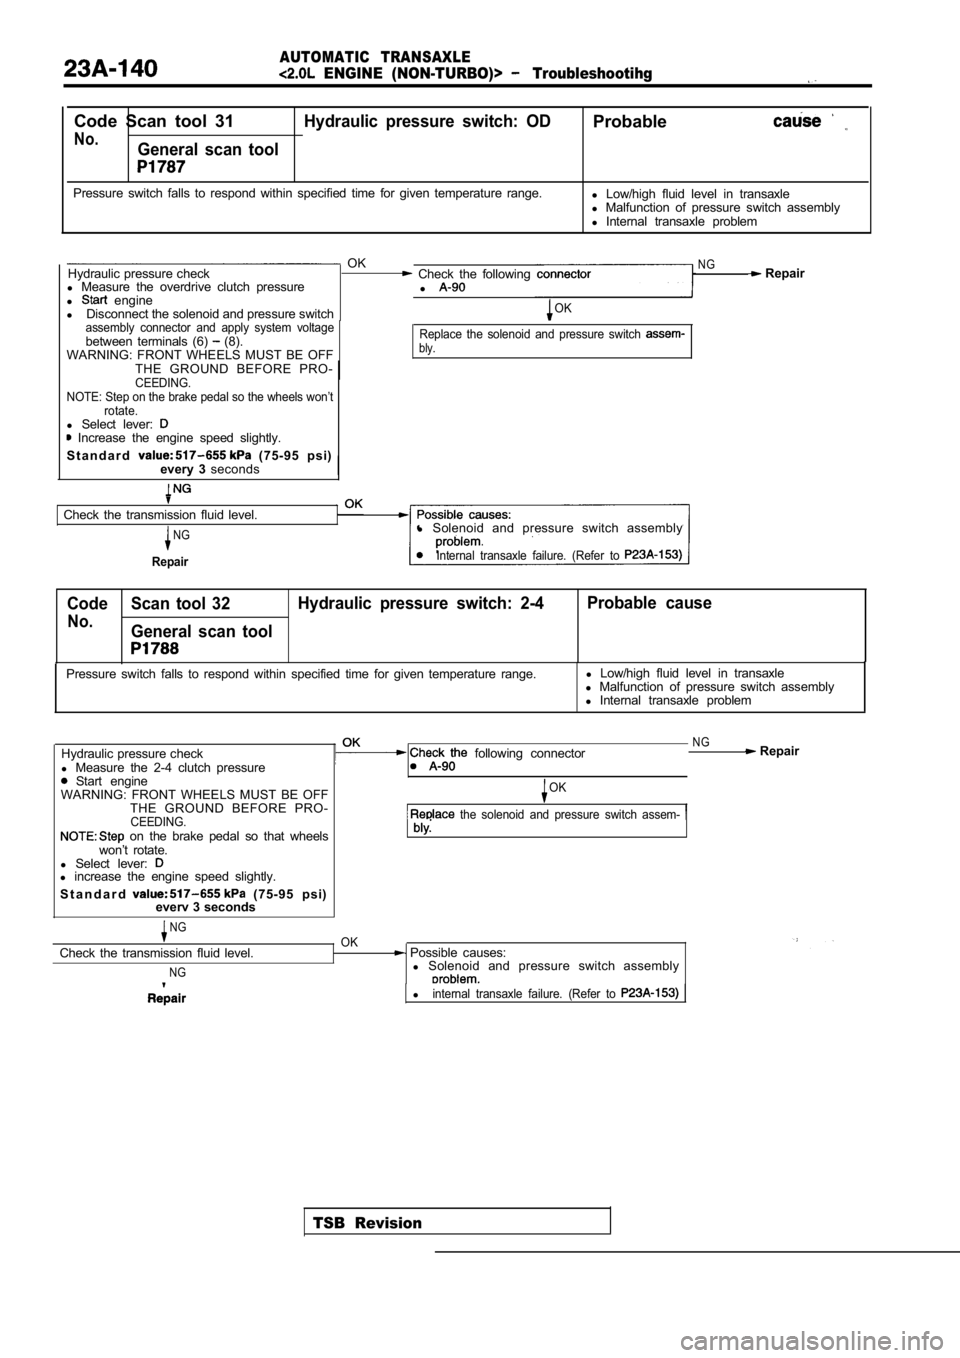
Button pressed brake pedal is depressed)
Button not pressed
Button pressed
Push buttonPush
Push
LOCK
ACC
0 0 0 0 0 2 0 9
,
1.Shift selector lever to each, and check lever
moves smoothly and clicks
indicator is
2.Check that the selector lever can be shifted to
(by button dperation as shown in the
3.Start the engine check if the vehicle
when the selector lever is from to moves
backward when shifted
4. When the shift lever adjust control cable’
and selector lever sleeve. Check for
sliding parts.
NOTE .
To move the selector lever “P” any
other position, first turn. the
key to
‘other than “LOCK (OFF)” the pedal.
. .
INTERLOCK
the vehicle and switch OFF before
making the check.
1Check that, under the the
lever cannot be moved from the position other
position.
Also check, at the same time, that the button
be pressed.
Ignition key position: or
Brake pedal: Depressed .
2.Check that, under the following conditions, the sel ector
lever can be moved from the
position to any other
position.
Press the button a few times and check to be sure that
the selector lever moves smoothly.
Ignition key position: “ACC”
Brake pedal: Depressed
Button: Pressed
TSB Revision
3. Check that, at all positions of the selector lev er (other
than “P”), the ignition key cannot be turned to the “LOCK
(OFF)” position.
Check to be sure that the ignition key smoothly tur ns
to the “LOCK (OFF)” position when the selector leve r
isthen set to the position and the button is released.
4.If a malfunction is discovered when following the above
checking procedures, either adjust or check the key inter-
lock cable mechanism. (Refer to P.
Page 1100 of 2103
AUTOMATIC TRANSAXLE
ENGINE (TURBO) AND ENGINE> On-vehicle Service‘
ACCSHIFT LOCK MECHANISM
1.
2.
3.
4.
Push button
Push button ACC
ACCI
TSB Revision Check that, under the following conditions, the sel
ector
lever cannot be moved from the position to any other
position.
Ignition keyposition: “ACC”
Brake pedal: Not depressed
Button: Pressed
Check that, under the following conditions, the sel ector
lever can be moved smoothly from the
position to
any other position.
Ignition keyposition: “ACC”
Brake pedal: Depressed
Button: Pressed
I.
Check that, under the following conditions, the sel ector
lever can be moved smoothly from the
position to
the “P” position.
Ignition key position: “ACC”
Brake pedal: Released
Button: Pressed
If a malfunction is discovered when following the a bove
checking procedures, either adjust or check the shi ft lock
cable mechanism. (Refer to P.
Page 1130 of 2103

AUTOMATIC TRANSAXLE
ENGINE (NON-TURBO)> Troubleshooting
dure
4Conditions
Selector lever
position:
lever
Operation
Engine
(1) Driving in
gea
with selector
in range
( 2 ) D r i v i n g i n
gear with lever in 2 range
(3) Driving in gea
with selector
in range
(OverdriveOFF)
(4) Driving in
gear with selec-
tor lever in
range(Overdriveswitch ON) (for at least 1
minute)
Driving in Re-
verse gear with
selector lever in
range (for at
least 30 se-
conds)
1) Driving in gear, then apply
the brake until a
downshift
occurs. (Do this
at least 3 times)
ingine
1) Driving atconstant speedof 80 km/h (50
mph) with selec-
tor lever in
range(Overdriveswitch ON)
Judgment value
Data list
and
(1) Check the UD
and clutch
(2)
the 2-4
(3)
the OD
clutch: 35 to 85
2-4 clutch: 20 to 77
OD clutch: 75 to
UD clutch: 24 to 70
Data list and
InputEngine
OutputInput
gear ratio
Data list
Data list
1) Locked gear
Inspection item
A T F l e v e l
UD hydraulic
circuit
2-4 and
clutch
Gear ratio in
gear
I n p u t a n d
speed sensor
Solenoidswitch
valve (latched in the
LU position)
Lockup control
Solenoid
switch
(latched in the
position)
Diagnostic
trouble
code
35
46
TSB Revision
36
36
56
57
58
37
38
47
Page 1148 of 2103

AUTOMATIC TRANSAXLE
ENGINE (NON-TURBO)> Troubleshootihg
Code Scan tool 31Hydraulic pressure switch: ODProbable
No.General scan tool
Pressure switch falls to respond within specified time for given temperature range.
l Low/high fluid level in transaxle
l Malfunction of pressure switch assembly
l Internal transaxle problem
OKNGHydraulic pressure check Check the following Repair
l Measure the overdrive clutch pressure
l
l engine
l Disconnect the solenoid and pressure switchOK
assembly connector and apply system voltage
between terminals (6) (8).
WARNING: FRONT WHEELS MUST BE OFFReplace the solenoid and pressure switch bly.
THE GROUND BEFORE PRO-CEEDING.
NOTE: Step on the brake pedal so the wheels won’t rotate.
l Select lever: Increase the engine speed slightly.
S t a n d a r d
(75-95 psi)
every 3 seconds
Check the transmission fluid level.
NG
Repair
l Solenoid and pressure switch assembly
Internal transaxle failure. (Refer to
Code Scan tool 32 Hydraulic pressure switch: 2-4 Probable cause
No.General scan tool
TSB Revision
Pressure switch falls to respond within specified t
ime for given temperature range.l
Low/high fluid level in transaxle
l Malfunction of pressure switch assembly
l Internal transaxle problem
Hydraulic pressure check
l Measure the 2-4 clutch pressure
Start engine
following connector
WARNING: FRONT WHEELS MUST BE OFF THE GROUND BEFORE PRO-
CEEDING. on the brake pedal so that wheels
won’t rotate.
l Select lever:
l increase the engine speed slightly.
S t a n d a r d
(75-95 psi)
everv 3 seconds
NGOK
NG Repair
OK
the solenoid and pressure switch assem-
Check the transmission fluid level.
NG
Possible causes:
l Solenoid and pressure switch assembly
linternal transaxle failure. (Refer to
Page 1156 of 2103

AUTOMATIC TRANSAXLE
ENGINE (NON-TURBO)> Troubleshooting
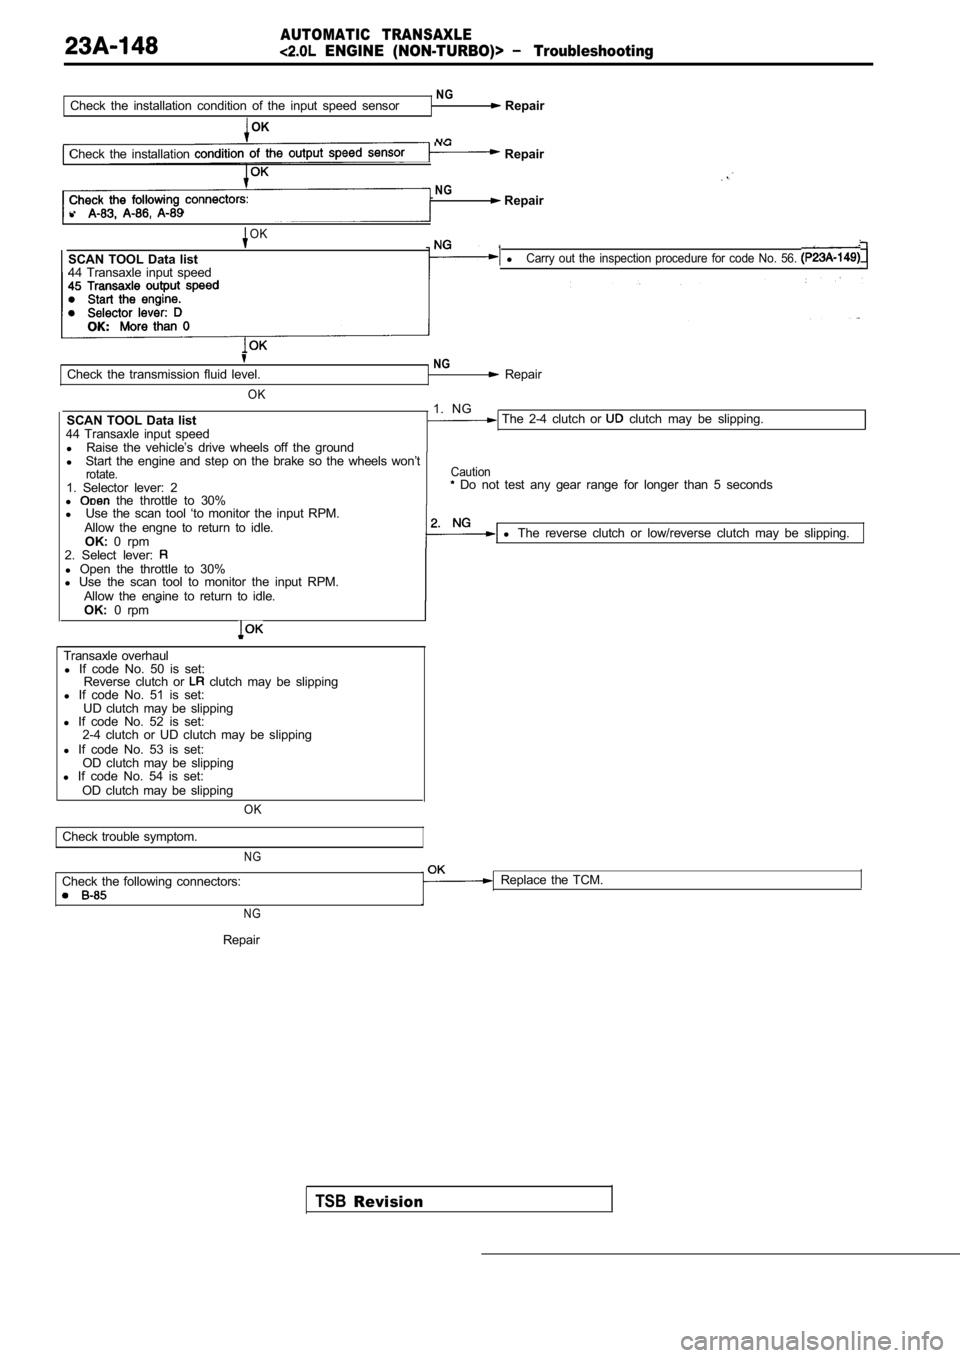
NGCheck the installation condition of the input speed sensor Repair
OK
NGCheck the installation Repair
NG Repair
l
OK
SCAN TOOL Data list lCarry out the inspection procedure for code No. 56.
44 Transaxle input speed
Check the transmission fluid level.
OK
SCAN TOOL Data list
44 Transaxle input speed l Raise the vehicle’s drive wheels off the ground
NG Repair
1. NG
The 2-4 clutch or clutch may be slipping.
l Start the engine and step on the brake so the wheel s won’t
rotate.1. Selector lever: 2
l the throttle to 30%
Caution Do not test any gear range for longer than 5 secon ds
l Use the scan tool ‘to monitor the input RPM.
Allow the engne to return to idle. OK: 0 rpm l
The reverse clutch or low/reverse clutch may be sli pping.
2. Select lever:
l Open the throttle to 30%
l Use the scan tool to monitor the input RPM.
Allow the enaine to return to idle.
OK: 0 rpm
Transaxle overhaul
l If code No. 50 is set:
Reverse clutch or
clutch may be slipping
l If code No. 51 is set:
UD clutch may be slipping
l If code No. 52 is set:
2-4 clutch or UD clutch may be slipping
l If code No. 53 is set:
OD clutch may be slipping
l If code No. 54 is set:
OD clutch may be slipping
OK
Check trouble symptom.
NG
Check the following connectors: Replace the TCM.
N G
TSBRevision
Repair