2020 MERCEDES-BENZ SPRINTER change time
[x] Cancel search: change timePage 238 of 416
#
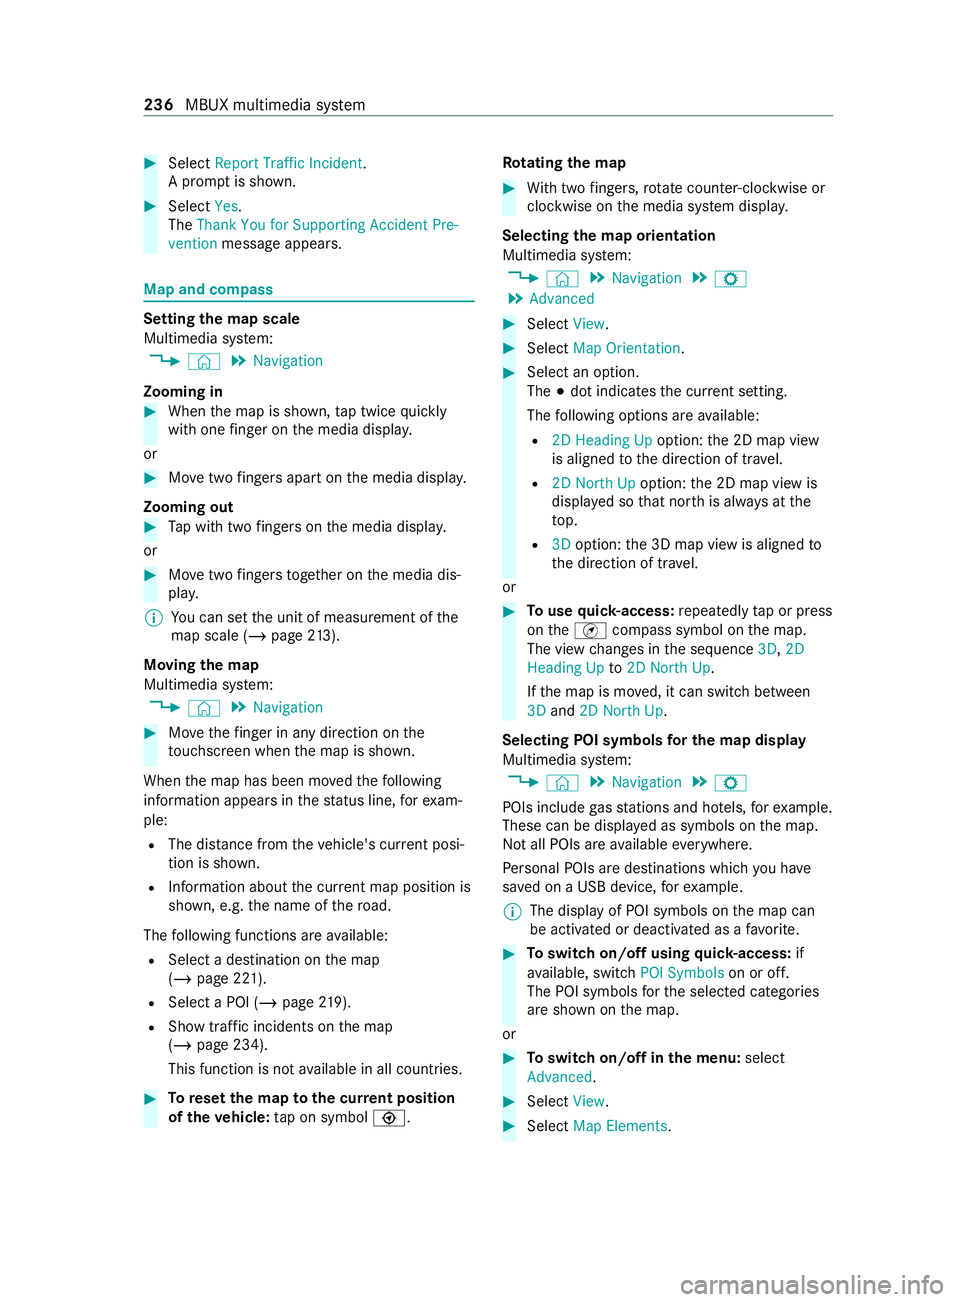
Select Report Traffic Incident.
A prom ptis shown. #
Select Yes.
The Thank You for Supporting Accident Pre-
vention message appears. Map and compass
Setting
the map scale
Multimedia sy stem:
4 © 5
Navigation
Zooming in #
When the map is shown, tap twice quickly
with one finger on the media displa y.
or #
Movetwo fingers apart on the media displa y.
Zooming out #
Tap with two fingers on the media displa y.
or #
Movetwo fingers toge ther on the media dis‐
pla y.
% Yo
u can set the unit of measurement of the
map scale (/ page213).
Moving the map
Multimedia sy stem:
4 © 5
Navigation #
Movethefinger in any di rection on the
to uchsc reen when the map is shown.
When the map has been mo vedth efo llowing
information appears in thest atus line, forex am‐
ple:
R The dis tance from theve hicle's cur rent posi‐
tion is shown.
R Information about the cur rent map position is
shown, e.g. the name of thero ad.
The following functions are available:
R Select a destination on the map
(/ page 221).
R Select a POI (/ page219).
R Show traf fic incidents on the map
(/ page 234).
This function is not available in all countries. #
Toreset the map tothe cur rent position
of theve hicle: tap on symbol \. Ro
tating the map #
With two fingers, rotat e counter-clockwise or
clockwise on the media sy stem displa y.
Selecting the map orientation
Multimedia sy stem:
4 © 5
Navigation 5
Z
5 Advanced #
Select View. #
Select Map Orientation. #
Select an option.
The 003Bdot indicates the cur rent setting.
The following options are available:
R 2D Heading Up option:the 2D map view
is aligned tothe direction of tr avel.
R 2D North Up option:the 2D map view is
displa yed so that nor this alw ays at the
to p.
R 3Doption: the 3D map view is aligned to
th e direction of tr avel.
or #
Touse quick- access: repeatedly tap or press
on theÄ compass symbol on the map.
The view changes in the sequence 3D,2D
Heading Up to2D North Up .
If th e map is mo ved, it can switch between
3D and 2D North Up.
Selecting POI symbols for the map display
Multimedia sy stem:
4 © 5
Navigation 5
Z
POIs include gasst ations and ho tels, forex ample.
These can be displa yed as symbols on the map.
Not all POIs are available everywhere.
Pe rsonal POIs are destinations which you ha ve
sa ve d on a USB device, forex ample.
% The display of POI symbols on
the map can
be activated or deactivated as a favo rite. #
Toswitch on/off using quick- access: if
av ailable, swit chPOI Symbols on or off.
The POI symbols forth e selected categories
are shown on the map.
or #
Toswitch on/off in the menu: select
Advanced. #
Select View. #
Select Map Elements. 236
MBUX multimedia sy stem
Page 240 of 416
#
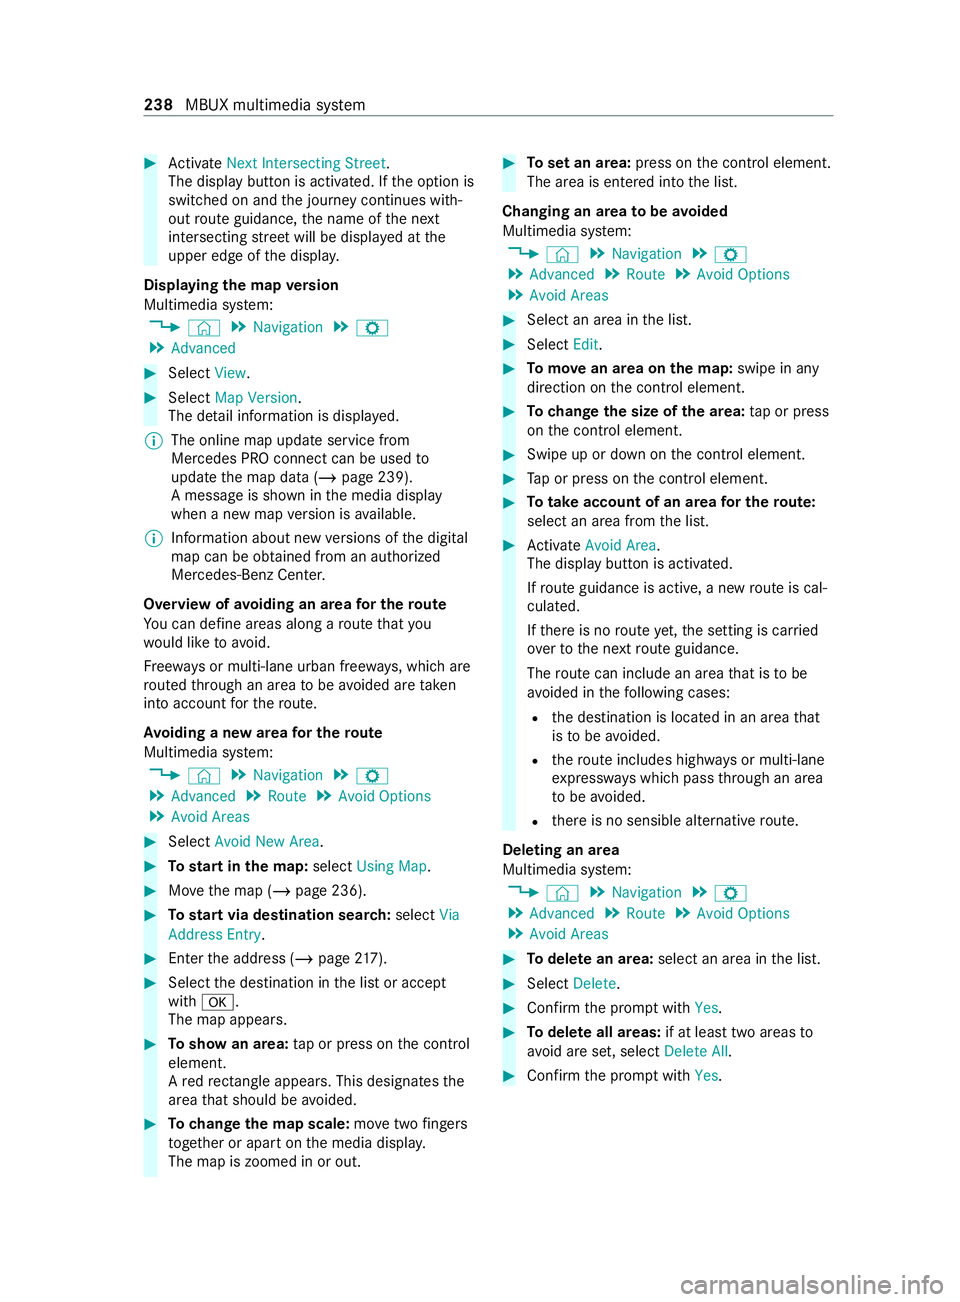
Activate Next Intersecting Street .
The displ aybutton is activated. If the option is
switched on and the journey continues with‐
out route guidance, the name of the next
intersecting stre et will be displa yed at the
upper edge of the displa y.
Displaying the map version
Multimedia sy stem:
4 © 5
Navigation 5
Z
5 Advanced #
Select View. #
Select Map Version .
The de tail information is displa yed.
% The online map update service from
Mercedes PRO connect can be used
to
update the map data (/ page 239).
A message is shown in the media display
when a new map version is available.
% In
fo rm ation about new versions of the digital
map can be obtained from an authorized
Mercedes-Benz Center.
Overview of avoiding an area for the route
Yo u can define areas along a route that you
wo uld like toavoid.
Fr ee wa ys or multi-lane urban free ways, which are
ro uted thro ugh an area tobe avo ided are taken
into account forth ero ute.
Av oiding a new area for the route
Multimedia sy stem:
4 © 5
Navigation 5
Z
5 Advanced 5
Route 5
Avoid Options
5 Avoid Areas #
Select Avoid New Area . #
Tostart in the map: selectUsing Map. #
Movethe map (/ page 236). #
Tostart via destination sear ch:select Via
Address Entry . #
Enter the address (/ page217). #
Select the destination in the list or accept
with 0076.
The map appears. #
Toshow an area: tap or press on the cont rol
element.
A redre ctangle appea rs. This designa testhe
area that should be avoided. #
Tochange the map scale: movetwo fingers
to ge ther or apart on the media displa y.
The map is zoomed in or out. #
Toset an area: press onthe cont rol element.
The area is entered into the list.
Changing an area tobe avo ided
Multimedia sy stem:
4 © 5
Navigation 5
Z
5 Advanced 5
Route 5
Avoid Options
5 Avoid Areas #
Select an area in the list. #
Select Edit. #
Tomo vean area on the map: swipe in any
direction on the cont rol element. #
Tochange the size of the area: tap or press
on the cont rol element. #
Swipe up or down on the cont rol element. #
Tap or press on the cont rol element. #
Totake account of an area for the route:
select an area from the list. #
Activate Avoid Area .
The displ aybutton is activated.
If ro ute guidance is active, a new route is cal‐
culated.
If th ere is no route yet,th e setting is car ried
ove rto the next route guidance.
The route can include an area that is tobe
avo ided in thefo llowing cases:
R the destination is located in an area that
is to be avo ided.
R thero ute includes high ways or multi-lane
ex pressw ays which pass thro ugh an area
to be avo ided.
R there is no sensible alternative route.
Deleting an area
Multimedia sy stem:
4 © 5
Navigation 5
Z
5 Advanced 5
Route 5
Avoid Options
5 Avoid Areas #
Todel ete an area: select an area in the list. #
Select Delete. #
Confirm the prom ptwith Yes. #
Todel ete all areas: if at least two areas to
avo id are set, select Delete All. #
Confirm the prom ptwith Yes. 238
MBUX multimedia sy stem
Page 244 of 416
Te
lephone Te
lephony Te
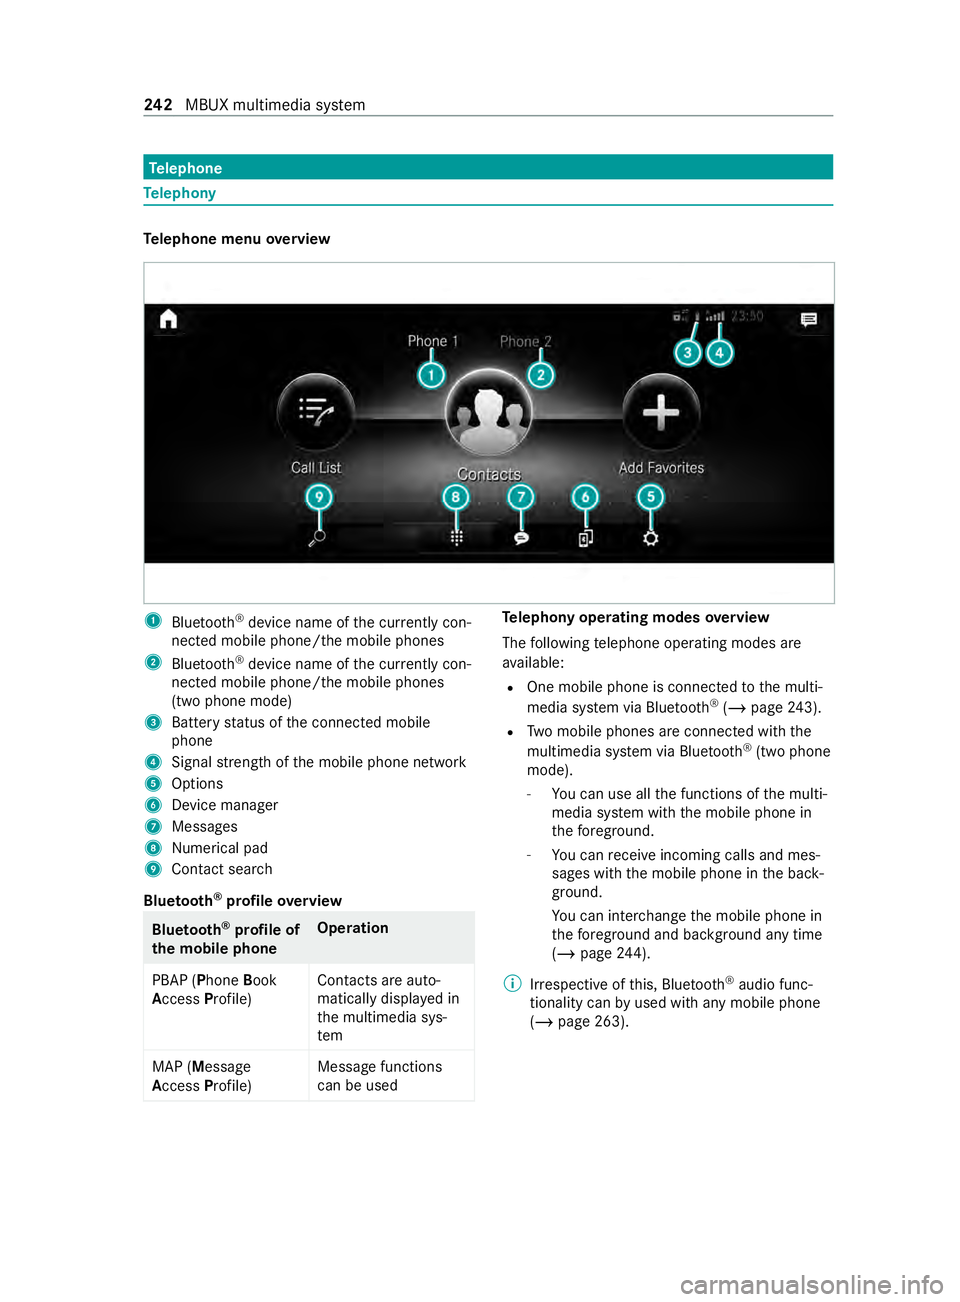
lephone menu overview 1
Blue tooth ®
device name of the cur rently con‐
nected mobile phone/the mobile phones
2 Bluetoo th®
device name of the cur rently con‐
nected mobile phone/the mobile phones
(two phone mode)
3 Battery status of the connected mobile
phone
4 Signal stre ngth of the mobile phone network
5 Options
6 Device manager
7 Messages
8 Nume rical pad
9 Contact sea rch
Blue tooth ®
profile overview Blue
tooth ®
profile of
the mobile phone Ope
ration
PBAP (Phone Book
Access Profile) Contacts are auto‐
matically displa
yed in
th e multimedia sys‐
tem
MAP (Message
Access Profile) Message functions
can be used Te
lephony operating modes overview
The following telephone operating modes are
av ailable:
R One mobile phone is connec tedto the multi‐
media sy stem via Blue tooth®
(/ page 243).
R Two mobile phones are connected with the
multimedia sy stem via Blue tooth®
(two phone
mode).
- You can use all the functions of the multi‐
media sy stem with the mobile phone in
th efo re ground.
- You can receive incoming calls and mes‐
sages wi th the mobile phone in the back‐
ground.
Yo u can inter change the mobile phone in
th efo re ground and bac kground any time
(/ page 244).
% Irre spective of this, Blue tooth®
audio func‐
tionality can byused with any mobile phone
(/ page 263). 242
MBUX multimedia sy stem
Page 260 of 416
We
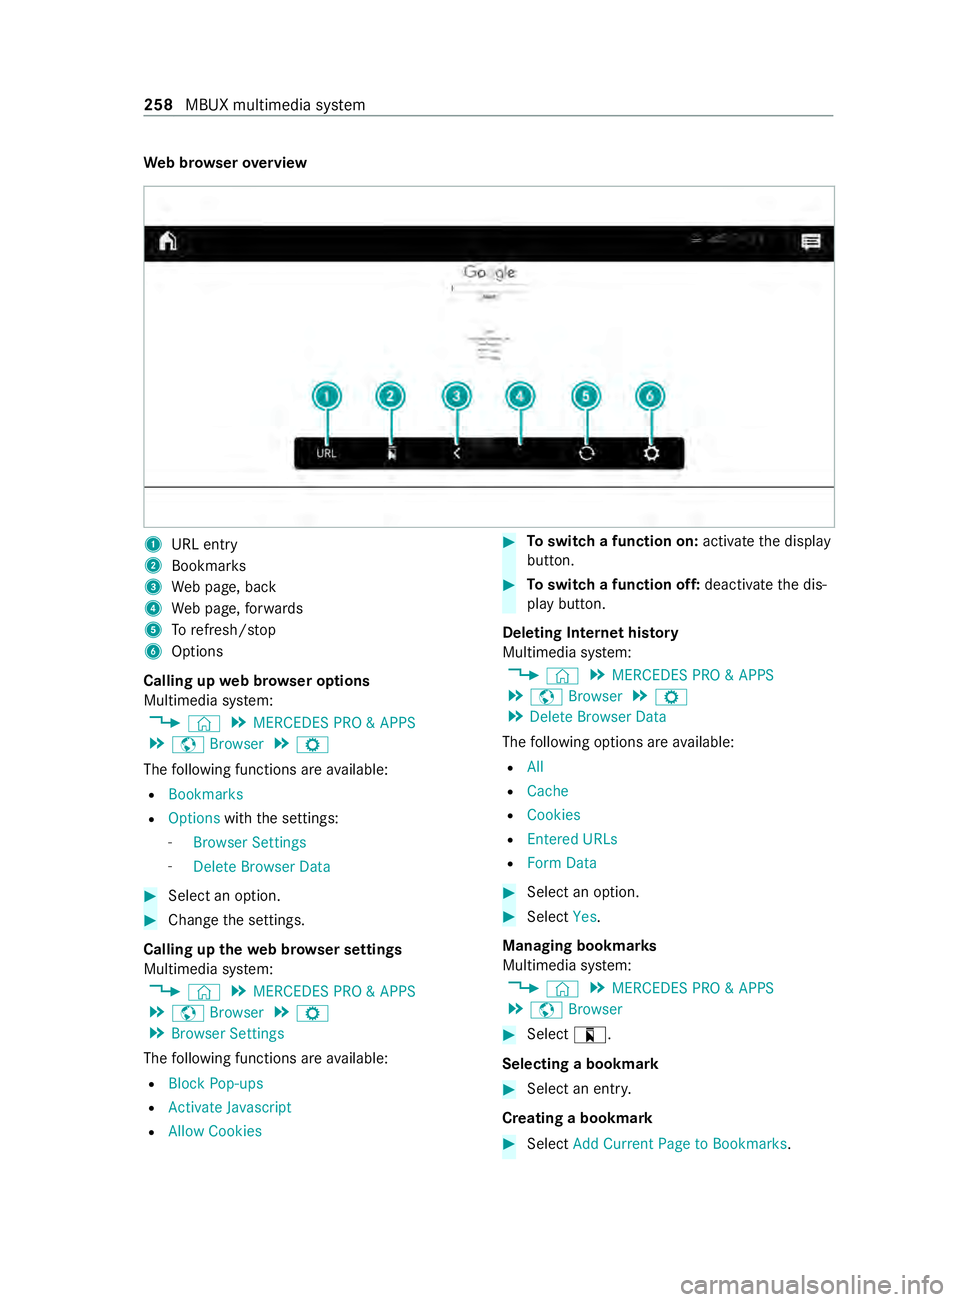
b br owser overview 1
URL ent ry
2 Bookma rks
3 Web page, back
4 Web page, forw ards
5 Torefresh/s top
6 Options
Calling up web br owser options
Multimedia sy stem:
4 © 5
MERCEDES PRO & APPS
5 z Browser 5
Z
The following functions are available:
R Bookmarks
R Options withthe settings:
- Browser Settings
- Delete Browser Data #
Select an option. #
Change the settings.
Calling up thewe b br owser settings
Multimedia sy stem:
4 © 5
MERCEDES PRO & APPS
5 z Browser 5
Z
5 Browser Settings
The following functions are available:
R Block Pop-ups
R Activate Javascript
R Allow Cookies #
Toswitch a function on: activatethe display
button. #
Toswitch a function off: deactivatethe dis‐
play button.
Deleting Internet his tory
Multimedia sy stem:
4 © 5
MERCEDES PRO & APPS
5 z Browser 5
Z
5 Delete Browser Data
The following options are available:
R All
R Cache
R Cookies
R Entered URLs
R Form Data #
Select an option. #
Select Yes.
Managing bookmar ks
Multimedia sy stem:
4 © 5
MERCEDES PRO & APPS
5 z Browser #
Select ?.
Selecting a bookmark #
Select an entry.
Creating a bookmark #
Select Add Current Page to Bookmarks. 258
MBUX multimedia sy stem
Page 271 of 416
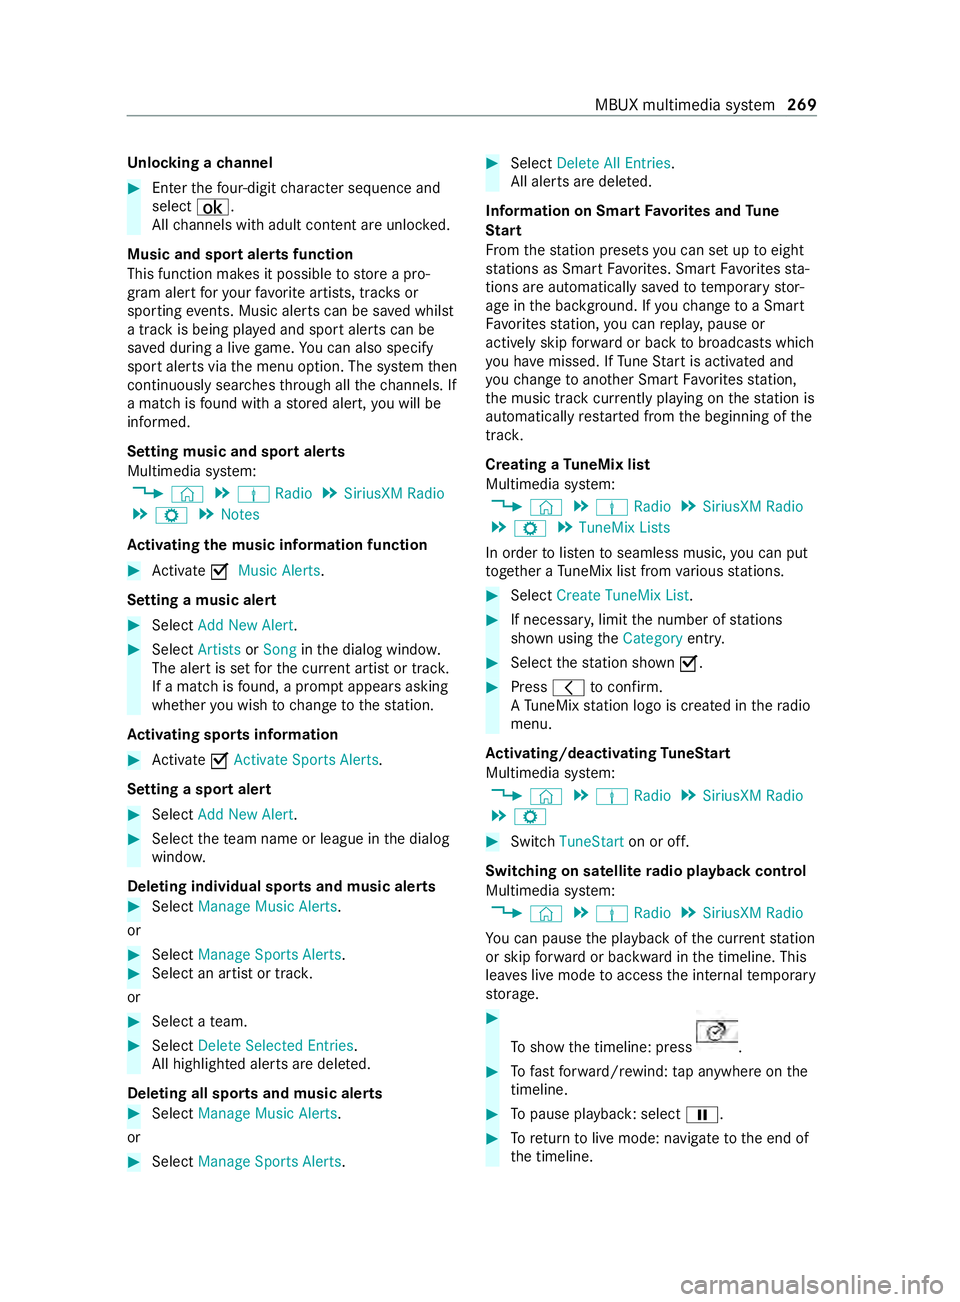
Un
locking a channel #
Enter thefo ur-digit character sequence and
select ¡.
All channels with adult con tent are unloc ked.
Music and sport alerts function
This function makes it possible tostore a pro‐
gram alert foryo ur favo rite artists, trac ksor
sporting events. Music alerts can be sa ved whilst
a tra ckis being pla yed and sport alerts can be
sa ve d during a live game. You can also specify
sport alerts via the menu option. The sy stem then
continuously sear ches thro ugh all thech annels. If
a mat chisfound with a stored alert, you will be
informed.
Setting music and sport alerts
Multimedia sy stem:
4 © 5
Þ Radio 5
SiriusXM Radio
5 Z 5
Notes
Ac tivating the music in form ation function #
Activate 0073Music Alerts.
Setting a music ale rt#
Select Add New Alert. #
Select Artists orSong inthe dialog windo w.
The alert is set forth e cur rent artist or trac k.
If a match is found, a prom ptappears asking
whe ther you wish tochange tothest ation.
Ac tivating spo rts information #
Activate 0073Activate Sports Alerts .
Setting a spo rtalert #
Select Add New Alert. #
Select thete am name or league in the dialog
windo w.
Deleting individual sports and music alerts #
Select Manage Music Alerts .
or #
Select Manage Sports Alerts. #
Select an artist or trac k.
or #
Select a team. #
Select Delete Selected Entries.
All highlighted alerts are dele ted.
Deleting all sports and music alerts #
Select Manage Music Alerts.
or #
Select Manage Sports Alerts. #
Select Delete All Entries.
All alerts are dele ted.
Information on Sma rtFavo rite s and Tune
St art
Fr om thest ation presets you can set up toeight
st ations as Smart Favorite s. Smart Favorite sst a‐
tions are automatically sa vedto te mporary stor‐
age in the bac kground. If youch ange toa Smart
Favo rite sst ation, you can repla y,pause or
actively skip forw ard or back tobroadcasts which
yo u ha vemissed. If Tune Start is activated and
yo uch ange toano ther Smart Favorite sst ation,
th e music track cur rently pl aying on thest ation is
automatically restar ted from the beginning of the
trac k.
Creating a TuneMix list
Multimedia sy stem:
4 © 5
Þ Radio 5
SiriusXM Radio
5 Z 5
TuneMix Lists
In order tolistento seamless music, you can put
to ge ther a TuneMix li stfrom various stations. #
Select Create TuneMix List . #
If necessar y,limit the number of stations
shown using theCategory entry. #
Select thest ation shown 0073. #
Press 0047toconfirm.
A Tu neMix station logo is created in thera dio
menu.
Ac tivating/deactivating TuneStart
Multimedia sy stem:
4 © 5
Þ Radio 5
SiriusXM Radio
5 Z #
Switch TuneStart on or off.
Switching on satellite radio playback control
Multimedia sy stem:
4 © 5
Þ Radio 5
SiriusXM Radio
Yo u can pause the playback of the cur rent station
or skip forw ard or backward in the timeline. This
lea ves live mode toaccess the internal temp orary
st orage. #
Toshow the timeline: press .
#
Tofast forw ard/r ewind: tap anywhere on the
timeline. #
Topause playback: select 00CF. #
Toreturn tolive mode: navigate tothe end of
th e timeline. MBUX multimedia sy
stem 269
Page 280 of 416

ASS
YST PLUS se rvice inter val display Fu
nction of the ASS YST PLUS se rvice inter val
displ ay The ASS
YST PLUS service inter val display on the
instrument display pr ovides information on the
re maining time or dis tance be fore the next
service due date.
Yo u can hide this service message byusing the
back button on the left-hand side of thesteering
wheel.
Yo u can obtain fur ther information concerning
th e servicing of your vehicle from a qualified spe‐
cialist workshop, e.g. an authorized Mercedes-
Benz Center. Displaying
the service due da te On-board computer:
4 Service 5
ASSYST PLUS
The next service due date is displa yed. #
Toexitth e displa y:press the back button on
th e left-hand side of thesteering wheel.
Bear in mind thefo llowing related topic:
R Operating the on-board com‐
puter(/ page176) Ca
rrying out maintenance workregular ly *
NO
TEPremature wearthro ugh failure to
obser veservice due dates Service
workwhich is not car ried out at the
ri ght time or incomple tely can lead to
inc reased wear and damage totheve hicle. #
Always obser vethe prescribed service
inter vals. #
Always ha vethe prescribed service
wo rkcar ried out at a qualified specialist
wo rkshop. Special service
requ irements The prescribed service inter
val is based on nor‐
mal vehicle use. Maintenance workwill need to
be per form ed more of tenth an presc ribed if the
ve hicle is operated under arduous conditions or
increased loads. Examples of arduous operating conditions:
R Regular city driving with frequent intermedi‐
ate stops
R Mainly short-dis tance driving
R Frequent operation in mountainous terrain or
on poor road sur faces
R When the engine is of ten le ftidling for long
periods
R Operation in particula rly dusty conditions
and/or if air-reci rculation mode is frequently
used
In these or similar operating conditions, ha vethe
interior air filter, engine air cleaner, engine oil and
oil filter etc. changed more frequently. If theve hi‐
cle is subjected tohigher loads, the tires must be
ch ecked more frequentl y.Yo u can obtain fur ther
information at a qualified specialist workshop. Battery disconnection periods
The ASS
YST PLUS se rvice inter val display can
only calculate the service due date when the
battery is connected. #
Notedown the service due date displa yed on
th e Instrument Display before disconnecting
th e battery (/ page278). Engine compa
rtment Opening and closing the hood
&
WARNING Risk of accident if the engine
hood is unlatched while driving
An unloc ked engine hood may open up when
th eve hicle is in motion and block your vie w. #
Never unlatch the engine hood while
driving. #
Before every trip, ensure that the engine
hood is latched. &
WARNING Danger of bu rns when open‐
ing the hood
If yo u open the hood when the engine has
ove rheated or during a fire inthe engine com‐
partment, you could come into con tact wi th
hot gases or other escaping operating fluids. #
Before opening the hood, allow the
engine tocool down. 278
Maintenance and care
Page 329 of 416

Information on
the direction of the tires' rota‐
tion Ti
re s with a specified direction of rotation ha ve
additional benefits, e.g. if there is a risk of hydro‐
planing. You will on lyga in these benefits if the
cor rect direction of rotation is obser ved.
An ar rowonthe side wall of the tire indicates its
cor rect direction of rotation.
Yo u may also ins tall a spare wheel against the
direction of rotation. Obser vethe time restriction
on use as well as the speed limitation specified
on the spare wheel. Information on
storing wheels Obser
vethefo llowing when storing wheels:
R Wheels that ha vebeen remo ved should be
st ored in a cool, dry and, if possible, dark
place.
R Protect the tires from oil, grease and fuel. Overview of
the tire-chan getool kit Necessary tire-changing
tools may include, for
ex ample:
R Jack
R Wheel wrench
% Yo
u will find the maximum load capacity of
th e jack stated on the adhesive label
attached tothe jac k.
The jack is maintenance-free. If there is a
malfunction, please contact a qualified spe‐
cialist workshop.
Ve hicles with rear wheel drive The tire-change
tool kit is located in stowage
compartment 1abo vethestep of the co-driv‐
er's door and in thestow age compartment in the
fo ot we ll on the co-driver side. Preparing
theve hicle for a wheel change Re
quirements:
R The requ ired tire-change tool is available.
R The vehicle is not on a slope.
R The vehicle is on solid, non-slippery and le vel
ground. #
Appl yth e parking brake. #
Movethe front wheels tothest ra ight-ahead
position. #
Vehicles with automatic transmission:
shift the transmission toposition 005D. #
Switch off the engine. #
Make sure that the engine cann otbe star ted. #
Take theve hicle tool kit from thefo ot we ll on
th e co-driver side (/ page 305). Ve
hicles with rear-wheel drive #
Take the jack and the tire-change tool kit out
of thestow age compartment (/ page 327). #
If necessar y,remo vethe hub cab. #
Assemble the lug wrench extension using the
middle rod and thero d with the lar gest diam‐
et er from theth re e-piece jack pump le ver. #
Starting with the middle rod, slide the lug
wrench extension as far as it will go onto the
lug wrench. #
Using the lug wrench, loosen the wheel nuts
or bolts on the wheel you wish tochange by Wheels and tires
327
Page 345 of 416

clogging. Deposits may also
form onthe fuel
injec tor.This may reduce the engine output.
Unburned fuel can get into the oil pan. This
causes the engine oil le velto rise. This can
cause engine mechanical damage.
Obser vethefo llowing points to avoid damage
and reducing the engine output: #
Fill up with fuels with bio-diesel content
of 5% (ULSD) or less, whene ver possi‐
ble. #
Regular lych eck your engine oil le vel if
yo u use B20 fuels on a regular basis. #
Strictly follow the oil change inter vals
qu oted in the instrument clus ter and
within your Main tenance Bookl et. #
Use only engine oils and filters
appr ovedfo r use in your vehicle. #
Ifyo u do not plan todrive your vehicle
fo r se veralwe eks, comple tely fill the
fuel tank in ad vance wi thULSD fuel. Fo
r more information, consult thega sst ation
st aff. The identification of fuels with bio-diesel
con tent (ULSD or B20) must be clear. If the iden‐
tification is not clear, do not refuel. Do not refuel
with any fuels that ha venot been appr ovedfor
yo ur vehicle.
Ta nk content and fuel reser ve
The total capacity of the fuel tank may vary,
depending on theve hicle equipment.
Ta nk content and fuel reser ve Gasoline engine
Total capacity
M2 74 approx. 22.5 gal
(85 liters) Diesel engine
Total capacity
OM6 51/OM642 appr ox.24 .5 gal
(93 liters) Gasoline engine Of which
reser ve
fuel
Models with appr ox.
22.5 gal (85 l) total
capacity appr
ox. 5 gal
(19 liters) Diesel engine Of which
reser ve
fuel
Models with appr ox.
24 .5 gal (93 l) total
capacity appr
ox. 5 gal
(19 liters) DEF
Note
s on DEF
Obser vethe no tes on operating fluids
(/ page 340).
DEF is a water-soluble fluid forth eex haust gas
af te rtre atment of diesel engines.
* NO
TEDama gecaused byadditives in
DEF or bydiluting DEF The DEF
exhaust gas af tertre atment sy stem
could be destr oyed bythefo llowing:
R Additives in DEF
R Diluting DEF #
Only use DEF in accordance with ISO
222 41 . #
Do not mix additives. #
Do not dilu teDEF. *
NO
TEDama geand malfunctions caused
by impurities in DEF Impurities in DEF
result in thefo llowing:
R Higher emission values
R Damage tothe catalytic con verter
R Engine damage
R Malfunctions in the DEF exhaust gas
af te rtre atment sy stem #
Avoid impurities in DEF. +
ENVIRONMENTAL
NOTESoiling wi th
DEF DEF
residue cr ystallizes af ter some time and
st ain the af fected sur faces. Te
ch nical da ta343