Page 97 of 320

Armrests
X
To adjust the armrest angle: fold the arm-
rest up by more than 45° to position 2.
The armrest is released.
X Fold armrest 3 forward to the stop.
X Slowly fold the armrest up to the desired
position.
X To fold the armrest up: if necessary, fold
the armrest up by more than 90° to position
1. Seat heating
G
WARNING
Repeatedly switching on the seat heating
can cause the seat cushion and backrest
pads to become very hot. The health of per-
sons with limited temperature sensitivity or
a limited ability to react to high tempera-
tures may be affected or they may even suf-
fer burn-like injuries. There is a risk of injury.
Therefore, do not switch the seat heating on
repeatedly.
! When you leave your seat, do not place
anything on the seat and switch off the seat
heating. Do not switch the seat heating on
when the seat is not occupied, e.g. when
driving without a front passenger. The seat
heating may otherwise overheat, causing
damage to the seat. The three red indicator lamps in the
Í but-
ton show the activated heating level 1 to 3.
The seat heating automatically switches down
from level 3 to level 2 after approximately
seven minutes.
The system automatically switches down from
level 2 to level 1 after approximately ten
minutes.
At level 1 the seat heating switches off auto-
matically after approximately
20 minutes.
X Make sure that the key is in position 1 or 2
in the ignition lock.
X To switch on: press the Í button
repeatedly until the desired heating level
has been set.
X To switch off: press the Í button
repeatedly until all indicator lamps go out.
If the on-board voltage is too low, the seat
heating will either switch itself off prematurely
or not come on at all. In this case, too many
electrical consumers are switched on or the
battery charge is not sufficient. The seat heat-
ing will automatically switch back to the cur-
rent heating level when enough on-board volt-
age is available again. Steering wheel
G
WARNING
You could lose control of your vehicle if you
do the following while driving:
R adjust the driver's seat, head restraint,
steering wheel or mirrors
R fasten the seat belt
There is a risk of an accident. Steering wheel
95
Seats, steering wheel and mirrors
Z
Page 98 of 320

Adjust the driver's seat, head restraint,
steering wheel and mirror and fasten your
seat belt before starting the engine.
G
WARNING
If the steering wheel is unlocked while the
vehicle is in motion, it could change position
unexpectedly. This could cause you to lose
control of the vehicle. There is a risk of an
accident.
Before starting off, make sure the steering
wheel is locked. Never unlock the steering
wheel while the vehicle is in motion. G
WARNING
Children could injure themselves if they
adjust the steering wheel. There is a risk of
injury.
When leaving the vehicle, always take the
SmartKey with you and lock the vehicle.
Never leave children unsupervised in the
vehicle.
The steering wheel can still be adjusted if the
key has been removed. Adjusts the steering wheel
:
Steering column height
; Lever
X To adjust the steering wheel: pull lever ;
up and hold it.
The steering wheel is unlocked.
X Move the steering wheel to the desired posi-
tion.
X Let go of lever ;.
The steering wheel engages and is locked
again. Mirrors
Important safety notes
G
WARNING
You could lose control of your vehicle if you
do the following while driving:
R adjust the driver's seat, head restraint,
steering wheel or mirrors
R fasten the seat belt
There is a risk of an accident.
Adjust the driver's seat, head restraint,
steering wheel and mirror and fasten your
seat belt before starting the engine. G
WARNING
The exterior mirror on the front-passenger
side reduces the size of the image. Visible
objects are actually closer than they appear.
This means that you could misjudge the dis-
tance from road users traveling behind, e.g.
when changing lane. There is a risk of an
accident.
For this reason, always make sure of the
actual distance from the road users traveling
behind by glancing over your shoulder. Inside rearview mirror
X
Anti-glare mode: push anti-glare lever :
forwards or back. 96
MirrorsSeats, steering wheel and mirrors
Page 99 of 320

Exterior mirrors
Adjusting manually X
Before starting off, manually adjust the exte-
rior mirrors in such a way that you can get a
good overview of road and traffic conditions.
Adjusting electrically X
Before pulling away, turn the key to position
1 or 2 in the ignition lock.
X Press the Z button for the left exterior
mirror or the \ button for the right exte-
rior mirror.
The indicator lamp for the button switches
on and the selected exterior mirror can be
adjusted.
The indicator lamp goes out again after
some time.
X If the indicator lamp for the Z or \
button lights up, press button 7 up or
down, to the right or left.
Adjust the exterior mirrors in such a way
that you have a good overview of traffic con-
ditions.
After the engine has been started, the exterior
mirrors are automatically heated if the rear
window defroster is switched on and the out-
side temperature is low.
Disengaged exterior mirrors If an exterior mirror has been pushed out of
position, proceed as follows:
X
Move the exterior mirror into the correct
position manually.
The mirror housing engages again and the
exterior mirrors can be adjusted again as
usual. Exterior mirror heating
i Vehicles without rear window
defroster: when the temperature is below
15 °C the mirror heating switches on auto-
matically after engine start and remains on.
i Vehicles with rear window heater: at
temperatures below
15 °C the mirror heater
switches on automatically for ten minutes
after engine start. In addition, mirror heating
can be switched on together with the rear
window defroster.
X To switch the mirror heating on man-
ually:
turn the key to position 2 in the igni-
tion lock.
X Press the ¤ button on the control panel.
If the indicator lamp in the ¤ button
lights up, both the mirror heating and the
rear window defroster are switched on.
The rear window defroster switches off auto-
matically after a few minutes. Memory function
General notes
With the memory function, you can store up to
three different seat settings, e.g. for three dif-
ferent people. The position of the seat, seat
backrest and head restraint are stored as a
single memory preset. Important safety notes
G
WARNING
If you use the memory function on the driv-
er's side while driving, you could lose con-
trol of the vehicle as a result of the adjust-
ments being made. There is a risk of an acci-
dent.
Only use the memory function on the driv-
er's side when the vehicle is stationary. G
WARNING
When the memory function adjusts the seat,
you and other vehicle occupants – particu-
larly children – could become trapped. There
is a risk of injury. Memory function
97
Seats, steering wheel and mirrors
Z
Page 100 of 320

While the memory function is making adjust-
ments, make sure that no one has any body
parts in the sweep of the seat. If somebody
becomes trapped, immediately release the
memory function position button. The
adjustment process is stopped. G
WARNING
Children could become trapped if they acti-
vate the memory function, particularly when
unattended. There is a risk of injury.
When leaving the vehicle, always take the
SmartKey with you and lock the vehicle.
Never leave children unsupervised in the
vehicle.
The memory function can be used at any time,
for example even when the key has been
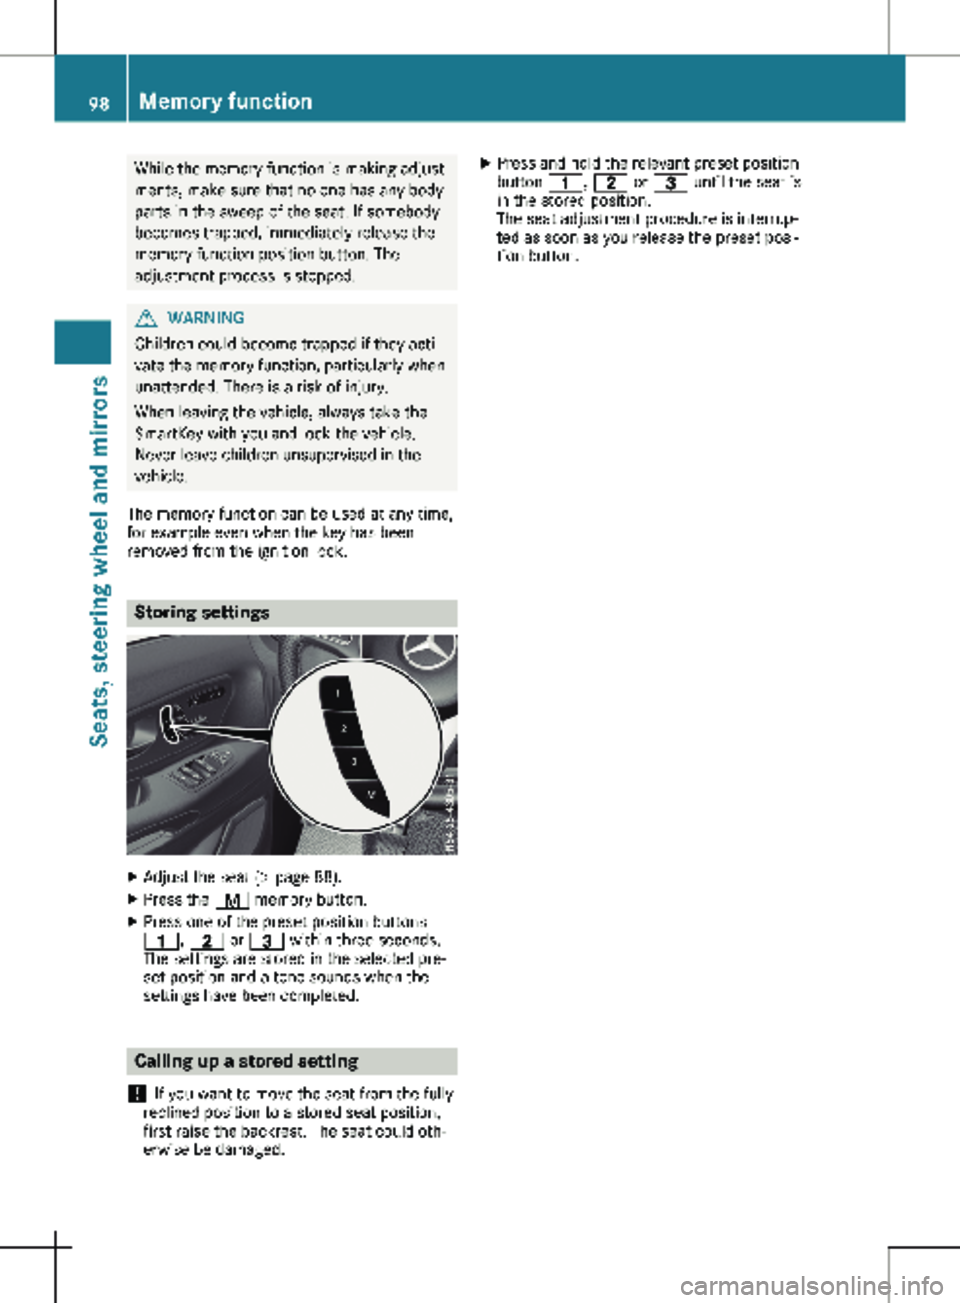
removed from the ignition lock. Storing settings
X
Adjust the seat (Y page 88).
X Press the r memory button.
X Press one of the preset position buttons
4, 5 or = within three seconds.
The settings are stored in the selected pre-
set position and a tone sounds when the
settings have been completed. Calling up a stored setting
! If you want to move the seat from the fully
reclined position to a stored seat position,
first raise the backrest. The seat could oth-
erwise be damaged. X
Press and hold the relevant preset position
button 4, 5 or = until the seat is
in the stored position.
The seat adjustment procedure is interrup-
ted as soon as you release the preset posi-
tion button. 98
Memory function
Seats, steering wheel and mirrors
Page 101 of 320

Useful information
This Operator's Manual describes all models
as well as standard and optional equipment of
your vehicle that were available at the time of
going to print. Country-specific variations are
possible. Note that your vehicle may not be
equipped with all of the described functions.
This also applies to systems and functions rel-
evant to safety.
Read the information on qualified specialist
workshops (Y page
32).Exterior lighting
Important safety notes
For reasons of safety, Mercedes-Benz recom-
mends that you drive with the lights switched
on even during the daytime. There may be dif-
ferences in operation due to legal require-
ments and voluntary recommendations in
some countries. Light switch
Operation 1W
Left-hand standing lamp
2X Right-hand standing lamp
3T Parking lamps, license plate and
instrument cluster lighting
4$ Lights off and daytime running lamps
à With light sensor: automatic driving
lights, controlled by the light sensor
5L Low-beam or high-beam headlamps
BN Fog lamps
CR Rear fog lamp
If you hear a warning tone when you leave the
vehicle, the lights may still be switched on.
X Turn the light switch to the $ or Ã
position.
The exterior lighting (except the parking/
standing lamps) switches off automatically in
the following situations:
R if you remove the key from the ignition lock.
R if you open the driver's door with the key in
position g in the ignition lock. Exterior lighting
99
Lights and windshield wipers
Page 102 of 320

Low-beam headlamps
When the ignition is switched on and the light
switch is in the
L position, the parking
lamps and low-beam headlamps are switched
on even if the light sensor does not sense dark
ambient light. This is particularly useful when
there is fog or rain.
X To switch on: turn the key to position 2 in
the ignition lock or start the engine.
X Turn the light switch to the L position.
The L indicator lamp in the instrument
cluster lights up.
Daytime running lamps X
To switch on: turn the light switch to the
$ or à position.
Automatic headlamp mode G
WARNING
When the light switch is set to Ã, the
low-beam headlamps may not be switched
on automatically if there is fog, snow or
other causes of poor visibility due to the
weather conditions such as spray. There is a
risk of an accident.
In such situations, turn the light switch to
L.
Automatic headlamp mode is only a driving
aid. You are responsible for the vehicle lighting
at all times.
When the parking lamps and low-beam head-
lamps are switched on, the green T (park-
ing lamps) and L (low-beam headlamps)
indicator lamps in the instrument cluster light
up.
à is the preferred light switch setting. The
light setting is automatically selected accord-
ing to the brightness of the ambient light
(exception: poor visibility due to weather con-
ditions, such as fog, snow or spray):
R Key in position 1 in the ignition lock: the
parking lamps are switched on or off auto-
matically depending on the brightness of the
ambient light.
R When the engine is on: depending on the
ambient light, the daytime running lamps or the parking lamps and low-beam headlamps
are switched on/off automatically.
X To switch on automatic headlamp mode:
turn the light switch to
Ã.
Fog lamps/rear fog lamp You can only switch the fog lamps on or off
manually in vehicles which have fog lamps
installed.
Front fog lamps help you to see and be seen in
conditions of poor visibility due to fog or pre-
cipitation. They can only be operated together
with the parking lamps or with the low-beam
headlamps.
The rear fog lamp improves visibility of your
vehicle for the traffic behind in the event of
heavy fog. Observe the legal requirements of
the country you are currently in when using
the rear fog lamp.
X Turn the light switch to L or Ã.
X Turn the key to position 2 in the ignition
lock or start the engine.
X To switch the front fog lamps on/off:
press the N button.
When the green
N indicator lamp in the
instrument cluster goes on, the fog lamps
are switched on.
X To switch the rear fog lamp on/off: press
the R button.
When the yellow R indicator lamp in the
instrument cluster goes on, the rear fog
lamp is switched on.
Standing lamps !
If the battery charge is very low, the stand-
ing lamps will switch off automatically to
enable the next engine start. Always park
your vehicle in accordance with legal regula-
tions, in a secure and adequately lit loca-
tion. Avoid leaving the T parking lamps
on for several hours. If possible, switch on
the right X or left W standing lamp.
Switching on the standing lamps ensures that
the corresponding side of the vehicle is illumi-
nated. 100
Exterior lightingLights and windshield wipers
Page 103 of 320

Switching on the standing lamps:
X Turn the key to position 0 (Y page 127) in
the ignition lock or remove the key.
X Right-hand standing lamp: turn the light
switch to position X.
X Left-hand standing lamp: turn the light
switch to position W.Combination switch
Turn signal lamp :
To indicate a right turn
; To indicate a left turn
X To indicate: press the combination switch
in desired direction : or ; until it
engages.
The combination switch automatically
returns to its original position after large
steering movements.
X To indicate briefly: press the combination
switch briefly in desired direction : or ;.
The corresponding turn signal flashes three
times. High-beam headlamps and high-beam
flasher :
High-beam headlamps
; High-beam flasher
X To switch on the high-beam headlamps:
turn the light switch to
L or Ã.
X Press the combination switch forwards :.
The K indicator lamp in the instrument
cluster lights up.
i In the à position, the high-beam head-
lamps are only switched on when it is dark
and the engine is running.
X To switch off the high-beam headlamps:
move the combination switch back to its
normal position.
The K indicator lamp in the instrument
cluster goes out.
X To flash the headlamps: turn the key to
position 1 or 2 in the ignition lock.
X Pull the combination switch briefly in direc-
tion of arrow ;. Hazard warning lamps
G
WARNING
If you open the rear-end doors 90°, the rear
lighting systems are no longer visible. The
vehicle will then be difficult for other road
users to see or will not be seen by them at
all, particularly if it is dark or visibility is
poor. There is a risk of an accident.
You should therefore ensure in this and simi-
lar situations that the vehicle is visible from
the rear in accordance with the relevant
national regulations, by using the warning
triangle, for instance. Exterior lighting
101
Lights and windshield wipers Z
Page 104 of 320

Hazard warning lamp switch
X
To switch on/off: press the £ hazard
warning lamp switch.
If you have indicated a turn while the hazard
warning lamps are switched on, only the turn
signal lamps on the side of the vehicle selec-
ted will light up.
The hazard warning lamps automatically
switch on if: R an air bag is deployed.
R you brake sharply and bring the vehicle to a
halt from a speed of more than 45 mph
(70 km/h
).
The hazard warning lamps switch off automati-
cally if the vehicle reaches a speed of over
6 mph (10 km/h) again after a full brake appli-
cation.
i The hazard warning lamps still operate
even if the ignition is switched off. Headlamps fogged up on the inside
The headlamps may fog up on the inside if
there is high atmospheric humidity.
X Switch on the low-beam headlamps and
drive off.
The level of moisture diminishes, depending
on the length of the journey and the weather
conditions (humidity and temperature).
If the level of moisture does not diminish:
X Have the headlamps checked at a qualified
specialist workshop. Interior lighting
Overview
Interior lighting buttons (example: comfort over-
head control panel)
:
p Switches the front left-hand reading
lamp on/off
; | Switches the automatic interior light-
ing control on and off
= c Switches the front interior lighting on
and off
? w Switches the rear compartment or
cargo compartment lighting on/off
A p Switches the front right-hand reading
lamp on and off
The number and arrangement of the buttons is
equipment-dependent. General notes
In order to prevent the vehicle's battery from
discharging, the interior lighting functions are
automatically deactivated after some time,
unless the key is in position 2 in the ignition
lock. Automatic interior lighting control
The interior lighting is activated for about
20 seconds
when the key is removed from the
ignition lock. For a vehicle with steering-wheel
buttons, the light delay function for the interior
lighting can be switched on and off using the
on-board computer ( Y page 193)102
Interior lighting
Lights and windshield wipers