Page 257 of 320

X
Turn cap : further and remove it from cool-
ant expansion tank ;.
X Check the coolant level.
If the coolant is up to marker bar =
in the
filler neck when cold, there is a sufficient
amount of coolant in coolant expansion
tank ;.
If the coolant is approximately 0.59 in
(1.5 cm) above marker bar = in the filler
neck when warm, there is a sufficient
amount of coolant in coolant expansion
tank ;.
Adding coolant X If the coolant drops under marker bar = in
the filler neck, add coolant.
Observe the information on the correct cool-
ant mixture ratio and the required water
quality under "Service products and capaci-
ties" ( Y page
310). To prevent damage to
the engine cooling system, use only
approved corrosion inhibitor/antifreeze that
complies with the Mercedes-Benz Specifica-
tions for Service Products.
X Replace cap : and tighten in a clockwise
direction.
X Start the engine.
X Set the temperature in the vehicle interior to
the maximum output on the air-conditioning
system control panel.
X After approximately five minutes, switch off
the engine again and allow it to cool down.
X Check the coolant level again and add cool-
ant if necessary.
X Close the hood. Brake fluid
G
WARNING
Service products may be poisonous and haz-
ardous to health. There is a risk of injury.
Comply with instructions on the use, storage
and disposal of service products on the
labels of the respective original containers.
Always store service products sealed in their
original containers. Always keep service
products out of the reach of children. G
WARNING
Opening the hood when the engine is over-
heated or when there is a fire in the engine
compartment could expose you to hot gases
or other service products. There is a risk of
injury.
Let an overheated engine cool down before
opening the hood. If there is a fire in the
engine compartment, keep the hood closed
and contact the fire department. G
WARNING
Certain components in the engine compart-
ment, such as the engine, radiator and parts
of the exhaust system, can become very
hot. Working in the engine compartment
poses a risk of injury.
Where possible, let the engine cool down
and touch only the components described in
the following.
Brake fluid is hazardous to health. Also
observe the safety notes under "Service prod-
ucts and capacities"
(Y page 305). G
WARNING
The brake fluid constantly absorbs moisture
from the air. This lowers the boiling point of
the brake fluid. If the boiling point of the
brake fluid is too low, vapor pockets may
form in the brake system when the brakes
are applied hard. This would impair braking
efficiency. There is a risk of an accident.
You should have the brake fluid renewed at
the specified intervals.
! If the brake fluid level in the brake fluid
reservoir has fallen to the MIN mark or
below, check the brake system immediately
for leaks. Also check the thickness of the
brake linings. Visit a qualified specialist
workshop immediately.
Do not add brake fluid. This does not cor-
rect the malfunction.
! Brake fluid corrodes paint, plastic and rub-
ber. If paint, plastic or rubber has come into
contact with brake fluid, rinse with water
immediately. Engine compartment
255
Maintenance and care Z
Page 258 of 320
.")
Have the brake fluid renewed every two years
at a qualified specialist workshop. Observe the
information regarding brake fluid in the "Ser-
vice products and capacities" section
(Y page
310).Check the brake fluid level regularly, e.g.
weekly or when refueling.
Checking the brake fluid level
X Stop your vehicle as far away from traffic as
possible on level ground.
X Switch off the engine.
X Secure the vehicle to prevent it from rolling
away.
X Open the hood (Y page
251).
X Check the brake fluid level.
The brake fluid level is adequate if the level
is between the MIN mark and MAX mark on
brake fluid reservoir :.
X Close the hood. Washer fluid
G
WARNING
Opening the hood when the engine is over-
heated or when there is a fire in the engine
compartment could expose you to hot gases
or other service products. There is a risk of
injury.
Let an overheated engine cool down before
opening the hood. If there is a fire in the
engine compartment, keep the hood closed
and contact the fire department. G
WARNING
Certain components in the engine compart-
ment, such as the engine, radiator and parts of the exhaust system, can become very
hot. Working in the engine compartment
poses a risk of injury.
Where possible, let the engine cool down
and touch only the components described in
the following. G
WARNING
Windshield washer concentrate is highly
flammable. If windshield washer concentrate
gets onto hot components of the engine or
the exhaust system, it can ignite. There is a
risk of fire and injury.
Make sure that windshield washer concen-
trate is not spilled in the vicinity of the filler
neck.
! Only use washer fluid which is suitable for
lamp lenses, e.g. MB SummerFit or MB Win-
terFit. Unsuitable washer fluid may damage
the lamp lenses of the headlamps. Example: washer fluid reservoir
Add windshield washer concentrate to the
washer fluid all year round. Observe the infor-
mation regarding washer fluid under "Service
Products and Capacities"
(Y page 312).
Adding washer fluid
X Mix the washer fluid to the appropriate mix-
ing ratio in a container beforehand.
X Open the hood ( Y page
251).
X Pull cap : on the washer fluid reservoir
upwards at the tab.
X Add the premixed washer fluid.
X Press cap : onto the filler neck until it
engages audibly.
X Close the hood.256
Engine compartment
Maintenance and care
Page 259 of 320

Maintenance
General notes
H
Environmental note
Observe measures to protect the environ-
ment when working on the vehicle. You
must observe the legal requirements when
disposing of service products, e.g. engine
oil. This also includes all components, e.g.
filters, which have come into contact with
service products. Any qualified specialist
workshop can provide information about
this.
Dispose of empty containers, cleaning
cloths and care products in an environmen-
tally responsible manner. Comply with the
instructions for use of the care products.
Do not run the engine for longer than neces-
sary when the vehicle is stationary.
Before carrying out maintenance measures
and repairs, you must read the following docu-
ments relating to maintenance measures and
repairs:
R relevant sections of the technical documen-
tation such as the Operator's Manual and
workshop information
R legal stipulations such as work safety regu-
lations and accident prevention regulations
While working under the vehicle, you must
secure the vehicle on jack stands with suffi-
cient load capacity.
Never use a vehicle jack instead of stands. The
jack is designed only to raise the vehicle for a
short time when changing a wheel. It is not
suited for performing maintenance work under
the vehicle.
Please also refer to the notes about qualified
specialist workshops
(Y page 32).
The scope and regularity of the inspection and
maintenance work primarily depend on the
often diverse operating conditions. Specialist
knowledge beyond the scope of this Opera-
tor's Manual is required when carrying out
testing and maintenance work. This work
should only be carried out by trained staff.
The vehicle Maintenance Booklet describes
the scope and frequency of maintenance work
and contains additional notes on the Limited
Warranty. You will find information about ser- vice products approved by Mercedes-Benz and
capacities under "Service products and capaci-
ties"
(Y page 305)
Maintenance services must be carried out in
accordance with the provisions and recom-
mendations in the Maintenance Booklet. Not
doing so could void the warranty claim and
lead to refusal of goodwill gestures after the
manufacturer has submitted a damage report.
Observe the information under "Mercedes-
Benz genuine parts" (Y page 34). Service interval display
General notes The service interval display informs you of the
next service due date. Information on the type
of service and service intervals can be found in
the Maintenance Booklet.
i The service interval display does not pro-
vide information about the engine oil level.
The service interval display should therefore
not be confused with the engine oil level dis-
play.
For example, the display shows one of the fol-
lowing service messages for a few seconds: R Service A in .. days
R Service A Due or Service A Due
R Serv. A Exceed. by .. Days
Then either the remaining time or distance
until the next service due date is displayed. If
the service due date has been exceeded, the
elapsed time or distance traveled after the
overdue service date is shown. The letter in
the display message indicates which service is
due. A stands for a minor service and B for a
major service.
A qualified specialist workshop, e.g. an author-
ized Mercedes-Benz Commercial Van Center,
will reset the service interval display after the
service work has been carried out. You can
also obtain further information on mainte-
nance work, for example. Maintenance
257
Maintenance and care Z
Page 260 of 320

The prescribed service interval is based on
normal vehicle use. Service work will need to
be performed more frequently than prescribed
if the vehicle is operated under more arduous
conditions or with higher loads. Such arduous
conditions include:
R regular city driving with frequent intermedi-
ate stops
R driving predominantly short distances
R frequent operation in mountainous terrain or
on poor road surfaces
R leaving the engine idling for long periods on
a frequent basis
In these or similar operating conditions, have
the air filter, engine oil and oil filter, for exam-
ple, replaced more frequently. Under more
arduous operating conditions, the tires must
be checked more often. Further information
can be obtained at a qualified specialist work-
shop, e.g. an authorized Mercedes-Benz Com-
mercial Van Center.
Hiding service messages Vehicles without steering wheel buttons
X Press the 3 button on the instrument clus-
ter.
Vehicles with steering wheel buttons
X Press the a or % button on the steer-
ing wheel.
Calling up the service due date Vehicles without steering wheel buttons
The vehicle must be stationary. Use the but-
tons in the instrument cluster.
X Turn the key to position 2 in the ignition
lock.
X Press È to select the service display.
The display shows a possible service mes-
sage.
Vehicles with steering wheel buttons
Using the steering wheel buttons
X Turn the key to position 2 in the ignition
lock.
X Press = or ; to select the Service
menu.
X Press 9 or : to select the ASSYST
PLUS submenu and press a to confirm.
The display shows the service due date. Battery
Important safety notes
Work on the battery, e.g. removing or instal-
ling, requires specialist knowledge and the use
of special tools. Therefore, always have work
on the battery carried out at a qualified spe-
cialist workshop. G
WARNING
Work carried out incorrectly on the battery
can lead, for example, to a short circuit and
thus damage the vehicle electronics. This
can lead to function restrictions applying to
safety-relevant systems, e.g. the lighting
system, the ABS (anti-lock braking system)
or the ESP ®
(Electronic Stability Program).
The operating safety of your vehicle may be
restricted.
You could lose control of the vehicle, for
example:
R when braking
R in the event of abrupt steering maneuvers
and/or when the vehicle's speed is not
adapted to the road conditions
There is a risk of an accident.
In the event of a short circuit or a similar
incident, contact a qualified specialist work-
shop immediately. Do not drive any further.
You should have all work involving the bat-
tery carried out at a qualified specialist
workshop.
Further information can be found under "ABS"
(Y page
67) and under "ESP ®
" (Y page 68). G
WARNING
Electrostatic build-up can lead to the crea-
tion of sparks, which could ignite the highly
explosive gases of a battery. There is a risk
of an explosion.
Before handling the battery, touch the vehi-
cle body to remove any existing electrostatic
build-up.
The flammable gas mix is produced when the
battery is charged or when the vehicle is jump-
started. 258
Battery
Maintenance and care
Page 261 of 320

Always make sure that neither you nor the bat-
tery are electro statically charged.
An electrostatic charge can build up in the fol-
lowing situations:
R wearing synthetic clothing
R friction between clothing and the seat
R dragging or pushing the battery across car-
pet flooring or any other synthetic materials
R by rubbing the battery with a cloth or towels
Comply with the following safety precautions
and take protective measures when handling
batteries. Risk of explosion. Explosive oxyhy-
drogen is produced when batteries
are being charged. Only charge
batteries in well-ventilated areas.
Fire, open flames and smoking are
therefore prohibited when working
on the battery. Avoid creating
sparks.
Battery acid is caustic. Avoid con-
tact with the skin, eyes or clothing.
Wear acid-proof protective gloves.
If skin or clothes are splashed with
acid, neutralize the splashes imme-
diately with soapy water or an acid
neutralizer, and then clean the
affected areas with water. Consult
a doctor if necessary.
Wear eye protection. When mixing
water and acid, the liquid can
splash into your eyes. Rinse acid
splashes to the eyes immediately
with clean water and contact a
doctor immediately.
Keep children at a safe distance.
Children are not able to assess the
dangers posed by batteries and
acid.
When handling batteries, observe
the safety precautions and special
protective measures contained in
this Operator's Manual.
H
Environmental note Batteries contain pollutants.
It is illegal to dispose of
them with the household
rubbish. They must be col-
lected separately and dis-
posed of in an environmen- tally responsible recycling
system. Dispose of batteries in an
environmentally responsible
manner. Take discharged
batteries to a qualified spe-
cialist workshop or to a col-
lection point for used bat-
teries.
Observe the following notes: R have the batteries recharged more fre-
quently in the following situations:
- if you predominantly drive short distan-
ces.
- if you predominantly drive at low outside
temperatures.
- if you leave the vehicle parked for a
lengthy period.
In order for the batteries to achieve their
maximum possible service life, they must
always be sufficiently charged.
R Consult an authorized Mercedes-Benz Com-
mercial Van Center if you wish to leave your
vehicle parked for a long period of time.
R When you park the vehicle, remove the key
if you do not require any electrical consum-
ers. The vehicle will then use very little
energy, thus conserving battery power.
R If your vehicle requires jump-starting, or if
you wish to provide jump-starting assistance
to another vehicle, only use the jump-start-
ing connection point in the engine compart-
ment
(Y page 272).
R Have the battery removed at a qualified spe-
cialist workshop. Installation locations
Your vehicle may be equipped with the follow-
ing three batteries, depending on the equip-
ment level:
R Starter battery in the seat base of the right-
hand front seat
R Auxiliary battery in the seat base of the
right-hand front seat
R Additional battery in the seat base of the
left-hand front seat Battery
259
Maintenance and care Z
Page 262 of 320

Disconnecting and removing
G
WARNING
During the charging process, a battery pro-
duces hydrogen gas. If a short circuit occurs
or sparks are created, the hydrogen gas can
ignite. There is a risk of an explosion.
R Make sure that the positive terminal of a
connected battery does not come into
contact with vehicle parts.
R Never place metal objects or tools on a
battery.
R It is important that you observe the
described order of the battery terminals
when connecting and disconnecting a bat-
tery.
R When jump-starting, make sure that the
battery poles with identical polarity are
connected.
R It is particularly important to observe the
described order when connecting and dis-
connecting the jumper cables.
R Never connect or disconnect the battery
terminals while the engine is running. G
WARNING
Battery acid is caustic. There is a risk of
injury.
Avoid contact with skin, eyes or clothing. Do
not inhale any battery gases. Do not lean
over the battery. Keep children away from
batteries. Wash away battery acid immedi-
ately with plenty of clean water and seek
medical attention.
! You should have all work involving the bat-
tery carried out at a qualified specialist
workshop.
If, in exceptional circumstances, you need
to disconnect the battery yourself, please
make sure that:
R Secure the vehicle to prevent it from roll-
ing away.
R You have switched off the engine and
removed the key. Make sure the ignition
is switched off. Check to see that there
are no indicator lamps lighting in the instrument cluster. Electronic compo-
nents such as the alternator may other-
wise be damaged.
R After the battery has been disconnected,
the parking brake is automatically
engaged. You can then no longer move
the vehicle.
R For vehicles with automatic transmission,
the transmission is locked in position P
after disconnecting the battery. You can
then no longer move the vehicle.
R You have first removed the negative ter-
minal and then the positive terminal.
Never mix up the terminal clamp discon-
nection/connection order and never mix
up the terminal clamps. The vehicle's
electronics may otherwise be damaged.
The battery and the cover of the positive ter-
minal clamp must be installed securely dur-
ing operation. Seat base (example: right-hand front seat)
The following description on disconnecting
and removing the battery is based upon the
example of the starter battery in the seat base
of the driver's seat. The additional battery is
disconnected and removed in the same way as
the starter battery. The auxiliary battery is
located in the seat base of the left-hand front
seat.
X Switch off all electrical consumers.
X Switch off the engine and remove the key
from the ignition lock.
X Open the front door on the right-hand side.
i To disconnect or remove the additional
battery, open the left-hand front door. The
auxiliary battery is located in the seat base
of the left-hand front seat. 260
BatteryMaintenance and care
Page 263 of 320

X
Press both latching springs : down and
remove cover ; upwards from the seat
base.
X Remove cover ; by pulling upwards at an
angle from the seat base. Open seat base (example: right-hand front seat)
X Remove screws A from holder B.
X Remove holder B.
X Remove breather hose ? from the top of
the battery.
X Pull the battery out of the seat base until
the negative clamp can be released and
removed.
X Disconnect the negative clamp from nega-
tive terminal =.
X Remove the negative clamp in such a way
that the battery cable terminal no longer
touches negative terminal =. Example: starter battery
X Remove the battery from the seat base and
place it on the door sill panel as shown. If
necessary, hold the battery by handles E.
X Remove the positive clamp cover from posi-
tive terminal C.
X Loosen positive clamp D on positive termi-
nal C. X
Remove positive clamp D in such a way
that the battery cable terminal no longer
touches positive terminal C.
X Lift the battery from the door sill panel by
handles E. Reconnecting and installing
G
WARNING
During the charging process, a battery pro-
duces hydrogen gas. If a short circuit occurs
or sparks are created, the hydrogen gas can
ignite. There is a risk of an explosion.
R Make sure that the positive terminal of a
connected battery does not come into
contact with vehicle parts.
R Never place metal objects or tools on a
battery.
R It is important that you observe the
described order of the battery terminals
when connecting and disconnecting a bat-
tery.
R When jump-starting, make sure that the
battery poles with identical polarity are
connected.
R It is particularly important to observe the
described order when connecting and dis-
connecting the jumper cables.
R Never connect or disconnect the battery
terminals while the engine is running.
! Always connect the battery in the order
described below. Never mix up the terminal
clamp disconnection/connection order and
never mix up the terminal clamps. You may
otherwise damage the vehicle electronics.
Always observe the prescribed positive ter-
minal installation position when doing so.
Otherwise, the positive clamp may come
into contact with vehicle parts. In this case
there is a risk that the vehicle may short-cir-
cuit and catch fire.
The following description on connecting and
installing the battery is based upon the exam-
ple of the starter battery in the seat base of
the right-hand front seat. The additional bat-
tery is connected and installed in the same
way as the starter battery. The auxiliary bat- Battery
261Maintenance and care Z
Page 264 of 320

tery is located in the seat base of the left-hand
front seat.
Example: starter battery
X Place the battery on the door sill panel as
shown and secure with handles = if neces-
sary.
X Connect positive clamp ; to positive termi-
nal :. Always observe the positive terminal
installation position shown when doing so.
The positive lead must be routed parallel to
the side of the battery housing in the con-
nection area.
X Place the positive clamp cover on positive
terminal :.
X Fold both handles = down onto the battery.
X Push the battery into the seat base until the
negative terminal can be connected.
X Connect the negative clamp to negative ter-
minal ?.
X Push the battery into the seat base as far as
it will go. Open seat base with installed battery (example:
right-hand front seat) X
Push vent hose A onto the battery connec-
tion next to the negative pole ? at the top.
X Guide holder C over the lower side of the
battery housing and the threads for screws
B.
X Screw on holder C with screws B.
The battery is secured to prevent slipping. Seat base (example: right-hand front seat)
X Insert cover E down in front of the battery
compartment into the seat base and close
it.
Latching springs D of cover E should
engage audibly.
Carry out the following work after connecting
the battery:
X Reset the side window (Y page 86).
X Reset the electric sliding doors ( Y page
80). Charging
G
WARNING
A discharged battery can freeze at tempera-
tures below freezing point. When jump-start-
ing the vehicle or charging the battery,
gases can escape from the battery. There is
a risk of an explosion.
Allow the frozen battery to thaw out before
charging it or jump-starting.
If the indicator/warning lamps do not light up
in the instrument cluster when temperatures
are low, it is probably because the discharged
battery has frozen. Should this be the case, do
not jump-start the vehicle or charge the bat-
tery. The service life of a thawed battery may
be shorter. Start-up behavior may deteriorate,
in particular at low temperatures. Have the 262
Battery
Maintenance and care
 1
1 2
2 3
3 4
4 5
5 6
6 7
7 8
8 9
9 10
10 11
11 12
12 13
13 14
14 15
15 16
16 17
17 18
18 19
19 20
20 21
21 22
22 23
23 24
24 25
25 26
26 27
27 28
28 29
29 30
30 31
31 32
32 33
33 34
34 35
35 36
36 37
37 38
38 39
39 40
40 41
41 42
42 43
43 44
44 45
45 46
46 47
47 48
48 49
49 50
50 51
51 52
52 53
53 54
54 55
55 56
56 57
57 58
58 59
59 60
60 61
61 62
62 63
63 64
64 65
65 66
66 67
67 68
68 69
69 70
70 71
71 72
72 73
73 74
74 75
75 76
76 77
77 78
78 79
79 80
80 81
81 82
82 83
83 84
84 85
85 86
86 87
87 88
88 89
89 90
90 91
91 92
92 93
93 94
94 95
95 96
96 97
97 98
98 99
99 100
100 101
101 102
102 103
103 104
104 105
105 106
106 107
107 108
108 109
109 110
110 111
111 112
112 113
113 114
114 115
115 116
116 117
117 118
118 119
119 120
120 121
121 122
122 123
123 124
124 125
125 126
126 127
127 128
128 129
129 130
130 131
131 132
132 133
133 134
134 135
135 136
136 137
137 138
138 139
139 140
140 141
141 142
142 143
143 144
144 145
145 146
146 147
147 148
148 149
149 150
150 151
151 152
152 153
153 154
154 155
155 156
156 157
157 158
158 159
159 160
160 161
161 162
162 163
163 164
164 165
165 166
166 167
167 168
168 169
169 170
170 171
171 172
172 173
173 174
174 175
175 176
176 177
177 178
178 179
179 180
180 181
181 182
182 183
183 184
184 185
185 186
186 187
187 188
188 189
189 190
190 191
191 192
192 193
193 194
194 195
195 196
196 197
197 198
198 199
199 200
200 201
201 202
202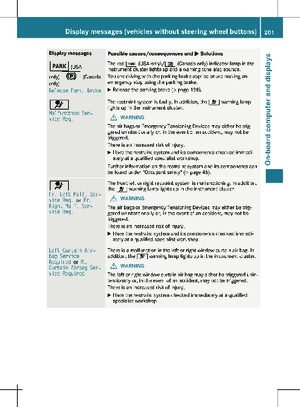 203
203 204
204 205
205 206
206 207
207 208
208 209
209 210
210 211
211 212
212 213
213 214
214 215
215 216
216 217
217 218
218 219
219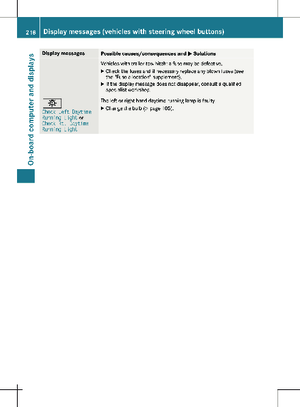 220
220 221
221 222
222 223
223 224
224 225
225 226
226 227
227 228
228 229
229 230
230 231
231 232
232 233
233 234
234 235
235 236
236 237
237 238
238 239
239 240
240 241
241 242
242 243
243 244
244 245
245 246
246 247
247 248
248 249
249 250
250 251
251 252
252 253
253 254
254 255
255 256
256 257
257 258
258 259
259 260
260 261
261 262
262 263
263 264
264 265
265 266
266 267
267 268
268 269
269 270
270 271
271 272
272 273
273 274
274 275
275 276
276 277
277 278
278 279
279 280
280 281
281 282
282 283
283 284
284 285
285 286
286 287
287 288
288 289
289 290
290 291
291 292
292 293
293 294
294 295
295 296
296 297
297 298
298 299
299 300
300 301
301 302
302 303
303 304
304 305
305 306
306 307
307 308
308 309
309 310
310 311
311 312
312 313
313 314
314 315
315 316
316 317
317 318
318 319
319