Page 297 of 394

3.Confirm that the cooling fan is turning.
If the fan is not turning, stop the engine
immediately and have it checked.
A- Radiator fan B- Air conditioning condenser fan (if so equipped)
*: Front of the vehicle
WARNINGl Be careful not to get your hands or clothes
caught in the cooling fan.
4. After the engine coolant temperature has
dropped to the normal temperature, stop the engine.
5. Check the coolant level in the reserve
tank (C).
WARNINGl If there is none, make sure that the engine
has cooled down before removing the ra-
diator cap (D), because hot steam or boil- ing water otherwise will gush from the filler port and may scald you.
6. Add coolant to the radiator and/or re-
serve tank if necessary. (Refer to the
“Maintenance” section.)
CAUTIONl Do not add coolant while the engine is hot.
Suddenly adding cold coolant could damage
the engine. Wait for the engine to cool
down, then add coolant a little at a time.
7. Examine the radiator hoses for coolant
leakage and the drive belt for looseness
or damage.
If there is anything wrong with the cool-
ing system or drive belt, we recommend
you to have it checked and repaired.
Engine overheating
8-05OVWX17E1For emergencies8
Page 298 of 394

Bleeding the fuel system(diesel-powered vehicles
only) E00800700149
The fuel system should be bled to remove air
as described below if the fuel supply is ex- hausted during travel.
Pump the hand pump (A) at the top of the fuel filter until the hand pump becomes stiff.
Then try again to start the engine.
If the engine does not start, repeat the process
above.Removal of water from the
fuel filter (diesel-powered
vehicles only) E00800800140
If the fuel filter indication lamp in the instru- ment panel illuminates during driving, it indi-
cates that water has accumulated in the fuel filter. If this occurs, remove the water as de-
scribed below. 1. Loosen the drain plug (A) at the bottom
of the fuel filter.2. Operate the hand pump (B) slowly 6 or 7
times in order to force the water out
through the drain plug.
3. Tighten the drain plug when water no
longer comes out.
4. Bleed the air in the fuel system. (Refer to “Bleeding the fuel system” onpage 8-06.)
5. Check to be sure that the fuel filter indi-
cation lamp illuminates when the igni-
tion switch is turned to “ON”, and that it goes off when the engine is started. If in
doubt, we recommend you to have your vehicle inspected.
CAUTIONl Do not smoke or have any other open flame
near the vehicle while bleeding the fuel sys- tem.
Bleeding the fuel system (diesel-powered vehicles only)
8-06OVWX17E1For emergencies8
Page 299 of 394

CAUTIONlBe sure to carefully clean away any water
drained out because any fuel mixed with the
water could ignite and cause a fire.Tool, jack and jack handle
E00800900659
Storage
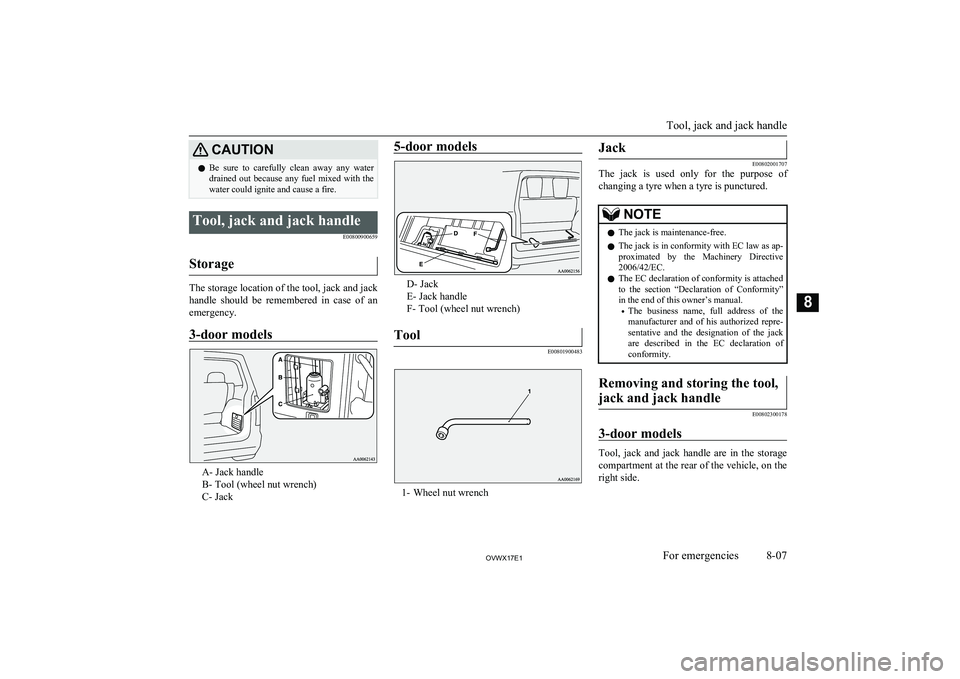
The storage location of the tool, jack and jack
handle should be remembered in case of an
emergency.
3-door models
A- Jack handle
B- Tool (wheel nut wrench)
C- Jack
5-door models
D- Jack
E- Jack handle
F- Tool (wheel nut wrench)
Tool
E00801900483
1- Wheel nut wrench
Jack
E00802001707
The jack is used only for the purpose of
changing a tyre when a tyre is punctured.
NOTEl The jack is maintenance-free.
l The jack is in conformity with EC law as ap-
proximated by the Machinery Directive
2006/42/EC.
l The EC declaration of conformity is attached
to the section “Declaration of Conformity”
in the end of this owner’s manual.
• The business name, full address of the
manufacturer and of his authorized repre-
sentative and the designation of the jack are described in the EC declaration of
conformity.Removing and storing the tool,
jack and jack handle
E00802300178
3-door models
Tool, jack and jack handle are in the storage
compartment at the rear of the vehicle, on the right side.
Tool, jack and jack handle
8-07OVWX17E1For emergencies8
Page 300 of 394
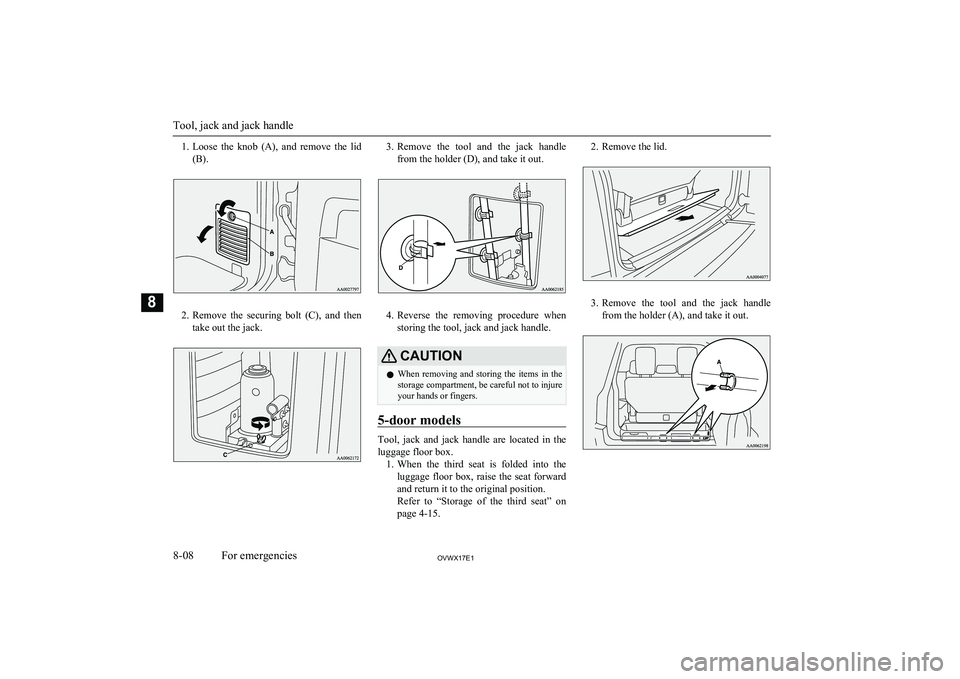
1.Loose the knob (A), and remove the lid
(B).
2. Remove the securing bolt (C), and then
take out the jack.
3. Remove the tool and the jack handle
from the holder (D), and take it out.
4. Reverse the removing procedure when
storing the tool, jack and jack handle.
CAUTIONl When removing and storing the items in the
storage compartment, be careful not to injure
your hands or fingers.
5-door models
Tool, jack and jack handle are located in the
luggage floor box. 1. When the third seat is folded into the
luggage floor box, raise the seat forward and return it to the original position.
Refer to “Storage of the third seat” on
page 4-15.
2. Remove the lid.
3. Remove the tool and the jack handle
from the holder (A), and take it out.
Tool, jack and jack handle
8-08OVWX17E1For emergencies8
Page 301 of 394

4. Pull the lid to remove it.
5.Remove the securing bolt (B), and then
take out the jack.
6. Reverse the removing procedure when
storing the tool, jack and jack handle.
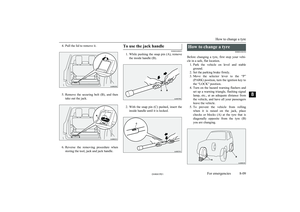
To use the jack handle
E00802400023
1. While pushing the snap pin (A), remove
the inside handle (B).
2. With the snap pin (C) pushed, insert the
inside handle until it is locked.
How to change a tyre
E00801204194
Before changing a tyre, first stop your vehi- cle in a safe, flat location. 1. Park the vehicle on level and stable
ground.
2. Set the parking brake firmly.
3. Move the selector lever to the “P”
(PARK) position, turn the ignition key to
the “LOCK” position.
4. Turn on the hazard warning flashers and
set up a warning triangle, flashing signal
lamp, etc., at an adequate distance from
the vehicle, and have all your passengers
leave the vehicle.
5. To prevent the vehicle from rolling
when it is raised on the jack, place
chocks or blocks (A) at the tyre that is
diagonally opposite from the tyre (B)
you are changing.
How to change a tyre
8-09OVWX17E1For emergencies8
Page 302 of 394

WARNINGlBe sure to apply chocks or blocks to the
correct tyre when jacking up the vehicle.If the vehicle moves while jacked up, the
jack could slip out of position, leading to
an accident.NOTEl The chocks shown in the illustration do not
come with your vehicle. It is recommended
that you keep one in the vehicle for use if needed.
l If chocks are not available, use stones or any
other objects that are large enough to hold the wheel in position.
6. Get the spare wheel, jack, jack handle
and wheel nut wrench ready.
Refer to “Tool, jack and jack handle” on page 8-07.
Spare wheel information
E00803600266
Check the air pressure of the spare tyre fre-quently and make sure it is ready for emer-
gency use at any time.
Maintaining the spare wheel at the highest specified air pressure will ensure that it can
always be used under any conditions (city/ high-speed driving, varying load weight,etc.).
The spare wheel is stored on the outside of
the backdoor. (Refer to “To remove the spare wheel” on page 8-10).
1- Spare wheel
CAUTIONl The tyre pressure should be periodically
checked and maintained at the specified
pressure while the tyre is stowed.
Driving with an insufficient tyre pressure can lead to an accident. If you have nochoice but to drive with an insufficient tyre
pressure, keep your speed down and inflate the tyre to the correct pressure as soon as
possible. (Refer to “Tyre inflation pressures”
on page 10-11.)To remove the spare wheel
E00803500177
CAUTIONl Grasp the spare wheel firmly when remov-
ing or attaching it.
l When removing the spare wheel, put on
gloves. Removing the spare wheel with your
bare hands may cause injury to the fingers.
1. Open the backdoor.
2. Open the lids (A) inside of the backdoor.
How to change a tyre
8-10OVWX17E1For emergencies8
Page 303 of 394
3.Remove the bolts (B) by turning them
anticlockwise with the wheel nut
wrench.
4. Close the backdoor.
5. Open the spare wheel garnish (C).
CAUTIONl Do not open the backdoor with the spare
wheel garnish open. The spare wheel garnish
could swing out to the right of the vehicle, resulting in an accident.
6. Loosen the spare wheel bolts with the
wheel nut wrench (D), then remove the spare wheel.
NOTEl Put the spare wheel under the vehicle body
near the flat tyre. This makes it safer if the jack slips out of position.To change a tyre
E00803202543
1. Loosen the wheel nuts a quarter turn
with the wheel nut wrench. Do not re- move the wheel nuts yet.
How to change a tyre
8-11OVWX17E1For emergencies8
Page 304 of 394

2.Using the jack handle, turn the release
valve (A) clockwise until it stops.
3. Insert the jack handle in the bracket of
the jack and hook the notch (B) on the
jack handle end to the claw (C) of the bracket.
4. Place the jack under one of the jacking
points shown in the illustration. Use the
jacking point closest to the tyre you wish
to change.
D- Front jacking point
E- Rear jacking point
WARNINGl Set the jack only at the positions shown
here. If the jack is set at a wrong position, it could dent your vehicle or the jack
might fall over and cause personal injury.
l Do not use the jack on a tilted or soft sur-
face. Otherwise, the jack might slip and cause personal injury. Always use the jack on a flat, hard surface. Before setting
the jack, make sure there are no sand or pebbles under the jack base.
5. Move the jack handle up and down to
raise the ram until just before the jack contacts the jacking point of the vehicle.
Ensure that the jack will properly con- tact the vehicle jacking point.
NOTEl This jack is a 3 stage expansion type.
6.
Raise the vehicle until the tyre is slightly
off the ground.
WARNINGl Stop jacking up the vehicle as soon as the
tyre is raised off the ground. It is danger-
ous to raise the vehicle any higher.
l Do not get under your vehicle while using
the jack.
How to change a tyre
8-12OVWX17E1For emergencies8