Page 49 of 200

SmartGate web interface
SmartGate parameters can be set in the SmartGate web interface.
The following address must be entered in the web browser of the external de-
vice that is connected with SmartGate.
HTTP://192.168.123.1
The setting changes are only effective after tapping the buttons “Save” →
“Reboot”.
Password/PIN code
The password for the Wi-Fi connection preset by the factory is the complete
vehicle identification number (entered in upper case); the PIN code for the Wi-
Fi direct connection is the last 6 digits of the vehicle identification number.
After changing the password/PIN, the connection to SmartGate must be re-es-
tablished on the external device to be connected using the new password or
new PIN code.
Changing the password for the Wi-Fi connection
›
Open the SmartGate web interface » page 47, SmartGate web interface .
›
In the “WPA / WPA2 key”menu item: Enter the new password (8 to 63 alpha-
numeric characters and special characters, small and capital letters).
›
Confirm the password change by tapping on the “Save” interface.
›
Restart SmartGate by tapping on the “Reboot” 1)
interface.
Changing the PIN code for the Wi-Fi Direct connection
›
Open the SmartGate web interface » page 47, SmartGate web interface .
›
In the “WiFi Direct PIN”menu item: Enter the new PIN code (6 digits).
›
Confirm the PIN code change by tapping on the “Save” interface.
›
Restart SmartGate by tapping on the “Reboot” 1)
interface.
Note
If you have forgotten your password for the connection to SmartGate,
SmartGate must be reset to factory settings in a specialised workshop.Unlocking and opening
Unlocking and locking
Introduction
This chapter contains information on the following subjects:
Unlock / lock using key and lock
48
Unlocking/locking with the remote control key
48
Unlocking/locking - KESSY
49
Vehicle locking / unlocking with the central locking button
49
SafeLock
50
Individual settings
50
Opening/closing a door
50
Child safety lock
51
Malfunctions
51
The vehicle is equipped with a central locking system which makes it possible
to unlock / lock all the doors, the fuel filler flap and boot lid simultaneously.
The door unlocking can be adjusted individually » page 50.
The unlocking of the vehicle is displayed by the turn signal lights flashing
twice.
If you unlock the vehicle and do not open a door or the boot lid within the next
30 seconds, the vehicle will lock again automatically.
The locking of the vehicle is displayed by the turn signal lights flashing once.
If the driver's door has been opened, the vehicle cannot be locked.
If the doors or the boot lid remain open after the vehicle has been locked, the turn signal lights do not flash until they have been closed.
1)
If the “Reboot” interface is not displayed, you must manually restore the web browser display.
47Unlocking and opening
Page 50 of 200
 could lock the car, turn on the ignition or start
the engine - There is risk of injury an")
WARNING■Never leave the key in the vehicle when you exit the vehicle. Unauthor-
ised persons (e.g. children) could lock the car, turn on the ignition or start
the engine - There is risk of injury and accidents!■
When leaving the vehicle, never leave people who are not completely in-
dependent, such as children, unattended in the vehicle. These individuals
might not be able to exit the vehicle by themselves or to help themselves.
Can be fatal at very high or very low temperatures!
CAUTION
■ Each key contains electronic components; therefore it must be protected
against moisture and severe shocks.■
Keep the key grooves clean. Impurities (textile fibres, dust etc.) have a nega-
tive effect on the functionality of the locking cylinder and ignition lock.
Unlock / lock using key and lock
Fig. 29
Left side of the vehicle: Turning
the key for unlocking and locking
the vehicle
Read and observe and on page 48 first.
Unlocking/locking the vehicle with the key » Fig. 29
Unlocking the vehicle
Locking the vehicle
CAUTION
If the locking cylinder is provided with a cap, the cap must be removed before-
hand to unlock/lock the vehicle. » page 165.Unlocking/locking with the remote control keyFig. 30
Key with pop-out key bit
Read and observe and on page 48 first.
Description of the key » Fig. 30
Unlock button
Lock button
Button to lock/unlock the boot lid
Button for folding out/folding in the key bit
Battery status warning light - if the warning light does not flash when you
press a button on the key, the battery is discharged
Unlocking / locking the boot lid
By pressing lightly on the button
the lid is unlocked.
By pressing down on the button
the lid is unlocked and unlatched (partly-
opened).
If the lid is unlocked or released with the button , then the lid is automati-
cally locked after closing. The period of time after which the flap is locked can
be set » page 53 .
CAUTION
■
The remote control may be affected by signal superimposition from transmit-
ters close to the car.■
The range of the remote control key is about 30 m. The battery must be re-
placed if the central locking only reacts to the remote control at a distance of
less than 3 m away » page 164.
AB48Using the system
Page 51 of 200
 enables unlocking and
locking of the")
Unlocking/locking - KESSYFig. 31
Vehicle unlocking / vehicle locking
Read and observe
and on page 48 first.
The KESSY system (Keyless Entry Start Exit System) enables unlocking and
locking of the vehicle without actively using the remote control key.
›
Grip the door handle to unlock » Fig. 31 -
the vehicle.
›
Touch the sensor on the door handle with your finger to
lock » Fig. 31 -
the
vehicle.
When unlocking/locking the vehicle, the key must be at a maximum distance
of approximately 1.5 m from the front door handle.
Information on locking
On vehicles fitted with automatic gearbox, the selector lever must be moved
into the position P before unlocking.
The vehicle cannot be locked from the outside if the ignition has not been
turned off.
After locking the vehicle, it is not possible to unlock it within the next 2 sec-
onds by touching the door handle. This can be used to check whether the vehi-
cle is locked.
Protection against inadvertently locking the key in the vehicle
If one of the doors is closed after locking the vehicle and the key with which
the vehicle was locked remains in the passenger compartment, the vehicle is
automatically unlocked. After automatically unlocking, the turn signal lights
will flash four times. If no door is opened within 45 seconds, the vehicle is au-
tomatically locked again.
If the boot lid is closed after locking the vehicle and the key with which the vehicle was locked remains in the luggage compartment, the lid is automatical-
ly unlatched (partially opened). After automatically unlocking, the turn signal
lights will flash four times. The boot lid remains unlatched (partially opened);
the other doors remain locked.
CAUTION
Some types of gloves can affect the unlocking or locking device via the sen-
sors in the door handle.
Vehicle locking / unlocking with the central locking button
Fig. 32
Central locking button
Read and observe and on page 48 first.
Conditions for the locking/unlocking using the central locking button.
The vehicle is not locked from the outside.
None of the doors are open.
›
To lock , press the
button in the area » Fig. 32.
Locking is displayed in the button by the illumination of the
symbol.
›
To unlock , press the button in the area
.
The following applies after locking. ▶ Opening the doors and the boot lid from the outside is not possible.
▶ The doors can be unlocked and opened from the inside by a single pull on the
opening lever of the respective door.
WARNINGDoors locked from the inside make it difficult for rescuers to get into the
vehicle in an emergency – risk to life!49Unlocking and opening
Page 52 of 200

SafeLockRead and observe
and on page 48 first.
SafeLock prevents opening the doors from inside as well as window operation.
This makes an attempted break-in to the vehicle more difficult.
Activating
SafeLock is activated when the vehicle is locked from the outside.
This function is pointed out by the following message on the display of the in-
strument cluster after the ignition is switched off.
Check SAFELOCK! Log book!CHECK DEADLOCK
Activation display
When SafeLock is activated, the warning light in the driver's door flashes for 2
seconds in rapid succession, then starts to flash at longer intervals.
Deactivating
▶ By locking twice within 2 seconds.
▶ or: by deactivating the interior monitor and the towing protection
» page 52 .
The warning light in the driver door flashes rapidly for about 2 seconds, then
goes out and starts to flash at longer intervals after about 30 seconds.
If the vehicle is locked and the safe securing system is switched off, the door
can be opened separately from the inside by a single pull on opening lever.
The Safelock system switches back on when the vehicle is locked.
WARNINGIf the car is locked and the safe securing system activated, no people must
remain in the car as it will then not be possible to either unlock a door or
open a window from the inside. The locked doors make it more difficult for
rescuers to get into the vehicle in an emergency – risk to life!
Individual settings
Read and observe
and on page 48 first.
The following central locking functions can be individually set via the MAXI
DOT display » page 43, Menu item
Settings
.
All doors
The function allows you to unlock all doors, the boot lid and the fuel filler flap.
Single door
The function allows you to unlock only the driver's door and the fuel filler flap
with the radio remote control. KESSY allows the unlocking of a single door
which is in the vicinity of the key, as well as the fuel filler flap. The other doors
and the boot lid are only unlocked once the door handle is unlocked or
touched.
Doors on a vehicle side
This function enables you to unlock both doors on the driver's side and the
fuel filler flap with the radio remote control unit. KESSY allows the unlocking of
both doors which are in the vicinity of the key, as well as the fuel filler flap. The
other doors and the boot lid are only unlocked once the door handle is un-
locked or touched.
Automatic locking/unlocking
This function enables the locking of all doors and the boot lid from a speed of
15 km / h. Opening the doors and the boot lid from the outside is not possible.
The renewed unlocking of the doors and the boot lid is carried out when the
ignition key is removed or when the door is opened from inside (depending on
the individual setting for the central locking system).
Opening/closing a door
Fig. 33
Door handle/door opening lever:
Read and observe
and on page 48 first.
›
To open from the outside , unlock the vehicle and pull the door handle
A
in
the direction of arrow » Fig. 33.
50Using the system
Page 53 of 200

›To
open from the inside pull the door opening lever B and push the door
away from you.›
To the lock from the inside , grab the handle
C
and close the door.
WARNING■
The door must be closed properly, otherwise it could open whilst the ve-
hicle is in motion - There is a risk of death!■
Only open and close the door when there is no one in the opening/closing
range – There is a risk of injury!
■
Never drive with the doors open - it can be fatal!
■
An opened door can close automatically if there is a strong wind or the
vehicle is on an incline – risk of injury!
Child safety lock
Fig. 34
Rear door: Switching the child safety system on/off
Read and observe
and on page 48 first.
The child safety lock prevents the rear door from being opened from the in-
side. The door can only be opened from the outside.
›
To turn on the child safety lock, turn the vehicle key to position
» Fig. 34 .
›
To turn off the child safety lock, turn the vehicle key to position
.
Malfunctions
Read and observe
and on page 48 first.
Synchronise remote
If the buttons on the remote control key have been depressed several times
beyond the effective range of the equipment, or the battery has been replaced
in the remote control key and the vehicle cannot be unlocked with the remote
control, the key must be synchronised.
›
Press any button on the remote control key.
›
Unlock the door with the key in the lock cylinder within 1 minute of pressing the button.
Central locking fault
If the warning light in the driver's door initially flashes quickly for around 2 sec-
onds, and then illuminates for 30 seconds without interruption before flashing
again slowly, you will need to seek the assistance of a specialist garage.
In the case of a fault with the central locking system, the vehicle doors and the
boot lid can be emergency locked or emergency released » page 165.
Failure of the KESSY system
If there is a fault in the KESSY system, the appropriate error message is dis-
played in the instrument cluster.
Low voltage of the key battery
If the voltage of the key battery is too low, a message appears in the display of
the instrument cluster referring to the need to replace the battery. Replace
the battery » page 164.
Anti-theft alarm system
Introduction
This chapter contains information on the following subjects:
Alarm trigger
52
Interior monitor and towing protection
52
The alarm system triggers audible and visual signals if an attempt is made to
break into the vehicle (hereafter referred to as alarm).
The alarm system is activated automatically approximately 30 seconds after the vehicle is locked. This is automatically disabled after release.
51Unlocking and opening
Page 54 of 200

CAUTIONBefore leaving the vehicle, it must be checked that all of the windows, doors
and the sliding/tilting roof are locked in order to ensure the full functionality of
the anti-theft alarm system.
Note
The alarm system has its own power source, whose service life is 5 years.
Alarm trigger
Read and observe
on page 52 first.
The alarm is triggered when one of the following unauthorised actions is acti-
vated on the vehicle with an activated warning system. ▶ Opening the bonnet.
▶ Opening the boot lid.
▶ Opening the doors.
▶ Manipulation of the ignition lock.
▶ Towing the vehicle.
▶ Movement in the vehicle.
▶ Sudden and significant voltage drop of the electrical system.
▶ Uncoupling the trailer.
An alarm is triggered also when the driver's door is unlocked and opened by
the lock cylinder.
The alarm is switched off by pressing the
button on the key or switching on
the ignition.
Interior monitor and towing protection
Fig. 35
Button for interior monitor and
towing protection
Read and observe on page 52 first.
The interior monitor detects movements inside the locked vehicle and then
triggers the alarm.
The anti-towing detects tilts in the locked vehicle and then triggers the alarm.
Both systems should be deactivated if there is a possibility that the alarm will
be triggered by movements (e.g. by people or animals) within the vehicle inte-
rior or if the vehicle has to be transported (e.g. by train or ship) or towed.
Deactivation
›
Switch off the ignition and open the driver's door.
›
Press the button on the centre column on the driver side
» Fig. 35, the
symbol illuminates in the button.
›
Lock the vehicle within 30 seconds.
Disabling the two systems, switches off SafeLock.
CAUTION
The opened glasses storage compartment reduces the effectiveness of the in-
terior monitor. To ensure the full functionality of the interior monitor, the
glasses storage compartment must always be closed before locking the vehi-
cle.
Luggage compartment lid
Introduction
This chapter contains information on the following subjects:
Opening / closing the boot lid
53
Delayed locking of the boot lid
53WARNING■ Never drive with the boot lid open or ajar, as otherwise exhaust gases
may get into the interior of the vehicle – risk of poisoning!■
Ensure that the lock is properly engaged after closing the lid. Otherwise,
the lid might open suddenly while the vehicle is moving, even if the lid was
locked – There is a risk of an accident!
■
Make sure that when closing the boot lid, no body parts are crushed -
there is danger of injury!
■
Do not press on the rear window when closing the luggage compartment
lid, it could crack – There is a risk of injury!
52Using the system
Page 55 of 200

Opening / closing the boot lidFig. 36
Opening / closing tailgate
Read and observe
on page 52 first.
›
To open the lid, press
--
--
» Fig. 36 button A in the direction of arrow 1.
›
Raise the lid in the direction of the arrow
2
.
›
To close , grab the mount
B
and pull in the direction of arrow
3
.
Note
Button A » Fig. 36 is disabled when starting off or driving at a speed of over 5
km/h. The button is reactivated when the vehicle has stopped and a door is
opened.
Delayed locking of the boot lid
Read and observe
on page 52 first.
If the boot lid is unlocked with the button on the key, then the boot lid is
automatically locked after closing.
The period after which the boot lid is locked automatically can be extended by
a specialist garage.
CAUTION
There is a risk of unwanted entry into the vehicle before the boot lid is locked
automatically.Window operation
Introduction
This chapter contains information on the following subjects:
Mechanical windows
54
Electric window
54
Opening the windows in the front passenger door and in the rear doors
54
Force limiter
55
Window convenience operation
55
Operational faults
55
The windows can be operated mechanically by the winder attached to the re-
spective door panel.
The windows can be operated electrically from the following locations; all win-
dows from the driver's seat and also via the buttons for the windows in the
passenger door or the rear doors.
WARNING■ Always close the window carefully and in a controlled manner. Otherwise
these could cause severe crushing injuries.■
The system is fitted with a force limiter » page 55. If there is an obsta-
cle, the closing process is stopped and the window goes down by several
centimetres. However, the windows should be closed carefully – risk of in-
jury.
CAUTION
■ Keep the windows clean (free of ice and similar) to ensure the correct func-
tionality of the electric windows.■
Always close the electric windows before disconnecting the battery.
Note
If the windows are opened, dust as well as other dirt can get into the vehicle
and in addition the wind noise is more at certain speeds.53Unlocking and opening
Page 56 of 200

Mechanical windowsFig. 37
Window Operation: Left / Right
Read and observe
and on page 53 first.
›
To open , turn the crank in the direction of arrow
A
» Fig. 37 .
›
To close , turn the crank in the direction of arrow
B
.
Electric window
Fig. 38
Window lifter buttons
Read and observe and on page 53 first.
All windows can be operated from the driver's seat. The window in the front
passenger door and the windows in the rear doors are operated via the button
in each door.
Electric window buttons » Fig. 38
Left front door
Right front door
Left rear door
ABCRight rear door
Deactivate/activate the buttons in the rear doors (the deactivation may be
advantageous if, for example, children are transported on the rear seats)›
To open , lightly press the appropriate button and hold it until the window
has moved into the desired position.
›
or: press the button to the stop, the window automatically opens fully. Re-
newed pressing of the button causes the window to stop.
›
To close , pull gently on the top edge of the corresponding button and hold
until the window has moved into the desired position.
›
or: pull the button briefly to the stop, the window automatically closes fully.
Renewed pulling of the button causes the window to stop immediately.
›
To deactivate/activate the buttons in the rear doors, press the
E
button. If
the buttons in the rear doors are deactivated, the warning light illumi-
nates in the
E
button.
Note
■ After switching off the ignition, the windows can still open and close for
about 10 minutes.■
After the driver or front passenger door is opened, the operation of the win-
dow is only possible with the button
A
» Fig. 38 , in which case this is pressed
or pulled for approx. 2 seconds.
Opening the windows in the front passenger door and in the rear
doors
Fig. 39
Power window button
Read and observe and on page 53 first.
There is a button in the front passenger door and in the rear doors for that
window.
›
To open , lightly press the button underneathand hold it until the window has
moved into the desired position.
DE54Using the system
 1
1 2
2 3
3 4
4 5
5 6
6 7
7 8
8 9
9 10
10 11
11 12
12 13
13 14
14 15
15 16
16 17
17 18
18 19
19 20
20 21
21 22
22 23
23 24
24 25
25 26
26 27
27 28
28 29
29 30
30 31
31 32
32 33
33 34
34 35
35 36
36 37
37 38
38 39
39 40
40 41
41 42
42 43
43 44
44 45
45 46
46 47
47 48
48 49
49 50
50 51
51 52
52 53
53 54
54 55
55 56
56 57
57 58
58 59
59 60
60 61
61 62
62 63
63 64
64 65
65 66
66 67
67 68
68 69
69 70
70 71
71 72
72 73
73 74
74 75
75 76
76 77
77 78
78 79
79 80
80 81
81 82
82 83
83 84
84 85
85 86
86 87
87 88
88 89
89 90
90 91
91 92
92 93
93 94
94 95
95 96
96 97
97 98
98 99
99 100
100 101
101 102
102 103
103 104
104 105
105 106
106 107
107 108
108 109
109 110
110 111
111 112
112 113
113 114
114 115
115 116
116 117
117 118
118 119
119 120
120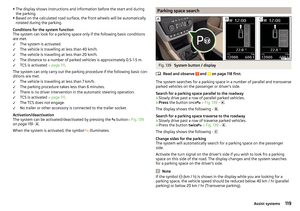 121
121 122
122 123
123 124
124 125
125 126
126 127
127 128
128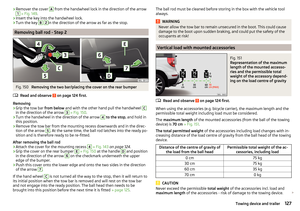 129
129 130
130 131
131 132
132 133
133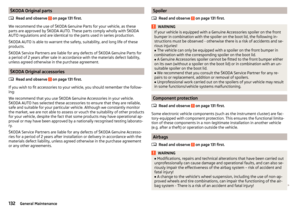 134
134 135
135 136
136 137
137 138
138 139
139 140
140 141
141 142
142 143
143 144
144 145
145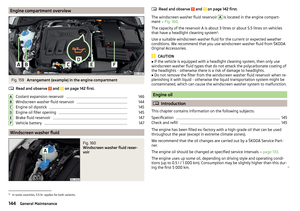 146
146 147
147 148
148 149
149 150
150 151
151 152
152 153
153 154
154 155
155 156
156 157
157 158
158 159
159 160
160 161
161 162
162 163
163 164
164 165
165 166
166 167
167 168
168 169
169 170
170 171
171 172
172 173
173 174
174 175
175 176
176 177
177 178
178 179
179 180
180 181
181 182
182 183
183 184
184 185
185 186
186 187
187 188
188 189
189 190
190 191
191 192
192 193
193 194
194 195
195 196
196 197
197 198
198 199
199