Page 153 of 219

Checking and refilling levels
reduce the frost protection and, in turn, de-
crease the cooling capacity.
When the coolant is topped up, use a mixture
of distilled water and, at least, 40 % of the G
13 or G 12 p lu
s-plus (TL-VW 774 G) additive
(both are purple) to obtain an optimum anti-
corrosion protection ››› . The mixture of G
13 with G 12 plus (TL-VW 774 F), G 12 (red) or
G 11 (green-blue) engine coolants will signifi-
cantly reduce the anticorrosion protection
and should, therefore be avoided ››› .
WARNING
If there is not enough anti-freeze in the cool-
ant system, the engine may fail leading to se-
rious damage.
● Please make sure that the percentage of
additive is correct with respect to the lowest
expected ambient temperature in the zone in
which the vehicle is to be used.
● When the outside temperature is very low,
the coolant could freeze and the vehicle
would be immobilised. In this case, the heat-
ing would not work either and inadequately
dressed passengers could die of cold. CAUTION
The original additives should never be mixed
with coolants which are not approved by
SEAT. Otherwise, you run the risk of causing
severe damage to the engine and the engine
cooling system. ●
If the fluid in the expansion tank is not pur-
ple but is, for example, brown, this indicates
that the G 13 additive has been mixed with
an inadequate coolant. The coolant must be
changed as soon as possible if this is the
case! This could result in serious faults and
engine damage. For the sake of the environment
Coolants and additives can contaminate the
environment. If any fluids are spilled, they
should be collected and correctly disposed
of, with respect to the environment. Checking the engine coolant level and
refilling
Fig. 109
In the engine compartment: Marking
on coolant expansion tank Fig. 110
In the engine compartment: Coolant
expansion tank cap If the coolant level is low, the coolant warn-
ing indicator will light.
Preparations
● Park the vehicle on even, flat and firm
ground.
● Allow the engine to cool ››› .
● Open the bonnet ››› page 143.
● The coolant expansion tank is easily recog-
nisable because of the symbol on the cap
››› Fig. 110 .
Chec k
ing the engine coolant level
● When the engine is cold, check the coolant
level using the side marking on the expan-
sion tank ››› Fig. 109.
● If the l
evel is below the “MIN” mark, top up
with coolant. When the engine is hot it may
be slightly above the marked area. »
151
Technical specifications
Advice
Operation
Safety
Page 154 of 219

Advice
Topping up the engine coolant level
● Always protect your face, hands and arms
from hot coolant and steam using a large,
thick cloth over the coolant expansion tank
cap.
● Remove the cap very carefully ››› .
● Only refill using new engine coolant ac-
c or
ding to SEAT specifications ( ››› page 150)
››› .
● The engine coolant level should be be-
tween the marks on the coolant expansion
tank ››› Fig. 109 .
Do not exceed the top level
of
the marked area ››› .
● Screw on the cap tightly.
● If, in the event of an emergency, you have
no coolant that is compliant to the required
specifications ( ››› page 150), do not use an-
other type of additive. Instead, top up with
distilled water only
›
›› . Then re-establish
the correct proportion of the mixture with the
correct additive as soon as possible
››› page 150 . WARNING
Hot vapours and coolant can cause serious
burns.
● Never open the coolant expansion tank if
steam or coolant is coming from the engine
compartment. Wait until you cannot see or
hear any steam or coolant escaping. ●
Always wait until the engine has complete-
ly cooled before very carefully opening the
expansion tank cap. Contact with hot ele-
ments of the engine can cause skin burns.
● When the engine is warm or hot, the cool-
ing system is pressurised. Do not unscrew
the cap on the expansion tank when the en-
gine is hot. Otherwise, coolant may spray out
under pressure causing burns and serious in-
jury.
– Carefully and slowly unscrew the cap an-
ti-clockwise, gently pressing down on it.
– Always protect your face, hands and arms
from hot coolant and steam using a large,
thick cloth.
● When refilling liquids, avoid spilling them
on parts of the engine and the exhaust sys-
tem. Spilled liquids could cause a fire. Under
specific circumstances, the ethylene glycol
can catch fire. CAUTION
● Top up with distilled water only. Any other
type of water may lead to considerable rust-
ing in the engine due to its chemical compo-
nents. This could consequently damage the
engine. If you have not used distilled water
but another type of water to top up the cool-
ant, a specialised workshop must immediate-
ly replace all of the fluid in the engine cooling
system.
● Only top up coolant to the top level of the
marked area ››› Fig. 109. Otherwise the ex- cess coolant will be forced out of the cooling
system when the engine is hot, causing dam-
age.
● If a lot of liquid coolant has been lost, wait
for the engine to cool down completely before
adding coolant. Extensive coolant loss is an
indication of leaks in the engine cooling sys-
tem. Have the engine cooling system inspec-
ted immediately by a specialised workshop.
Otherwise engine damage may occur.
● When refilling or changing service liquids,
ensure that you put the liquids into the right
tank. Making a mistake when refilling could
cause serious malfunctions and damage the
engine! Brake fluid
Checking the brake fluid level Fig. 111
In the engine compartment: brake
fluid reservoir, lid 152
Page 155 of 219

Checking and refilling levels
In the course of time, the brake fluid absorbs
water from the ambient air. If there is too
much water in the brake fluid, the brake sys-
tem could be damaged. In addition, the boil-
ing point of the brake fluid is significantly
lowered. When the brake fluid contains too
much water and the brakes are subject to
considerable forces, bubbles of water vapour
can form in the system. These bubbles can
significantly reduce braking power, notably
increasing braking distance, and could even
result in the total failure of the brake system.
Ensuring that the brake system is always
functioning correctly is essential for your own
safety and the safety of other road users
››› .
Brake fluid specifications
SEAT have developed a special brake fluid
optimised for the brake systems of their vehi-
cles. To ensure the optimum working of the
brake system, SEAT recommends the use of
brake fluid in accordance with the VW 501 14
standard . If this brake fluid is not available or
another br ak
e fluid is used for different rea-
sons, use a brake fluid that complies with the
United States standard FMVSS 116 DOT 4 or
the German standard DIN ISO 4925 CLASS 4
››› .
Brake fluids conforming to the standard
VW 501 14, fulfil the American requirements
of the FMVSS 116 DOT 4 standard and the
German DIN ISO 4925 CLASS 4 standard. However, fluids that comply with the Ameri-
can FMVSS 116 DOT 4 standard or the Ger-
man DIN ISO 4925 CLASS 4 standard do not
necessarily comply with the VW 501 14
standard. Always check the information on
the brake fluid container and ensure that you
are using suitable brake fluid.
A suitable brake fluid can be obtained from
SEAT dealerships.
Brake fluid level
The level of the brake fluid should always be
between the MIN and MAX marks, or above
the MIN mark
››› .
It is not always possible to check the level of
the brake fluid, as in some models the en-
gine components make it difficult to see the
brake fluid reservoir. If you cannot read the
exact brake fluid level, consult a specialist.
The brake fluid level drops slightly when the
vehicle is being used due to wear of the
brake pads and the automatic readjustment
of the brake.
Changing the brake fluid
The brake fluid should be changed in accord-
ance with the instructions given in the Main-
tenance Programme. Have the brake fluid
changed by a specialised workshop. SEAT
recommends taking your car in for technical
service. This means that only brake fluid complying with the required specifications
will be used. WARNING
If the brake fluid level is low or unsuita-
ble/old brake fluid is used, the brake system
may fail or braking power may be reduced.
● Check the brake system and the brake fluid
level regularly!
● The brake fluid should be changed regular-
ly in accordance with the instructions given
in the Maintenance Programme.
● When the brake fluid is used and brakes
are subjected to extreme braking forces, bub-
bles of vapour form in the brake system.
These bubbles can significantly reduce brak-
ing power, notably increasing braking dis-
tance, and could result in the total failure of
the brake system.
● Always ensure that you use suitable brake
fluid. Only used brake fluid that conforms to
the VW 501 14 standard, FMVSS 116 DOT 4
standard or even the DIN ISO 4925 CLASS 4
standard. Other types of brake fluid could af-
fect brake operation and reduce braking pow-
er. Do not use a brake fluid if the container
does not specify compliance with the
VW 501 14, FMVSS 116 DOT 4 or
DIN ISO 4925 CLASS 4 standards.
● The replacement brake fluid must be new. WARNING
Brake fluid is poisonous. » 153
Technical specifications
Advice
Operation
Safety
Page 156 of 219

Advice
●
To reduce the risk of poisoning, do not keep
brake fluid in drinks bottles/containers or
similar. Other people could drink from these
recipients even if the contents are clearly
marked.
● Always keep brake fluid in the original con-
tainer; keep it correctly sealed and out of
reach of children. CAUTION
Brake fluid damages the vehicle paintwork.
Wipe off any brake fluid from the paintwork
immediately. For the sake of the environment
Brake fluid is an environmental pollutant.
Collect any spilt service fluids and allow a
professional to dispose of them. Checking and topping up the
windscreen washer reservoir with
water
Fig. 112
In the engine compartment: wind-
screen washer reservoir top Check the water level in the windscreen
washer reservoir regularly and top up as re-
quired.
● Open the bonnet ››› page 143.
● The washer reservoir is marked with the
symbol on the lid ››› Fig. 112 .
● Chec k
there is enough water in the reser-
voir.
● To top up, mix water with a window cleaner
recommended by SEAT ››› . Please follow
the instructions for use found on the packag-
ing.
● In cold weather, a special antifreeze should
also be added to prevent the water from
freezing ››› .Reservoir capacity
The washer bottle capacity is approximately 3
litres.
WARNING
Never mix an unsuitable antifreeze or other
similar additives with the windscreen washer
water. A greasy layer may be formed on the
windscreen which will impair visibility.
● Use clean water with a window cleaner rec-
ommended by SEAT.
● If necessary, add a suitable antifreeze to
the water in the reservoir. CAUTION
● Do not mix cleaning products recommen-
ded by SEAT with other products. This could
lead to flocculation and may block the wind-
screen washer jets.
● When topping up service fluids, make abso-
lutely certain that you fill the fluids into the
correct reservoirs. Using the wrong fluids
could cause serious malfunctions and engine
damage! Vehicle battery
Introduction The battery is a component of the vehicle's
electrical system.
154
Page 157 of 219

Checking and refilling levels
Never work on the electrical system without
fully understanding the operations required,
the applicable safety standards and without
the correct tools ››› ! If required, have any
work carried out by a specialised workshop.
SEAT recommends taking your car in for tech-
nical service. Negligent work can cause seri-
ous injury.
Location of the vehicle battery
The battery is located in the engine compart-
ment.
Explanation of the warning indications on
the vehicle's batterySymbolMeaning
Wear eye protection!
Battery acid is very corrosive and caustic.
Always wear protective gloves and eye
protection!
Fires, sparks, open flames and smoking
are prohibited.
A highly explosive mixture of gases is re-
leased when the battery is under charge.
Keep children away from acid and batter-
ies!
WARNING
Working on the vehicle battery and the elec-
trical system can cause corrosion, fire and electric shocks. Always read and take into ac-
count the following warnings and safety
standards before carrying out any work:
●
Before working on the battery, switch off
the engine, the ignition and all electrical de-
vices then disconnect the negative connec-
tion on the battery.
● Keep children away from acid and the bat-
tery itself!
● Wear eye protection.
● Battery acid is very corrosive and caustic. It
can burn skin and cause blindness. When
handling the battery, protect yourself from
splashes of acids, above all your hands, arms
and face.
● Do not smoke and never work close to pla-
ces exposed to flames or sparks.
● Avoid sparks and electrostatic discharges
when working with cables and electrical devi-
ces.
● Never short the battery terminals.
● Never use a damaged battery. It can ex-
plode. Replace a damaged battery immedi-
ately.
● Replaced damaged or frozen batteries as
soon as possible. A flat battery can also
freeze at temperatures close to 0 °C (+32 °F). CAUTION
● Never disconnect the battery if the ignition
is switched on or if the engine is running. This could damage the electrical system or
electronic components.
● Do not expose the battery to direct sunlight
over a long period of time, as the intense ul-
traviolet radiation can damage the battery
housing.
● If the car is left standing for long periods,
protect the battery from extreme cold temper-
ature so that it does not “freeze up” and be-
come damaged. Warning lamp
It
lights upPossible
causeSolution
Faulty generator.
Contact a specialised
workshop. Have the elec-
trical system checked.
Disconnect any unneces-
sary electrical devices.
The generator does not
charge the battery while
the vehicle is in motion.
Several warning and control lamps light up
for a few seconds when the ignition is switch-
ed on, signalling that the function is being
verified. They will switch off after a few sec-
onds.
»
155
Technical specifications
Advice
Operation
Safety
Page 158 of 219

Advice
WARNING
Observe the safety warnings ››› in Control
and warning lamps on page 40. Checking the electrolyte level of the
vehicle battery
Fig. 113
In the engine compartment: Remove
the cover from the vehicle's battery. The battery's electrolyte level should be
checked regularly in high-mileage vehicles,
in hot countries and in older batteries. Other
batteries do not require maintenance.
Vehicles fitted with the Start-Stop system are
equipped with special batteries. For technical
reasons, the electrolyte level cannot be
checked in these batteries. Preparations
● Prepare the vehicle for work in the engine
compartment ››› page 143
● Open the bonnet ››› page 143.
● Press on the tabs ››› Fig. 113 (arrows) in the
dir ection of
the arrows and lift the battery
cover up.
Checking the battery electrolyte level
● Make sure there is sufficient lighting to
clearly recognise the colours. Never use
flames or shiny objects as a light source.
● Depending on the level of acid, the Magic
eye on the top of the battery will change col-
our.
Colour in-
dicatorNecessary operations
Light yellow
or colourlessThe electrolyte level of the vehicle's bat-
tery is too low. Have the battery checked
and, where applicable, replaced by a
specialised workshop.
BlackThe electrolyte level of the vehicle's bat-
tery is correct. WARNING
Working with the vehicle battery involves a
risk of corrosion, explosions and electric
shock. ●
Never tilt the vehicle battery. Battery acid
could spill out of the openings for the release
of gases and cause corrosion damage.
● Never open the vehicle battery.
● If battery acid splashes on you, immediate-
ly rinse your eyes and skin abundantly with
water for several minutes. Then seek medical
care immediately.
● If acid is swallowed by mistake, consult a
doctor immediately. Charging, replacing and connecting or
disconnecting the battery
Charging the battery
The vehicle battery should be charged by a
specialised workshop only, as batteries us-
ing special technology have been installed
and they must be charged in a controlled en-
vironment
››› . SEAT recommends taking
your car in for technical service.
Replacing a vehicle battery
The battery has been developed to suit the
conditions of its location and has special
safety features. If the battery must be re-
placed, consult a technical service for infor-
mation on electromagnetic compatibility, the
size and maintenance, performance and
safety requirements of the new battery in
your vehicle before you purchase one. SEAT
156
Page 159 of 219

Checking and refilling levels
recommends you have the battery replaced
by a technical service.
Use only maintenance-free genuine batteries
conforming to TL 825 06 and VW 7 50 73
Standards. These standards must be dated
April 2008 or later.
Vehicles fitted with the Start-Stop system are
equipped with a special battery. Therefore,
this battery must only be replaced by another
with the same specifications.
Disconnecting the vehicle's battery
If you must disconnect the battery from the
electrical system, please note the following:
● Switch off the ignition and all electrical
equipment.
● The vehicle must be unlocked before dis-
connecting the battery, otherwise the alarm
will be triggered.
● First disconnect the negative cable and
then the positive ››› .
Connecting the vehicle's battery
● Before reconnecting the battery, switch off
the engine and all electrical devices.
● First reconnect the positive cable and then
the negative ››› .
Different control lamps may light up after
connecting the battery and switching the ig-
nition on. They will be turned off after a short trip at a speed of between 15-20 km/h
(10-12 mph). If the warning indicators remain
lit, please visit a specialised workshop to
have the vehicle checked.
If the battery has been disconnected for a
long time, it is possible that the next service
date is not displayed or calculated correctly
››› page 36 . Respect the maximum service in-
t er
vals permitted ››› Booklet Maintenance
Programme.
Autom
atic device disconnection
The intelligent vehicle electrical system auto-
matically implements a range of measures to
prevent the battery from discharging when
high demands are made on it:
● The idling speed is increased so that the al-
ternator provides more electricity.
● Where necessary, the power to the most
powerful devices is reduced or even com-
pletely disconnected.
● On starting the engine, the power supply
from the 12-volt power sockets and the ciga-
rette lighter may be interrupted for a short
time.
The on-board management program cannot
always prevent the battery from running flat.
For example, if the ignition is left on for a
long period with the engine off or if the side
lights or parking lights are left on while the
vehicle is stationary. Why the battery runs flat:
●
When stationary for a long time without
starting the engine, particularly if the ignition
is switched on.
● Use of electrical devices with the engine
switched off. WARNING
Incorrectly securing the battery or using the
wrong battery can cause short-circuits, fire
and serious injuries.
● Always use only maintenance-free batter-
ies, protected to prevent a leak, and whose
properties, specifications and size corre-
spond to the standard battery. WARNING
A highly explosive mixture of gases is re-
leased when the battery is under charge.
● The batteries should be charged in a well-
ventilated room only.
● Never charge a frozen or recently thawed
battery. A flat battery can also freeze at tem-
peratures close to 0 °C (+32 °F).
● Always replace a battery which has frozen.
● Battery cables not correctly connected may
cause a short circuit. Reconnect first the posi-
tive cable and then the negative cable. » 157
Technical specifications
Advice
Operation
Safety
Page 160 of 219

Advice
CAUTION
● Never disconnect the battery if the ignition
is switched on or if the engine is running.
This could damage the electrical system or
electronic components.
● Never plug accessories that supply current,
such as solar panels or a battery charger, to
the 12-volt power socket or the cigarette
lighter. This could damage the vehicle's elec-
trical system. For the sake of the environment
Dispose of the battery in an environment-
friendly manner. Batteries contain toxic sub-
stances such as sulphuric acid and lead. For the sake of the environment
Battery acid can contaminate the environ-
ment. Collect any spilt service fluids and dis-
pose of them correctly. Wheels and tyres
Wheels Introduction SEAT recommend that all work on tyres and
wheels is carried out by a specialised work-
shop. These workshops have the necessary
special tools and replacement parts, trained
personnel and facilities for disposing of the
old tyres while respecting the environment.
SEAT recommends taking your car in for tech-
nical service.
WARNING
The vehicle cannot be totally controlled or
braked if the tyres (new or used) are worn or
damaged.
● Incorrect use of wheels and tyres could
make driving more dangerous and result in
serious accidents and damage.
● All four wheels must be fitted with radial
tyres of the same type, size (rolling circumfer-
ence) and the same tread pattern.
● New tyres do not give maximum grip and
will not have reached their maximum braking
capacity to start with, and therefore need
running in. To prevent accidents and major
damage, extreme caution should be taken for
the first 600 km. ●
Check tyre pressures regularly and ensure
they are maintained at the pressures indica-
ted. If the tyre pressure is too low, they could
overheat, resulting in tread detachment or
even burst tyres.
● Never drive on damaged (punctured, cut,
cracked or dented) or worn tyres. Driving on
damaged or worn tyres could result in burst
tyres, serious accidents or damage. Worn or
damaged tyres must be replaced immediate-
ly.
● Never exceed the maximum permitted
speed or loads specified for the type of tyre
fitted on your vehicle.
● The effectiveness of driver and brake assist
systems also depends on the grip of the
tyres.
● If you notice unusual vibration or if the ve-
hicle pulls to one side when driving, stop the
car immediately and check the tyres and
wheels for damage.
● To minimise the risk of losing control of the
vehicle or causing a serious accident, never
undo the bolted joints of beadlock wheels.
● Never mount used tyres or wheels if you are
not sure of their previous history. They may
be damaged, although the damage is not im-
mediately visible.
● Old tyres, even if they have never been
used, may lose air or burst unexpectedly
while driving, especially at high speeds, re-
sulting in serious accident and injury. If tyres
are over six years old, they should only be
used in an emergency and with extreme cau-
tion. 158
 1
1 2
2 3
3 4
4 5
5 6
6 7
7 8
8 9
9 10
10 11
11 12
12 13
13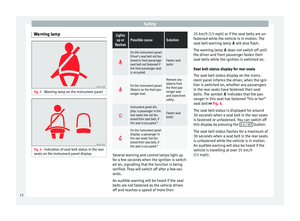 14
14 15
15 16
16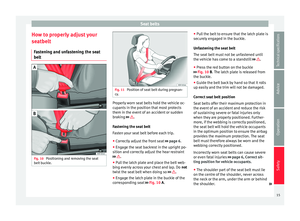 17
17 18
18 19
19 20
20 21
21 22
22 23
23 24
24 25
25 26
26 27
27 28
28 29
29 30
30 31
31 32
32 33
33 34
34 35
35 36
36 37
37 38
38 39
39 40
40 41
41 42
42 43
43 44
44 45
45 46
46 47
47 48
48 49
49 50
50 51
51 52
52 53
53 54
54 55
55 56
56 57
57 58
58 59
59 60
60 61
61 62
62 63
63 64
64 65
65 66
66 67
67 68
68 69
69 70
70 71
71 72
72 73
73 74
74 75
75 76
76 77
77 78
78 79
79 80
80 81
81 82
82 83
83 84
84 85
85 86
86 87
87 88
88 89
89 90
90 91
91 92
92 93
93 94
94 95
95 96
96 97
97 98
98 99
99 100
100 101
101 102
102 103
103 104
104 105
105 106
106 107
107 108
108 109
109 110
110 111
111 112
112 113
113 114
114 115
115 116
116 117
117 118
118 119
119 120
120 121
121 122
122 123
123 124
124 125
125 126
126 127
127 128
128 129
129 130
130 131
131 132
132 133
133 134
134 135
135 136
136 137
137 138
138 139
139 140
140 141
141 142
142 143
143 144
144 145
145 146
146 147
147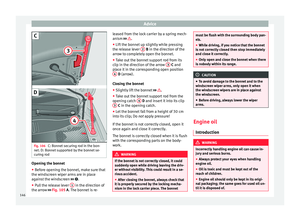 148
148 149
149 150
150 151
151 152
152 153
153 154
154 155
155 156
156 157
157 158
158 159
159 160
160 161
161 162
162 163
163 164
164 165
165 166
166 167
167 168
168 169
169 170
170 171
171 172
172 173
173 174
174 175
175 176
176 177
177 178
178 179
179 180
180 181
181 182
182 183
183 184
184 185
185 186
186 187
187 188
188 189
189 190
190 191
191 192
192 193
193 194
194 195
195 196
196 197
197 198
198 199
199 200
200 201
201 202
202 203
203 204
204 205
205 206
206 207
207 208
208 209
209 210
210 211
211 212
212 213
213 214
214 215
215 216
216 217
217 218
218