Page 169 of 338
167
508RXH_en_Chap06_securite-enfants_ed01-2014
ISOFIX child seats recommended by PeugeOt and approved
for your vehicle
this seat can be used on seats not equipped with ISOFIX mountings.
In this case, it must be attached to the vehicle's seat using the three-point seat belt.
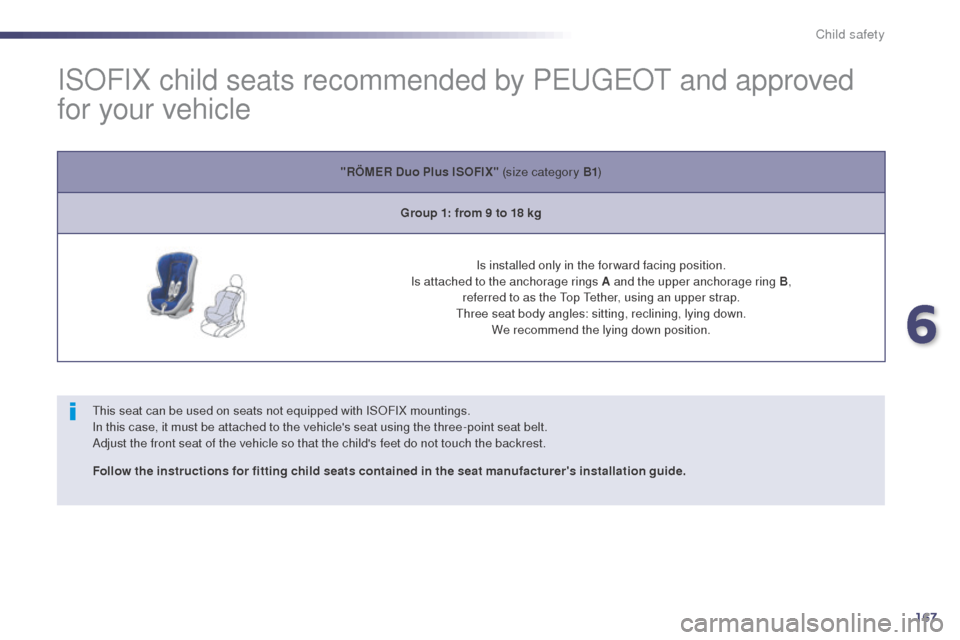
Adjust the front seat of the vehicle so that the child's feet do not touch the backrest. "RÖMER Duo Plus ISOFIX" (size category B1
)
Group 1: from 9 to 18 kg
Is installed only in the forward facing position.
Is attached to the anchorage rings A and the upper anchorage ring B, referred to as the t
o
p t
e
ther, using an upper strap.
th
ree seat body angles: sitting, reclining, lying down.
We recommend the lying down position.
Follow the instructions for fitting child seats contained in the seat manufacturer's installation guide.
6
Child safety
Page 170 of 338

168
508RXH_en_Chap06_securite-enfants_ed01-2014
Baby P2C Mini and its ISOFIX base (size category: E)
Group 0+: from bir th to 13 kg
Installed "rear ward facing" using an ISOFIX base which is attached to the anchorage rings A .
th
e base has a support leg, adjustable for height, which sits on the vehicle's floor.
th
is seat can also be secured with a seat belt. In this case only the seat shell is used.
"Baby P2C Midi" and its ISOFIX base (size categories: D, C, A, B, B1 )
Group 1: from 9 to 18 kg
Installed "rear ward facing" using an ISOFIX base which is attached to the anchorage rings A .
th
e base has a support leg, adjustable for height, which sits on the vehicle's floor.
th
is child seat can also be used "for ward facing".
th
is seat can not be secured with a seat belt.
We recommend that you use the seat in the "rear ward facing" position up to the age of 3 years.
Follow the instructions for fitting child seats contained in the seat manufacturer's installation guide.
th
e ISOFIX BABY P2C base must be installed in a way that the ISOFIX latches 3, 4 and 5 are visible. And the support leg must have 6 holes
visible.
Child safety
Page 171 of 338

169
508RXH_en_Chap06_securite-enfants_ed01-2014
Locations for installing ISOFIX child seats
In accordance with european Regulations, this table indicates the options for installing ISOFIX child seats on seats in the vehicle fitted with ISOFIX
mountings.
In the case of universal and semi-universal ISOFIX child seats, the ISOFIX size category, determined by a letter from A to G , is indicated on the child
seat next to the ISOFIX logo.
Weight of the child / indicative age
Less than 10 kg (group 0)
u
p to approx. 6 months Less than 10 kg
(group 0)
Less than 13 kg (group 0+)
up t
o approx. 1 yearFrom 9 to 18 kg (group 1)
From approx. 1 to 3 years
Type of ISOFIX child seat Shell"rearwards-facing"
"rearwards-facing""forwards-facing"
ISOFIX size categor y F G C D E C D A B B1
Front passenger seat Not Isofix
Outer rear seats XIL- SU IL- SU IUF
IL- SU
Centre rear seat Not Isofix
I UF: seat suitable for the installation of an I sofix Universal seat, " For wards-facing" secured using the top belt.
IL- SU: seat suitable for the installation of an I sofix Semi-Universal seat either:
-
"
rear wards-facing" fitted with a top belt or a stay,
-
"
for wards-facing" fitted with a stay,
-
a s
hell seat fitted with an upper strap or a stay.
For advice on securing of the top belt, refer to the paragraph "Isofix mountings".
X: seat not suitable for the installation of a child seat or shell for the weight group indicated.
6
Child safety
Page 172 of 338

170
508RXH_en_Chap06_securite-enfants_ed01-2014
Child seats
the incorrect installation of a child seat in a
vehicle compromises the child's protection in
the event of an accident.
Check that there is no seat belt or seat belt
buckle under the child seat as this could
destabilise it.
Remember to fasten the seat belts or the
child seat harnesses keeping the slack in
relation to the child's body to a minimum,
even for short journeys.
For the installation of a child seat using a
seat belt, ensure that this is well tensioned
on the child seat and that it is holding the
child seat firmly against the seat of your
vehicle. If your front passenger seat is
adjustable, move it forward if necessary.
At the rear seats, always leave sufficient
space between the front seat and:
-
a r
ear ward facing child seat,
-
t
he feet of a child seated in a for ward
facing child seat.
For this, move the front seat for ward and if
necessary straighten its backrest.
Recommendations
As a safety precaution, do not leave:
- o ne or more children alone and
unsupervised in a vehicle,
-
a c
hild or an animal in a vehicle which
is exposed to the sun, with the windows
closed,
-
t
he keys within reach of children inside
the vehicle.
to p
revent accidental opening of the doors,
use the "Child lock".
ta
ke care not to open the rear windows by
more than one third.
to p
rotect young children from the rays of
the sun, fit side blinds on the rear windows.
th
e chest part of the seat belt must be
positioned on the child's shoulder without
touching the neck.
en
sure that the lap part of the seat belt
passes correctly over the child's thighs.
P
e
uge
Ot
recommends the use of a booster
seat which has a back, fitted with a seat belt
guide at shoulder level.
For optimum installation of the "forward
facing" child seat, ensure that the back of
the child seat is as close as possible to the
backrest of the vehicle's seat, or in contact
if possible
th
e head restraint must be removed before
installing a child seat with a backrest on the
passenger seat.
en
sure that the head restraint is stowed or
attached securely so that it is not thrown
around the vehicle in the event of sharp
braking.
Refit the head restraint as soon as the child
seat is removed.Children at the front
the legislation on carrying a child on the
front passenger seat is specific to each
country. Refer to the legislation in force in
the country in which you are driving.
Deactivate the passenger's front airbag
when a "rear ward facing" child seat is
installed on the front passenger seat.
Otherwise, the child would risk being
seriously injured or killed if the airbag were
deployed.
Installing a booster
cushion
Child safety
Page 173 of 338

171
508RXH_en_Chap06_securite-enfants_ed01-2014
electric child lock
Remote control system to prevent opening of the rear doors using their interior controls and use of the rear electric windows.
Switching on
F With the ignition on, press this button.the indicator lamp in the button comes on,
accompanied by a message to confirm that the
child lock is on.
th
is indicator lamp remains on until the child
lock is switched off.
It is still possible to open the doors from the
outside and operate the rear electric windows
from the driver's control panel.
Switching off
F With the ignition on, press this button again.
th
e indicator lamp in the button goes off,
accompanied by a message to confirm that the
child lock is off.
th
is indicator lamp remains off while the child
lock is switched off. Any other status of the indicator lamp
indicates a fault with the electric child
lock.
Have it checked by a P
e
uge
Ot
dealer
or a qualified workshop.
th
is system is independent and in no
circumstances does it take the place of
the central locking control.
Check the status of the child lock each
time you switch on the ignition.
Always remove the key from the ignition
when leaving the vehicle, even for a
short time.
In the event of a serious impact, the
electric child lock is switched off
automatically to permit the exit of the
rear passengers.
6
Child safety
Page 174 of 338

172
508RXH_en_Chap07_securite_ed01-2014
Direction indicators
F Lower the lighting control stalk fully when moving to the left.
F
R
aise the lighting control stalk fully when
moving to the right.
Three flashes
Move the stalk briefly upwards or downwards,
without going beyond the point of resistance;
the corresponding direction indicators will flash
3 times.
If you forget to cancel the direction
indicators for more than twenty
seconds, the volume of the audible
signal will increase if the speed is above
40 mph (60 km/h).
Hazard warning lamps
Press the button, the direction indicators flash.th ey can operate with the ignition off.
Automatic operation of
hazard warning lamps
When braking in an emergency, depending on
the rate of deceleration, as well as when the
ABS regulation is invoked or in the event of an
impact, the hazard warning lamps come on
automatically.
th
ey switch off automatically the first time you
accelerate.
F
Y
ou can also switch them off by pressing
the button.
th
is function can be used at any speed,
but it is particularly useful for changing
lane on fast roads.
Safety
Page 175 of 338
173
508RXH_en_Chap07_securite_ed01-2014
Horn
F Press the central part of the multifunction steering wheel.
Audible warning system to alert other road
users to an imminent danger.
us
e the horn moderately and only in the
following circumstances:
-
i
mmediate danger,
-
ov
ertaking a cyclist or pedestrian,
-
a
pproaching a location lacking
visibility.
emergency or
assistance call
this system allows you to make an emergency
or assistance call to the emergency services or
to the dedicated P
e
uge
Ot
service.
For more information on the use of this
function, refer to the "Audio equipment
and telematics" section.
7
Safety
Page 176 of 338
174
508RXH_en_Chap07_securite_ed01-2014
Warning triangle
Before leaving your vehicle to set up
and install the triangle, switch on the
hazard warning lamps and put on your
high visibility vest.
th
is safety device should be used in addition to the hazard warning lamps.
Its presence in the vehicle is mandatory.
th
e triangle is available as an
accessory; contact a P
e
uge
Ot
dealer
or a qualified workshop.
F
P
lace the triangle behind the vehicle, as
required by the legislation in force in your
c o unt r y.
Placing the triangle in the
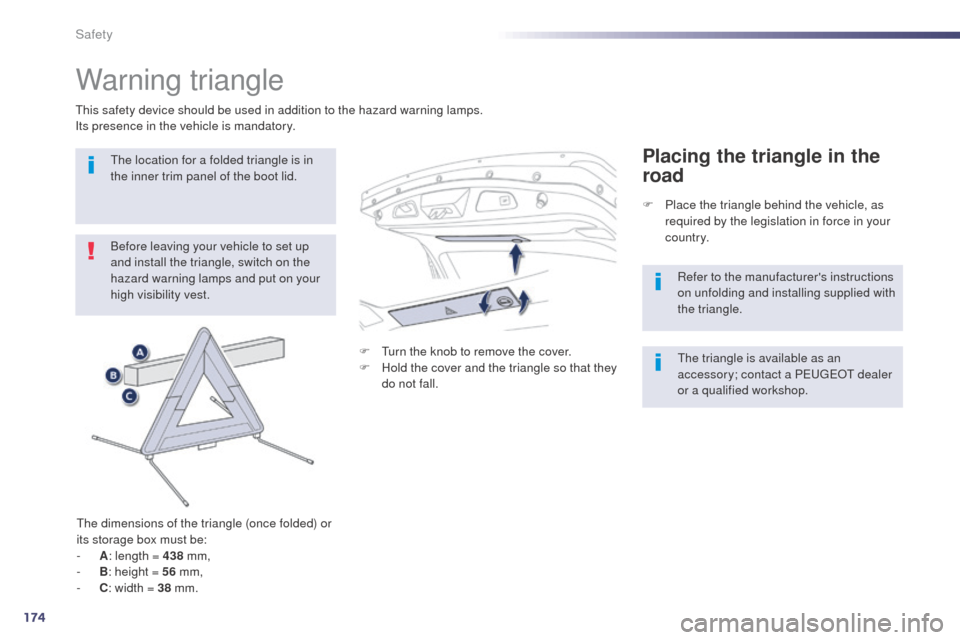
roadthe location for a folded triangle is in
the inner trim panel of the boot lid.
th
e dimensions of the triangle (once folded) or
its storage box must be:
-
A : l
ength = 438 mm,
-
B : h
eight = 56 mm,
-
C : w
idth = 38 mm. F
t
u
rn the knob to remove the cover.
F
H
old the cover and the triangle so that they
do not fall. Refer to the manufacturer's instructions
on unfolding and installing supplied with
the triangle.
Safety