Page 97 of 338

95
508RXH_en_Chap03_confort_ed01-2014
Automatic day/night model
By means of a sensor, which measures the
light from the rear of the vehicle, this system
automatically and progressively changes
between the day and night uses.
Adjustable mirror providing a central rearward
view.
eq
uipped with an anti-dazzle system, which
darkens the mirror glass and reduces the
nuisance to the driver caused by the sun,
headlamps from other vehicles...
Rear view mirror
Manual day/night model
Adjustment
F Adjust the mirror so that the glass is directed correctly in the "day" position.
Day / night position
F Pull the lever to change to the "night" anti-dazzle position.
F
P
ush the lever to change to the normal
"day" position. In order to ensure optimum visibility
during your manoeuvres, the mirror
lightens automatically when reverse
gear is engaged.
Steering wheel adjustment
F When stationary
, lower the control lever
to release the steering wheel adjustment
mechanism.
F
A
djust the height and reach to suit your
driving position.
F
P
ull the control lever to lock the steering
wheel adjustment mechanism.
As a safety precaution, these
operations should only be carried out
while the vehicle is stationary.
3
Comfort
Page 98 of 338
96
508RXH_en_Chap03_confort_ed01-2014
Interior fittings
1. Cooled glove box I
t has a ventilation nozzle* (delivering
cooled air) which can be closed using a
thumb wheel as well as a
u
S
B port* for the
3
g k
ey.
2.
R
etractable cup holder
P
ress the cover to open the cup holder
3.
Re
movable ashtray
P
ress the lid to open the ashtray.
t
o e
mpty it, pull it out by pulling it upwards.
4.
C
ontrols *
M
assage, Adaptive lighting, Blind spot
monitoring.
5.
C
ontrols *
Alarm, Peuge
O
t Connect Assistance,
Peuge
O
t Connect SOS
6.
F
ront armrest
7.
1
2 V accessor y socket (120 W) *
O
bserve the maximum power rating to
avoid damaging your accessory
8.
U
SB Player - Plug
* Depending on version.
Comfort
Page 99 of 338

97
508RXH_en_Chap03_confort_ed01-2014
MatsRemovable carpet protection.
When fitting the mat for the first time, on the
driver's side use only the fixings provided in the
wallet attached.
th
e other mats are simply placed on the
carpet.
Fitting
Removal
to remove the mat on the driver's side:
F m ove the seat as far back as possible,
F
un
clip the fixings,
F
r
emove the mat.
Refitting
to refit the mat on the driver's side:
F p osition the mat correctly,
F
r
efit the fixings by pressing,
F
c
heck that the mat is secured correctly.
to a
void any risk of jamming of the
pedals:
-
o
nly use mats which are suited to
the fixings already present in the
vehicle; these fixings must be used,
-
n
ever fit one mat on top of another.
th
e use of mats not approved by
P
e
uge
Ot
may inter fere with access to
the pedals and hinder the operation of
the cruise control
/ speed limiter.
th
e mats approved by P
e
uge
Ot
have
two fixings located below the seat. F
L
ower the rear armrest for a more
comfortable position.
It may be fitted with cup holders and also gives
access to the ski flap.
Rear armrest
3
Comfort
Page 100 of 338

98
508RXH_en_Chap03_confort_ed01-2014
PeugeOt Connect uS B
this connection box comprises a JACK
auxiliary socket and a
uS B port.
It permits the connection of portable device,
such as a digital audio player of the iPod
® type
or a
uS
B memory stick.
It reads the audio file formats (MP3, O
g
g
,
W
MA, WAV, ...) which are transmitted to your
audio equipment and played via the vehicle's
speakers.
You can manage these files using the steering
mounted controls or the audio system control
panel and display them in the instrument panel
screen. When the
u
S
B port is used, the portable device
charges automatically.
While charging, a message is displayed if the
current consumption of the portable device
exceeds the current delivered by the vehicle.
For more information on the use of this
system, refer to the "Audio equipment
and telematics" section.
Ski flap
Facility for storing and transporting long
objects.
Opening
F Lower the armrest.
F P ress the flap opening control.
F
L
ower the flap.
F
L
oad the objects from inside the boot.
Do not leave the flap open when not
transporting long objects.
Comfort
Page 101 of 338
99
508RXH_en_Chap03_confort_ed01-2014
Boot fittings
1. Boot lamps
2. Rear seats folding controls
3.
R
etractable hooks
4.
1
2 V accessor y socket (120 W max)
5.
Sto
rage wells
W
ith towing eye, a wheel chock
and a temporary puncture repair kit
(according to destination country and
equipment).
6.
L
oad space cover
(
see following page)
7.
T
r a c k s for stowing rings
8.
S
towing rings
t
a
ke each ring in turn and then slide them
into the oblong location in the track.
P
ressing the button, move the ring to the
desired position.
Observe the direction of fitment: the
ring should be towards the outside of
the vehicle.
3
Comfort
Page 102 of 338
100
508RXH_en_Chap03_confort_ed01-2014
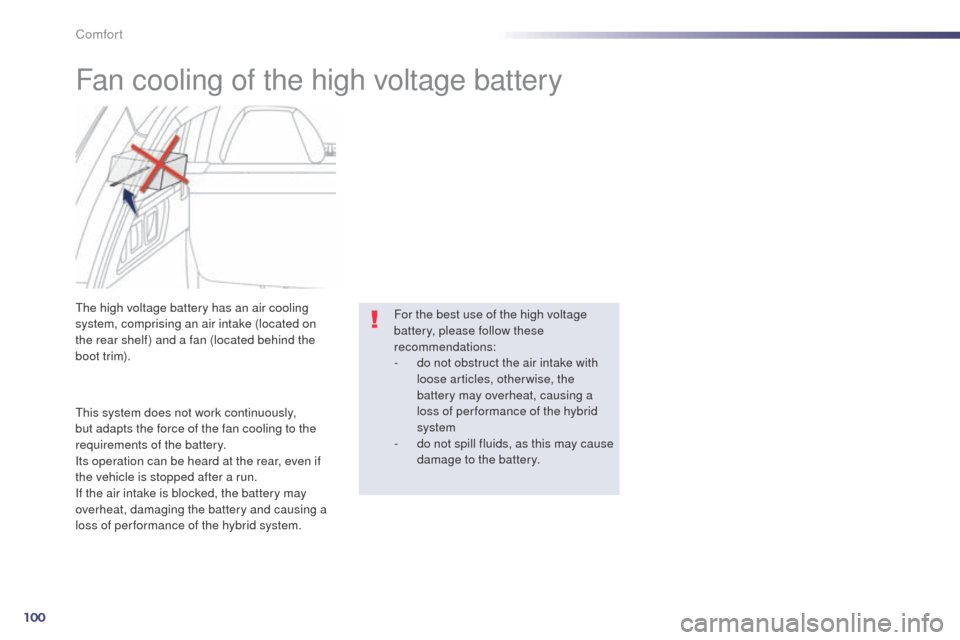
Fan cooling of the high voltage battery
this system does not work continuously,
but adapts the force of the fan cooling to the
requirements of the battery.
Its operation can be heard at the rear, even if
the vehicle is stopped after a run.
If the air intake is blocked, the battery may
overheat, damaging the battery and causing a
loss of per formance of the hybrid system.
th
e high voltage battery has an air cooling
system, comprising an air intake (located on
the rear shelf) and a fan (located behind the
b o ot t r im). For the best use of the high voltage
battery, please follow these
recommendations:
-
d
o not obstruct the air intake with
loose articles, otherwise, the
battery may overheat, causing a
loss of per formance of the hybrid
system
-
d
o not spill fluids, as this may cause
damage to the battery.
Comfort
Page 103 of 338
101
508RXH_en_Chap03_confort_ed01-2014
Luggage cover
To reel inTo removeTo install
F gently push on the (PReSS) handle, the
luggage cover reels in automatically.
th
e moving part A can be folded against the
rear bench seat backrest. F
C ompress the control 1 and lift the luggage
cover on the right then on the left to
remove
it.F
P osition the left-hand end of the luggage
cover roller in its location B behind the rear
bench seat.
F
C
ompress the roller control 1 and put the
roller in place in its location C on the right.
F
R
elease the control to secure the luggage
c ove r.
F
u
n
reel it to its fastening on the rear pillar.
3
Comfort
Page 104 of 338
102
508RXH_en_Chap03_confort_ed01-2014
High load retaining net
Hooked onto the special upper and lower
fixings, this allows the use of the entire loading
volume up to the roof:
-
b
ehind the front seats (row 1) when the rear
seats are folded.
-
b
ehind the rear seats (row 2).
Never reposition the rear seats if the
net's roller is attached to the backs of
the folded seats. F
p
osition the net's roller above the two rails
(located on the back of the folded rear
seats),
F
t
he two grooves A must be placed above
the two rails B . Slide the two rails B in the
grooves A and push the roller (lengthwise)
from right to left to secure it,
F
c
heck that the net is hooked and tightened
c o r r e c t l y, F
f
old the rear seats,
F
u
nroll the high load retaining net without
stretching it,
F
p
osition one of the ends of the net's metal
bar in the corresponding upper fixing 1 ,
F
p
ull the net's metal bar to position the other
end in the other upper fixing 1 .
Row 1
Comfort