Page 177 of 241

88A-41
WIRING HARNESS
Engine wiring: Removal - Refitting
EQ UIPMENT LEVEL SPORT
88A
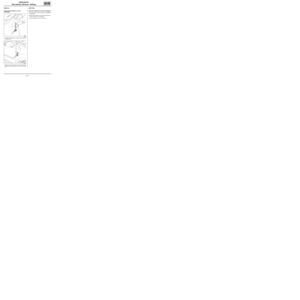
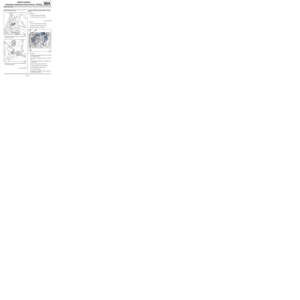
aIndex the engine wiring retaining bracket in the hole
(39) of the battery tray mounting.
aRefit the engine wiring clamp on the bracket (40) .
aConnect the reverse gear switch connector.
aClip the bypass of the positive cable and earth cable
onto the mounting bracket (41) of the air filter tie rod.
aRefit:
-the engine compartment connection unit,
-the supply terminal of the engine compartment
connection unit.-the fuse holders on the engine compartment con-
nection unit,
aConnect the engine wiring/front of engine wiring
connector (R67).
aLock the engine wiring/front of engine wiring con-
nector (R67).
aTorque tighten the engine compartment connec-
tion unit supply terminal nut (12 N.m).
aRefit the cover of the engine compartment connec-
tion unit and check that the cover is definitely in con-
tact with the unit casing.
aConnect the injection computer connectors.
aRefit the injection computer tamperproof panel on
the injection computer mounting.
III - FINAL OPERATION
aRefit:
-the air pipe at the air filter unit inlet,
-the air filter unit (see Air filter unit: Removal - Re-
fitting) (12A, Fuel mixture),
-the battery tray (see 80A, Battery, Battery tray:
Removal - Refitting, page 80A-6) ,
-the battery (see 80A, Battery, Battery: Removal -
Refitting, page 80A-2) ,
-the cover from the engine compartment connection
unit,
-the scoop under the scuttle panel grille (see Scoop
under the scuttle panel grille: Removal - Refit-
ting) (56A, Exterior equipment),
-the scuttle panel grille (see Scuttle panel grille:
Removal - Refitting) (56A, Exterior equipment),
-the windscreen wiper arms (see 85A, Wiping -
Washing, Windscreen wiper arm: Removal - Re-
fitting, page 85A-6) ,
-the left-hand headlight (see 80B, Headlights,
Halogen headlight: Removal - Refitting, page
80B-7) ,
-the front bumper (see Front bumper: Removal -
Refitting) (55A, Exterior protection),
-the front wheel arch liners (see Front wheel arch
liner: Removal - Refitting) (55A, Exterior protec-
tion),
141123
141124
RIGHT-HAND DRIVE
Page 178 of 241
88A-42
WIRING HARNESS
Engine wiring: Removal - Refitting
EQ UIPMENT LEVEL SPORT
88A
-the front wheels (see Wheel: Removal - Refitting)
(35A, Wheels and tyres),
-the engine undertray.
IV - CHECKING AFTER REPAIR
aSwitch on the ignition.
aConnect the Diagnostic tool
aCheck that there are no faults.
Page 179 of 241
88A-43
WIRING HARNESS
Passenger compartment wiring: Connector access
LEFT-HAND DRIVE
88A
I - LOCATION OF CONNECTORS
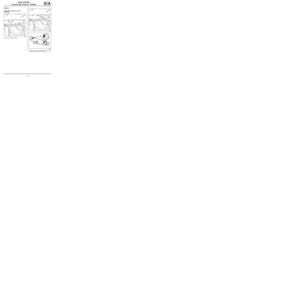
1 - R 107
aR 107 connectors (Dashboard / front of engine con-
nection).
2 - R 99
aR 99 connector (Dashboard / heating system con-
nection).3 - R 301
aR 301 connectors (Dashboard / interior lights con-
nection).
4 - R 3
aR 3 connector (Dashboard / driver's door connec-
tion).
122341
122341
122345
122345
Page 180 of 241
88A-44
WIRING HARNESS
Passenger compartment wiring: Connector access
LEFT-HAND DRIVE
88A
5 - R 4
aR 4 connector (Dashboard / passenger's door con-
nection).
6 - R 334
aR 334 connector (Passenger compartment / passen-
ger's front seat connection).7 - R 335
aR 335 connector (Passenger compartment / driver's
front seat connection).
8 - R 15
aR 15 connectors (Rear left-hand / tailgate connec-
tion).
122346
Note:
Connectors R 3 and R 4 are identical.
122349
122349
Note:
Connectors R 334 and R 335 are identical.
122356
Page 181 of 241
88A-45
WIRING HARNESS
Passenger compartment wiring: Connector access
LEFT-HAND DRIVE
88A
9 - R 259
aR 259 connectors (Passenger compartment / rear
bumper connection).
II - CONNECTOR OPENING
a
aSwitch off the ignition.
aDisconnect the battery (see 80A, Battery, Battery:
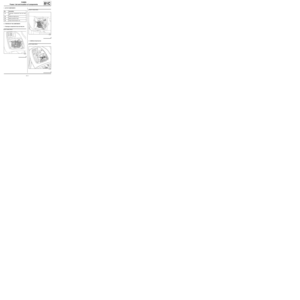
Removal - Refitting, page 80A-2) .1 - Accessing R 107 connectors
aUnclip the dashboard lower trim (1) .
aDisconnect the connectors.
122354
IMPORTANT
Consult the safety and cleanliness advice and
operation recommendations before carrying out
any repair (see 88A, Wiring harness, Wiring:
Precautions for the repair, page 88A-2) .
WARNING
To prevent damaging the connectors, consult the
disconnection procedures (see Connector: Dis-
connection and reconnection) (Technical Note
6015A, 88A, Wiring).
120278
Page 182 of 241
88A-46
WIRING HARNESS
Passenger compartment wiring: Connector access
LEFT-HAND DRIVE
88A
aDisconnect the R 107 connectors.
2 - Accessing the R 99 connector
aRemove the dashboard (see Dashboard: Removal
- Refitting) (MR 412, 57A, Interior equipment).aDisconnect the R 99 connector.
3 - Accessing R 301 connectors
aRemove the left-hand windscreen pillar trim (see
Windscreen pillar trim: Removal - Refitting) (MR
412, 71A, Body internal trim).
aDisconnect the R 301 connectors.
119504
122242119704
112590
Page 183 of 241
88A-47
WIRING HARNESS
Passenger compartment wiring: Connector access
LEFT-HAND DRIVE
88A
4 - Accessing the R 3 connector
aRemove:
-the front left-hand door sill lining (see Front door
sill lining: Removal - Refitting) (MR 412, 71A,
Body internal trim),
-the front left-hand door (see Front side door: Re-
moval - Refitting) (MR 412, 47A, Side doors).
aRemove the bolts (2) .
aUnclip the R 3 connector.
5 - Accessing the R 4 connector
aRemove:
-the front right-hand door sill lining (see Front door
sill lining: Removal - Refitting) (MR 412, 71A,
Body internal trim),
-the front right-hand door (see Front side door: Re-
moval - Refitting) (MR 412, 47A, Side doors).aRemove the bolts (3) .
aUnclip the R 4 connector.
6 - Accessing the R 334 connector
aUnclip the cover (4) under the front passenger seat
base.
aDisconnect the R 334 connector.
122249
122249
120814
Page 184 of 241
88A-48
WIRING HARNESS
Passenger compartment wiring: Connector access
LEFT-HAND DRIVE
88A
7 - Accessing the R 335 connector
aUnclip the cover (5) under the driver's seat base.
aDisconnect the R 335 connector.
8 - Accessing the R 15 connectors
aRemove the rear left-hand wheel arch liner (see
Rear wheel arch trim: Removal - Refitting) (MR
412, 71A, Body internal trim).
aDisconnect the R 15 connectors.9 - Accessing the R 259 connector
aRemove:
-the rear lights on the wing (see 81A, Rear lighting,
Rear wing light: Removal - Refitting, page 81A-
3) ,
-the rear bumper (see Rear bumper: Removal -
Refitting) (MR 412, 55A, Exterior protection).
aDisconnect the R 259 connector.
120814
122338