Page 105 of 241
86A-8
RADIO
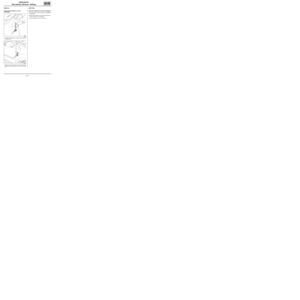
Front speakers: Removal - Refitting
WITH 2 SPEAKERS, WITHOUT RADIO or WITH 4 SPEAKERS, WITHOUT RADIO or RADIO NO. 01 or RADIO
NO. 03
86A
REMOVAL
I - REMOVAL PREPARATION OPERATION
aRemove the front side door trim (see Front side
door trim: Removal - Refitting) (MR 412, 72A,
Side opening element trim).
II - OPERATION FOR REMOVAL OF PART
CONCERNED
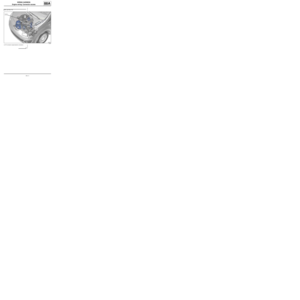
aRemove the front speaker bolts.
aExtract the front speaker.
aDisconnect the front speaker connector.
REFITTING
I - REFITTING OPERATION FOR PART
CONCERNED
aConnect the front speaker connector.
arefit:
-the front speaker,
-the front speaker bolts.
II - FINAL OPERATION.
aRefit the front side door trim (see Front side door
trim: Removal - Refitting) (MR 412, 72A, Side ope-
ning element trim).
120280
Page 106 of 241
86A-9
RADIO
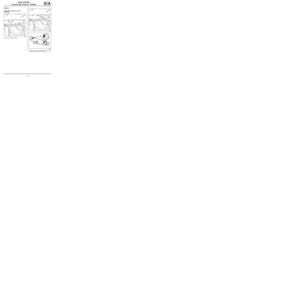
Rear speakers: Removal - Refitting
WITH 4 SPEAKERS, WITHOUT RADIO or RADIO NO. 03
86A
REMOVAL
I - REMOVAL PREPARATION OPERATION
aRemove:
-the rear parcel shelf side trim (see Rear parcel
shelf side trim: Removal - Refitting) (MR 412,
71A, Body internal trim),
-the rear panel trim (see Rear panel lining: Remo-
val - Refitting) (MR 412, 71A, Body internal trim).
II - OPERATION FOR REMOVAL OF PART
CONCERNED
aRemove:
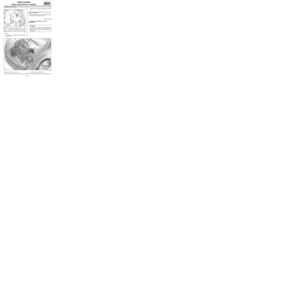
-the rear speaker bolts (1) ,
-the rear speaker (2) .
aDisconnect the rear speaker connector.
REFITTING
I - REFITTING OPERATION FOR PART
CONCERNED
aConnect the rear speaker connector.
aRefit:
-the rear speaker,
-the rear speaker bolts.II - FINAL OPERATION.
aRefit:
-the rear panel trim (see Rear panel lining: Remo-
val - Refitting) (MR 412, 71A, Body internal trim),
-the rear parcel shelf side trim (see Rear parcel
shelf side trim: Removal - Refitting) (MR 412,
71A, Body internal trim).
121064
Page 107 of 241
86A-10
RADIO
Display: Removal - Refitting
RADIO NO. 03
86A
REMOVAL
I - REMOVAL PREPARATION OPERATION
a
aIn the event of a replacement operation, carry out
the necessary operations (see Fault finding - Re-
placement of components) (MR 413, 83A, Instru-
ment panel).
II - OPERATION FOR REMOVAL OF PART
CONCERNED
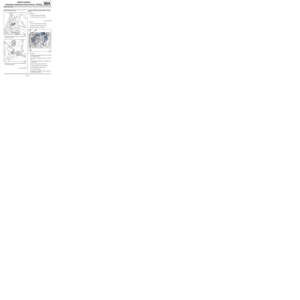
aRemove the instrument panel (1) (see 83A, Instru-
ment panel, Instrument panel: Removal - Refit-
ting, page 83A-1) .
REFITTING
I - REFITTING OPERATION FOR PART
CONCERNED
aRefit the instrument panel (see 83A, Instrument pa-
nel, Instrument panel: Removal - Refitting, page
83A-1) .II - FINAL OPERATION.
aIn the event of a replacement operation, carry out
the necessary operations (see Fault finding - Re-
placement of components) (MR 413, 83A, Instru-
ment panel).
Note:
The radio display is built into the instrument
panel and cannot be separated.
121084
Page 108 of 241
86A-11
RADIO
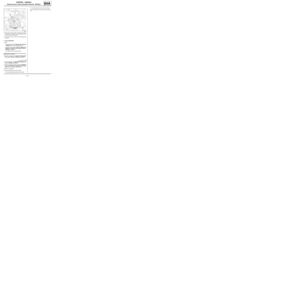
Radio control satellite: Removal - Refitting
WITH 4 SPEAKERS, WITHOUT RADIO or RADIO NO. 01 or RADIO NO. 03
86A
REMOVAL
I - REMOVAL PREPARATION OPERATION
aRemove the rev counter (see 83A, Instrument pa-
nel, Rev counter: Removal - Refitting, page 83A-
3) .
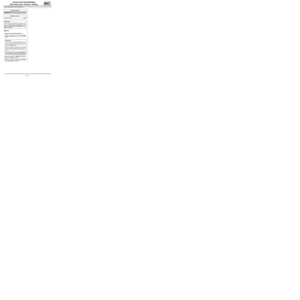
aRemove the lower cover bolts (1) .aUnclip the upper cover at (2) .
aRemove the upper cover (3) .
aRemove the lower cover (4) . ENGINE REV COUNTER
127437
127438
127439
Page 109 of 241
86A-12
RADIO
Radio control satellite: Removal - Refitting
WITH 4 SPEAKERS, WITHOUT RADIO or RADIO NO. 01 or RADIO NO. 03
86A
II - OPERATION FOR REMOVAL OF PART
CONCERNED
aDisconnect the connector (5) from the radio control
satellite.
aRemove:
-the bolt (6) from the radio control satellite,
-the radio control satellite (7) .
REFITTING
I - REFITTING OPERATION FOR PART
CONCERNED
aRefit the radio control satellite on the steering colu-
mn switches.
aConnect the radio control satellite connector.
II - FINAL OPERATION.
aRefit:
-the lower cover,
-the upper cover.
aRefit the rev counter (see 83A, Instrument panel,
Rev counter: Removal - Refitting, page 83A-3) .
121134
ENGINE REV COUNTER
Page 110 of 241

86A-13
RADIO
Offset multimedia socket: Removal - Refitting
RADIO NO. 03
86A
REMOVAL
I - REMOVAL PREPARATION OPERATION
aRemove:
-the radio (see 86A, Radio, Radio: Removal - Re-
fitting, page 86A-4) ,
-the centre console (see Centre console: Removal
- Refitting) (MR 412, 57A, Interior equipment),
-the centre front panel (see Centre front panel: Re-
moval - Refitting) (MR 412, 57A, Interior equip-
ment).
II - OPERATION FOR REMOVAL OF PART
CONCERNED
aMark the routing of the offset audio socket wiring (1)
behind the radio.
aRemove:
-the bolts (2) ,
-the offset audio connection.
REFITTING
I - REFITTING OPERATION FOR PART
CONCERNED
aRefit:
-the offset audio connection,
-the offset audio socket bolts.
aFit the wiring of the offset audio socket in the posi-
tion marked during the removal operation.II - FINAL OPERATION.
aRefit:
-the centre front panel (see Centre front panel: Re-
moval - Refitting) (MR 412, 57A, Interior equip-
ment),
-the centre console (see Centre console: Removal
- Refitting) (MR 412, 57A, Interior equipment),
-the radio (see 86A, Radio, Radio: Removal - Re-
fitting, page 86A-4) .
121381
Page 111 of 241
86B-1
CAR PHONE
Car phone: List and location of components
HANDS-FREE TELEPHONE KIT
86B
I - LIST OF COMPONENTS
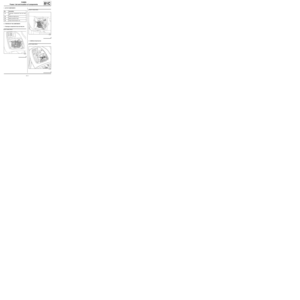
The « car phone » consists of:
-a telephone aerial
-a computer
-a "hands-free" microphone
-a telephone control on the steering wheel
II - LOCATION OF COMPONENTS
Telephone aerial
To remove the telephone aerial (see 86A, Radio, Ra-
dio aerial: Removal - Refitting, page 86A-5) .
Computer
The computer is secured under the glovebox by a self-
fastening strip."Hands-free" microphone
Telephone control on the steering wheel
To remove the car phone control on the steering wheel
(see 86A, Radio, Radio control satellite: Removal -
Refitting, page 86A-11) .
121087
132408
132406
109918
Page 112 of 241
86B-2
CAR PHONE
"Hands-free" microphone: Removal - Refitting
HANDS-FREE TELEPHONE KIT
86B
REMOVAL
I - REMOVAL PREPARATION OPERATION
aDisconnect the battery (see 80A, Battery, Battery:
Removal - Refitting, page 80A-2) .
aRemove the computer (see 86B, Car phone, Com-
puter: Removal - Refitting, page 86B-4) .
aUnclip the dashboard side panel (1) on the passen-
ger side.
aRemove the A-pillar trim on the passenger side (see
Windscreen pillar trim: Removal - Refitting) (71A,
Body internal trim).II - OPERATION FOR REMOVAL OF PART
CONCERNED
aRemove the “hands-free” microphone wire from the
A-pillar clips (2) .
aRemove the “hands-free” microphone wire from the
dashboard side panel.
121136
132407
132405