2006 LAND ROVER FRELANDER 2 oil pressure
[x] Cancel search: oil pressurePage 2848 of 3229

Driving hints
128
L
Driving hintsGENERAL DRIVING POINTS
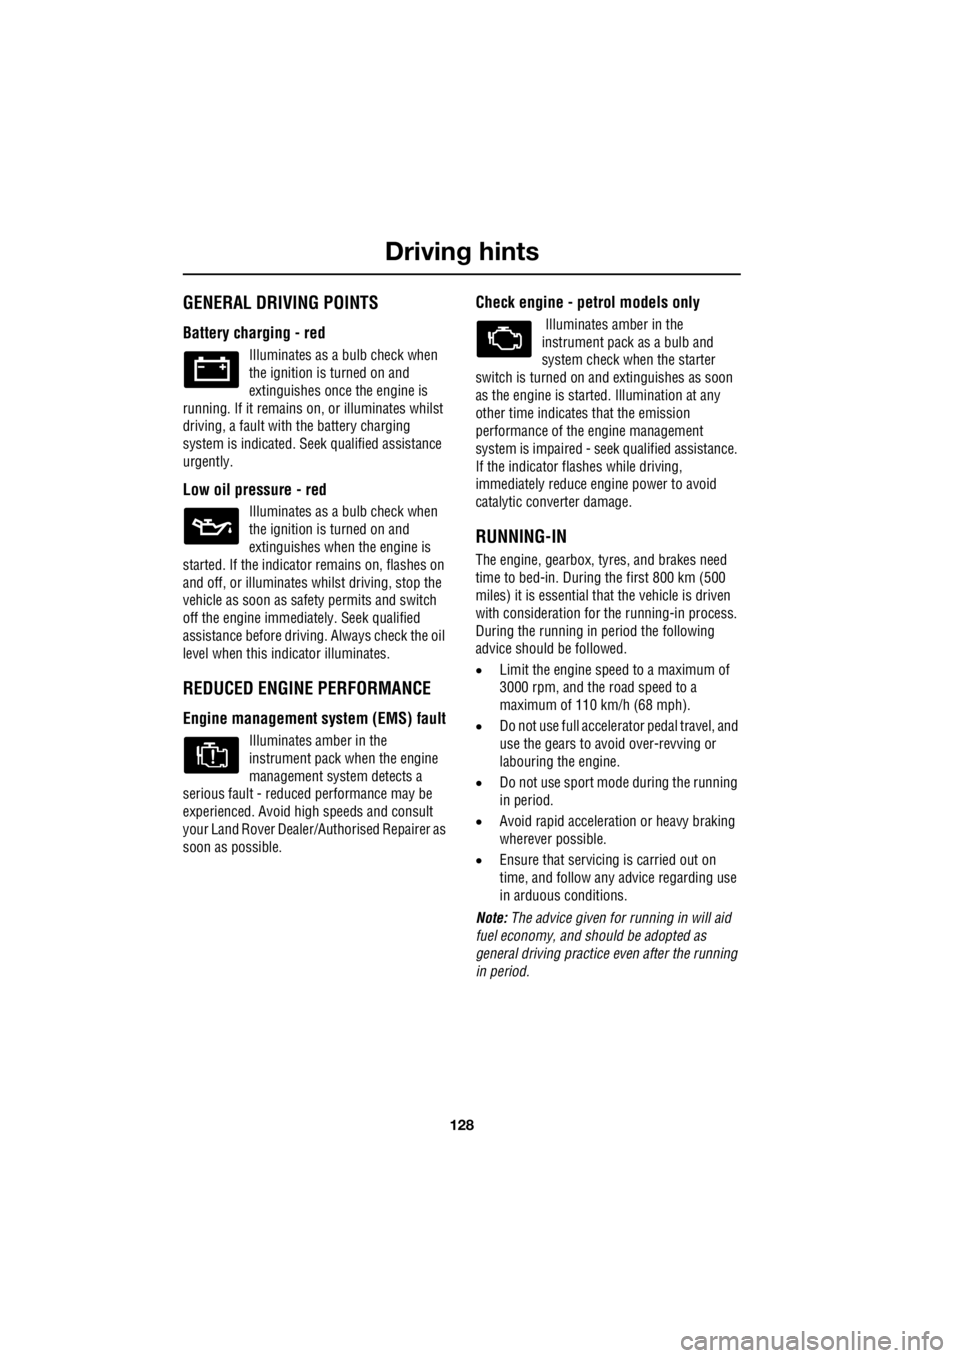
Battery charging - red
Illuminates as a bulb check when
the ignition is turned on and
extinguishes once the engine is
running. If it remains on, or illuminates whilst
driving, a fault with the battery charging
system is indicated. Seek qualified assistance
urgently.
Low oil pressure - red
Illuminates as a bulb check when
the ignition is turned on and
extinguishes when the engine is
started. If the indicator remains on, flashes on
and off, or illuminates whilst driving, stop the
vehicle as soon as safety permits and switch
off the engine immediat ely. Seek qualified
assistance before driving. Always check the oil
level when this indicator illuminates.
REDUCED ENGINE PERFORMANCE
Engine management syst em (EMS) fault
Illuminates amber in the
instrument pack when the engine
management system detects a
serious fault - reduce d performance may be
experienced. Avoid high speeds and consult
your Land Rover Dealer/A uthorised Repairer as
soon as possible.
Check engine - petrol models only
Illuminates amber in the
instrument pack as a bulb and
system check when the starter
switch is turned on and extinguishes as soon
as the engine is starte d. Illumination at any
other time indicates that the emission
performance of the engine management
system is impaired - seek qualified assistance.
If the indicator flashes while driving,
immediately reduce e ngine power to avoid
catalytic converter damage.
RUNNING-IN
The engine, gearbox, tyre s, and brakes need
time to bed-in. During the first 800 km (500
miles) it is essential th at the vehicle is driven
with consideration for the running-in process.
During the running in period the following
advice should be followed.
• Limit the engine speed to a maximum of
3000 rpm, and the road speed to a
maximum of 110 km/h (68 mph).
• Do not use full accelerator pedal travel, and
use the gears to avoid over-revving or
labouring the engine.
• Do not use sport mode during the running
in period.
• Avoid rapid accelerati on or heavy braking
wherever possible.
• Ensure that servicing is carried out on
time, and follow any advice regarding use
in arduous conditions.
Note: The advice given for running in will aid
fuel economy, and s hould be adopted as
general driving practice even after the running
in period.
Page 2849 of 3229

129
Driving hints
R
ECONOMICAL DRIVING
There are two main factors which influence fuel
economy, the way the vehicle is driven, and
maintenance.
Driving tips for economy
• Avoid unnecessary jour neys, especially
short stop-start trips.
• Accelerate smoothly and gently from a
stand still.
• Use the gears to avoid labouring, or
over-revving the engine.
• Allow time to brake gently and smoothly.
• Be aware of traffic and road conditions
ahead, and take action in time to avoid
hard braking or acceleration.
• When stationary apply the park brake, and
select neutral.
• Turn off the air conditioning when not
needed.
Maintenance and fuel economy
Regular servicing by a Land Rover
Dealer/Approved repairer, along with regular
checks by the driver are essential for vehicle
longevity and fuel economy.
The condition of the engine (oils, filters, spark
plugs, settings etc) tyre pressures, and wheel
alignment, will all have a bearing on fuel
economy. For this reason it is essential that the
vehicle is checked regularly by the driver, and
serviced by an approved Land Rover
Dealer/Authorised Repairer at the correct
intervals.
Note: If you are in any doubt about the
maintenance requirement s, intervals, or
checks required, contact your Land Rover
Dealer/Authorised repairer for advice.
Page 2874 of 3229

Vehicle care
154
L
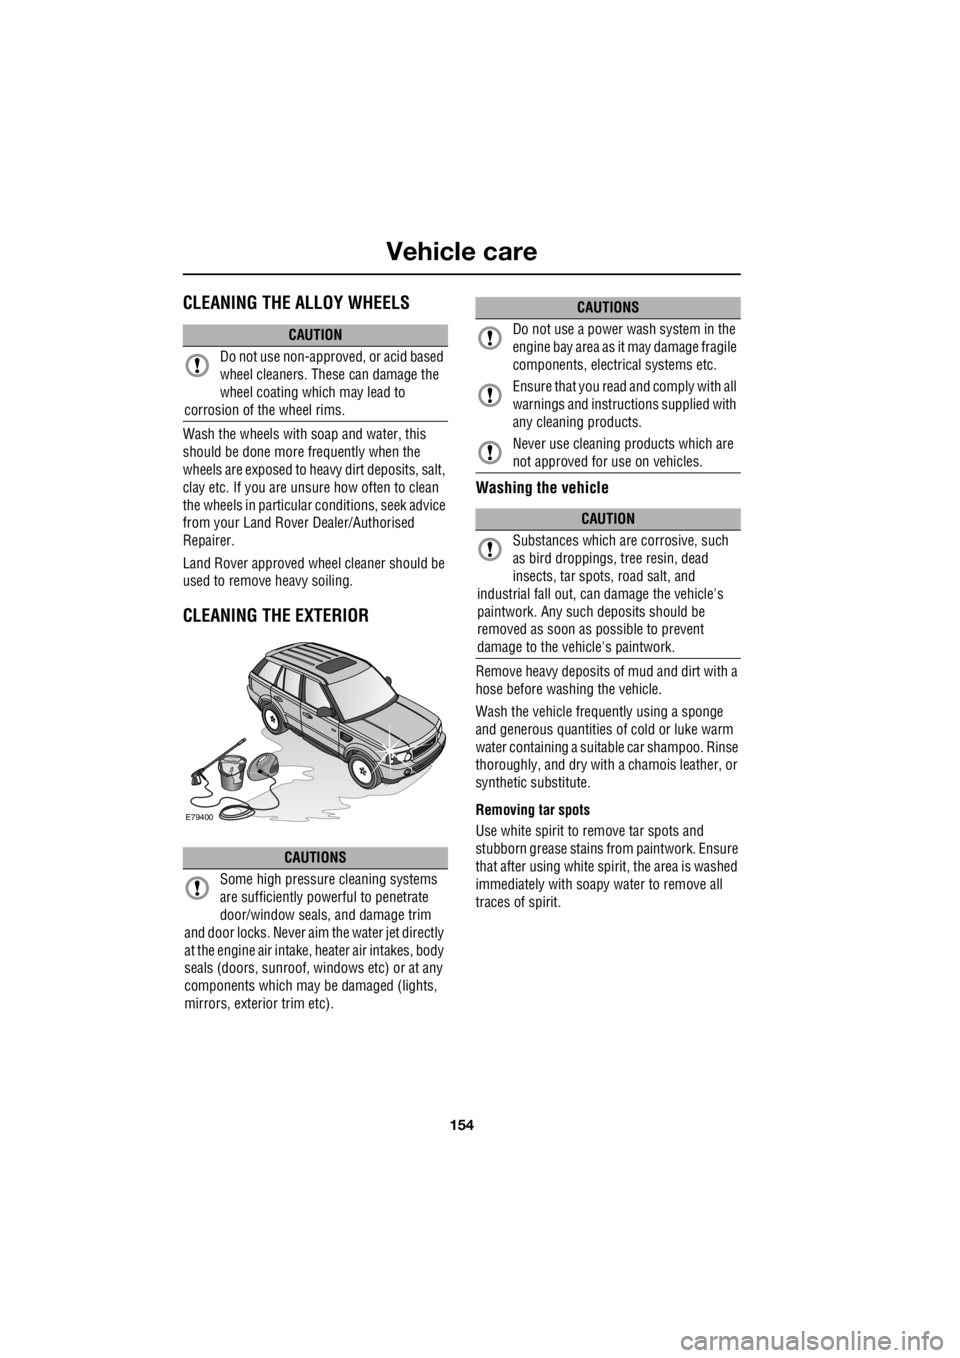
Vehicle careCLEANING THE ALLOY WHEELS
Wash the wheels with soap and water, this
should be done more frequently when the
wheels are exposed to he avy dirt deposits, salt,
clay etc. If you are unsure how often to clean
the wheels in particular conditions, seek advice
from your Land Rover Dealer/Authorised
Repairer.
Land Rover approved wheel cleaner should be
used to remove heavy soiling.
CLEANING THE EXTERIOR
Washing the vehicle
Remove heavy deposits of mud and dirt with a
hose before washing the vehicle.
Wash the vehicle frequently using a sponge
and generous quantities of cold or luke warm
water containing a suit able car shampoo. Rinse
thoroughly, and dry with a chamois leather, or
synthetic substitute.
Removing tar spots
Use white spirit to remove tar spots and
stubborn grease stains from paintwork. Ensure
that after using white spirit, the area is washed
immediately with soapy water to remove all
traces of spirit.
CAUTION
Do not use non-approved, or acid based
wheel cleaners. These can damage the
wheel coating which may lead to
corrosion of the wheel rims.
CAUTIONS
Some high pressure cleaning systems
are sufficiently pow erful to penetrate
door/window seals, and damage trim
and door locks. Never aim the water jet directly
at the engine air intake, heater air intakes, body
seals (doors, sunroof, windows etc) or at any
components which may be damaged (lights,
mirrors, exterior trim etc).
E79400
Do not use a power wash system in the
engine bay area as it may damage fragile
components, electrical systems etc.
Ensure that you read and comply with all
warnings and instruct ions supplied with
any cleaning products.
Never use cleaning products which are
not approved for use on vehicles.
CAUTION
Substances which are corrosive, such
as bird droppings, tr ee resin, dead
insects, tar spots, road salt, and
industrial fall out, can damage the vehicle's
paintwork. Any such deposits should be
removed as soon as possible to prevent
damage to the vehicle's paintwork.
CAUTIONS
Page 2878 of 3229

Maintenance
158
L
One or both types of serv ice interval (distance
and time) may be displayed. For example, if an
engine oil service is du e based on mileage, and
a brake fluid change is due based on time, both
distance and time c ountdowns will display.
Service Portfolio
The Service Portfolio book includes a Service
Record section, which enables a record to be
kept of all the servicing and inspections that are
carried out on the vehicle. This section of the
book also has an area for brake fluid changes
to be recorded.
Ensure your service provider signs and stamps
the book after each se rvice and inspection.
Owner Maintenance
In addition to the routine maintenance, a
number of simple checks must be carried out
more frequently. Advice is given on the pages
that follow.
Daily checks
• Operation of lamps, horn, direction
indicators, wipers, washers and warning
indicators.
• Operation of seat belts and brakes.
• Look for fluid deposits underneath the
vehicle that might indicate a leak.
Weekly checks
• Engine oil level. See ENGINE OIL CHECK
(page 162).
• Engine coolant check. See ENGINE
COOLANT CHECK (page 163).
• Brake/clutch fluid level. See BRAKE AND
CLUTCH FLUID CHECK (page 165). •
Power steering fluid level. See POWER
STEERING FLUID CHECK (page 166).
• Screen washer fluid level. See WASHER
FLUID CHECK (page 167).
• Tyre pressure s and condition.
• Operate air conditioning.
Note: The engine oil leve l should be checked
more frequently if the vehicle is driven for
prolonged periods at high speeds.
Driving in arduous conditions
When a vehicle is operated in extremely
arduous conditions, more frequent attention
must be paid to servicing requirements.
For example, if your vehicle experiences deep
wading conditions, even daily servicing could
be necessary to ensure the continued safe and
reliable operation of the vehicle.
Arduous driving conditions include:
• Driving in dusty and/or sandy conditions.
• Driving on rough and/or muddy roads
and/or wading.
• Driving in extremely hot conditions.
• Towing a trailer or driving in mountainous
conditions.
Contact a Land Rover Dealer/Authorised
Repairer for advice.
Emission control
Your vehicle is fitted with various items of
emission and evaporative control equipment,
designed to meet sp ecific territorial
requirements. You should be aware that
unauthorised replacemen t, modification or
tampering with this equipment by an owner or
repair shop, may be unlawful and subject to
legal penalties.
CAUTION
Any significant or sudden drop in fluid
levels, or uneven tyre wear, should be
reported to a qualified technician without
delay.
Page 2910 of 3229

Wheels and tyres
190
L
Using the Land Rover tyre repair kit
Note: All vehicle drivers and occupants should
be made aware that a temporary repair has
been made to a tyre fitted to the vehicle. They
should also be made aware of the special
driving conditions im posed when using a
repaired tyre. Repair procedure
1. Open the tyre repair kit and peel off the
maximum speed label. Attach the label to
the facia in the driver's field of view. Take
care not to obstruct any of the instruments
or warning lights.
2. Uncoil the compressor power cable and
the inflation hose.
3. Unscrew the orange cap from the sealant
bottle receiver, and the sealant bottle cap.
4. Screw the sealant bottle into the receiver
(clockwise) until tight.
• Screwing the bottle onto the receiver will
pierce the bottle's se al. Do not unscrew
a full, or partly us ed bottle from the
receiver. Doing so will result in the
sealant leaking from the bottle.
5. Remove the valve cap from the damaged
tyre.
6. Remove the protective cap from the
inflation hose, and c onnect the inflation
hose to the tyre valve. Ensure that the hose
is screwed on firmly.
7. Ensure that the compressor switch is in
the off ( O) position.
8. Insert the power cable connector into an
auxiliary power socket. See AUXILIARY
POWER SOCKETS (page 110).
9. Unless the vehicle is in an enclosed or
poorly ventilated area , start the engine.
10. Set the compressor switch to the on ( l)
position.
11. Inflate the tyre to a minimum of 1.8 bar (26
lb/in²) and a maximum of 3.5 bar (51
lb/in²).
†
WARNINGS
Avoid skin contact with the sealant
which contains natu ral rubber latex.
Do not unscrew the sealant bottle from the
receiver until it is empty, as sealant will leak
out.
If the tyre inflation pressure does not
reach 1.8 bar (26 lb/in²) within seven
minutes, the tyre may have suffered excessive
damage. A temporary repair will not be
possible, and the vehicle should not be driven
until the tyre has been replaced.
CAUTIONS
Before attempting a tyre repair, ensure
that the vehicle is parked safely, as far
away from passing traffic as possible.
Ensure that the parki ng brake is applied,
and P is selected if an automatic
transmission is fitted.
Do not attempt to remove foreign objects
such as nails, screws, etc from the tyre.
Always run the engine when using the
compressor, unless the vehicle is in an
enclosed, or poorly ventilated space.
To prevent overheating do not operate
the compressor continuously for longer
than ten minutes.
Page 2913 of 3229

193
Wheels and tyres
R
• Avoid tyre/vehicle damage by removing
the traction devices as soon as the
conditions allow.
TYRE GLOSSARY
Terms used
lbf/in² or psi
Pounds per square inch, an imperial unit of
measure for pressure.
kPa
Kilo Pascal, a metric unit of measure for
pressure.
Cold tyre pressure
The air pressure in a tyre which has been
standing in excess of th ree hours, or driven for
less than one mile.
Maximum inflation pressure
The maximum pressure to which the tyre
should be inflated. This pressure is given on
the tyre side wall in lbf/in² (psi) and kPa.
Note: This pressure is the maximum allowed
by the tyre manufacturer. It is not the pressure
recommended for use. See TECHNICAL
SPECIFICATIONS (page 194).
Kerb weight
The weight of a standa rd vehicle, including a
full tank of fuel, any optional equipment fitted,
and with the correct coolant and oil levels.
Gross vehicle weight
The maximum permissible weight of a vehicle
with driver, passengers, load, luggage,
equipment, and towbar load.
Accessory weight
The combined weight (in excess of those items
replaced) of items available as factory installed
equipment. Production options weight
The combined weight of options installed
which weigh in excess of 1.4 kg (3 lb) more
than the standard items that they replaced, and
are not already considered in kerb or accessory
weights. Items such as heavy duty brakes, high
capacity battery, special trim etc.
Vehicle capacity weight
The number of seats multiplied by 68 kg (150
lb) plus the rated amount of load/luggage.
Maximum loaded vehicle weight
The sum of kerb wei ght, accessory weight,
vehicle capacity weig ht, plus any production
option weights.
Rim
The metal support for a ty re, or tyre and tube,
upon which the tyre beads are seated.
Bead
The inner edge of a tyre th at is shaped to fit to
the rim and form an air tight seal. The bead is
constructed of steel wires which are wrapped,
or reinforced, by the ply cords.
Page 2993 of 3229

Index
273
R
Driving after a collision . . . . . . . . . . . . . . 205 Before starting or driving . . . . . . . . . . 205
Resetting the fuel cut-off . . . . . . . . . . 205
When driving . . . . . . . . . . . . . . . . . . . 205
E
Economical driving . . . . . . . . . . . . . . . . . 129
Driving tips for economy . . . . . . . . . . 129
Maintenance and fuel economy . . . . . 129
Ejecting compact discs . . . . . . . . . . . . . . 246
Ejecting multiple compact discs . . . . . . . 246
Electric exterior mirrors . . . . . . . . . . . . . . 95 Adjusting and folding . . . . . . . . . . . . . . 95
Mirror dip when reversing . . . . . . . . . . 96
Electric seats . . . . . . . . . . . . . . . . . . . . . . . 49 Driving position memory . . . . . . . . . . . 50
Electric sunroof . . . . . . . . . . . . . . . . . . . . 105 Anti-trap mechanism . . . . . . . . . . . . . 105
Calibration . . . . . . . . . . . . . . . . . . . . . 106
Operation . . . . . . . . . . . . . . . . . . . . . . 105
Sunroof blinds . . . . . . . . . . . . . . . . . . 106
Electric windows . . . . . . . . . . . . . . . . . . . . 93
One shot operation . . . . . . . . . . . . . . . . 93
Overriding anti-trap protec tion . . . . . . . 93
Window isolator . . . . . . . . . . . . . . . . . . 94
Window reset . . . . . . . . . . . . . . . . . . . . 94
Engine compartment overview . . . . . . . . 161 1. Engine oil filler caps (Black) . . . . . . 161
2. Engine oil dipsticks (Yellow) . . . . . . 161
3. Brake fluid reservoi r cap (Black) . . . 161
4. Coolant reservoir ca p (Black) . . . . . 161
5. Washer fluid reserv oir cap (Blue) . . 161
6. Power steering flui d reservoir cap (Black)
161
Engine coolant check . . . . . . . . . . . . . . . 163 Checking the coolant level . . . . . . . . . 163
Topping up the coolant . . . . . . . . . . . . 164
Engine oil check . . . . . . . . . . . . . . . . . . . 162 Checking the oil level . . . . . . . . . . . . . 162
Engine oil specification . . . . . . . . . . . . 163
Topping up the oil . . . . . . . . . . . . . . . . 163
Engine specifications. . . . . . . . . . . . . . . . 211
Enhanced other network (RDS-EON). . . . 229
Essential towing checks . . . . . . . . . . . . . 151
Event data recording . . . . . . . . . . . . . . . . . 37 Exterior mirrors . . . . . . . . . . . . . . . . . . . . . 94
Proximity mirror (Japan only) . . . . . . . . 94
F
Fast forward/reverse . . . . . . . . . . . . . . . . . 247
Fastening the seat belts . . . . . . . . . . . . . . . 56 Releasing the seat belts . . . . . . . . . . . . . 56
Filling station information . . . . . . . . . . . . . . 33 Engine coolant specification. . . . . . . . . . 34
Engine oil specification . . . . . . . . . . . . . 34
Fuel filler flap . . . . . . . . . . . . . . . . . . . . . 33
Tyre pressures . . . . . . . . . . . . . . . . . . . . 34
Front fog lamps . . . . . . . . . . . . . . . . . . . . . 72
Fuel and refuelling Technical specifications . . . . . . . . . . . . 146
Fuel burning heater. . . . . . . . . . . . . . . . . . 104
Fuel consumption . . . . . . . . . . . . . . . . . . . 146
Fuel cut-off . . . . . . . . . . . . . . . . . . . . . . . . 144 Resetting the fuel cut-off . . . . . . . . . . . 144
Fuel filler flap . . . . . . . . . . . . . . . . . . . . . . 144
Fuel quality . . . . . . . . . . . . . . . . . . . . . . . . 142 Alternative fuels for petrol engines. . . . 143
Diesel engined vehicles . . . . . . . . . . . . 143
Petrol engined vehicles . . . . . . . . . . . . 142
Fuse box locations . . . . . . . . . . . . . . . . . . 195
Fuse specification chart . . . . . . . . . . . . . . 196 Engine compartment fuse box . . . . . . . 196
Luggage compartment fuse box . . . . . 201
Passenger compartment fuse box . . . . 199
G
General driving points . . . . . . . . . . . . . . . 128 Battery charging - red . . . . . . . . . . . . . 128
Low oil pressure - red . . . . . . . . . . . . . 128
General information on ra dio frequencies. . 40
H
Handbrake . . . . . . . . . . . . . . . . . . . . . . . . 124
Hazard warning flashers . . . . . . . . . . . 74, 204
HDC . . . . . . . . . . . . . . . . . . . . . . . . . . . . . 137
Head restraints . . . . . . . . . . . . . . . . . . . . . . 51
Headlamp adjustment . . . . . . . . . . . . . . . . . 73
Headlamp levelling . . . . . . . . . . . . . . . . . . . 73 Halogen headlamps . . . . . . . . . . . . . . . . 73
Xenon headlamps . . . . . . . . . . . . . . . . . 73
Headlamp washers . . . . . . . . . . . . . . . . . . . 88
Headphones . . . . . . . . . . . . . . . . . . . . . . . 253
Page 3006 of 3229

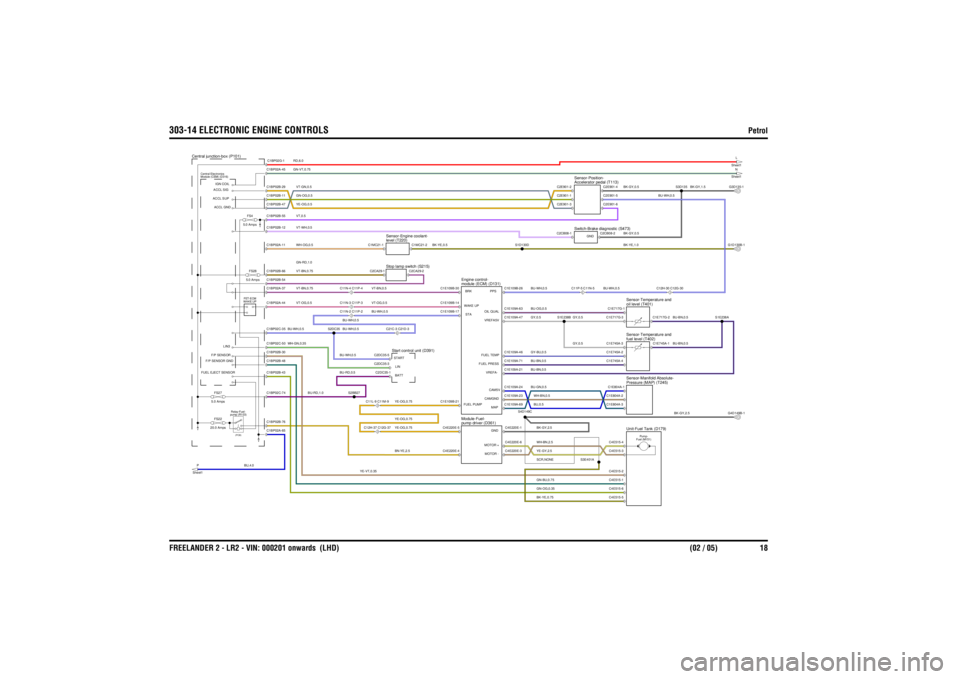
303-14 ELECTRONIC ENGINE CONTROLS
Petrol
FREELANDER 2 - LR2 - VIN: 000201 onwards (LHD) (02 / 05) 18
YE-OG,0.5VT-WH,0.5
BU-WH,0.5VT-OG,0.5
GN-VT,0.75
VT-BN,0.5
VT,0.5VT-GN,0.5GN-OG,0.5RD,6.0
BN-YE,2.5
BK-YE,0.5
GN-BU,0.75
YE-VT,0.35
GN-OG,0.35
YE-OG,0.75YE-OG,0.75
VT-OG,0.5
BU,4.0
BU-RD,1.0
WH-GN,0.35BU-WH,0.5
BU-RD,0.5
YE-OG,0.75
BU-WH,0.5BU-WH,0.5BU-WH,0.5
GN-RD,1.0VT-BN,0.75WH-OG,0.5VT-BN,0.75
SCR,NONEYE-GY,2.5WH-BN,2.5BK-YE,0.75
BK-GY,2.5
WH-BN,0.5BU,0.5
GY,0.5GY,0.5
BU-GN,0.5BU-BN,0.5GY-BU,0.5BU-BN,0.5BU-OG,0.5BK-GY,2.5GY,0.5
BU-BN,0.5BU-BN,0.5
BK-YE,1.0
BU-WH,0.5
BU-WH,0.5
BK-GY,0.5
BU-WH,0.5
BK-GY,0.5
BK-GY,1.5
FS4
5.0 AmpsFS28
5.0 Amps
FS22
20.0 Amps
WAKE UP FET-ECM
C11N-3 C11P-3
Module (CEM) (D316)
Central Electronics
Central junction-box (P101)
FS27
5.0 Amps
P
Sheet1
pump (R103) Relay-Fuel-(PCB)
Start control unit (D391)
C12H-37 C12G-37C11L-9 C11M-9
C11N-2 C11P-2
C21C-3 C21D-3
C11N-4 C11P-4
Stop lamp switch (S215)level (T220)
Sensor-Engine coolant-
oil level (T401)
Sensor-Temperature and
module (ECM) (D131)
Engine control-
Unit-Fuel Tank (D179)
pump driver (D361)
Module-Fuel-
Pressure (MAP) (T245)
Sensor-Manifold Absolute-
Fuel (M151) Pump-
fuel level (T402)
Sensor-Temperature and
Switch-Brake diagnostic (S473)Accelerator pedal (T113)
Sensor-Position-C11P-5 C11N-5
C12H-30 C12G-30
N
Sheet1L
Sheet1
C1E109B-14 WAKE UPC1E109B-30 BRKC1E109B-17 STAC1E109B-21FUEL PUMP
C1BP02A-44C1BP02C-74C1BP02C-50C1BP02A-65C1BP02C-35C1BP02B-43C1BP02B-30C1BP02B-48C1BP02B-76
FUEL EJECT SENSORF/P SENSOR GND
LIN3
F/P SENSOR
S2BB27
S2DC35
C2DC35-1BATTC2DC35-5 STARTC2DC35-3 LIN
C1BP02B-55C1BP02B-12C1BP02A-37C1BP02B-54C1BP02A-11C1BP02A-45C1BP02B-47C1BP02B-11C1BP02B-29C1BP02B-66
ACCL SUPACCL GNDIGN COILACCL SIG
C1BP02G-1
C2CA29-1
C2CA29-2
C1MC21-1
C1MC21-2
C4E515-3
C4E220E-3
MOTOR -
C4E220E-4
S3E401A
C4E515-6C4E515-5C4E515-2C4E515-1
C4E220E-6
MOTOR +C4E220E-1
GNDC1E109A-69
MAPC1E109A-24
CAM5VC1E109A-23
CAMGND
S4D149C
C4E220E-5
C1E109A-21
VREFA-C1E109A-47
VREFA5VC1E109A-63
OIL QUALC1E109A-71
FUEL PRESSC1E109A-46
FUEL TEMP
S1E238B
C4E515-4C1E804A-2C1E804A-3C1E804A-1
G4D149B-1
C1E745A-4C1E745A-2C1E745A-3
C1E745A-1
C1E717G-3C1E717G-1
C1E717G-2
S1E238A
C2CB08-2
GND
C1E109B-26
PPS
S1D130D
C2CB08-1C2E901-2C2E901-3C2E901-1
G1D130B-1
S3D135
C2E901-4C2E901-6C2E901-5
G3D135-1