Page 1212 of 3171

EC-232
DTC P0686 ECM RELAY
DTC P0686 ECM RELAY
PFP:25230
ECM Terminals and Reference valveEBS01KJ3
Specification data are reference values and are measured between each terminal and ground.
CAUTION:
Do not use ECM ground terminals when measuring input/output voltage. Doing so may result in dam-
age to the ECM's transistor. Use a ground other than ECM terminals, such as the ground.
On Board Diagnosis LogicEBS01KJ4
The MI will not light up for this self-diagnosis.
DTC Confirmation ProcedureEBS01KJ5
NOTE:
If DTC Confirmation Procedure has been previously conducted, always turn ignition switch OFF and wait at
least 10 seconds before conducting the next test.
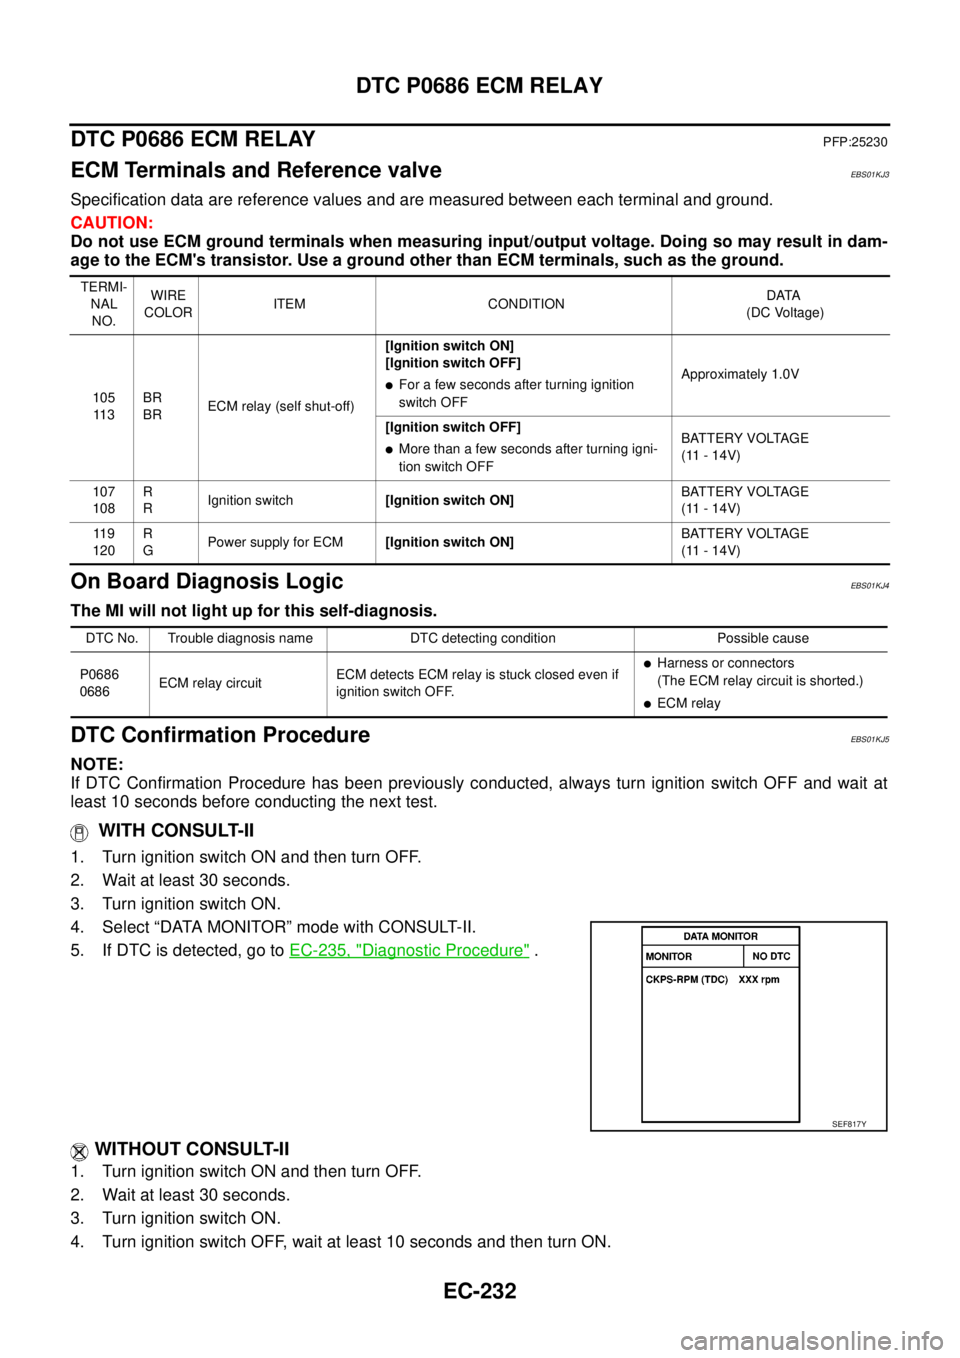
WITH CONSULT-II
1. Turn ignition switch ON and then turn OFF.
2. Wait at least 30 seconds.
3. Turn ignition switch ON.
4. Select “DATA MONITOR” mode with CONSULT-II.
5. If DTC is detected, go toEC-235, "
Diagnostic Procedure".
WITHOUT CONSULT-II
1. Turn ignition switch ON and then turn OFF.
2. Wait at least 30 seconds.
3. Turn ignition switch ON.
4. Turn ignition switch OFF, wait at least 10 seconds and then turn ON.
TERMI-
NAL
NO.WIRE
COLORITEM CONDITIONDATA
(DC Voltage)
105
11 3BR
BRECM relay (self shut-off)[Ignition switch ON]
[Ignition switch OFF]
lFor a few seconds after turning ignition
switch OFFApproximately 1.0V
[Ignition switch OFF]
lMore than a few seconds after turning igni-
tion switch OFFBATTERY VOLTAGE
(11 - 14V)
107
108R
RIgnition switch[Ignition switch ON]BATTERY VOLTAGE
(11 - 14V)
11 9
120R
GPower supply for ECM[Ignition switch ON]BATTERY VOLTAGE
(11 - 14V)
DTC No. Trouble diagnosis name DTC detecting condition Possible cause
P0686
0686ECM relay circuitECM detects ECM relay is stuck closed even if
ignition switch OFF.
lHarness or connectors
(The ECM relay circuit is shorted.)
lECM relay
SEF817Y
Page 1213 of 3171
DTC P0686 ECM RELAY
EC-233
C
D
E
F
G
H
I
J
K
L
MA
EC
5. Perform Diagnostic Test Mode II (Self-diagnostic results) with ECM.
6. If DTC is detected, go toEC-235, "
Diagnostic Procedure".
Page 1214 of 3171
EC-234
DTC P0686 ECM RELAY
Wiring Diagram
EBS01KJ6
MBWA1053E
Page 1215 of 3171

DTC P0686 ECM RELAY
EC-235
C
D
E
F
G
H
I
J
K
L
MA
EC
Diagnostic ProcedureEBS01KJ7
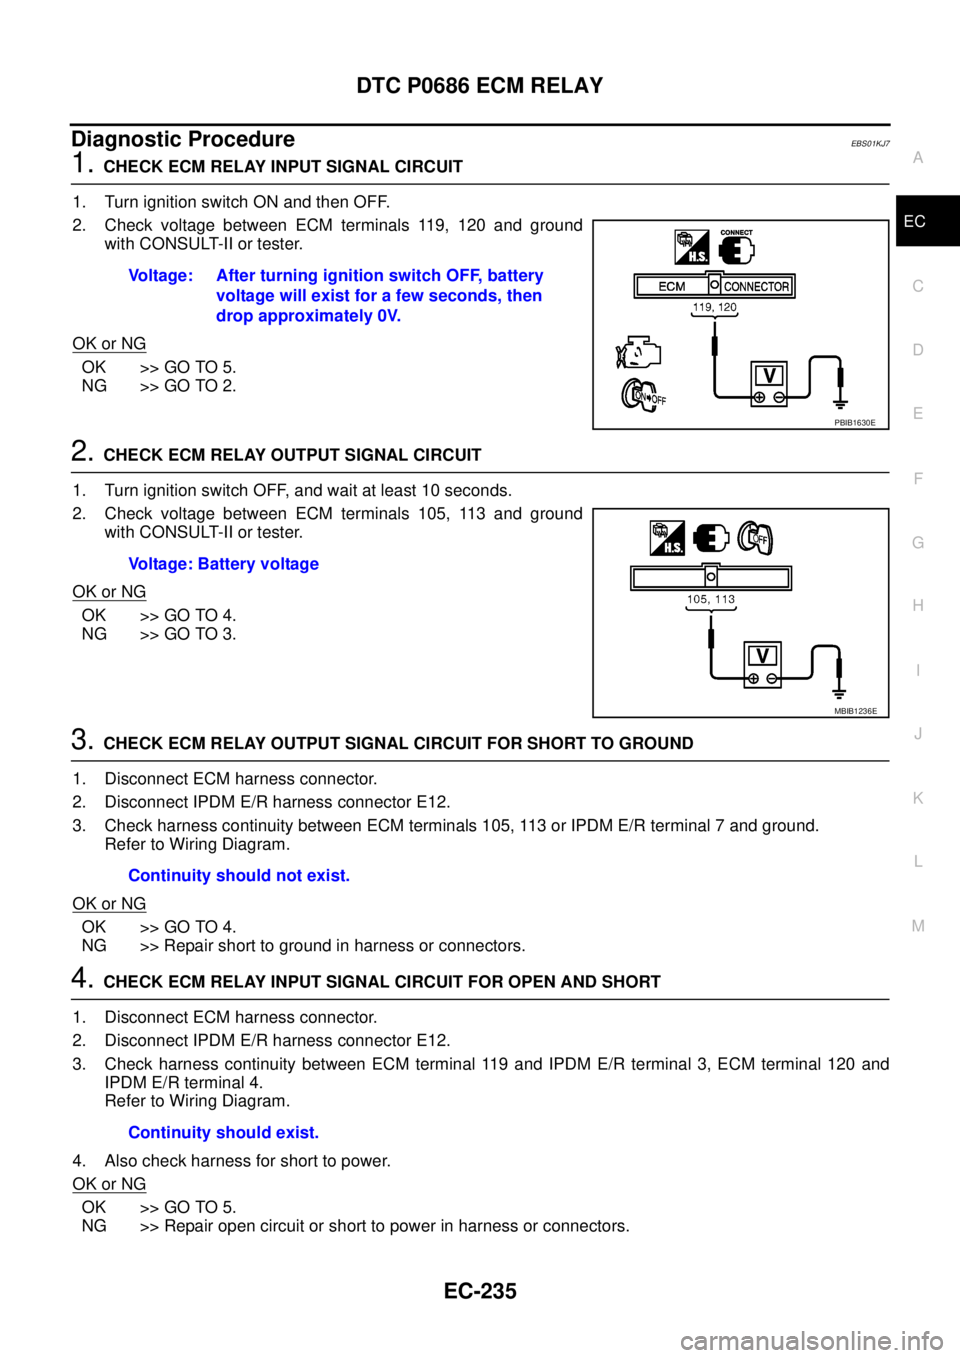
1.CHECK ECM RELAY INPUT SIGNAL CIRCUIT
1. Turn ignition switch ON and then OFF.
2. Check voltage between ECM terminals 119, 120 and ground
with CONSULT-II or tester.
OK or NG
OK >> GO TO 5.
NG >> GO TO 2.
2.CHECK ECM RELAY OUTPUT SIGNAL CIRCUIT
1. Turn ignition switch OFF, and wait at least 10 seconds.
2. Check voltage between ECM terminals 105, 113 and ground
with CONSULT-II or tester.
OK or NG
OK >> GO TO 4.
NG >> GO TO 3.
3.CHECK ECM RELAY OUTPUT SIGNAL CIRCUIT FOR SHORT TO GROUND
1. Disconnect ECM harness connector.
2. Disconnect IPDM E/R harness connector E12.
3. Check harness continuity between ECM terminals 105, 113 or IPDM E/R terminal 7 and ground.
Refer to Wiring Diagram.
OK or NG
OK >> GO TO 4.
NG >> Repair short to ground in harness or connectors.
4.CHECK ECM RELAY INPUT SIGNAL CIRCUIT FOR OPEN AND SHORT
1. Disconnect ECM harness connector.
2. Disconnect IPDM E/R harness connector E12.
3. Check harness continuity between ECM terminal 119 and IPDM E/R terminal 3, ECM terminal 120 and
IPDM E/R terminal 4.
Refer to Wiring Diagram.
4. Also check harness for short to power.
OK or NG
OK >> GO TO 5.
NG >> Repair open circuit or short to power in harness or connectors.Voltage: After turning ignition switch OFF, battery
voltage will exist for a few seconds, then
drop approximately 0V.
PBIB1630E
Voltage: Battery voltage
MBIB1236E
Continuity should not exist.
Continuity should exist.
Page 1216 of 3171
EC-236
DTC P0686 ECM RELAY
5.CHECK INTERMITTENT INCIDENT
Refer toEC-70, "
TROUBLE DIAGNOSIS FOR INTERMITTENT INCIDENT".
OK or NG
OK >> Replace IPDM E/R.
NG >> Repair open circuit or short to ground or short to power in harness or connectors.
Page 1275 of 3171

GLOW CONTROL SYSTEM
EC-295
C
D
E
F
G
H
I
J
K
L
MA
EC
GLOW CONTROL SYSTEMPFP:25230
DescriptionEBS01KLM
SYSTEM DESCRIPTION
*: The output signal is sent from the ECM through CAN communication line.
When engine coolant temperature is more than approximately 80°C(176°F), the glow relay turns off.
When engine coolant temperature is lower than approximately 80°C(176°F):
lIgnition switch ON
After ignition switch has turned to ON, the glow relay turns ON for a certain period of time in relation to
engine coolant temperature, allowing current to flow through glow plug.
lCranking
The glow relay turns ON, allowing current to flow through glow plug.
lSta rti ng
After engine has started, current continues to flow through glow plug (after-glow mode) for a certain period
in relation to engine coolant temperature.
The glow indicator lamp turns ON for a certain period of time in relation to engine coolant temperature at the
time glow relay is turned ON.
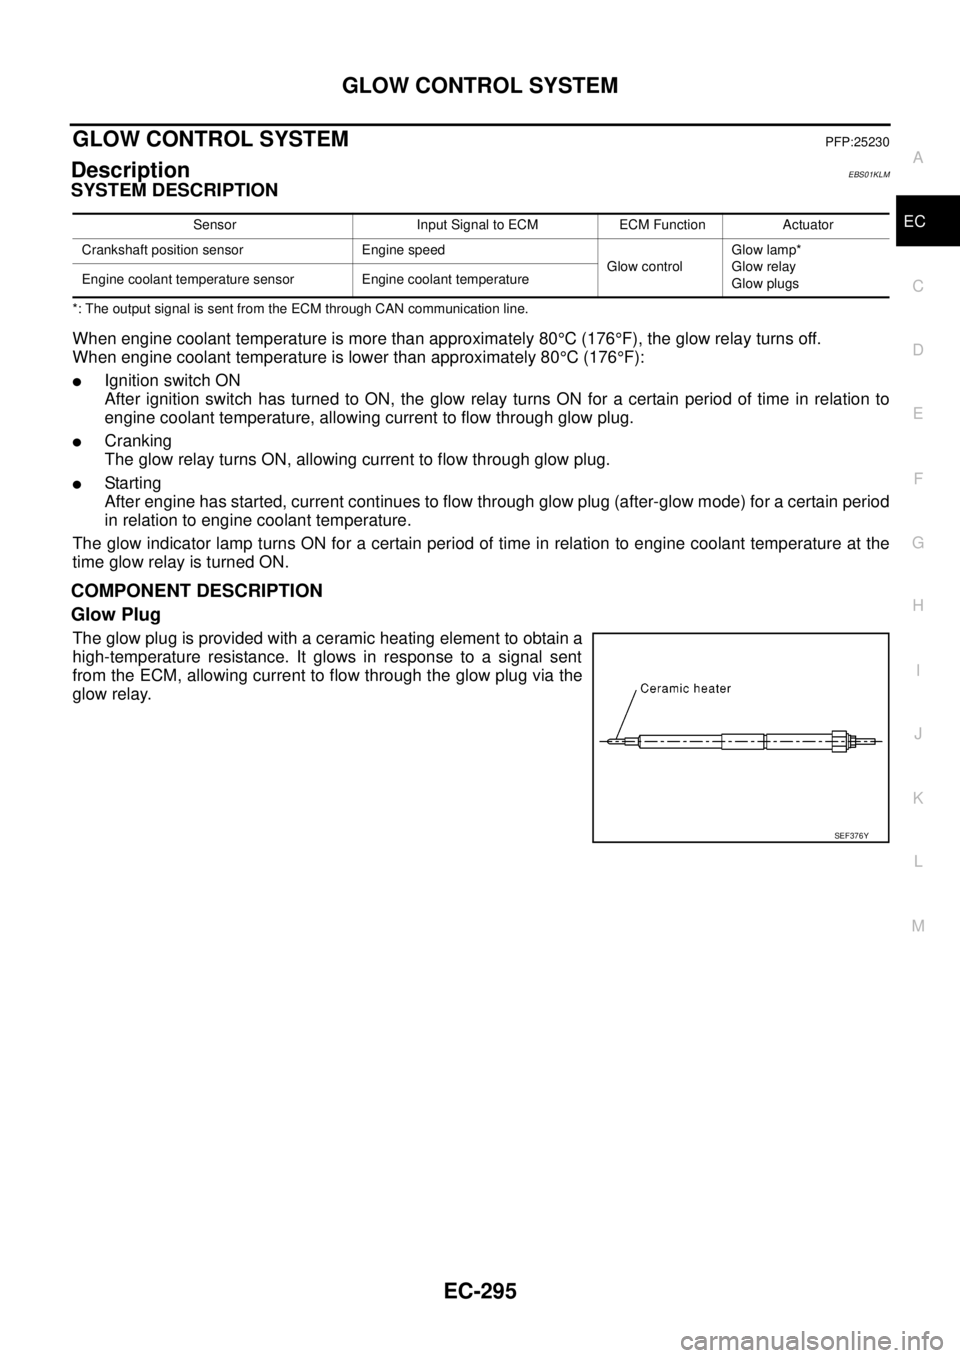
COMPONENT DESCRIPTION
Glow Plug
The glow plug is provided with a ceramic heating element to obtain a
high-temperature resistance. It glows in response to a signal sent
from the ECM, allowing current to flow through the glow plug via the
glow relay.
Sensor Input Signal to ECM ECM Function Actuator
Crankshaft position sensor Engine speed
Glow controlGlow lamp*
Glow relay
Glow plugs Engine coolant temperature sensor Engine coolant temperature
SEF376Y
Page 1279 of 3171
GLOW CONTROL SYSTEM
EC-299
C
D
E
F
G
H
I
J
K
L
MA
EC
5.CHECK DTC
Check that DTC U1000 is not displayed.
Ye s o r N o
Yes >> Perform trouble diagnoses for DTC U1000, refer toEC-79, "DTC U1000 CAN COMMUNICATION
LINE".
No >> GO TO 6.
6.CHECK COMBINATON METER OPERATION
Does combination meter operate normally?
Ye s o r N o
Ye s > > G O T O 1 4 .
No >> Check combination meter circuit. Refer toDI-4, "
COMBINATION METERS".
7.CHECK GLOW RELAY POWER SUPPLY CIRCUIT
1. Turn ignition switch OFF.
2. Disconnect glow relay (1).
3. Check voltage between glow relay terminals 1, 3 and ground
with CONSULT-II or tester.
OK or NG
OK >> GO TO 9.
NG >> GO TO 8.
8.DETECT MALFUNCTIONING PART
Check the following.
l60A fusible link
lHarness for open or short between glow relay and battery
>> Repair harness or connectors.
MBIB1220E
Voltage: Battery voltage
PBIB1413E
Page 1280 of 3171

EC-300
GLOW CONTROL SYSTEM
9.CHECK GLOW RELAY OUTPUT SIGNAL CIRCUIT FOR OPEN AND SHORT
1. Disconnect ECM harness connector.
2. Check harness continuity between ECM terminal 37 and glow relay terminal 2.
Refer to Wiring Diagram.
3. Also check harness for short to ground and short to power.
OK or NG
OK >> GO TO 11.
NG >> GO TO 10.
10.DETECT MALFUNCTIONING PART
Check the following.
lHarness connectors E8, F2
lHarness for open or short between glow relay and ECM
>> Repair open circuit or short to ground or short to power in harness or connectors.
11 .CHECK HARNESS CONTINUITY BETWEEN GLOW RELAY AND GLOW PLUG FOR OPEN AND
SHORT
1. Disconnect glow plug harness connector.
2. Check harness continuity between glow relay terminal 5 and glow plug harness connector.
Refer to Wiring Diagram.
3. Also check harness for short to ground and short to power.
OK or NG
OK >> GO TO 13.
NG >> GO TO 12.
12.DETECT MALFUNCTIONING PART
Check the following.
lHarness connectors E7, F8
lHarness for open or short between glow relay and glow plug
>> Repair open circuit or short to ground or short to power in harness or connectors.
13.CHECK GLOW RELAY
Refer toEC-301, "
Component Inspection".
OK or NG
OK >> GO TO 14.
NG >> Replace glow relay.
14.CHECK GLOW PLUG
Refer toEC-301, "
Component Inspection".
OK or NG
OK >> GO TO 15.
NG >> Replace glow plug.Continuity should exist.
Continuity should exist.