Page 1086 of 2890
B4M0227A
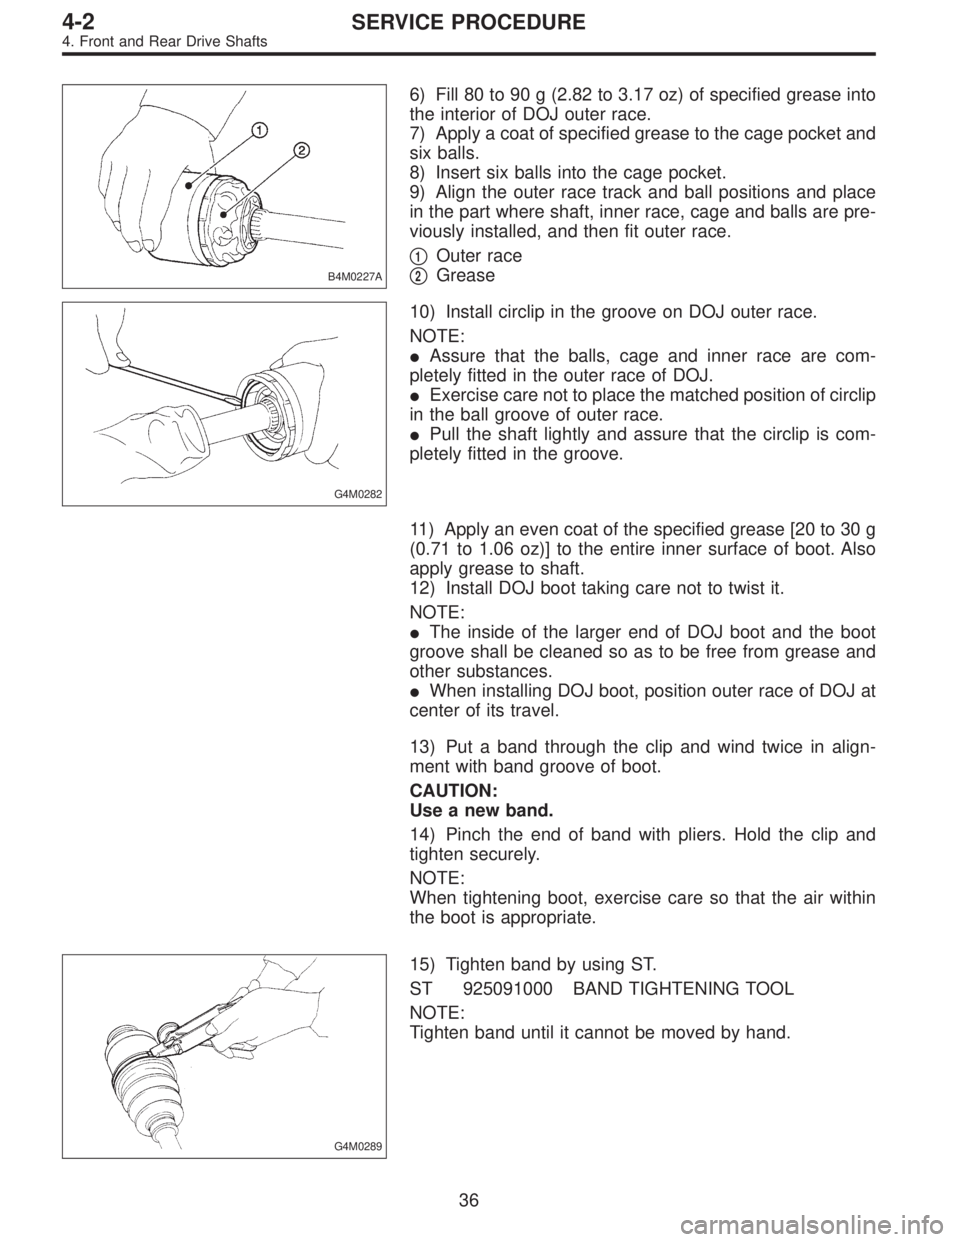
6) Fill 80 to 90 g (2.82 to 3.17 oz) of specified grease into
the interior of DOJ outer race.
7) Apply a coat of specified grease to the cage pocket and
six balls.
8) Insert six balls into the cage pocket.
9) Align the outer race track and ball positions and place
in the part where shaft, inner race, cage and balls are pre-
viously installed, and then fit outer race.
�
1Outer race
�
2Grease
G4M0282
10) Install circlip in the groove on DOJ outer race.
NOTE:
�Assure that the balls, cage and inner race are com-
pletely fitted in the outer race of DOJ.
�Exercise care not to place the matched position of circlip
in the ball groove of outer race.
�Pull the shaft lightly and assure that the circlip is com-
pletely fitted in the groove.
11) Apply an even coat of the specified grease [20 to 30 g
(0.71 to 1.06 oz)] to the entire inner surface of boot. Also
apply grease to shaft.
12) Install DOJ boot taking care not to twist it.
NOTE:
�The inside of the larger end of DOJ boot and the boot
groove shall be cleaned so as to be free from grease and
other substances.
�When installing DOJ boot, position outer race of DOJ at
center of its travel.
13) Put a band through the clip and wind twice in align-
ment with band groove of boot.
CAUTION:
Use a new band.
14) Pinch the end of band with pliers. Hold the clip and
tighten securely.
NOTE:
When tightening boot, exercise care so that the air within
the boot is appropriate.
G4M0289
15) Tighten band by using ST.
ST 925091000 BAND TIGHTENING TOOL
NOTE:
Tighten band until it cannot be moved by hand.
36
4-2SERVICE PROCEDURE
4. Front and Rear Drive Shafts
Page 1090 of 2890
B4M0227A
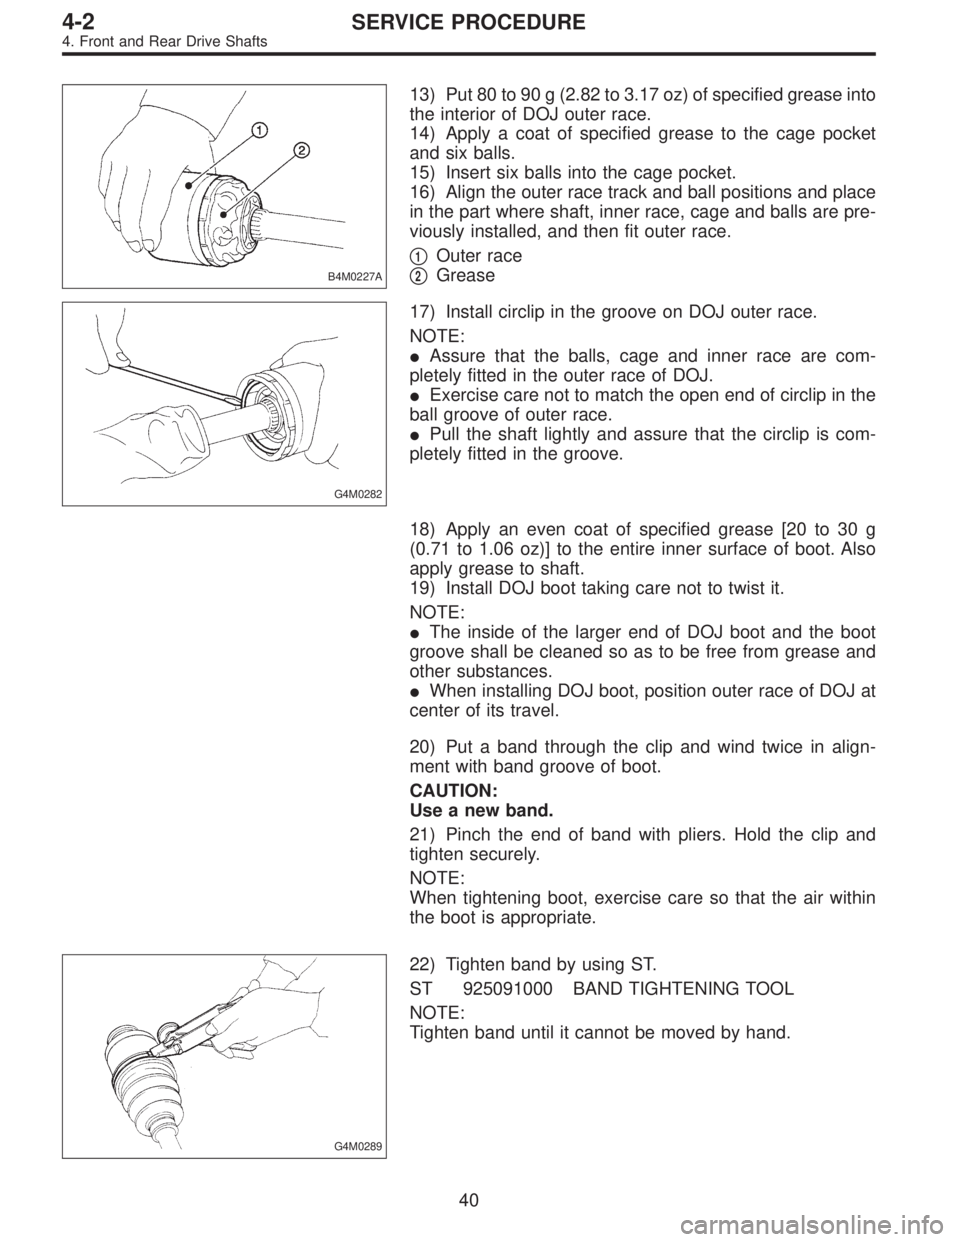
13) Put 80 to 90 g (2.82 to 3.17 oz) of specified grease into
the interior of DOJ outer race.
14) Apply a coat of specified grease to the cage pocket
and six balls.
15) Insert six balls into the cage pocket.
16) Align the outer race track and ball positions and place
in the part where shaft, inner race, cage and balls are pre-
viously installed, and then fit outer race.
�
1Outer race
�
2Grease
G4M0282
17) Install circlip in the groove on DOJ outer race.
NOTE:
�Assure that the balls, cage and inner race are com-
pletely fitted in the outer race of DOJ.
�Exercise care not to match the open end of circlip in the
ball groove of outer race.
�Pull the shaft lightly and assure that the circlip is com-
pletely fitted in the groove.
18) Apply an even coat of specified grease [20 to 30 g
(0.71 to 1.06 oz)] to the entire inner surface of boot. Also
apply grease to shaft.
19) Install DOJ boot taking care not to twist it.
NOTE:
�The inside of the larger end of DOJ boot and the boot
groove shall be cleaned so as to be free from grease and
other substances.
�When installing DOJ boot, position outer race of DOJ at
center of its travel.
20) Put a band through the clip and wind twice in align-
ment with band groove of boot.
CAUTION:
Use a new band.
21) Pinch the end of band with pliers. Hold the clip and
tighten securely.
NOTE:
When tightening boot, exercise care so that the air within
the boot is appropriate.
G4M0289
22) Tighten band by using ST.
ST 925091000 BAND TIGHTENING TOOL
NOTE:
Tighten band until it cannot be moved by hand.
40
4-2SERVICE PROCEDURE
4. Front and Rear Drive Shafts
Page 1092 of 2890
B4M0777
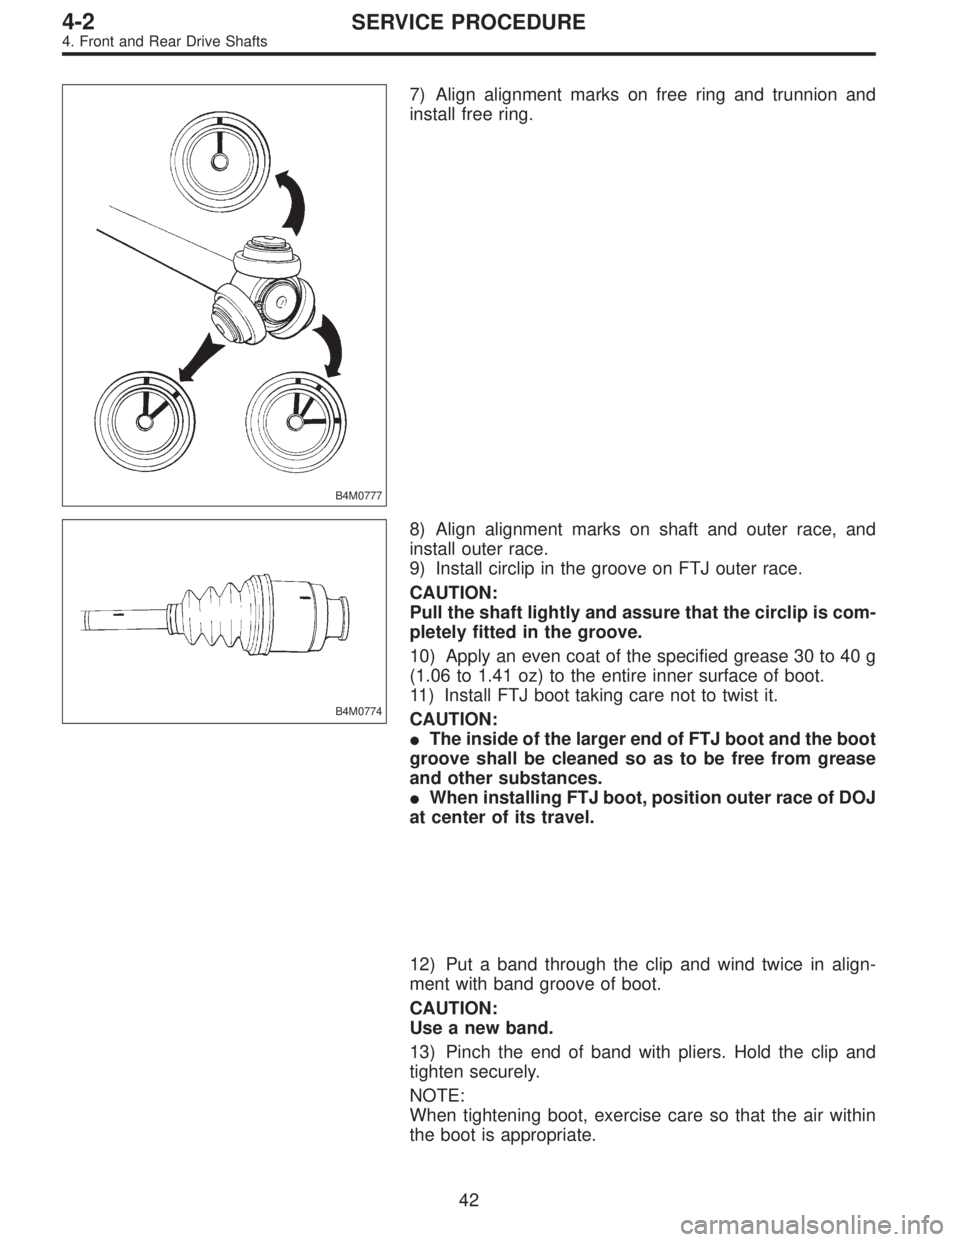
7) Align alignment marks on free ring and trunnion and
install free ring.
B4M0774
8) Align alignment marks on shaft and outer race, and
install outer race.
9) Install circlip in the groove on FTJ outer race.
CAUTION:
Pull the shaft lightly and assure that the circlip is com-
pletely fitted in the groove.
10) Apply an even coat of the specified grease 30 to 40 g
(1.06 to 1.41 oz) to the entire inner surface of boot.
11) Install FTJ boot taking care not to twist it.
CAUTION:
�The inside of the larger end of FTJ boot and the boot
groove shall be cleaned so as to be free from grease
and other substances.
�When installing FTJ boot, position outer race of DOJ
at center of its travel.
12) Put a band through the clip and wind twice in align-
ment with band groove of boot.
CAUTION:
Use a new band.
13) Pinch the end of band with pliers. Hold the clip and
tighten securely.
NOTE:
When tightening boot, exercise care so that the air within
the boot is appropriate.
42
4-2SERVICE PROCEDURE
4. Front and Rear Drive Shafts
Page 1094 of 2890
G4M0279
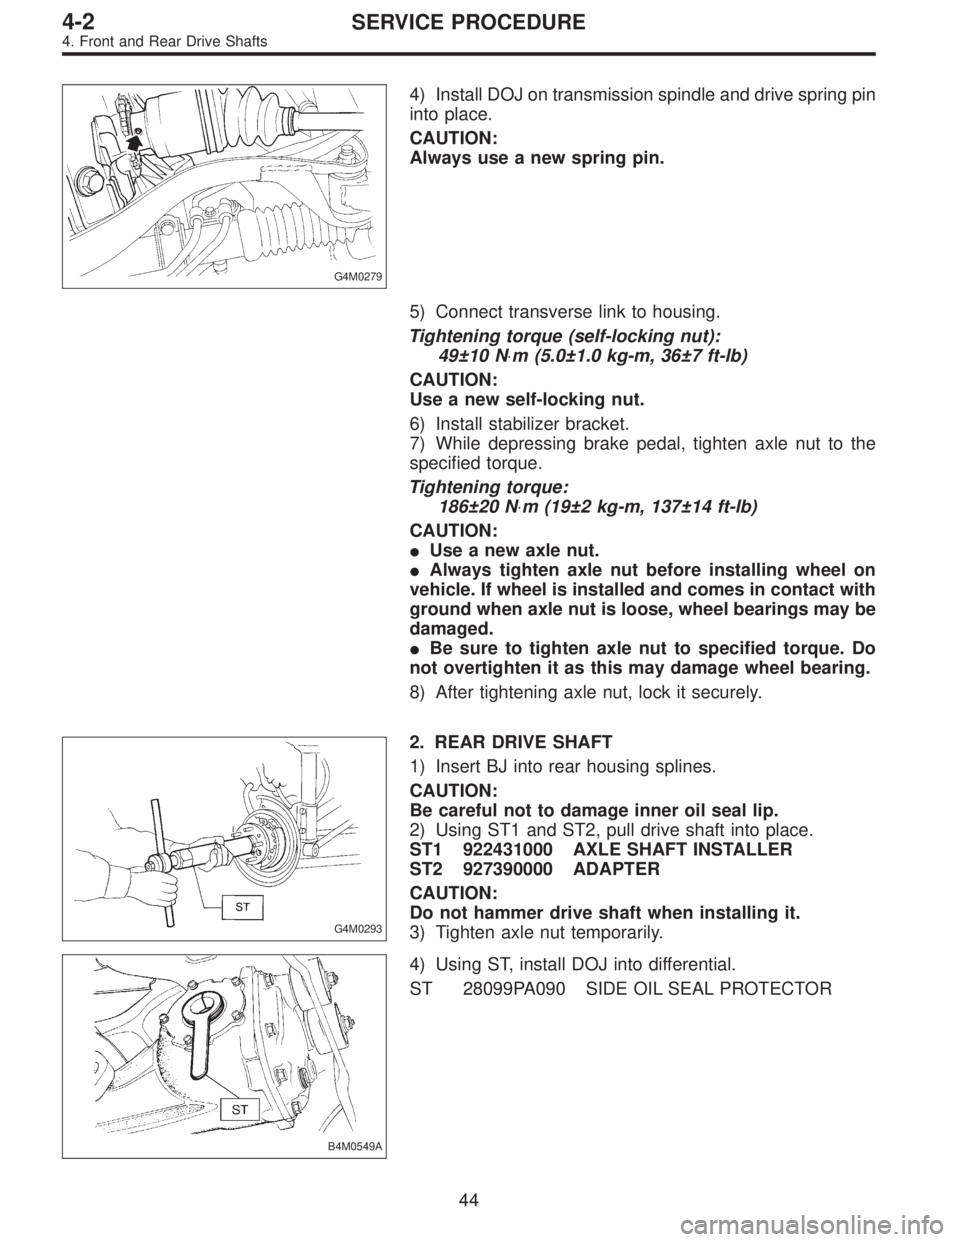
4) Install DOJ on transmission spindle and drive spring pin
into place.
CAUTION:
Always use a new spring pin.
5) Connect transverse link to housing.
Tightening torque (self-locking nut):
49±10 N⋅m (5.0±1.0 kg-m, 36±7 ft-lb)
CAUTION:
Use a new self-locking nut.
6) Install stabilizer bracket.
7) While depressing brake pedal, tighten axle nut to the
specified torque.
Tightening torque:
186±20 N⋅m (19±2 kg-m, 137±14 ft-lb)
CAUTION:
�Use a new axle nut.
�Always tighten axle nut before installing wheel on
vehicle. If wheel is installed and comes in contact with
ground when axle nut is loose, wheel bearings may be
damaged.
�Be sure to tighten axle nut to specified torque. Do
not overtighten it as this may damage wheel bearing.
8) After tightening axle nut, lock it securely.
G4M0293
2. REAR DRIVE SHAFT
1) Insert BJ into rear housing splines.
CAUTION:
Be careful not to damage inner oil seal lip.
2) Using ST1 and ST2, pull drive shaft into place.
ST1 922431000 AXLE SHAFT INSTALLER
ST2 927390000 ADAPTER
CAUTION:
Do not hammer drive shaft when installing it.
3) Tighten axle nut temporarily.
B4M0549A
4) Using ST, install DOJ into differential.
ST 28099PA090 SIDE OIL SEAL PROTECTOR
44
4-2SERVICE PROCEDURE
4. Front and Rear Drive Shafts
Page 1095 of 2890
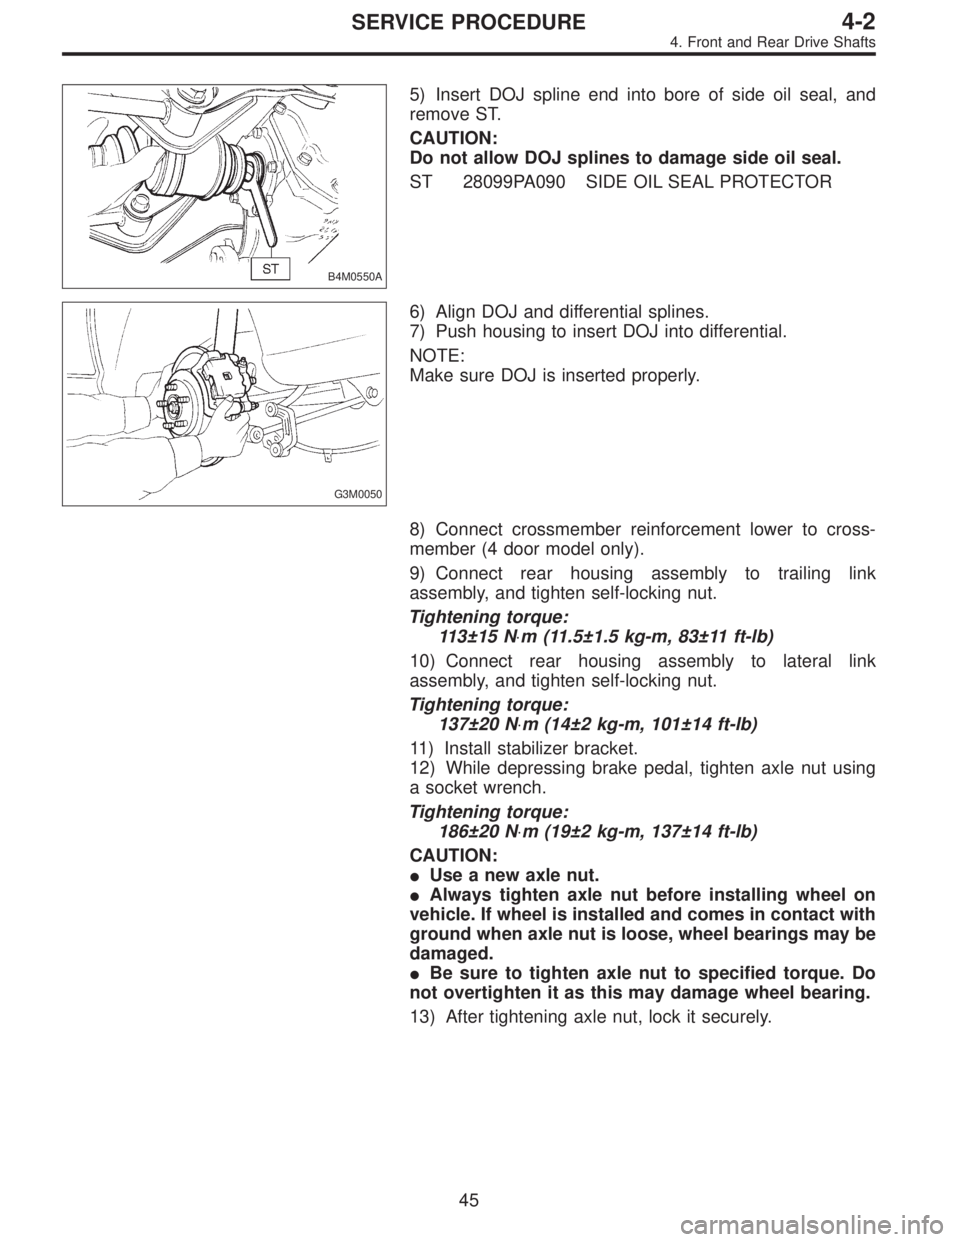
B4M0550A
5) Insert DOJ spline end into bore of side oil seal, and
remove ST.
CAUTION:
Do not allow DOJ splines to damage side oil seal.
ST 28099PA090 SIDE OIL SEAL PROTECTOR
G3M0050
6) Align DOJ and differential splines.
7) Push housing to insert DOJ into differential.
NOTE:
Make sure DOJ is inserted properly.
8) Connect crossmember reinforcement lower to cross-
member (4 door model only).
9) Connect rear housing assembly to trailing link
assembly, and tighten self-locking nut.
Tightening torque:
113±15 N⋅m (11.5±1.5 kg-m, 83±11 ft-lb)
10) Connect rear housing assembly to lateral link
assembly, and tighten self-locking nut.
Tightening torque:
137±20 N⋅m (14±2 kg-m, 101±14 ft-lb)
11) Install stabilizer bracket.
12) While depressing brake pedal, tighten axle nut using
a socket wrench.
Tightening torque:
186±20 N⋅m (19±2 kg-m, 137±14 ft-lb)
CAUTION:
�Use a new axle nut.
�Always tighten axle nut before installing wheel on
vehicle. If wheel is installed and comes in contact with
ground when axle nut is loose, wheel bearings may be
damaged.
�Be sure to tighten axle nut to specified torque. Do
not overtighten it as this may damage wheel bearing.
13) After tightening axle nut, lock it securely.
45
4-2SERVICE PROCEDURE
4. Front and Rear Drive Shafts
Page 1096 of 2890
5. Replacement of Front DOJ and UFJ
Boots
A: REMOVAL
1) Disconnect ground cable from battery.
2) Jack-up vehicle, support it with safety stands (rigid
rocks), and remove front wheel cap and wheels.
NOTE:
Do not remove axle nut.
3) Remove stabilizer link.
4) Disconnect transverse link from housing.
G4M0279
5) Remove spring pin which secures transmission spindle
to DOJ.
CAUTION:
Use a new spring pin.
6) Remove DOJ and UFJ boot from drive shaft.
B: INSTALLATION
1) Install DOJ and UFJ boots to drive shaft.
G4M0279
2) Install DOJ on transmission spindle and drive spring pin
into place.
CAUTION:
Always use a new spring pin.
3) Connect transverse link to housing.
4) Install stabilizer link.
46
4-2SERVICE PROCEDURE
5. Replacement of Front DOJ and UFJ Boots
Page 1097 of 2890
6. Replacement of Rear DOJ and BJ
Boots
A: REMOVAL
1) Disconnect ground cable from battery.
2) Lift-up vehicle, and remove rear wheel cap and wheels.
NOTE:
Axle nut need not be removed.
3) Remove A.B.S. sensor clamps and parking brake cable
bracket.
4) Disconnect stabilizer link from lateral link.
5) Remove bolts which secure lateral link assembly to rear
housing.
6) Remove bolts which secure trailing link assembly to
rear housing.
7) Remove crossmember reinforcement lower from cross-
member (4 door model only).
G4M0994
8) Remove DOJ from rear differential using ST.
ST 28099PA100 DRIVE SHAFT REMOVER
NOTE:
The side spline shaft circlip comes out together with the
shaft.
G4M0995
CAUTION:
Be careful not to damage side bearing retainer. Always
use bolt as shown in figure, as supporting point for ST
during removal.
ST 28099PA100 DRIVE SHAFT REMOVER
B: INSTALLATION
1) Install DOJ and BJ boots to drive shaft.
47
4-2SERVICE PROCEDURE
6. Replacement of Rear DOJ and BJ Boots
Page 1099 of 2890
B4M0051
7. Full Wheel Cap
A: REMOVAL
Pry off the full wheel cap with a wheel cap remover inserted
between openings in the cap.
B: INSTALLATION
Align the valve hole in the wheel cap with the valve on the
wheel and secure the wheel cap by tapping four points by
hand.
8. Steel Wheel and Tire
1) Deformation or damage on the rim can cause air leak-
age. Check the rim flange for deformation, crack, or
damage, and repair or replace as necessary.
2) Take stone, glass, nail etc. off the tread groove.
G4M0297
3) Replace tire:
�when large crack on side wall, damage or crack on
tread is found.
�when the“tread wear indicator”appears as a solid
band across the tread.
CAUTION:
�When replacing a tire, make sure to use only the
same size, construction and load range as originally
installed.
�Avoid mixing radial, belted bias or bias tires on the
vehicle.
49
4-2SERVICE PROCEDURE
7. Full Wheel Cap - 8. Steel Wheel and Tire