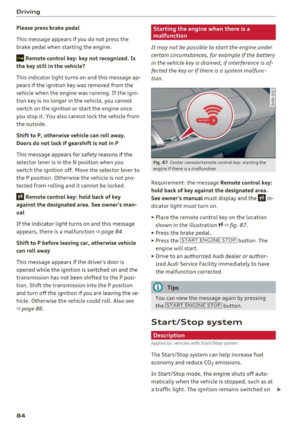
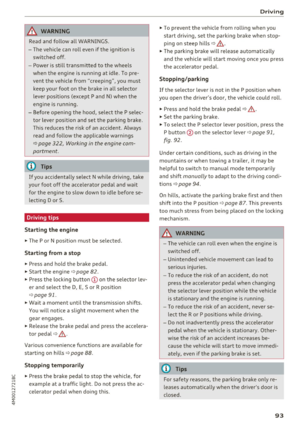
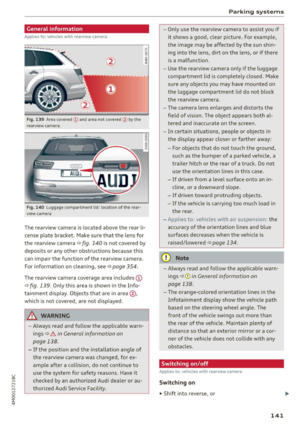
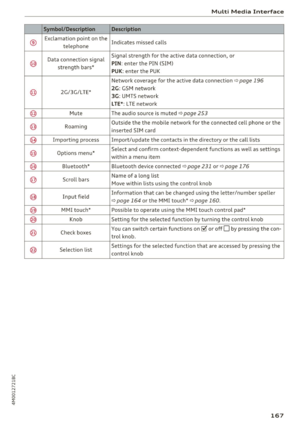
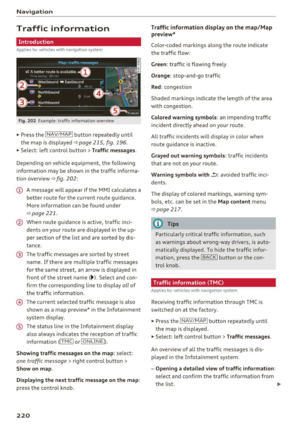
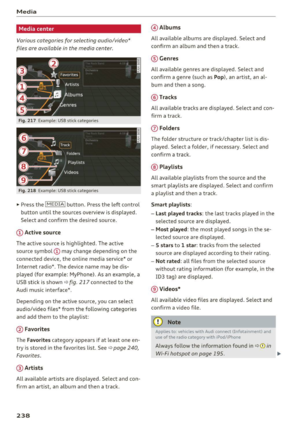
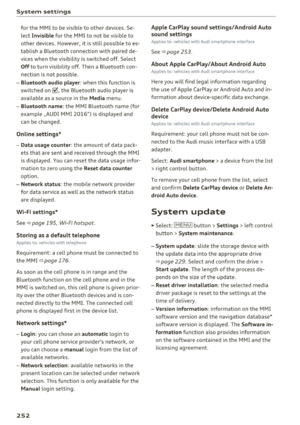
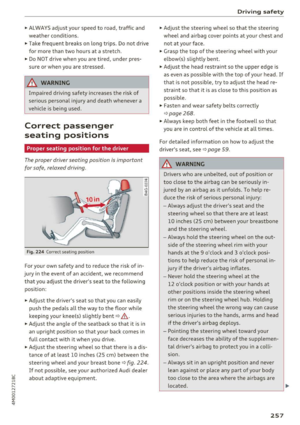
Page 9 of 402
u
"' .... N
" N .... 0
0
l'. ...
7
Page 10 of 402
Cockpit overview
Cockpit overview
Controls at a glance
Fig. 1 Cockpit : left section
F ig. 2 Cockpit: rig ht sect ion
8
i
Page 11 of 402

u co ...... N r-... N ...... 0
0
:E: '
(!) side assist displays, warning abo ut
exiting the vehicle ..... ... .. .. .
@ Door handle
@ Cent ral locking switch ....... .. .
@ Memory buttons ........... .. .
® Vent
® Thumbwhee l for vent and button
for wide vent, depending on equip-
ment ... .. .... .. .... ... ... . .
0 Lever for:
- T urn s ignals and high beams . . .
- High beam assistant .... .. .. .
- Active lane assist ........... .
- T raffic jam assist ........... .
@ Mu lt if unction steer ing whee l with:
- Horn
- Drive r's airbag . ..... ... .. .. .
- Drive r informat ion system con -
trols . ... .... .. .... ... .. .. .
- Audio/v ideo, telephone, nav iga
tion and voice recognition con -
t rols .. .. ... .. ..... ... .. .. .
- Button @/steering wheel heating
- Sh if t paddles .......... .. .. .
® Instrument cluster ........... .
@ Reset t rip odometer ...... .. .. .
@ W indshield washe r system lever
@ I STAR T ENGINE ST OPI button .. .
@ Steer ing whee l adjustment, de -
pending on equipmen t
- Mechan ica l .............. .. .
- Power .... .. .. ..... ... .. .. .
@ Leverfo r:
- C ruise cont rol sys tem
- Adaptive cruise cont rol ...... .
@ Data link connector for On-board
Diagnostic System (OBD II) . ... .
@ H ood release .... . .... .... ... .
@ Ins trumen t illum ination ... .. .. .
@ Button for switch ing the head-up
d isplay on/off, adjust ing the
height .. .. ........ ..... .. .. .
@ Sw itch for lugg age compa rtment
lid . ... .. .. .. .. .. .... ... .. .. .
@ H eadlight control sw itch .... .. .
126
38
64
7 1
49
49
123
114
27 7
1 2
14
1 4
94
10
12
55
82
81
8 1
10 2
107
2 1
323
52
20
4 0
48
Coc kpit o ve rv iew
@ Buttons fo r:
- All-weather lights
- Night vision assist .......... .
- Rea r fog lights ..... . ..... .. .
@ Power exte rior m irror adjustment
@ Power windows .............. .
@ Infotainment system display
@ Lockable glove compa rtme nt
@) Front passenger 's airbag .... .. .
@ Drives for CD, DVD, SI M cards .. .
@ Swi tch for cooled glove compa rt-
me nt ...... ................ .
@ Depend ing on equ ipment, buttons
for :
- drive select ................ .
- Sta rt/Stop system ... ..... .. .
- Electronic Stabilization Control
(ESC) . .. .. .. .. ... ....... .. -
- Emergency flashers ......... .
- Parking system ............. .
- Hill hold ass ist .. .. .. ..... .. .
- Extend ing/retracting the Info-
tainment system disp lay ... .. .
@ Climate contro l system .... ... . .
@) Storage compartment and outlet
@ Cup holder and mount for vehicle
key .... .... .. .. ............ .
@ Infotai nment system on/off
button . .. .. . ............... .
@ Center armrest w ith sto rage com
partment. Depending on vehicle
equipment, it may have:
- Aud i m usic interface ........ .
@ Starting the engine if the re is a
malfunction ... .. ... .. ..... .. .
@ E lectromechanical parking brake
@ Automa tic tr ansmission se lector
lever ... .. .. .. ... .. .. ..... .. .
@ Infotainment system unit
(D Tips
48
131
48
52
43
157
67
27 7
229
6 7
134 84
149
so
138
150
1S7
71
6 7,66
66
156
2 35
84
87
91
156
Some the equipment listed here is only instal
l ed in certa in models or is available as an op
tion.
9
Page 12 of 402

Cockpit overview
Instrument cluster
Instrument cluster overview
The instrument cluster is the central information center for the driver.
Fig. 3 Instrument cluster overv iew (analog)
F ig . 4 Instrument cluster overv iew (Audi v irtual cockpit)
(D Engine coolant temperature gauge
@ Tachometer ................. .
-with
OFF status ind icator .... .
- with
READY status indicator .. .
@ Tab area .... ... ... ....... ... .
@ Central area with
- Driver informat io n system .... .
- Indicator lights ...... ...... .
® Status line (displayed on one or two
lines)
@ Speedometer/convenience display
0 Fuel level
10
11
11
82
82,84
12
15
22
12
@ Speedometer
® Left additional display (divided in
two sections in the expanded view)
There may be additional indicator lights in the
tachometer @, the speedometer @, the status
line ® and, depending on the instrument clus
ter, above or below the central area@.
The following pages will primarily show illustra
tions of the ana log instrument cluster. The ap
pearance or the location of the items shown may
differ in the Audi virtual cockpit*. ...,
Page 13 of 402

& WARNING
Do not assume the roads are free of ice based
on the outside temperature display. Be aware
that there may be ice on roads even when the
outs ide temperature is around 41 °F ( +S °C)
and that ice can increase the risk of accidents .
@ Tips
-Depending on vehicle equipment, the in
strument illumination (needles and gauges)
may turn on when the lights are off and the
i gnition is sw itched on . The illumination for
the gauges reduces automat ically and even
tually turns off as brightness outside in
creases . This funct ion reminds the driver to
turn the low beams on at the app ropr iate
time .
- You can se lect the u nits used for tempe ra
tu re , speed and othe r measureme nts in the
Infotainment system¢
page 249.
-If your vehicle is stationary or if yo u are driv
i ng at very low speeds, the temperat ure dis
played may be s ligh tly higher than the ac
tua l tempe ra ture outside due to the heat ra
diating from the engine.
- At temperatures below 41 °F (+S °C), a
snowflake symbol appears in front of the
temperature display¢.&. .
Coolant temperature indicator
The coolant tempe rature display (D ¢ page 10,
fig . 3
or ¢ page 10, fig. 4 only funct ions when
the ignition is switched on . To prevent engine
damage, please observe the follow ing notes
about t he temperature ranges.
Cold r ange
If only the L EDs at the bottom of the gauge turn
on, the engine has not reached operating tem
perature yet . Avo id h igh engine speeds, full ac
celerat ion and heavy engine loads .
Normal range
~ The engine has reached its operating temper a-,.....
~ ture once the L EDs up to the center of the gauge
8 turn on . If the . indicator light in the instru-o :E: '
Coc kpit o ve rv iew
ment cluster d isp lay turns on, the coo lant tem
peratur e is too high
¢ page 26.
(D Note
-Aux iliary headlights and ot her a ccesso ries in
front o f the coo ling -air intake impa ir the
cooling effect of the coolant . This increases
the risk of the engine overheating dur ing
high outside temperat ures and heavy en
gine load.
- The front spoiler a lso helps to distribute
cooling air correctly while driving. If the
spoiler is damaged, the cooling effect will
be impaired and the r isk of the eng ine over
heating will increase . See an authorized
Audi dealer or author ized Audi Service Fa
cility for assistance .
@ Tips
Diesel engines: due to the h igh efficiency of
these engines, the engine may not a lways
r each operat ing temperatu re in cold outside
temperat ures . This is norm al and no t a cause
f or concern.
Tachometer
The ta chometer displays the engine speed in rev
olutions per minute (RPM).
T he beg inning of t he red zone in the tachometer
indica tes the maxim um permissible engi ne speed
f o r all gea rs once the engi ne h as bee n broken in.
Be fore reach ing t his zone, you shou ld shift into
the next h ighest gear, select the D/S se lector lev
er posit io n, or remove yo ur foot from the acc eler
ator pedal.
(D Note
The need le in the tachometer @¢ page 10,
fig . 3
or ¢ page 10, fig . 4 may on ly be in t he
r ed area of the gauge for a sho rt time or there
i s a risk of engine damage . The location where
the red zone begins varies depending on the
engine.
IJII,,
11
Page 14 of 402

Cockpit overv iew
@ For the sake of the environment
Upshifting early helps you to save fuel and re
duces operating noise.
@ Tips
Depending on the engine : the engine speed
may be limited when the engine is cold -the
full engine output will not be ava ilable . When
the engine is at operating temperature, the
red area in the tachometer moves to a h igher
RPM range .
Fuel level
The display (j) ~ page 10, fig. 3 or ~ page 10,
fig. 4 only functions when the ign ition is swi tch
ed on . When the display has reached the reserve
mark, a red LED turns on and the~ indicator
light t urns on~
page 31. The red LED wi ll blink
when the fuel level is very low .
For the tank capacity in you r vehicle , refer to the
Technical Data
~ page 379.
Cl) Note
Never drive until the tank is completely emp
t y. The irregular supp ly of fuel that results
from that can cause engine misfires . Uncom
busted fuel will then enter the exhaust sys
tem . This can cause overheating and damage
to the cata lytic converter .
Odometer
Fig. 5 Ins trum ent clust er: odo meter and re set bu tton
12
Tr ip odometer and odom ete r
The trip odometer shows the distance driven
since it was last reset. It can be used to measure
short distances .
The trip odometer ca n be reset to zero by press
i ng the
Efil reset button.
The odometer shows the total distance that the
vehicle has been driven.
Malfunction indicat or
If there is a malfunc tion in the instrumen t clus
ter,
DEF will appear in the trip odometer display .
Have the malfunction corrected as soon as possi
ble .
Cl) Tips
The units of measurement can be set in the
Infotainment system
~ page 249.
Multifunction steering
wheel
Operating
Fig . 6 D rive r in fo rma tion sy stem display
Fig . 7 L eft sid e of m ultifun ction ste ering wh eel
Requirement: th e ignition must be switched on. ..,.
Page 15 of 402

u (0
The driver informa tion system contains mult iple
tabs ©
c:;, fig. 6 that display various information
@.
The fo llow ing tab s are ava ilable, depend ing o n
ve hicl e equ ipment:
First tab Veh icle (on-board computer)
<=>page 15
Se co nd Messages
tabal
Thir d tabb)
Night vis ion ass ist*
c:;, page 131
F o urth tab Radio <=>page 16
Media c:;, page 16
Fifth tab Telephone
* c:;, page 1 76
S ixth tab Navigation" c:;, page 205
Map*
•> Thi s tab is only visible when there is at least one indicato r
light or m essage displayed.
bl T hi s tab is only v isible if Night vision ass ist * h as been acti
vated.
@ l<11> I Button
-Switching tabs: press the !<1 t> I bu tton re pea ted
l y until t he des ired tab is shown (for example,
Radio).
Control buttons
Fi g. 8 Se lect ion menu and opt ions menu view
Left control button
;::j -Opening/closing the selection menu : press the r--.
~ respe ctive le ft control button on the s teer ing 0
~ wheel c:;, fig . 8. You can sele ct and co nfi rm a
Cockpit overview
@IV IEWI button
Swi tc h ing views or red ucing the disp lay
¢ page 14 .
@ ~Button
Ret urn to fu nctions a t higher levels
@ Ill and @ control buttons
Open/close the se lecti on men u or options menu
<=> page 13.
0 Left thumbwheel
-Selecting a function in a menu/list : tur n the
left thumbwheel to the des ired function (fo r
examp le, select ing a frequency).
- Confirming a selection : press the left thumb
wheel
(J) c:;, fig. 7.
- Zooming in/out on the map : when a map is
disp layed, turn the left thumbw heel up/down
to zoom in/out on the map .
fu nction in t he se lec tion m enu us ing t he left
t hum bwhee l (for examp le, select ing a freque n-
cy band). ..,.
13
Page 16 of 402

Cockpit overview
Right control button
- Opening/closing the options menu :
press the
respective right control button on the steering
whee l~
fig. 8 . You can change any context-de
pendent functions and settings using the left
thumbwheel (for example, additional station information).
(D Tips
The availability of a se lection menu or options
menu depends on the function that is select
ed.
Switching views
Applies to: vehicles with Audi virtual cockpit
F ig. 9 Expanded v iew
Applies to: vehicles with Audi virtual cockpit
Fig. 10 Classic view
Applies to: vehicles with Audi virtual cockpit
- Switching views : press the IVIEW ! button @)
~ page 12, fig. 7 to sw itch from the classic
view ~
fig. 10 to the expanded view~ fig. 9. To
return to the classic view, press the IVIEW I but
ton again .
Applies to: vehicles with analog instrument cluster
-Reducing the display : press the IVIEW I button
to switch from the classic to reduced d isplay .
To return to the class ic view, press the !VIEWI
button aga in.
14
Other function buttons
Fig. 11 Right side of the multifunction steering wheel
(D 0Button
- Accepting a call:
press the 0 button when
there is an incoming call.
-Ending a call: press the 0 button during an ac
tive phone call.
- Opening the call list: if no phone call is in prog
ress and there are no incoming calls, press the
0 button.
@ ~ Button
- Switching the voice recognition system on:
briefly press the E:9 button. Say the desired
command after the
Beep.
- Switching the voice recognition system off:
press and hold the [:9 button. Or: say the com
mand
Cancel.
For more information about the voice recognition
system, see
~ page 169, Voice recognition sys
tem
or Q page 249.
@ Right thumbwheel
You can adjust the volume of an audio source or a
system message (f or example, from the voice
recognition system) when the sound is playing.
-Increasing or decreasing the volume: turn the
r ig ht thumbwheel up or down.
-Muting/pausing : press the right thumbwheel.
Or: turn the right thumbwheel down.
-Unmuting or resuming : turn the right thumb
wheel up.
Or: press the right thumbwheel.
© !1441 / l t>t>I! Button
- Selecting the previous/next track or station :
press the l1<1 <1I or lt>t> II button . .,,.