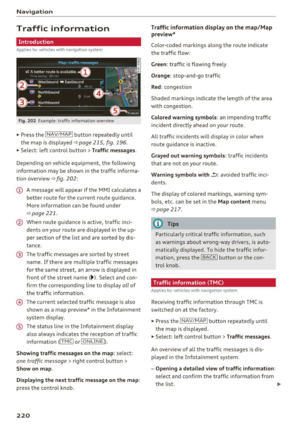
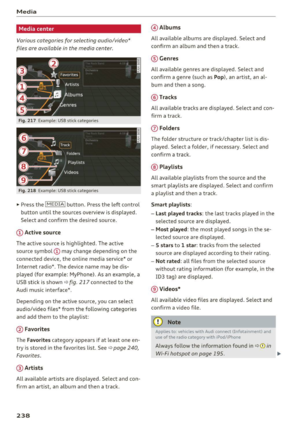
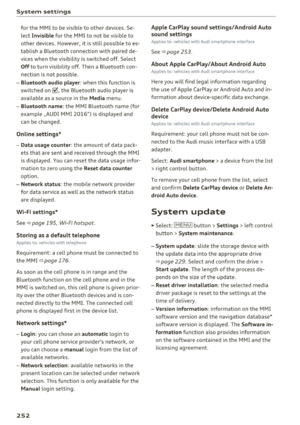
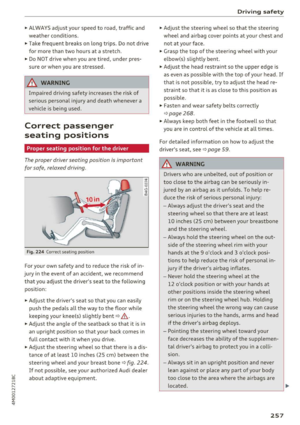
Page 57 of 402

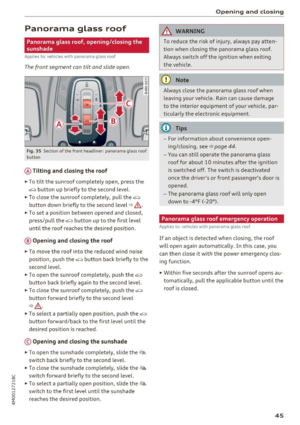
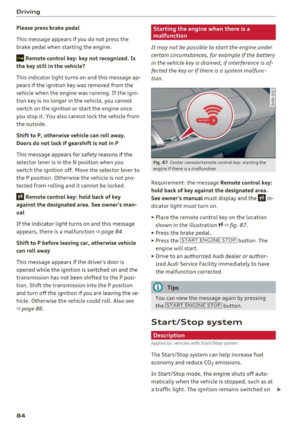
Windshield wipers
Switching the wipers on
•® !
• @ cb
Fig. 49 Windshield wiper lever
Fig. SO Rea r w indow wiper operat ion
• @
• @
•®
Move the windshield wiper lever to the corre·
spond ing pos ition:
@ · Windshield wipers off
en
-0 9 :i
cb
(D -Rain sensor mode. The winds hield wipers
switch on once the vehicle speed exceeds app rox
imately 2 mph (4 km/h) and it is raining. The
h igher the sensitivity of the rain sensor that is set
(switch ® to the right), the earlier the wind·
shie ld wipers react to moisture on the wind
shield . You ca n deactivate the rain sensor mode
in the Infota inment system, which switches the
intermittent mode on. To do th is, select :
!MENU !
button > Vehicle > lef t con trol b utton > Driver
a ssistan ce
> Rain sensor . In intermittent mode ,
you can adjust the interva l time using the switch
® ·
@ · Slow wip ing
@ -Fast wip ing
u
~ @ -Single wipe. If you hold the lever in th is posi-
~ tion longer, the wipers switch from slow wiping ~ g to fast w iping.
:E
Lights and V ision
® -Clean the w indshield . The wipers w ipe one
time after several seconds of d riv ing to remove
water droplets . Yo u can sw itch this funct ion off
by moving the lever to posit ion ® within 10 sec
onds of the afterwipe . The afterwipe function is
reactivated the next time you switch the ignit ion
o n .
Clean the headlights*. The headlight washer sys
tem* operates only when the low beam head lights are o n. If you move t he lever to posit io n
® · the headlights and the night v is io n assist
camera* are cleaned at inte rva ls .
® -Wipe t he rear window. The number of w ipes
depe nds on the windsh ield wiper movement .
The rear wiper automat ica lly switches on when
the reverse gear is selected and the front wind
shield wipers are on and running.
(J) -Clean the rear window . The number of wipes
depends on how long the lever is held in pos ition
(J) .
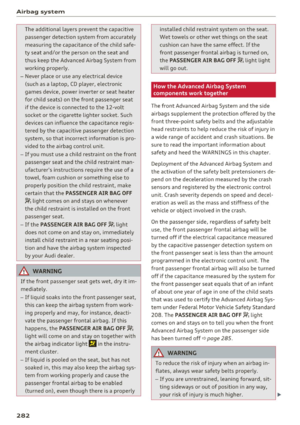
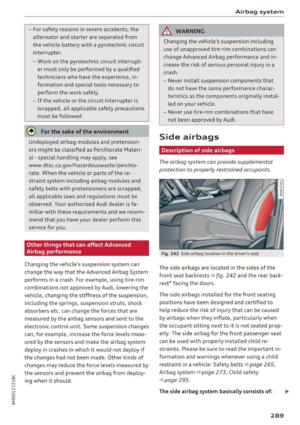
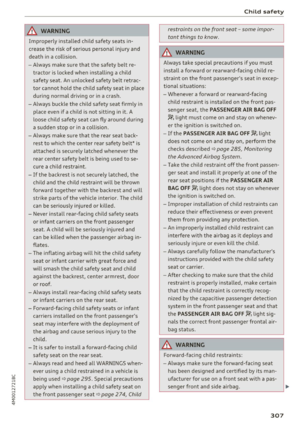
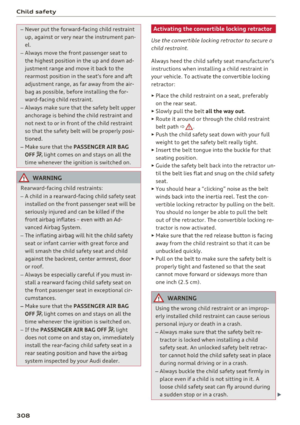
A WARNING
-The rain sensor is on ly intended to ass ist the
d river. The drive r may still be responsib le
for manually switching the wipers on based on visibili ty cond itions .
- The winds hield may not be t reated w ith wa
ter- repelling w indshield coating agents. Un
f a vorable co ndit io ns, su ch as wet ness, da rk
ness o r low su n, can resu lt in increased
g la re, which increases the risk of an acci
dent . Wiper blade chatter is also possib le.
- P roperly func tioning w indshield wiper
b lad es are requ ired for a clear view and safe
driving<:::>
page 56, Replacing wiper
blades .
(D Note
-If there is frost, m ake sure the win dsh ield
w iper bl ades are not froze n to the wind
shield. Switching on the w indshie ld w ipers
w hen the b lades are frozen to the wind
shield can damage the wiper blades.
- The windshie ld wiper system must be
switched off (lever in position 0) before us
ing a car wash. Th is prevents the w ipers
55
Page 58 of 402

Lights and Vi sion
from switching on unintentionally and ca us
ing damage to the windshield wiper system.
@ Tips
- The windshield wipers switch off when the
ignition is switched off. You can activate the
windshield wipers after the ignition is
switched back on by moving the windshield
wiper lever to any pos it ion.
- Worn or dirty windshield wiper blades result
in streaking. This can affect the rain sensor
funct ion. Check your windshield wiper
blades regularly.
- The washer fluid nozzles for the windshield
washer system are heated at low tempera
tures when the ignition is on .
- When stopp ing temporarily, such as at a
traffic light, the speed of the windshield
wipers automatically reduces by one level.
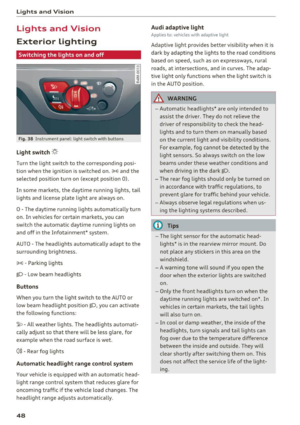
Cleaning the wiper blades
Clean the wiper blades when you see wiper
streaks. Use a soft cloth and a glass clea ne r.
Windshield wiper
"' Place the windshield wiper arms in the service
pos ition
¢ page 56 .
"'Fold the windshield wiper arms away from the
winds hield.
Rear window wiper
"' Fo ld the wiper arm away from the rear window.
A WARNING
Dirty windshield wiper blades can impair vi
sion, which increases the risk of an accident.
56
-
· Replacing wiper blades
Fig. 51 Removing windshie ld wiper blades
Windshield wiper service position/blade
replacement position
"'T o br ing the windshield w ipers into the serv ice
position, turn the ign ition off and move the
w indshie ld wiper lever into position@
¢page 55, fig. 49.
"'To bring the wip ers into the starting position ,
turn the ignition on and move the windshield
wiper lever into position @for at least two sec
onds
¢ page 55, fig. 49.
You can also turn the service position on or off in
the Infotainment system:
"' Switch the windshie ld wipers off (position @
¢page 55, fig . 49).
"' Select: the IM ENU I button > Vehicle > left con
trol button
> Service & checks > Wiper change
position .
Removing the wiper blade
"'Fold the windshie ld wiper arm away from the
windshield.
"' Press the locking knob
(D ¢ fig. 51 on the w iper
blade. Hold the wiper blade firmly.
"' Remove the wiper blade in the direction of the
arrow.
Installing the wiper blade
"' Insert the new wiper blade into the mount on
the wiper arm @until it clicks into place.
"' Place the wiper arm back on the windsh ield.
"' Turn the service position off.
1111>
Page 59 of 402

A WARNING
For safety reasons, the windshield wiper
blades should be replaced once or tw ice each
year .
(D Note
-Only fold the windshield wipers away when
they are in the service position . Otherwise,
you r isk damaging the paint on the hood or
the windshie ld wiper motor.
- You should not move your vehicle or operate
the windshield w iper lever when the wiper
arms are fo lded away from the w indshield.
The windshield wipe rs would move back in
to their original position and could damage
the hood and w indshield.
- To reduce the risk of damage to the wiper
system, always loosen blades which are fro
zen to the windsh ield before operating the
wipe rs .
- To reduce the risk of damage to the wiper
blades, do not use gasoline, kerosene, paint
thinner, or other so lvents on or near the
wiper blades.
- To reduce the risk of damage to the wiper arms or other components, do not attempt
to move the wipers by hand.
@ Tips
- You can also use the service position, for ex
ample, if you want to protect the windsh ield
from icing by using a cover.
- You cannot activate the service position
when the hood is open.
Replacing rear wiper blade
Fig . 52 Rear w indow wiper : in stalling the wiper blade
Lights and V ision
Removing the wiper blade
.,. Fold the wiper arm away from the rear window.
.,. Remove the wiper blade from its holder.
Installing the wiper blade
.,. Press the w iper blade mount into the retainer .
.,. Fold the window w iper arm back onto the rear
w indow.
A WARNING
F or safety reasons, the windshield wiper
b lades should be rep laced once or twice each
year.
Digital compass
Switching the compass on and off
Applies to: vehicles with digita l compass
Fig. 53 Rearview mirror: digita l compass is sw itched on
0 N 0
l Cl)
.,. To turn the compass on or off, press the button
@ until the compass in the mirror appears or
disappears .
The digital compass only works when the ignition
is turned on. The directions are indicated with ab
breviations:
N (north), NE (northeast), E (east),
SE (southeast), S (south), SW (southwest), W
(west), NW (northwest) .
@ Tips
To prevent inaccurate compass readings, do
not bring any remote controls, electrical devi
ces or metallic objects near the mirror.
57
Page 60 of 402
Lights and Vision
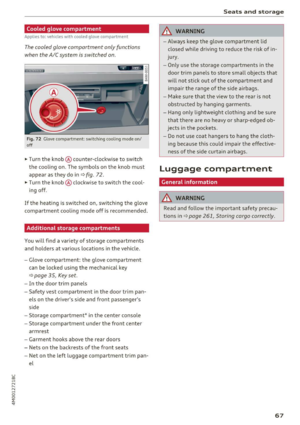
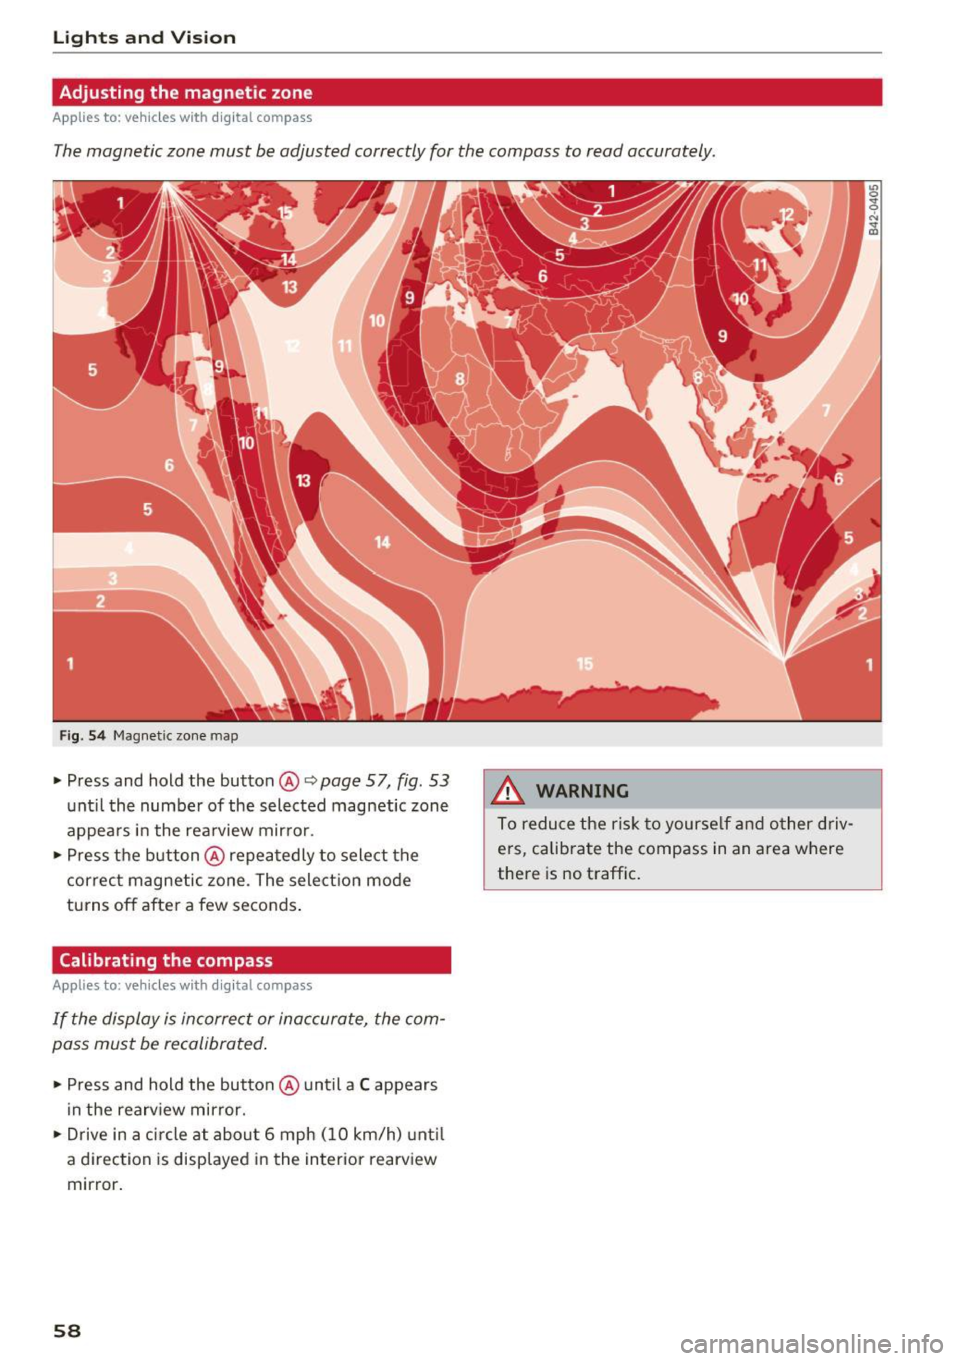
Adjusting the magnetic zone
Applies to: ve hicles w ith d ig ital compass
The magnetic zone must be adjusted correctly for the compass to read accurately.
Fig. 54 Magnetic zone map
• Press and hold the button@~ page 57, fig. 53
unt il the number of the selected magnetic zone
appears in the rea rview mir ror .
• Press the b utton @repeatedly to select the
correc t magnetic zone . The sele ct ion mode
turns off after a few seconds .
Calibrating the compass
App lies to: ve hicles with d ig ital compass
If the display is incorrect or inaccurate, the com
pass must be recalibrated .
• Press and hold the button @ until a C appears
in the rearv iew mirror.
• Drive in a circle at about 6 mph ( 10 km/h) unt il
a d irec tion is displayed i n the in terior rearv iew
mirror .
58
A WARNING
To reduce the ris k to yourse lf and o ther driv·
e rs, calibra te the compass in an area where
there is no traffic .
Page 61 of 402

u (0 ...... N r--. N ...... 0
0
:E
Seats and storage
General information
A WARNING
See¢ page 256, Driving safety for important
information, tips, suggestions and warnings
that you should read and follow for your own
safety and the safety of your passengers.
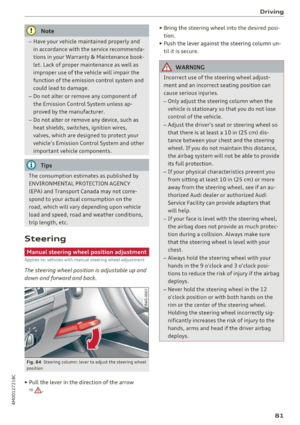
Front seats
Power seat adjustment
Fig. 55 Fro nt seat: adjus ting the seat (ver sion B)
@ -Moving the seat forward/back: press the but
ton forward/back.
@ -Moving the seat up/down : press the button
up/down. To adjust the front seat cushion, press
the front button up/down. To adjust the rear seat cushion, press the rear button up/down .
@ -Adjusting the backrest angle : press the but
ton forward/back.
© -Switching the massage fun ction* on/off
c::> fig. 55. Select the type of massage with the
multifunction button*
c::> page 59 .
CD-lumbar support or multifunction but ton*
c:> page 59 . To adjust the lumbar support , press
the button in the applicable location .
A WARNING
- The power front seats can also be adjusted
when the ignition is switched off. To reduce
the risk of injury, children should never be
left unattended in the vehicle for this rea
son.
Seats and storage
- To reduce the risk of an accident, only adjust
the driver's seat when the vehicle is station
ary.
- E xercise caution when adjusting the seat
height. Unsupervised or careless seat ad
justment can pinch fingers or hands, which
increases the risk of injury .
- The front seat backrests must not be re
clined too far back when driving, because
this impairs the effectiveness of the safety
belts and airbag system, which increases
the risk of injury.
Multifunction button
Applies to : vehicles wi th mult if un ction b utto n
You can adjust the massage function, lumbar
support, side bolsters and upper thigh support
using the multifunction button .
Fig. 56 Infotainment syste m : seat sett ings
Operating
"'If you turn the multifunction button CD
c::> page 59, fig. 55 to the left or to the right,
the possible seat settings @ are shown in the
Infotainment system
c::> fig . 56 .
.,. To select a seat setting, turn the multifunction
button
CD in the corresponding direction until
the desired seat setting is outlined in red.
.,. The arrows @ represent the possible adjust
ments. For example, to lower the lumbar sup
port, press the multifunction button
CD down.
T he corresponding arrow © lights up.
The following seat settings @ are possible:
Massage function* -select the Wave, Pulse,
Stretch, Lumbar or Shoulder massage type or
Off. You can adjust the intensity of each massage ..,.
59
Page 62 of 402

Sea ts and stor age
from 1 through 5 . You can switch the selected
massage on/off using the button @
¢fig . 56 .
Lumb ar support -you can adjust the lumbar sup
port up/down and to be s tronge r/weaker.
Side bol ster s* -you can increase/decrease the
latera l support in the seat using the s ide bo lsters
on the seat surface and the backrest.
Upp er thigh support* -you can increase/de
crease the upper th igh support .
(D Tips
-The massage function switches off auto
matically after approx imately 10 minutes .
- The air in the side bolsters* is released as
soon as the driver's door opens. This makes
is possible to enter and exit the vehicle
more comfortab ly. As soon as you sta rt d riv
i ng the veh icle, the s ide bo lsters fi ll.
Center armrest
There is a storage compartment under the arm
rest.
F ig . 57 Comfort center armrest between the driver's seat
and front passe nger's seat
• To adjust the angle, raise the armrest from the
start ing pos it ion notch by no tch.
• To bring the armrest back i nto the starti ng po
s ition, ra ise it out o f the top notch and fold it
back down.
The arm rest can be moved forward/back sepa
rately for the dr iver/front passenge r.
60
Rear seats
Adjusting the seats (second row seats)
The forward/back position" of the seat surface
and the angle of the backrest can be adjusted.
Fig. 58 Se con d row seats: adjusting th e ba ckrest angle
··-·-·--··-.. ____ .. _,,,___ ____
-... ···-----...... _ ..... _____ ..
Fig. 59 Seco nd row seats: adjusting t he forward/back posi
t io n
Adju sting the angle of the outer back rest
• Pull the lever upward and push the backrest
back to the desired position¢
fig. 58. Release
the lever.
• Pull the handle upward so that the backrest will
tilt forward. Re lease the lever and push the
backrest back to p ut the back res t in i ts basic
posi tion .
Adju sting the angle of the center backrest
• Pull the release strap and p ush the backrest
back to the des ired position
¢page 68,
fig. 75.
Re lease the st rap.
Adju sting forward and backward*
• Pull the handle up and slide the seat forward or
back
c> fig . 59.
• Release the handle and cont inue sliding the
seat unt il it locks in place .
Page 63 of 402

u (0 ...... N r--. N ...... 0
0
:E
_& WARNING
-To reduce the risk of an accident, the seat
can only be adjusted when the vehicle is sta
tionary .
- Be careful when adjusting the seat. Adjust
ing the seat without paying attention can
pinch fingers or limbs, which increases the
risk of injury.
-A lways pull forward on the backrest to make
sure it is check if it is correctly locked in
place.
Entry /exit assistance (second row seats )
Applies to: vehicles with entry assistance
Entry/exit assistance creates easier access to the
third-row seating*.
•
Fig. 60 Second-row seat ing: folding th e seat down
Fig. 61 Second-row seating : fo lding the seat upright
To be able to enter and exit, you must fold the
backrest on the second row seat down, and then
fold the seat upward.
Folding the second row seat backrest down
.,. Pull the lever upward o:::> page 60, fig. 58. Or
.,. From the third row seat*, pull the release strap
on the seat in front -arrow-
o:::> fig. 60.
.,. The backrest folds down by itself.
Seats and storage
Folding the second row seat upward
.,. Pull the seat up by the lever(!) until it is folded
upward
o:::> fig. 61.
If the second row seats are not folded down and
locked into the floor when you begin to drive,
then the
II ind icator light turns on in the instru
ment cluster display as well as the message
Sec
ond seat row not locked. Risk of injury for rear
passengers.
A warning tone will also sound.
A WARNING
-- When the second row seats are folded
down, they must not be used as a footrest
or have objects placed on them as this in
creases the risk of an accident.
- To reduce the risk of an accident, never al
low people to ride in the third row* if the
second row seats are folded upward.
- To reduce the risk of an accident, never drive with objects on the folded third row* backrests if the second row seats are folded up
right.
- Be mindful of persons in the third row*
when folding down the second row seats.
Not paying attention when folding down
seats can cause pinching injuries.
- Always pull forward on the backrest to make
sure it is check if it is correctly locked in
place.
- If you are unlocking the second row seat
backrest from the third row seat*
o:::> fig. 60,
be careful of any passengers in the second
row seats or within the backrest's range of
motion. Not paying attention when folding
down seats can cause injuries .
(D Note
Move the rear head restraints down before
folding the rear backrests forward
¢ page 63. This is especially true if the Rear
Seat Entertainment (RSE)* is installed, be
cause it could be damaged.
61
Page 64 of 402

Sea ts and stor age
Folding the backrest down/up (third row
seats)
Applies to veh icles with third row seats
Fig. 62 T hir d row seats: fold ing the headrest
F ig . 63 Thir d row seats: fold ing the backrest
Folding the backre st down /up
The buttons are located in the rear area @and in
the luggage compartment @¢
fig. 63.
.,. Press the button CD or @ until the backrest is
completely folded down or up.
You can fo ld the backrests up or down at the
same time using the button
CD and @.
I f the backrests are not in their locked position,
thr
9 indicator light and the message P lea se
mo ve third seat r ow to it s end po sition . S ee
owner 's manual
appear in the instrument cluster
disp lay. A warning tone will a lso sound.
Unfold ing th e head re st ra int s
The head restraint is automatically folded in
when the backrest is folded down . You must
manually unfo ld the head restraint after unfold
ing the backrest .
.,. Unfold the head restraint by tilting it upward
until you feel it click into p lace.
62
Meaning of the LED in the button
- If the LED blink s, the backrest is still not in its
end position.
- If the LED turn s on, the backrest is in its end
posi tion.
_& WARNING
- Be carefu l when fo lding and unfolding the
backrests. Not paying attention and not
checking when fo ld ing/unfolding the backr
ests can lead to pinch ing injuries.
- Always pull forward on the backrest to make
sure it is check if it is correctly locked in
place.
- Do not drive if the indicator light in the but
ton is blinking
¢ fig. 63. Th is situation in
creases the risk of an accident, since the
backrest is not locked in place and it is not
in its e nd position .
- To reduce the r isk of an accident, never drive
w ith persons in the third row-seat if the
seats a re not folded comp letely upright .
(D Note
-To reduce the risk of damage, make sure the
second-row seat backrest is upr ight before
folding the th ird-row seat backrest up or
down .
- Do not place any objects on the third row
seat backrest if it is not completely folded
down.
(I} Tips
- Very low temperatures can cause malfunc
t ions when folding and unfolding the backr
ests . If this is the case, moving the vehicle
to a warmer a rea (such as a garage) will
help.
- T he backrest cannot be fo lded down or up if
the vehicle door on the side to be adjusted is closed .