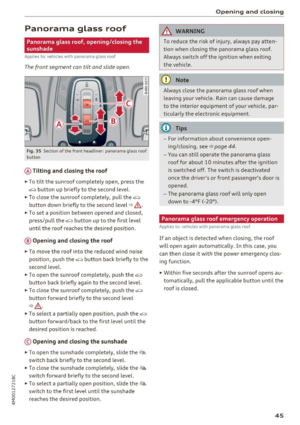
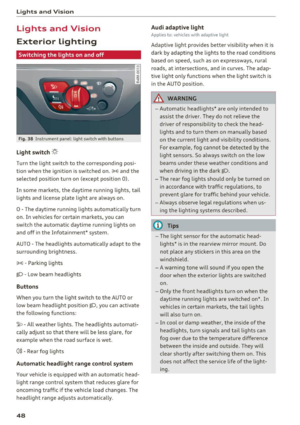
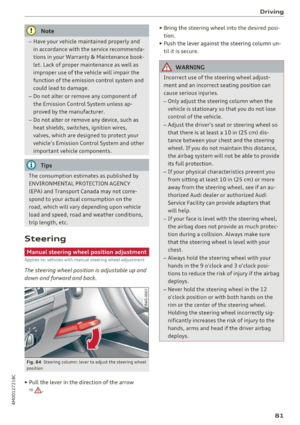
Page 65 of 402

u (0 ...... N r--. N ...... 0
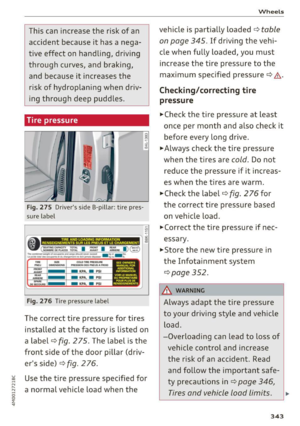
0
:E
Head restraints
Front head restraints
Applies to: vehicles with adjustable head restra ints
Fig. 6 4 Front seat: adjusting the head restraint
Adjust the head restraints so the upper edge is as
even as possible with the top of your head. If that
i s not possible, try to adjust as close to this pos i·
tion as possible.
Adjusting the head rest raints
.,. To move the head restraint upward/forward,
hold it at the sides with both hands and slide it
upward/forward until you feel it click into
place.
.,. To move the head restrai nt downward/back·
ward, p ress t he side button and sli de the head
res trai nt downward/bac kward. Re lease the bu t
ton and slide the head restra in t farther until it
clicks into place.
A WARNING
Always read and follow the applicab le warn
ings ¢
page 2 59, Proper adjustment of head
restraints.
Rear head restraints
I
F ig. 65 Seco nd row seats: adjusting the head restra int
-
"' "' N
Seats and storag e
Fig. 66 Rear seat: remov ing the head rest raint
If passengers will be sitting in the rear seats,
move the head restraints in the second row all
the way up or fold up t he head restra ints on the
occupied third row seats¢_&.
Moving the head restraint s
.,. To move the head restraint upward, hold it at
the sides with both hands and slide it upward
until it clicks into place ¢
fig. 65.
.,. To move the head restrain t down, p ress the
button -arrow· ¢
fig. 65 and slide the head re·
straint downward.
Folding the head restraints for the third row
seats * down and up
.,. Fold the head restraint down by pulling on the
t ab ¢
page 62, fig. 62.
.,. Unfold t he head res tra int by t ilting it upwa rd
until you fee l it click into pla ce.
Removing the head restraints
.,. Move the head restraint upward as far as it can
go.
.,. Press the re lease point¢
fig. 66 using the me
chan ica l key
<=>page 35, Key set and p ress the
but ton -arrow-
¢fig. 65. Pull the head restr aint
out of the bac kres t at the same time¢_& .
Installing the head restraints
.,. Slide t he posts on the head restra in t down into
t he guides un til the posts clic k in to p lace .
.,. Press the bu tton -arrow-
r=> fig. 65 a nd slide the
he ad res traint all the way dow n. You s ho ul d no t
be able to remove the head restrai nt from the
backrest without pressing the button . .,.
63
Page 66 of 402

Sea ts and stor age
_& WARNING
- Always read and follow the applicable warn
ings
q pag e 259, Proper adjustm ent of
head restraints .
-Only remove the head restraints for the sec
ond row seats when it is necessary for in
sta lling a child safety seat~
page 295,
Child safety.
Install the head rest rai nt again
immediately once the child s afety seat is re
moved. Driv ing with the head res traints re
moved or not in the upright position in
creases the risk of serious injury .
Memory function
Description
Applies to: veh icles with memory function
Using the memory funct ion , you can qu ickly and
easi ly store a pe rsonal seat profile for the driver
and fron t passenger and recall the settings. The
memory function is controlled by t he remo te
control key and the memory buttons in the driv
er's/front passenger's* door .
The drive r's seat profile is stored aga in and as
signed to the remo te control key each time the
ve hicl e is locked. When you open the door, the
seat profi le is automatica lly recalled.
If two peo
p le use the ve hicle, it is recommended that each
person a lways uses their "own" remote contro l
key.
Two seat profiles can be stored each using the memory buttons . Once they are stored, these
seat profiles can be selected at any time.
The fo llowing settings are stored:
Remote Memory button
control
key
Driver Dri ver Front pas-
senger
Seat X X X
Steering
X X wheel*
Both exte rior
X X mirrors
*
64
Remote control key
Applies to: vehicles with memory function
The driver 's seat profile can be assigned to the
remote control key when the vehicle is locked .
.. Select in the Infotainment system: IMENUj but
ton
> Ve hicle > left control button > Vehicle
se tting s > Se ats > Driver 's seat> S tore se t
t ing s on remo te control k ey.
@ Tips
If you do not wish to have the seat profile for
another driver ass igned to the remote control
key, switch the memory f unction off in the In
fotainment system.
Memory buttons
Applies to: vehicles with memory funct ion
Fig . 67 D rive r's doo r: memory function b utto ns
The memory buttons are located in the driver's/
front passenger's * door .
Storing a sea t p rofile
.. Press the ISETI button . The LED in the button
turns on.
"' Press memory button
[I] or ~-
A signal tone will sound when it is s uccessfully
stored.
Acc essing a s eat profil e
"' If the driver's/front passenger's door is open
and the ignition is switched off, press the mem
ory button .
.. If the driver's/front passenger's door is closed
or the ignition is sw itched on, press and hold
the memory button until the seat profile is comp letely set. .,..
Page 67 of 402

u (0 .-I N r--. N .-I 0
0
:E
A WARNING
-For safety reasons, th e seat setting can only
be recalled when the veh icle is stationary to
red uce the risk of a n accident.
- I n an emergency, seat adjustment operation
can be stopped by press ing the
ISETI button
o r the buttons @or@
¢ pag e 59, fig. 55.
Adjusting the front passenger's seat in the
Infotainment system
Applies to: vehicles with memory function
The driver can move the front passeng er's seat
into various positions.
Adjusting the front passenger's seat from
the driver's seat
~ Se lect in the Info tainment sys tem: !MENU I but
ton
> Vehicle > left contro l butto n > Vehicle
s ettings > Seats
> Front pa ssenger' s seat > Ad
ju st seat position .
~ You can now adjust the front passenger's seat
u sing the d river 's seat buttons
¢ page 64,
fig .
67 .
Align with driver's seat
~ Select in the Info tainment sys tem: !MENUI bu t
ton
> Vehicle > left co ntro l bu tto n > Vehicle
settings
> Seats > Front pas senger' s seat >
Align with driver 's seat > Set now .
~ Press and hold the control knob until the ad
j ust ing process is complete.
@ Tips
The lumbar support an d upper t high s upport
sett ings are not transferred when a ligning
th e front passenger's seat with the driver's
seat.
Seats and storag e
Ashtray
Applies to: vehicles with ashtray
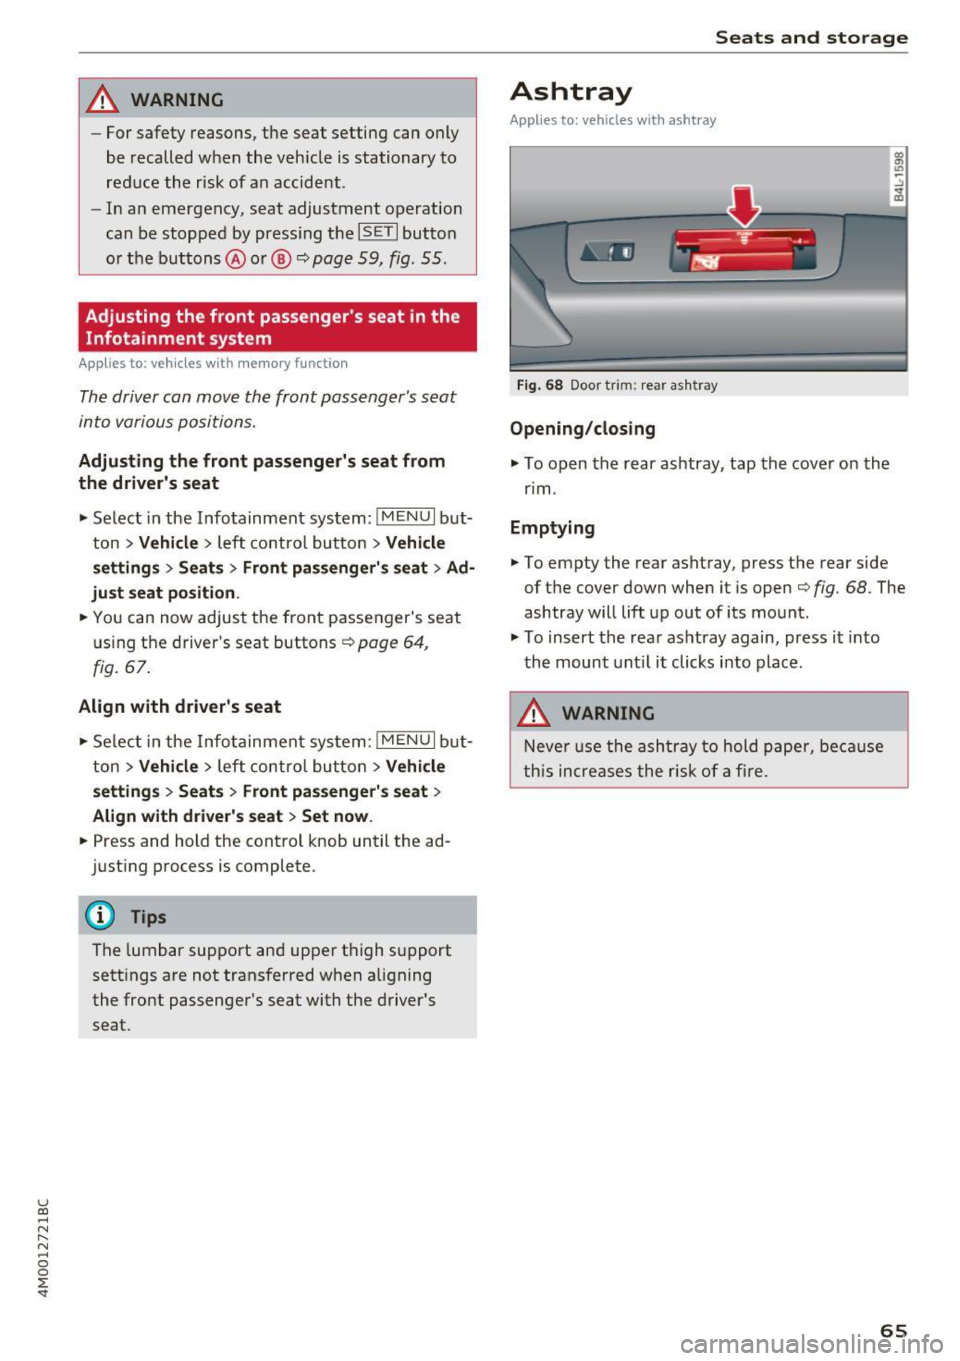
619
---
Fig. 68 Door trim: rear as htray
Opening /closing
~ To open the rear ashtray, tap the cover on the
r im .
Emptying
~ To empty the rear ashtray, press the rear side
of th e cover down when it is open
¢ fig. 68. The
ashtray will lift up out of its mo unt.
~ To insert the rear as htray again, press i t into
the mount unt il it clicks into place.
A WARNING
Neve r us e the a sh tra y to hold paper, be cause
t his increases the r isk of a fire.
65
Page 68 of 402

Sea ts and stor age
Sockets
Fig . 69 R ear center conso le: 12 vol t socket
Fig . 70 Lugg age c ompartmen t side trim p anel: 12 volt
socket
The 12-volt sockets can be used for electrical ac
cessories . The power usage must not exceed
120 watts .
There is an additional 12 Volt socket* in the cen
ter conso le storage compartment .
A WARNING
The sockets and the electrical accessories con
nected to them only function when the igni
tion is switched on . Incorrect usage can lead
to ser ious injuries o r bu rns . To reduce the risk
of injuries, never leave chi ldren unattended in
the vehicle with the vehicle key.
CD Note
- To reduce t he risk of damage to the vehicle
electrica l system, never attempt to charge
the veh icle battery by connecting accesso
r ies t hat provide power, such as solar pane ls
or battery chargers, to the 12 Volt sockets
or the cigarette lighter.
- To reduce the risk of damage to the sockets,
on ly use plugs that fit correct ly.
66
Storage
Cup holders
Fig. 71 Rear center armres t: cup holde rs
Your veh icle has cup holders in the front cen ter
console, in the door po ckets, in the center arm
rest in the second row seat and o n the left and
right side in the third row seat* .
Cup holder in the cen ter armrest in th e
second row seat
.,. Fold the center armrest downward by pressing
the button in the second row middle seat .
.,. Press the button to open the c up holder
~ fig.
71 .
... Set your beverage in the holder.
... To close the cup holder, fold th e cover back un
til it clicks into plac e.
A WARNING -
- Do not put any hot beverages in the cup
holder while the vehicle is moving. Hot bev
erages could spill, which increases the risk
of injury .
- Do not use any breakab le beverage contain
ers (for example , made out of glass or por
celain). You could be injured by them in the
event of an accident.
CD Note
Beverage containers in the cup holders should
a lways have a lid. If not, beverages could spill
and cause damage to veh icle equipment, such
e lectron ics or seat covers .
Page 69 of 402

u (0 ...... N r--. N ...... 0
0
:E
Cooled glove compartment
Appl ies to: ve hicles with cooled glove compartme nt
The cooled glove compartment only functions
when the AIC system is switched on.
-.- !i:CI:!·
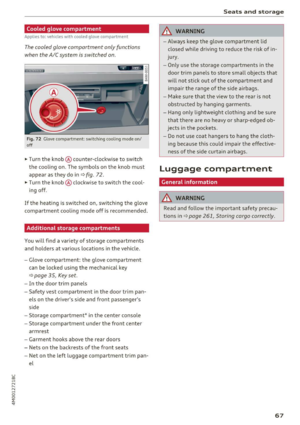
Fig. 72 G love compartment: switching cooling mode on/
off
~ Turn the knob @ counter-clockw ise to switch
the cooling on. The symbols on the knob must
appear as they do in
~ fig . 72 .
~ Turn the knob@ clockwise to switch the cool
ing off .
If the heating is switched on, switching the glove
compartment cooling mode off is recommended.
Additional storage compartments
You will find a variety of storage compartments
and holders at various locations in the vehicle.
- Glove compartment : the glove compartment
can be locked using the mechanical key
<=> page 35, Key set.
-In the door trim panels
- Safety vest compartment in the door trim pan-
els on the driver's side and front passenger's
side
- Storage compartment* in the center console
- Storage compartment under the front center
armrest
- Garment hooks above the rear doors
- Nets on the backrests of the front seats
- Net on the left luggage compartment trim pan-
el
Seats and storage
A WARNING
--Always keep the glove compartment lid
closed while dr iving to reduce the risk of in
jury .
- Only use the storage compartments in the
door trim panels to store small objects that
will not stick out of the compartment and
impair the range of the side airbags.
- Make sure that the view to the rear is not
obstructed by hanging garments.
- Hang only lightweight clothing and be sure
that there are no heavy or sharp-edged ob
jects in the pockets.
- Do not use coat hangers to hang the cloth
ing because this could impair the effective
ness of the side curtain airbags .
Luggage compartment
General information
A WARNING
Read and follow the important safety precau
tions in
r::!> page 261, Storing cargo correctly.
67
Page 70 of 402

Seats and storage
Luggage compartment cover
Fig. 73 Luggage compartment: cove r attached
Fig . 74 Luggage compar tment: removing and installing
the l uggage compartment cover
Attaching
., Pull the cover out and attach it in the mounting
eyelets in the side trim panel~
fig. 73.
Removing
., Pull the lever in the direction of the arrow
~fig. 74 and remove the cove r upward .
Installing
., Place the left and right s ides of the cover into
the mounts on the side trim panel.
., Push the cover downward until it clicks into
place.
A WARNING
The luggage compartment cover is not a sur
face for stor ing objects. Objects placed on the
cover could endanger all vehicle occupants
during sudden braking maneuvers or in a
crash .
68
(D Note
-Let the luggage compartment cover ro ll up
slowly to reduce the risk of damage.
- Also read and fo llow the applicab le warn
ings
~ (j) in Folding the backrest down/up
(third row seats) on page 62.
Increasing the size of the luggage
compartment
The backrests can be folded down individually*
or together.
Fig. 75 Second row seats: re lease strap on the center back ·
re st
Fig. 76 Luggage compartment : fol ding down the second
row seats
Folding the backrest down
., Pull the lever upward ~ page 60, fig. 58. The
backrest will swing forward. Or
., Pull the release strap at the rear side of the
seat ~
fig. 76.
., Let the backrest latch into the lowest position.
Folding the backrest upright
., Pull the lever up~ page 60, fig. 58 and fold the
backrest upright until it locks into place
~ _&. Ill>
Page 71 of 402

u (0 ...... N r--. N ...... 0
0
:E
Folding th e center back re st down*
• To rele ase the back rest, pull the release strap
at the front or rear side of the seat ¢
fig. 75 or
r::!>fig. 76.
• Fold the backrest forward .
Folding the center backrest upright *
• Fold the backrest upwa rd un til it locks i nto
pla ce ¢
A .
The center backrest may be folded down sepa
r ately* . This allows you to transport long obje cts
(such as skis) inside the vehicle.
_& WARNING
- T he backrest must be latched secure ly to
ensure that the safety belt is protecting the
center seating posit ion .
-
-The backrest must be securely latched so
objects cannot slide forward out of the lug
gage compartment dur ing sudden braking .
- To red uce the risk of injury in vehicles with
third row seats*, the center backrest must
be in the upright pos ition and locked into
place if there are passengers rid ing in the
third row*.
(D Note
Make sure the oute r safety belts are not
pinched or damaged when folding the seat
up.
- Read and follow the warnings¢.&.
in Entry/
exit assistance (second row seats) on
page 61
and ¢(Din Folding the backrest
down/up (third row seats) on page
62 .
-Move the rear head restraints down before
fo ld ing the rear backrests forward
¢ page 63. This is especia lly true if the Rear
Seat Entertainment (RSE)* is insta lled, be
cause it could be damaged .
Seats and storage
Luggage compartment net
Applies to: vehicles with luggage compartment net
The cargo net prevents small objects from slid
ing .
Fig. 77 Lu ggag e compar tment: ca rgo net stretched o ut
"" Attach the hooks for the l uggage comp artment
net in the tie-downs ¢
fig. 77.
Cargo floor
Fig. 7 8 Luggage co mpartme nt: inst all ing the ca rgo floor
Removing and installing the cargo floor
a, M
0
~ .. ID
"" To remove the cargo floor, pull the entire cargo
floor toward the back of the vehicle .
• To ins tall the cargo floor, insert the tabs at
both s ides into the openings and s lide the car
go floor a ll the way in toward the backrest
¢ fig. 78.
69
Page 72 of 402

Sea ts and stor age
Roof rack
i
ii
.. j
Fig. 79 Roof: mounting points for the roof rack
• To open the flap above the attachment poi nts,
press the flap downward in the front a rea.
If luggage or cargo is to be carried on the roof,
you must observe the following:
- Only a specially designed roof rack may be used
on your vehicle . These roof racks are the basis
for a complete roof rack system. Additional at
tachments/carrier systems are necessary to
transport l uggage and sports equipment. We
recommend roof racks and attachmen ts from
t he Audi Gen uine Accessories prog ram .
- When install ing the roof rack, ma ke sure that it
is mounted only at the designated points on
the roof
q fig . 79.
- T he maxim um permissible roof load for your
vehicle is 220 lbs (100 kg). The roof load is the
total of the weight of the roof rack, the attach
ments and the cargo you are carrying. However,
please note the permissible load of the carrier
system being used, the permissib le axle loads
and the permissible total vehicle weight
qpage378 .
A WARNING
-Follow the installation instructions provided
with the roof rack system.
If you do not se
cu re the roof rack sys tem and objects on the
roof correc tly, they cou ld come loose from
the vehicle and cause an acc ident .
- T he risk of an accident increases when using
a roof rack system, because it changes the
dr iving character istics by sh ifting the center
of gravity and/or the increasing the surface
70
area exposed to wind. Adapt your driving
and speed to the current conditions .
(D Note
Make sure that the luggage compartment lid
and the panorama g lass roof* do not come in
to contact with objects on the roof when they
are open.
@ For the sa ke of the environment
Your vehicle will use more fue l due to the in
creased wind resistance . So remove the roof
rack after us ing it.
{!) Tips
When installing roof rack systems on the roof
rail, the ESC uses sensors to adapt itself to a
different center of gravity.