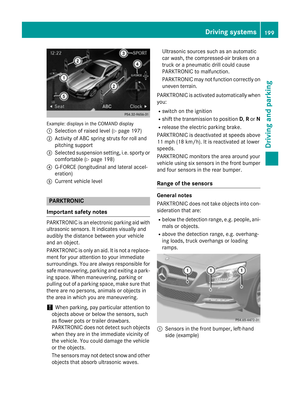
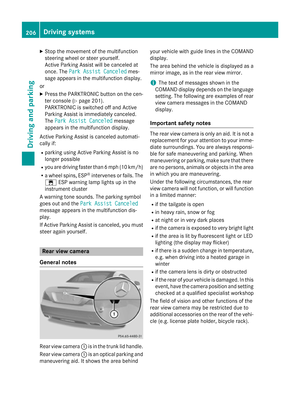
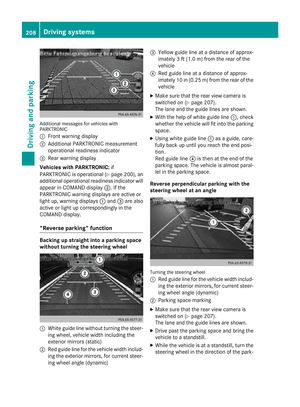
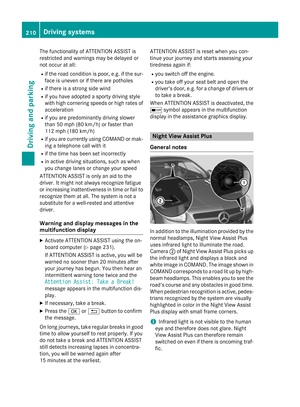
Page 369 of 614

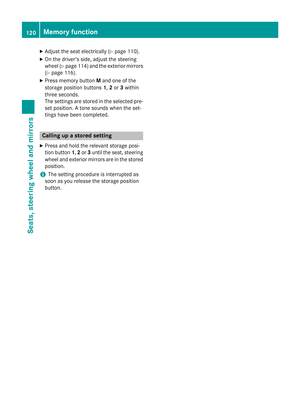
If you selectNo, the process will be can-
celed.
Map operation and map settings
General notes
Company logos displayed on the map are
trademarks of the respective companies and
used solely for the purpose of indicating the
locations of these companies. The use of such logos on the map does not indicate approval
of, support of or advertising by these compa-
nies for the navigation system itself.
Setting the map scale
:Set map scale as a number with unit
;Currently set map scale as indicated by
the needle on the scale bar
=New map scale
?Scale bar
Unit of measurement :in the COMAND dis-
play depends on the selection made in the
instrument cluster; see the separate vehicle
Operator's Manual.
XTo hide the menu: slideZVthe COMAND
controller and, when the Full Screen
menu item is shown, press W.
XTo call up the scale bar:as soon as you
turn cVd the COMAND controller, scale
bar =appears.
XTurn cVd until the desired scale is set.
Moving the map
Showing the crosshair
Map with crosshair
:
Current vehicle position
;Crosshair
=Details of the crosshair position
?Map scale selected
XTo hide the menu: slideZVthe COMAND
controller and, when the Full Screen
menu item is shown, press W.
XTo scroll the weather map: slideXVY,
ZVÆ oraVb the COMAND controller.
A crosshair appears on the map. If you slide
it again, the map under the crosshair moves
in the corresponding direction.
Display =may be the name of a street, for
example, provided the digital map contains
the necessary data. It shows the geo-coordi-
nate position of the crosshair if the Geo-
coordinatesdisplay is switched on
(
Ypage 370).
Hiding the crosshair and centering the
map on the vehicle position or destination
XPress the %back button twice.
The crosshair disappears and the map is
set to the vehicle position.
Centering the map on the vehicle's posi-
tion
XTo show the menu: pressWthe COMAND
controller.
XSelect Positionin the navigation system
menu bar by sliding VÆand turning cVd
Navigation367
COMAND
Z
Page 370 of 614

the COMAND controller and pressWto
confirm.
XSelect Vehicle Position Mapand press
W to confirm or, if the crosshair is shown,
press the %back button.
This hides the crosshair.
Centering the map on the destination
position
This function requires a calculated route to a
destination. If the route includes way points
and an intermediate stop, the map can also be
set to these positions.
XTo show the menu: pressWthe COMAND
controller.
XSelect Positionin the navigation system
menu bar by sliding VÆand turning cVd
the COMAND controller and press Wto
confirm.
XSelect Destination Position Mapand
press Wto confirm.
The crosshair position is set to the relevant
destination.
Map settings
Calling up the map settings menu
XTo show the menu: pressWthe COMAND
controller.
XSelect Naviin the main function bar by
sliding ZVand turning cVdthe COMAND
controller and press Wto confirm.
XSelect MapSettingsand press Wto con-
firm.
The map settings menu appears. Map orientation
Example: map orientation
:
Current map orientation (
0or¤)
Possible map orientations:
R0 North orientation (The map view is dis-
played so that north is always up)
R¤ Heading orientation (the map view is
aligned to the direction of travel. The direc-
tion of travel is always at the top, the
orange-color tip of the symbol points
north.)
R¤ Bird's-eye view (the map view is aligned
to the direction of travel. The map projec-
tion reproduces the curvature of the earth's surface, the orange-color tip of the symbol
points north.)
R¤ 3D map (the map view is aligned to the
direction of travel. At a scale of 1 km the
map displays elevation, the orange-color
tip of the symbol points north.)
Map orientation menu
Setting the map orientation
XTo show the menu: pressWthe COMAND
controller.
XSelect Naviin the main function bar by
sliding ZVand turning cVdthe COMAND
controller and press Wto confirm.
368Navigation
COMAND
Page 371 of 614

XSelectMapSettingsand press Wto con-
firm.
The map settings menu appears.
XSelect Map Orientationand press Wto
confirm.
XSelect North Up,Heading Up, Bird's-
eye Viewor 3-D Mapby turning cVdthe
COMAND controller and press Wto con-
firm.
A # dot indicates the new setting.
Selecting POI symbols
Setting the POI symbol display
You can set the points of interest you wish to
have displayed as symbols on the map. Points
of interest are, for example, gas stations,
hotels, cinemas and restaurants.
XTo show the menu: pressWthe COMAND
controller.
XSelect Naviin the main function bar by
sliding ZVand turning cVdthe COMAND
controller and press Wto confirm.
XSelect MapSettingsand press Wto con-
firm.
The map settings menu appears.
XSelect POISymbolsOnMapand press W
to confirm.
The following settings are possible:
RDefault Symbols
Symbol display determined by the factory
settings.
RPersonal Symbols
You can determine the symbols yourself.
RNo Symbols
The map does not show any symbols.
XSelect DefaultSymbols,PersonalSym‐
bolsor No Symbols.
If you select Personal Symbols
, the POI
list appears.
XTo switch the symbol display on/off:
select a POI by turning cVdthe COMAND
controller and press Wto confirm.
Depending on the previous state of the
symbols, they will either be shown Oor
hidden ª. You can switch on the symbol
displays for more than one point of interest.
XTo switch all personal symbols on/off:
select All
and press Wto confirm.
Depending on the previous status of the
symbols, they will either be shown Oor
hidden ª.
If the function is switched on O, the indi-
vidual POIs are grayed out and the previ-
ously selected settings remain unchanged.
If the function is switched off ª, you can
reselect the individual POIs. They show the
most recently selected settings.
iThe list shows all symbols that are con-
tained on the digital map across all coun-
tries. However, not all points of interest are
available in all countries. As a result, certain
point of interest symbols may not be dis-
played on the map, even if the symbol dis-
play is switched on.
XTo exit the menu: press thekback
button.
Navigation369
COMAND
Z
Page 372 of 614

Selecting map information
Map information in the display
During route guidance, you can have map
information shown at the bottom edge of the
display.
XTo show the menu:pressWthe COMAND
controller.
XSelect Naviin the main function bar by
sliding ZVand turning cVdthe COMAND
controller and press Wto confirm.
XSelect MapSettingsand press Wto con-
firm.
The map settings menu appears.
XSelect Text Information On Mapand
press Wto confirm.
A # dot indicates the current setting.
XSelect Current Street,Geo-coordi‐
natesor Noneand press Wto confirm.
XTo exit the menu: slideXVY the COMAND
controller.
Road display
:
Road names or numbers, e.g. for high-
ways
Geo-coordinate display
:
Current height above average sea level
(rounded to the nearest 10 m)
;Current vehicle position: latitude coordi-
nates
=Current vehicle position: longitude coor-
dinates
?Number of GPS satellites currently being
used
There must be sufficient GPS reception for all
displays to be shown. If this is not the case,
the display will be grayed out. Height dis-
play :may vary from the actual value,
because the navigation system uses the GPS
signals for the calculation.
During the "Move map" function, you will see
the geo-coordinates of the crosshair position.
Height display :and number of satellites
used ?are not displayed.
Display switched off
:
Current map orientation
While moving the map, you will see additional
data, depending on the crosshair position, if
the digital map supports this data. A street
name, for example, can be shown here
(
Ypage 367).
Coordinates on the map
XTo show the menu: pressWthe COMAND
controller.
XSelect Naviin the main function bar by
sliding ZVand turning cVdthe COMAND
controller and press Wto confirm.
XSelect MapSettingsand press Wto con-
firm.
The map settings menu appears.
XSelect Compass On Mapand press Wto
confirm.
A menu appears.
370Navigation
COMAND
Page 373 of 614

XSelectNever,When Off-Roador When
Route Guidance Inactiveand press W
to confirm.
The selected setting is accepted.
Switching additional information on/off
Switching the topographic map on/off
XTo show the menu: pressWthe COMAND
controller.
XSelect Naviin the main function bar by
sliding ZVand turning cVdthe COMAND
controller and press Wto confirm.
XSelect MapSettingsand press Wto con-
firm.
The map settings menu appears.
XSelect Topographic Mapand press Wto
confirm.
Depending on the previous status, switch
the option on Oor off ª.
The topographical map uses different colors
to depict elevation. The color key generally
reflects the topography's dominant vegeta-
tion or the ground's perceived color when
seen from the air, for example:
Rgreen (grass) for lowland
Ryellow, brown (woodland) for hills
Rgray (stone) and white (snow) for moun-
tains
Example: highway information
Switching highway information on/off When driving on the highway, you can see the
following information on the right of the dis-
play:
Rthe nearest gas stations
Rthe nearest rest areas, etc.
Rand their distance from the current vehicle
position
The entries show the number of the high-
way and the highway exits as well as their
distance from the current vehicle position.
The name of the highway exit continues to
be displayed.
XTo switch to navigation mode:
press the
Ø button.
XTo show the menu: pressWthe COMAND
controller.
XSelect Naviin the main function bar by
sliding ZVand turning cVdthe COMAND
controller and press Wto confirm.
XSelect MapSettingsand press Wto con-
firm.
The map settings menu appears.
XSelect Highway Informationand press
W to confirm.
Depending on the previous status, switch
the option on Oor off ª.
Example: city model
Switching city view on/off
When the city model is switched on, the map
shows buildings in 3D.
XTo show the menu: pressWthe COMAND
controller.
Navigation371
COMAND
Z
Page 374 of 614

XSelectNaviin the main function bar by
sliding ZVand turning cVdthe COMAND
controller and press Wto confirm.
XSelect MapSettingsand press Wto con-
firm.
The map settings menu appears.
XSelect City(3D)and press Wto confirm.
Depending on the previous status, switch
the option on Oor off ª.
iThe city model is only shown for "Bird's-
eye View" or "3D Map".
It is available in the 0.05 mi and 0.1 mi map
scales.
The data required for displaying buildings is
not available for all cities.
Example: intersecting roads on city routes/high-
ways
Showing/hiding intersecting streets
If route guidance is inactive, intersecting
streets can be shown on the upper edge of the
display.
XTo show the menu: pressWthe COMAND
controller.
XSelect Naviin the main function bar by
sliding ZVand turning cVdthe COMAND
controller and press Wto confirm.
XSelect MapSettingsand press Wto con-
firm.
The map settings menu appears.
XSelect Next Intersecting Streetand
press Wto confirm.
Depending on the previous status, switch
the option on Oor off ª.
Traffic information on the map
:Delimits the section of the route affected
;Indicates an incident on the route (traffic
flow)
If you subscribe to the SIRIUS XM Satellite
Radio Traffic Message Service, traffic infor-
mation can be displayed on the map. You can
select three categories for the display.
XTo switch the display on/off: pressW
the COMAND controller to show the menu.
XSelect Naviin the main function bar by
sliding ZVand turning cVdthe COMAND
controller and press Wto confirm.
XSelect TrafficInformationOnMapand
press Wto confirm.
XSelect Incidentsand/or Speed & Flow
and/orFree Flowand press Wto con-
firm.
Depending on the previous status, switch
the option on Oor off ª.
372Navigation
COMAND
Page 375 of 614

Traffic
informationDisplay on the map
IncidentsRoad sections with traffic
incidents are illustrated
with a yellow line and
arrows.
Speed &
FlowRoad sections with traffic
jams are represented by yel-
low or red lines.
Yellow lines: traffic jams,
average speed 25 - 45 mph
(40 - 72 km/h)
Red lines: traffic jams, aver-
age speed 5 - 20 mph
(8 - 32 km/h)
Free FlowFree flowing road sections
are illustrated with a green
line and arrows.
Additional settings
Avoiding an area
General information
COMAND enables you to avoid areas you do
not wish to drive through.
If you activate or deactivate a route block
while route guidance is active, COMAND will
calculate a new route. If you activate or deac-
tivate a route block while route guidance is
inactive, COMAND will use the new setting for
the next route guidance.
The calculated route may include an area to
be avoided if:
Ryour destination is located in such an area.
Rthe route uses roads that lead through an
area to be avoided.
iHighways within blocked areas are always
taken into consideration in the route cal-
culation. Defining an area for the first time
XTo switch to navigation mode:
press the
Ø button.
XTo show the menu: pressWthe COMAND
controller.
XSelect Naviin the main function bar by
sliding ZVand turning cVdthe COMAND
controller and press Wto confirm.
XSelect Avoid Areaand press Wto con-
firm.
If you have not previously blocked an area,
a menu appears.
XSelect Using Map,From Memoryor From
Personal POIsand press Wto confirm.
If you select Using Map
, the map with the
crosshair appears.
If you select From Memory
orFrom Per‐
sonal POIs, either the destination mem-
ory or the list of categories for POIs
appears.
RDestination memory (Ypage 330)
RList of categories for personal POIs
(
Ypage 344)
XSelect the desired destination or personal
POI and press Wto confirm.
XWhen the destination address is displayed,
select Continue
and press Wto confirm.
The map appears.
The crosshair marks the center of the area
that is to be avoided.
XTo scroll the weather map: slideXVY,
ZVÆ oraVb the COMAND controller.
Navigation373
COMAND
Z
Page 376 of 614

XTo set the map scale:as soon as you turn
cVd the COMAND controller, the scale bar
appears. Turning clockwise zooms out from
the map; turning counter-clockwise zooms
in.
XTurn cVd until the desired scale is set.
XTo apply a block: pressWthe COMAND
controller.
A red square appears on the map.
XTo adjust the size of the square: turn
cVd the COMAND controller.
The square is enlarged or reduced.
XTo confirm the settings: pressW.
The list appears. The previously selected
area to be avoided has been added and
activated.
You can also determine additional areas to be
avoided (
Ypage 374).
Defining further areas
XTo switch to navigation mode: press the
Ø button.
XTo show the menu: pressWthe COMAND
controller.
XSelect Naviin the main function bar by
sliding ZVand turning cVdthe COMAND
controller and press Wto confirm.
XSelect Avoid Areaand press Wto con-
firm.
If you have already selected one or more
areas to avoid, a list of areas appears.
Example: list of areas
iAvailable positions in the list are named
Empty
and are shown in grey.
XSelect Avoid New Areaby turning cVd
the COMAND controller and press Wto
confirm.
A menu appears.
XSelect Using Map,From Memoryor From
Personal POIsand press Wto confirm.
If you select Using Map
, the map with the
crosshair appears.
If you select From Memory
orFrom Per‐
sonal POIs, either the destination mem-
ory or the list of categories for POIs
appears.
RDestination memory (Ypage 330)
RList of categories for personal POIs
(
Ypage 344)
XSelect the desired destination or personal
POI and press Wto confirm.
XWhen the destination address is displayed,
select Continue
and press Wto confirm.
The map appears.
374Navigation
COMAND