Page 329 of 614

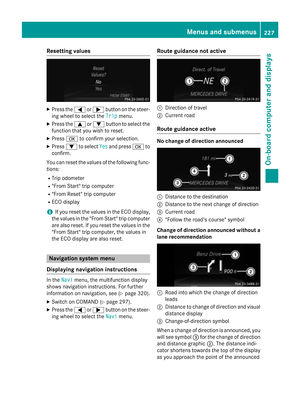
House number list as selection list
Option 2: house number list as selection list
XSelect an entry by turningcVdthe
COMAND controller.
XIrrespective of the option, press Wto con-
firm your selection.
The address entry menu appears again. The house number has now been entered.
Entering the ZIP code, center and inter-
section
Entering the ZIP code
XCall up the address entry menu
(
Ypage 324).
XSelect ZIPin the address entry menu by
turning cVdand sliding ZVÆthe
COMAND controller and press Wto con-
firm.
You will see the ZIP code list either with the
character bar (option 1) or as a selection
list (option 2).
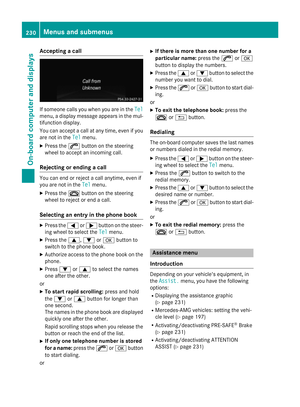
List of ZIP codes with character bar
Option 1: ZIP code list with character bar
XEnter a ZIP code. Character entry, using city input as an example (
Ypage 303).
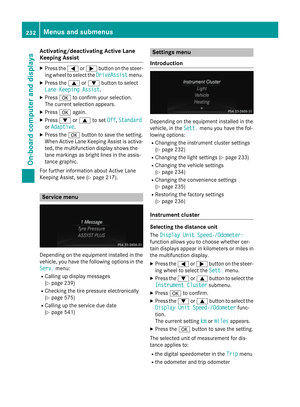
ZIP code list as selection list
Option 2: ZIP code list as selection list
XSelect the desired ZIP code by turning cVd
the COMAND controller.
XIrrespective of the option, press Wto con-
firm your selection.
If COMAND is able to assign the ZIP code
unambiguously to a specific address, the
address entry menu appears again. The ZIP code appears in place of the city's name.
If COMAND cannot assign the ZIP code
unambiguously to a specific address, the
address entry menu also appears again.
The ZIP code is automatically entered. You
can now enter the street for a more precise
location. Only streets in the area covered
by the entered ZIP code are available.
XStart route calculation (Ypage 329).
Entering the center
Entering a center will, for example, delete a
previously entered street.
XCall up the address entry menu
(
Ypage 324).
XSelect Centerin the address entry menu
by turning cVdand sliding ZVÆthe
COMAND controller and pressing Wto
confirm.
You will see the center list either with the
character bar (option 1) or as a selection
list (option 2).
Navigation327
COMAND
Z
Page 330 of 614

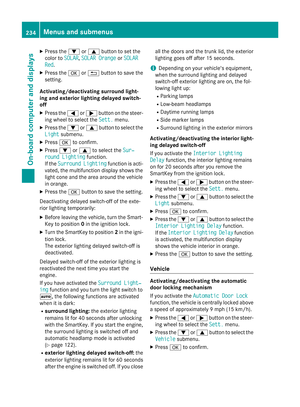
Citycenter list with character bar
Option 1: center list with character bar
XEnter a center. Character entry, using city
input as an example (
Ypage 303).
Centerlistas selection list
Option 2: center list as selection list
XSelect a center by turning cVdthe
COMAND controller.
XIrrespective of the option, press Wto con-
firm your selection.
The address entry menu appears again. The center selected has been entered.
XStart route calculation (Ypage 329).
Entering the intersection
XCall up the address entry menu
(
Ypage 324).
XSelect Intersectionin the address entry
menu by turning cVdand sliding ZVÆthe COMAND controller and press
Wto con-
firm.
You will see the intersection list either with
the character bar (option 1) or as a selec-
tion list (option 2).
In tersection list with character bar
:
List entry most closely resembling the
characters entered so far
;List
=Character bar
Option 1: intersection list with character bar
XEnter an intersection. Character entry,
using city input as an example
(
Ypage 303).
In tersection list as selection list
Option 2: intersection list as selection list
XSelect an intersection by turning cVdthe
COMAND controller.
328Navigation
COMAND
Page 331 of 614

XIrrespective of the option, pressWto con-
firm your selection.
The address entry menu appears again. The
intersection selected has been entered.
XStart route calculation (Ypage 329).
Starting route calculation
Address entry menu with destination address
:
Destination address
;Starts route calculation
You can have COMAND calculate a route to
the destination address, or you can save the
destination address (for example, as your
home address (My address)) (
Ypage 329).
XCall up the address entry menu
(
Ypage 324).
XIn the address entry menu, confirm Start
by pressingW.
If no other route has been calculated, route
calculation starts immediately (option 1). If
another route has already been calculated
(route guidance is active), a prompt
appears (option 2).
iThe Continuemenu item is displayed
instead of Start
ifCalculate Alterna‐
tiveRoutesis activated in the navigation
menu (option 2) (
Ypage 351).
Option 1 – no route guidance active: route
calculation starts. While route calculation is in progress, an arrow will indicate the direction
to your destination. Below this, you will see a
message, e.g. Calculating Fast
Route....
Once the route has been calculated, route
guidance begins. If the vehicle is not on a digitized road, the
following is displayed:
Rthe linear distance to the destination
Rthe direction to the destination
Rthe
Off Mapped Roadmessage
Option 2 – route guidance is already
active: if route guidance is already active, a
prompt will appear asking whether you wish
to terminate the currently active route guid-
ance.
XSelect YesorNoand press Wto confirm.
If you select Yes
, COMAND will stop route
guidance and start route calculation for the
new destination.
If you select No
, COMAND will continue
with the active route guidance.
iRoute calculation takes a certain amount
of time. The time depends on the distance
from the destination, for example.
COMAND calculates the route using the
digital map data.
The calculated route can differ from the
ideal route, for example because of incom-
plete map data. Please also refer to the
notes about the digital map (
Ypage 377).
Entering and saving your home address
You can either enter your home address for
the first time (option 1) or edit a previously
stored home address (option 2).
XOption 1: enter the address, e.g. a city,
street and house number (
Ypage 325).
XAfter entering the address in the address
entry menu, select Save
by turningcVd
and ZVÆ sliding the COMAND controller
and press Wto confirm.
XSelect Save as "My Address"and press
W to confirm.
COMAND stores your home address as My
Addressin the destination memory.
XOption 2:proceed as described under
"Option 1".
A prompt appears asking whether the cur-
rent home address should be overwritten.
Navigation329
COMAND
Z
Page 332 of 614

XSelectYesand press Wto confirm.
After selecting Yes
, theDatasaved.mes-
sage appears.
Selecting a destination from the desti-
nation memory (e.g. My Address)
Introduction
The destination memory always contains an
entry named "My Address". You may wish to
assign your home address to this entry, for
example (
Ypage 329), and select it for route
guidance. This entry is always located at the
top of the list in the destination memory.
XTo switch to navigation mode: press the
Ø button.
XTo show the menu: pressWthe COMAND
controller.
XSelect Destinationin the navigation sys-
tem menu bar by turning cVdthe
COMAND controller and press Wto con-
firm.
XSelect From Memoryand press Wto con-
firm.
You will see the destination memory list
either with the character bar (option 1) or
as a selection list (option 2).
Option 1: destination memory list with
character bar
:Character entered by the user
;Characters automatically added by the
system
=List entry most closely resembling the
characters entered so far
?Switches to the selection list
ADeletes an entry
BCharacters not currently available
CCharacter bar
DCurrently selected character
ECancels an entry
FCharacters currently available
XEnter a destination, e.g. "My Address".
Character entry, using city input as an
example (
Ypage 303).
Option 2: destination memory list as
selection list
Destination memory list
XSelect My Addressby turning cVdthe
COMAND controller.
XIrrespective of the option, press Wto con-
firm your selection.
The address entry menu appears again.
"My Address" has been entered.
XTo start route calculation: selectStart
and press Wto confirm.
Entering a destination from the list of
last destinations
XTo switch to navigation mode: press the
Ø button.
XTo show the menu: pressWthe COMAND
controller.
330Navigation
COMAND
Page 333 of 614

XSelectDestinationin the navigation sys-
tem menu bar by turning cVdthe
COMAND controller and press Wto con-
firm.
XSelect From Last Destinationsand
press Wto confirm.
XSelect the desired destination by turning
cVd the COMAND controller and press W
to confirm.
The address entry menu appears again. The
destination address selected has been
entered.
XTo start route calculation: selectStart
and press Wto confirm.
Once the route has been calculated, route
guidance begins (
Ypage 329).
i“Last destinations” memory
(
Ypage 366).
Entering a destination using the map
Calling up the map
XTo switch to navigation mode: press the
Ø button.
XTo show the menu: pressWthe COMAND
controller.
XSelect Destinationin the navigation sys-
tem menu bar by turning cVdthe
COMAND controller and press Wto con-
firm.
:Current vehicle position
;Crosshair
=Details of the crosshair position
?Map scale selected
XSelect UsingMapand press Wto confirm.
You will see the map with a crosshair.
Display =depends on the settings selected
in "Map information in the display"
(
Ypage 370). You can see the current street
name if the digital map contains the neces-
sary data, You can see the coordinates of the
crosshair if the geo-coordinate display is
switched on and the GPS signal is strong
enough.
Moving the map and selecting the desti-
nation
XTo scroll the map: slideXVY, ZVÆor
aVb the COMAND controller.
XTo set the map scale: as soon as you turn
cVd the COMAND controller, the scale bar
appears.
XTurn cVd until the desired scale is set.
Turning clockwise zooms out from the map;
turning counter-clockwise zooms in.
Navigation331
COMAND
Z
Page 334 of 614

XTo select a destination:pressWthe
COMAND controller once or several times. If COMAND is unable to assign a unique
address, you will see either the address
entry menu with the destination address or
a selection list.
XSelect a destination by turning cVdthe
COMAND controller and press Wto con-
firm.
If the destination is within the limits of the
digital map, COMAND attempts to assign
the destination to the map.
If the destination can be assigned, you will
see the address entry menu with the
address of the destination. If not, you will
see the Destination From Map
entry.
XTo start route calculation: selectStart
and press Wto confirm.
Entering a destination using geo-coor-
dinates
XTo switch to navigation mode: press the
Ø button.
XTo show the menu: pressWthe COMAND
controller.
XSelect Destinationin the navigation sys-
tem menu bar by turning cVdthe
COMAND controller and press Wto con-
firm.
XSelect Using Geo-Coordinatesand
press Wto confirm.
An entry menu appears.
You can now enter the latitude and longitude
coordinates with the COMAND controller or
the number keypad (
Ypage 303).
XTo change a value: turncVd the
COMAND controller.
XTo move the mark within the line: slide
XVY the COMAND controller.
XTo move the mark between the lines:
slideZVÆ the COMAND controller.
XTo confirm the value: pressWthe
COMAND controller.
iIf the selected position is outside the dig-
ital map, COMAND uses the nearest digi-
tized road for route calculation. You will see
the The co-ordinates are outside
the map areamessage. If the selected
position is located over a body of water, you
will see the The destination is in a
body of water. Please select
another destination.message.
Entering a destination using Mercedes-
Benz Apps
XTo switch to navigation mode: press the
Ø button.
XTo show the menu: pressWthe COMAND
controller.
XSelect Destinationin the navigation sys-
tem menu bar by turning cVdthe
332Navigation
COMAND
Page 335 of 614

COMAND controller and pressWto con-
firm.
XSe lect Mercedes-BenzAppsand press W
to confirm.
If an Internet connection isestablished, you
will see the message: Do you want to
accept the navigation data sent
via Mercedes-Benz Apps?
Street View
XTo switchtonavigation mode:press the
Ø button.
XTo show the menu: pressWthe COMAND
controller.
XSe lect Destinationin the lower menu bar
by turning cVdthe COMAND controller
and press Wto confirm.
XSelect Address Entryand press Wto
confirm.
XSe lect icon :inthe addr ess entry menu
and press Wto confirm.
If an Internet connection isestablished, you
will see the Street View basic display.
XTo explore the view of the stree t:turn
cVd or slide XVY,ZVÆ the COMAND
controller.
XTo return to navigation: press thek
button.
Entering way points
Introd uction
You can map the route yourself byentering up
to four way points. The sequence of the way
poin ts can bechanged at any time.
COMAND pro vides a selection of predefined
destinations ineight categories for th ispur-
pose, e.g. GAS
STATIONorCOFFEESHOP. You
can also use the destination entry options to
enter way points.
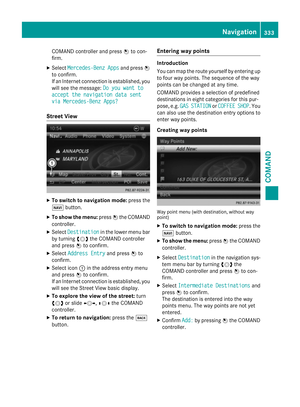
Creating way poin ts
Way pointmen u(wit hdestination ,without way
point)
XTo switch tonavigation mode: press the
Ø button.
XTo show the menu: pressWthe COMAND
controller.
XSe lect Destinationinthe navigation sys-
tem menu bar byturning cVdthe
COMAND controller and press Wto con-
firm.
XSe lect Intermediate Destinationsand
press Wto confirm.
The destination isentered into the way
poin ts menu. The way points are not yet
entered.
XConfirm Add:bypressing Wthe COMAND
controller.
Navigation333
COMAND
Z
Page 336 of 614

XSelect the category orOtherby turning
cVd the COMAND controller and press W
to confirm.
After selecting a category, the POIs which
are available along the route and in the
vicinity are displayed.
COMAND first searches for destinations
along the route. Searching for destinations
then continues within a radius of approx-
imately 60 miles (100 km) of the vehicle
position.
XAfter selecting Other, select one of the
destination entry options from the list.
SelectionStep
Address EntryXEnter a destina-
tion by address
(
Ypage 324).
From MemoryXSelect a destina-
tion from the des-
tination memory
(
Ypage 330).
From Last Desti‐
nations
XSelect a destina-
tion from the list
of last destina-
tions
(
Ypage 330).
From POIsXSelect a point of
interest
(
Ypage 336).
SelectionStep
From Personal
POIs
XEnter a destina-
tion from the per-
sonal POIs
(
Ypage 344).
Using the MapXEnter a destina-
tion using the map
(
Ypage 331).
Using Geo-Coor‐
dinates
XEnter a destina-
tion using the geo- coordinates
(
Ypage 332).
XSelect POI and press Wto confirm.
After selecting a POI or entering a destina-
tion, the address of the way point is dis-
played.
After entering a destination using the map,
the address entry menu is displayed. OK
is
highlighted.
334Navigation
COMAND